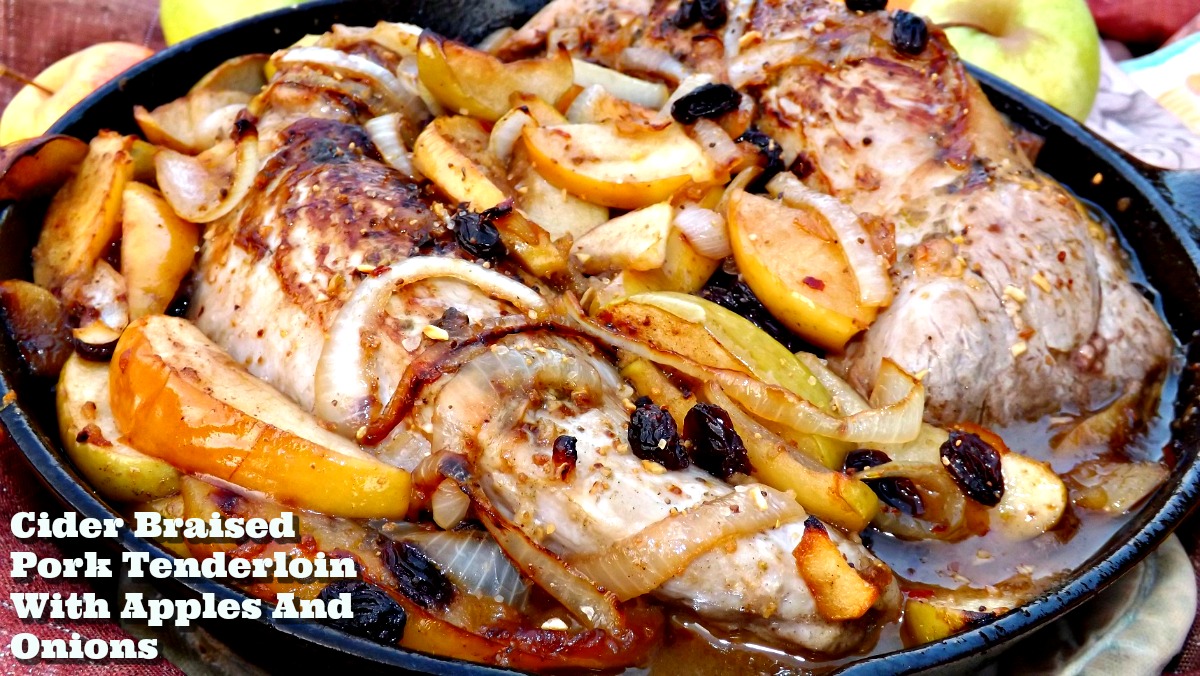
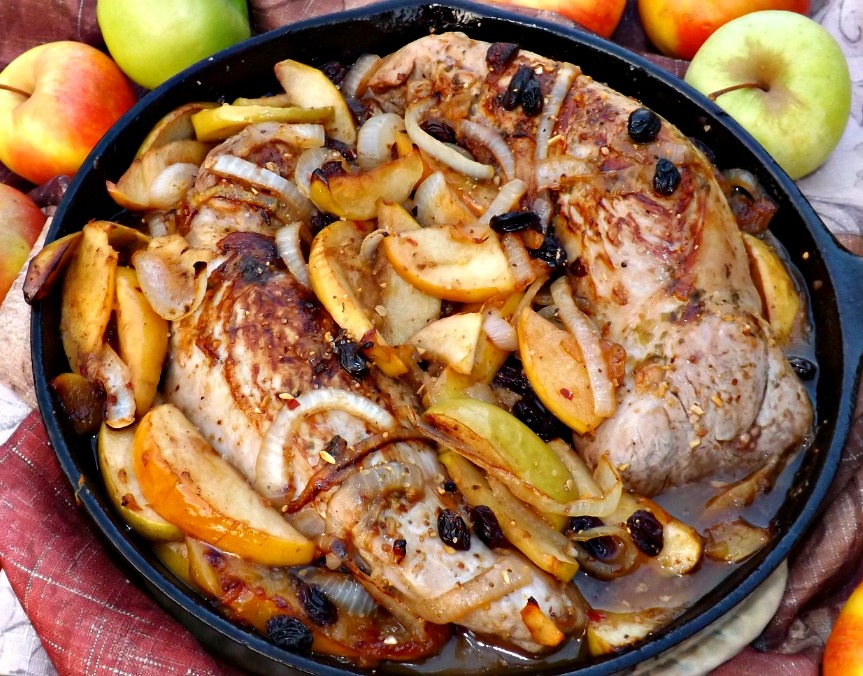
Cider Braised Pork Tenderloin With Apples And Onions
Yay!!!! Halloween is over!!!! I mean…erhmmm, I’m so sad for those of you who enjoy Halloween and have to wait another LONGGGGGGG year for it to arrive again *grins*. I, on the other hand, am 816% ready to have it gone and to move on to Fall comfort foods and cozy cool evenings, crispy leaves under my feet as the puppy drags me at a run across the yard in a vain attempt to catch the cats on her 2 inch tall legs. I crave spiced cider (preferably spiked. I have a husband, kids, cats and a dog. Don’t judge), beef stew, driving home in the afternoon, getting to our driveway and smiling as I smell the scent of a fire going in the wood stove, and flannel sheets.
One meat I tend to use more often in the Fall and Winter is pork. I love pork, but something about it just seems too heavy for eating often in the Spring and Summer. I think part of it is that I grew up before they started breeding leaner pork and I still think of pork as heavy and fatty, even though that’s not the case most of the time anymore. Apples are in season this time of year too and they play soooo nicely together. I like to think God planned all of those things, because, really, could you imagine using a Spring veggie like asparagus or a fruit like strawberries with pork? Nope. Those go with other meat dishes, but not so much with pork. Pork works better with Fall and Winter foods. Like apples. And onions. And apple cider. Can we say “yummy”, class?
This dish isn’t anything new. I’m not inventing the wheel here. It’s just one of my takes on the ubiquitous pork and apples. But it’s totally delicious, extremely easy, and doesn’t take hours. Did I mention that it’s delicious? Moist, fork tender pork tenderloin, spiced and browned, then finished in a bath of apple cider and surrounded with sauteed apples and onions. So good; so comforting.
You know the drill… 🙂
Cider Braised Pork Tenderloin With Apples And Onions
- 2 medium onions, sliced into half moons (about 2 cups)
- 3 apples (use your favorites. I used a mix from what we got at the orchard a few weeks back), cored and cut into wedges (leave the peel. It adds color, flavor and fiber)
- 3 tablespoons unsalted butter
- 1/4 teaspoon salt
- 1/4 teaspoon cinnamon
- 1 tablespoon neutral cooking oil
- 2 1 to 1.5 lb pork tenderloins (tenderloins, NOT loins)
- 3/4 teaspoon cinnamon (the spice measurements for all the spices I’m giving are approximate for this recipe. You may like a bit more or less of one or another)
- 1 teaspoon ground black pepper
- 2 teaspoons McCormick Smokehouse Maple seasoning (easily found in the spice aisle of your grocery store)
- 3/4 teaspoon ground sage
- salt to taste (but be careful; there is salt in the seasoning blend)
- 1/2 cup raisins
- 3/4 cup apple cider
- Preheat oven to 425 degrees.
- Melt the butter in an oven safe large non stick pan (I used my largest cast iron skillet). Add in the sliced onions and apples; sprinkle with the 1/4 teaspoon salt and 1/4 teaspoon cinnamon. Cook over low heat until they are softened and barely fork tender, stirring occasionally. When done, remove from the pan and set aside for now.
- Add the oil to the same pan and heat until just below the smoking point. Carefully add in the pork tenderloins. Brown on one side, then carefully flip over. Sprinkle half the seasonings evenly over both pieces of meat. Brown the next side, then repeat with the remainder of the seasoning.
- Mix the raisins in with the apples and onions, then spoon the mixture alongside and over the meat. Carefully pour the apple cider in the pan along the sides. If you can’t fit it all, that’s ok. Just use what you can.
- Carefully slide the pan into the hot oven, being careful not slosh all over yourself (don’t ask me why I felt the need to add that warning, please and thank you).
- Cook at 425 for about 15 to 20 minutes or until a meat thermometer stuck into the middle of the loins comes out at between 135 to 140 degrees (it will come up to 145 in the few minutes you let it rest after taking it from the oven; start checking at about 12 minutes just to be safe; nothing worse than overcooked pork).
- Let rest for about ten minutes to firm up and come to temp, then thinly slice the meat and serve with the apples and onions spooned over it. This is delicious with noodles or rice, with the fruits and pan juices served on top of the side dish also.
Cider Braised Pork Tenderloin With Apples And Onions
Copyright Notice: From Cupcakes To Caviar images and original content are copyright protected. Please do not publish these materials anywhere without prior permission.