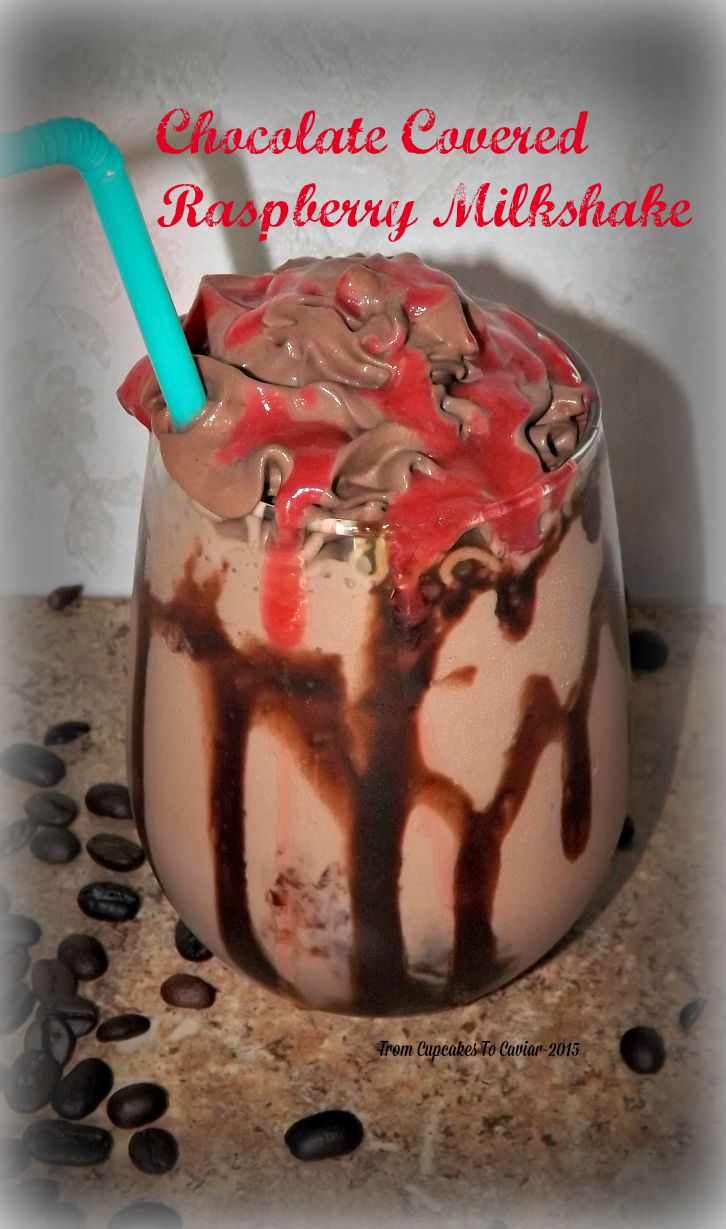
Chocolate Covered Raspberry Milkshake

Hey everybody! It’s time for a creamy Summer recipe and a Hamilton Beach giveaway. I still so love being one of their ambassadors. Their products are wonderful and this one is no exception. Before I give you the recipe and details on the giveaway, let me tell you why you want this blender. 😀
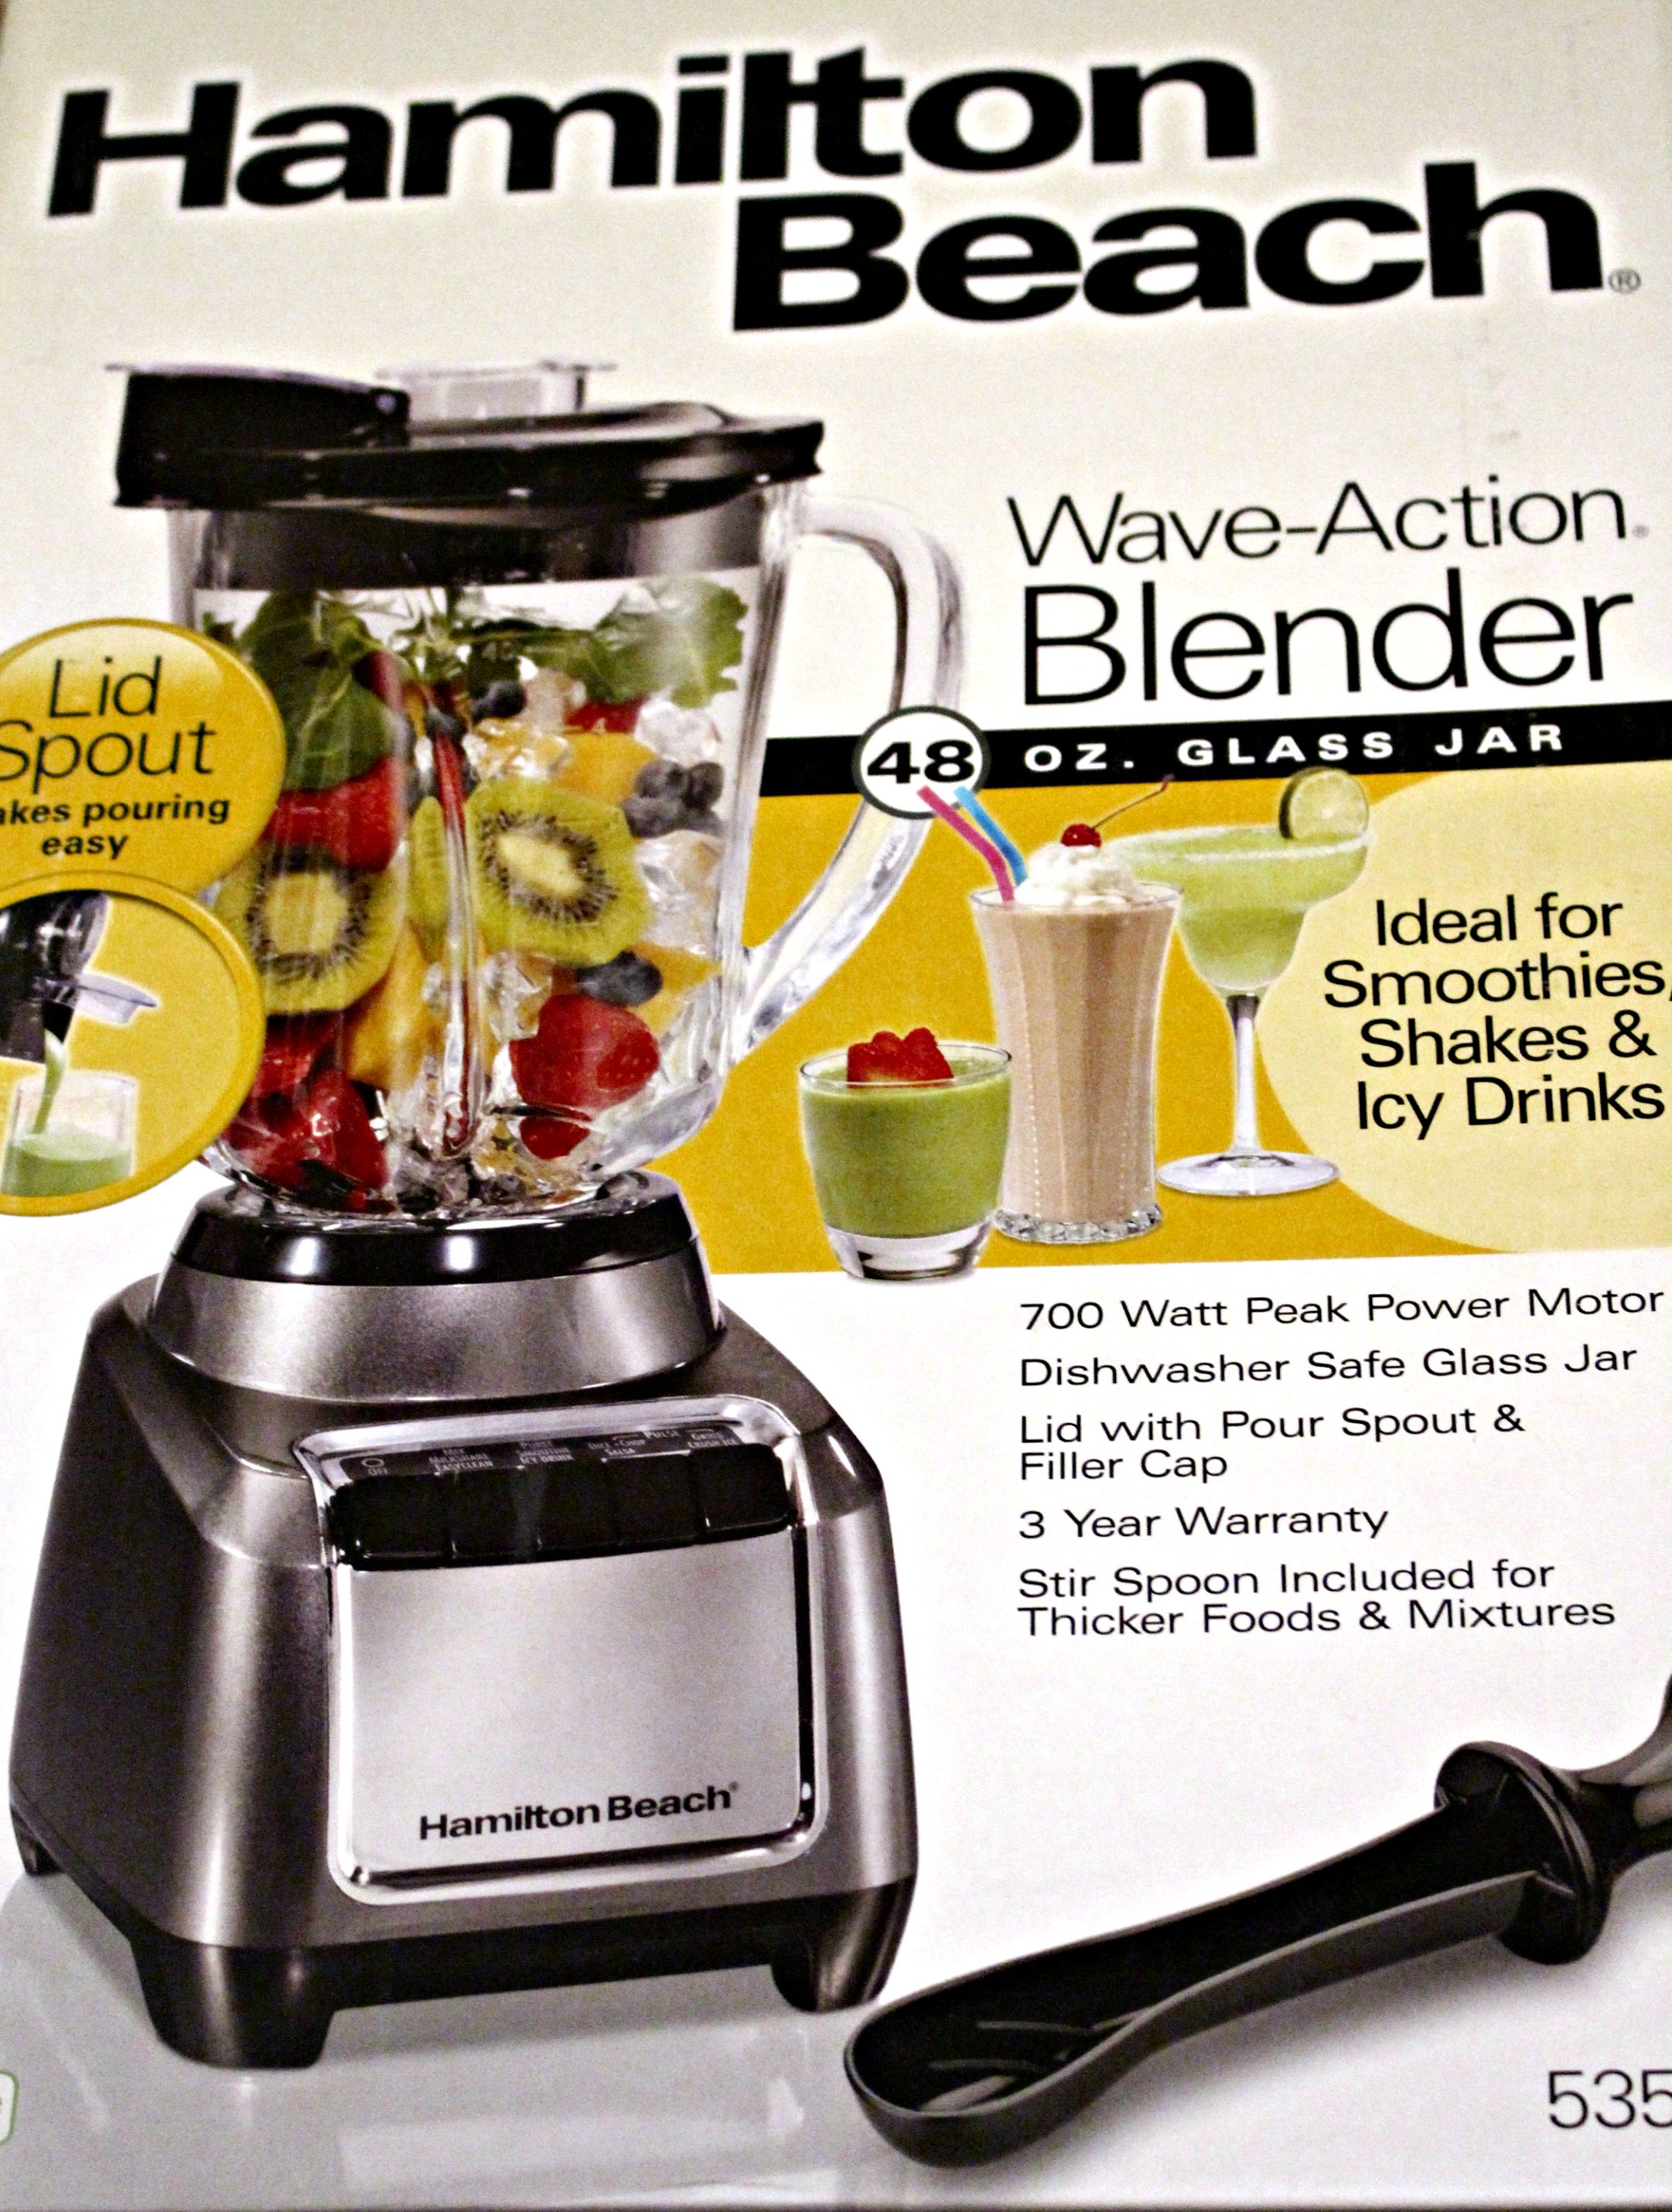 Raise your hand if you’ve ever had a blender that came with a cheap, “look at this funny and it’ll break” plastic jar! *Raises my hand and waggles it around wildly*. Not with this bad boy. This jar is SOLID. It’s a nice thick, heavy glass jar with a good heft to it. If you can manage to break this jar, you should probably not be trusted with kitchen appliances or sharp objects, hehe.
Also, have you ever been making something in the blender and it gets stuck down by the bottom? Then you have to turn it off and shove a spoon or butter knife down by the blades and try to unclog it. That won’t happen here for two reason. The first is that this has a 700 watt motor and it makes the liquids move! The “wave action” continually forces the mixture down towards the blades so it doesn’t get clogged. This recipe used some thick ice cream and not a whole lot of liquid, but the blender had no problems breaking it down. The second is that if things DO get stuck, they give you what they call a “stir spoon”, a thick plastic spoon that works wonders for stirring things up down by the bottom of the blender.
Another plus to the Hamilton Beach Wave Action Blender is the pour spout. This one seals up when the blender is in use and gently pulls open when you’re ready to pour and you don’t end up with a puddle on the counter as you have with some blenders that are hard to pour from due to an overly large pouring area.
The ONLY issue I have with the Hamilton Beach Wave Action Blender is the lid. It fits so well that it can be difficult for hands like mine, that are arthritic, to pull off. Even if I opened the pour spout to let air in, it was still a struggle to get the lid off. BUT… that said, for those of you with no joint pain, that shouldn’t be a problem.
Now, on to what I know you want; the recipe for a creamy, delicious Chocolate Covered Raspberry Shake and a chance to win one of these fantastic blenders.
Chocolate Covered Raspberry Milkshake
- 2 cups chocolate ice cream
- 1/2 cup good quality chocolate milk (GOOD stuff here, not some cheap watery store brand)
- 2 dry pints fresh raspberries
- 1 1/2 tablespoons instant coffee granules
- chocolate syrup and whipped cream for garnish
- Dump your raspberries in a large bowl and smash them down to pulp. The easiest way I’ve found is simply to take a flat bottomed glass and smush them. No getting out a food processor and it takes just seconds.
- Then, push them through a fine mesh strainer (I use the same flat bottomed glass to push them through) into a large measuring cup. You should end up with about 3/4 of a cup of puree. It’s ok if it’s a bit less or more.
- Dissolve the coffee granules in the chocolate milk. Pour the milk into the blender, then add the ice cream and 1/2 cup of the berry puree. If you want a thinner shake or just want to make it go farther, add a bit more chocolate milk. Just make sure to add some more raspberry puree also, so you don’t overpower the raspberry flavor with the chocolate.
- Use the milkshake setting on the Hamilton Beach Wave Action Blender to blend it all up until it’s smooth and creamy.
- Get two 8 to 12 ounce glasses out. Tilt the glasses sideways and drizzle the chocolate syrup in a circle over the inside of the glass. It will drizzle down and make a pretty design on the inside of the glass. Divide the shake mixture between the two glasses and top with whipped cream, some of the extra raspberry puree and some chocolate syrup. Enjoy!!
Copyright Notice: From Cupcakes To Caviar images and original content are copyright protected. Please do not publish these materials anywhere without prior permission.
Hamilton Beach provided me with a Hamilton Beach Wave Action Blender for review and will send one to one winner of my giveaway, 18 years or older, in the United States. I received no other compensation for this and all opinions are my own.