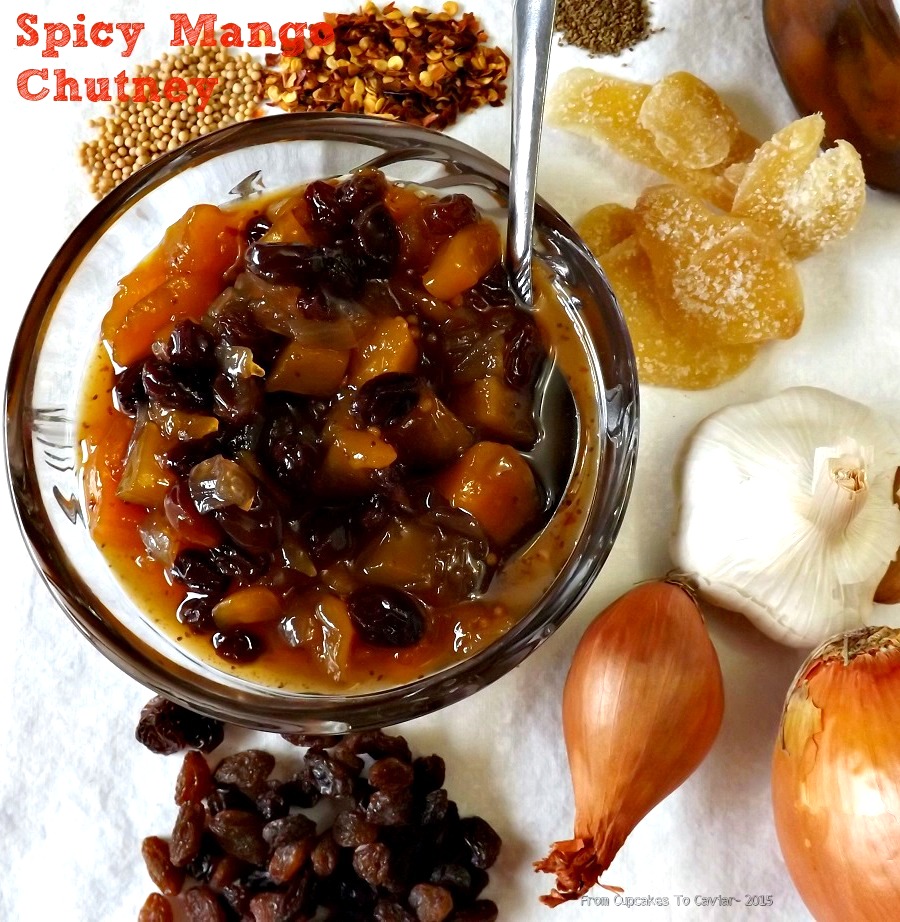
Spicy Mango Chutney

Spicy Mango Chutney

Spicy Mango Chutney


Being brought up in the Midwest in the 60’s and 70’s (yes, I’m old. Just shush.), there wasn’t much in the way of “exotic” foods. There was a lot of sausage, a lot of pork, which was horrid back then for the record- really fatty and just nasty. I honestly stopped eating pork as a young adult because I thought it was horrible. Now I absolutely love pork. There was also a lot of chicken, etc etc. All the homey Eastern European foods that had been brought to the heartland and foods that were made by a depression era parent were part of our upbringing. But Indian foods? Thai Curries? Fiery spice blends? Nahhhh…. not in the Chicago of that time period. When I got into my early thirties, I wanted to branch out some in my cooking. I’m not even sure why. There was nothing in me that said, “oooo, that sounds delicious and I want to try to make it!” It was more like just cooking curiosity. I have always been very interested in reading about different cultures and when you combine that in a book with their food culture, you’ll have me hooked. I had no idea that once I started down that road, I would become a quick addict.

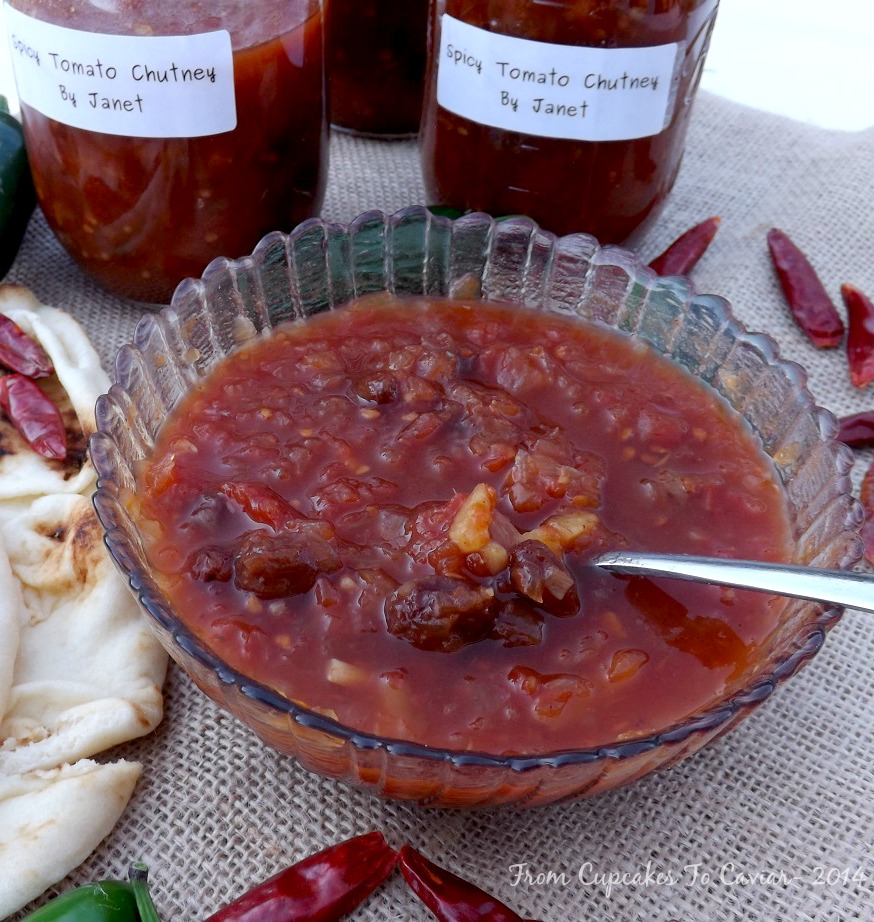
But I have. I could happily eat foods of that part of the world daily and not get bored with them. The problem is that it is difficult still to get good ingredients in my neck of the woods for the actual dishes and there are very few restaurants serving good Indian or Thai foods. So most of the time I settle for the condiments- mainly the chutneys. Some of what I make is Americanized because I want it to appeal to my not as adventurous family. I buy the “real” stuff from stores with good ethnic food selections and enjoy them myself. But I have made so many different chutneys it’s ridiculous- that tomato one up there, peach, cranberry, blueberry cranberry, pear ginger and so one and so forth. But my favorite will always be this spicy mango one I keep coming back to. It is a total amalgamation of a handful of different ones I have tried over the years until I finally got it to where I wanted it to be. It’s sweet, tangy from the vinegar, fruity and has a mild bite that adds so much to foods. I don’t just use chutneys with curries. I love them with baked chicken, fried chicken, any sort of pork. You name it, I’ll try it with chutney πŸ˜€ This doesn’t need to be canned, though you can do so if you’re feeling froggy. Just store it in the fridge in a covered container. It will keep well in there for months due to the high vinegar content.

You know the drill… πŸ™‚

Mrs. Cupcake, who is now craving a good Indian curry.
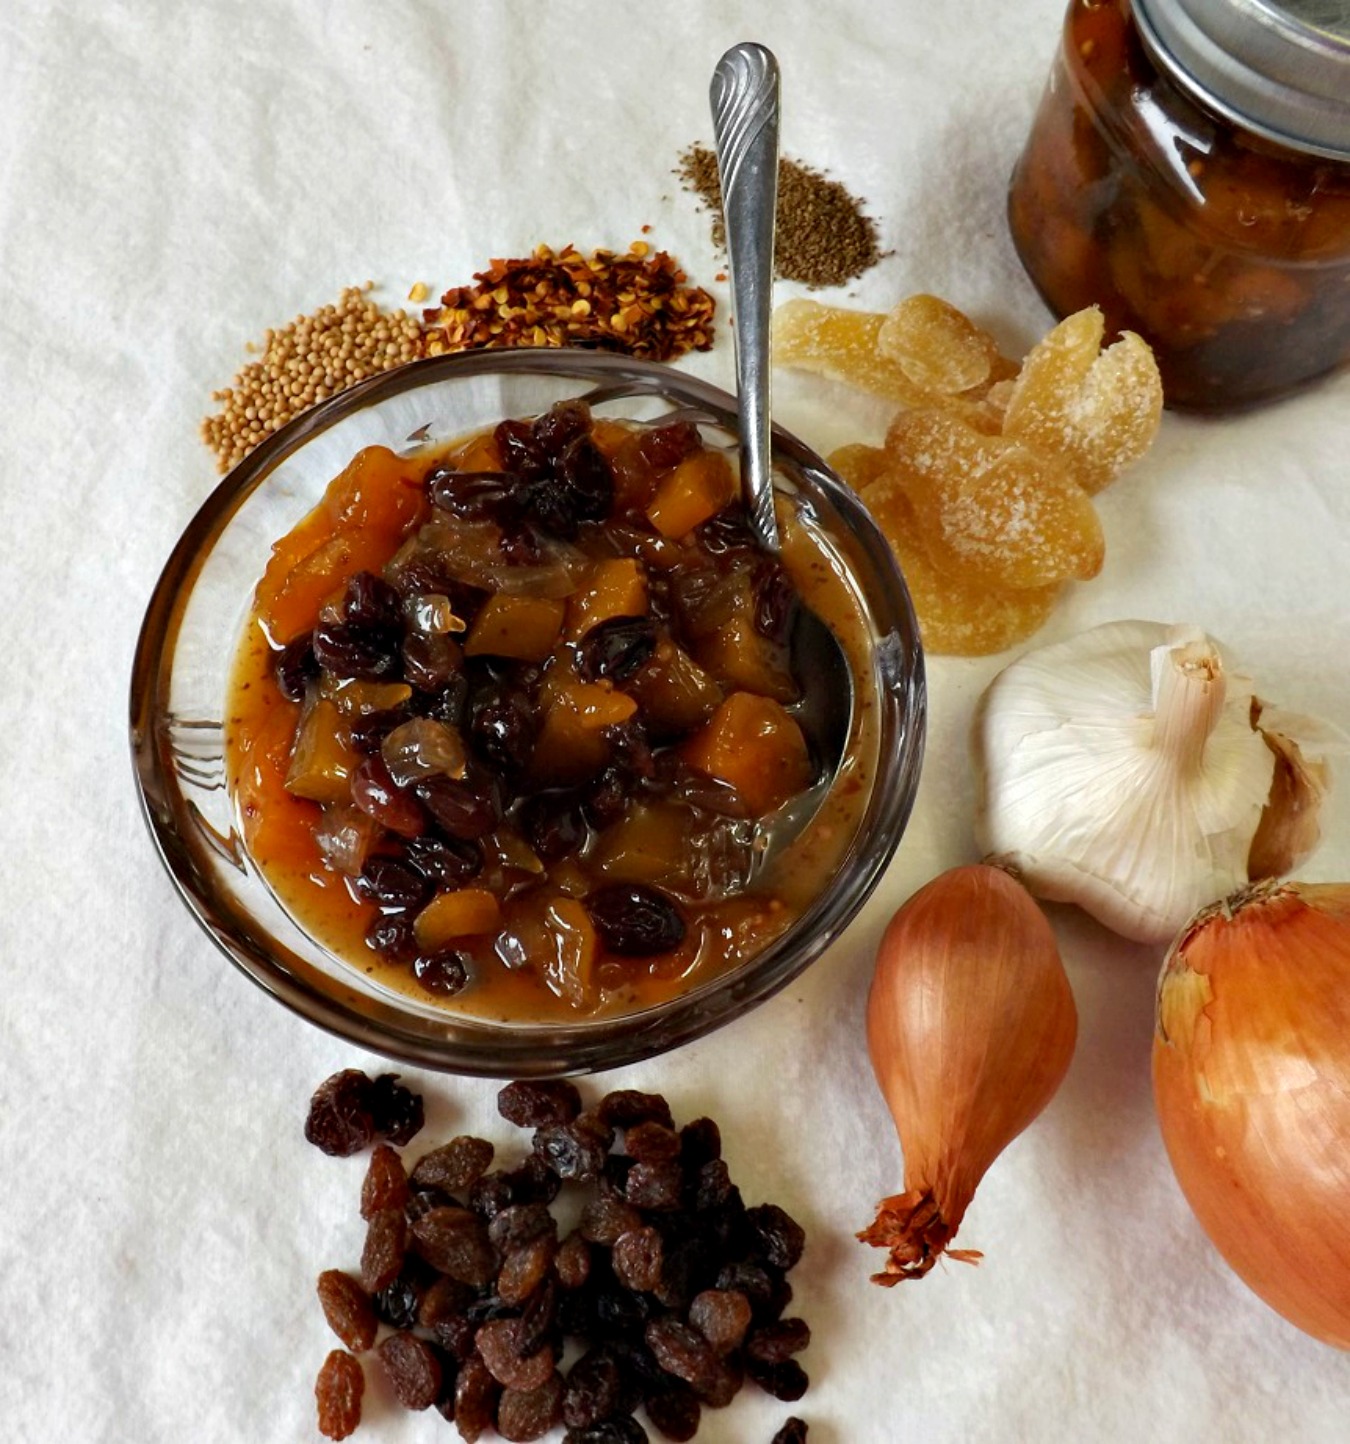
Spicy Mango Chutney

  • 1 3/4 cups sugar
  • 2/3 cup vinegar, cider or white (white makes it a bit sharper in taste, but I rather enjoy that)
  • 4 ripe mangoes, peeled and cubed
  • 2/3 cup raisins
  • 1 cup chopped onion
  • 1 tablespoon minced garlic
  • 1 tablespoon minced shallot
  • 2 tablespoons chopped crystallized ginger
  • 1 1/2 – 2 teaspoons crushed red pepper (use more or less depending on how much you like spiciness. This amounts puts it at about a 5 on a 1-10 scale)
  • 1 teaspoon mustard seeds (NOT ground mustard)
  • 1/2 teaspoon celery seed
  • 1/2 teaspoon ground cinnamon
  • 1/4 teaspoon ground cloves
  • 3/4 teaspoon salt
  1. Combine the sugar and vinegar in a medium pot (I use a 3 quart pot to help contain any bubbling). Bring to a boil over medium high heat, then add all the rest of the ingredients.
  2. Stir well, then cook over medium heat, stirring frequently to prevent sticking. Turn the heat down if it seems to be sticking. It will take longer to cook down, but it will get there. Cook until the chutney has reduced by about 1/3, is no longer watery, but looks thick and syrupy. It should take about an hour and a half or so.
  3. Let cool, then store in the fridge in a covered container. This can also be canned via water bath if preferred.

Copyright Notice: From Cupcakes To Caviar images and original content are copyright protected. Please do not publish these materials anywhere without prior permission.

Spicy Mango Chutney

Spicy Mango Chutney

Spicy Tomato Chutney

Spicy Tomato Chutney

Spicy Tomato Chutney


We didn’t have a whole lot of luck with our tomato plants this year. It was such a wet, unseasonably cool Summer that they didn’t stand a chance. They would get decent sized and green, but few got enough sun to finish ripening. Out of about 12 plants, we got enough tomatoes for one session in the dehydrator, which we ended up eating like candy  and enough for this batch of chutney. I can sincerely say that this chutney was worth the wait for ripe tomatoes.

I’ve been canning for about 17 years or so now. I tend to stick to jams, relishes and chutneys. One of these days I’ll branch out and do pressure canning. I have the canner, just not the motivation or expendable cash. I keep saying that if I come across some fantastic sale on meat, I’ll can some, but who ever finds a fantastic sale on meat nowadays? Most of us are instead practicing meatless dinners a time or two a week because it’s so darned expensive to buy meat of any kind.

Is it horrid of me that I am enjoying this chutney so much that I keep going over to the bowl of it that is in the photo and snagging bites? Hehe This has a wonderfully unique taste in comparison to other, fruitier chutneys I have made in the past. You have the sweet acidity of the tomatoes, the bite from the peppers and garlic, the tang of the vinegar…. all melded together into a textural delight. Darn, I’m just soooo poetic today πŸ˜›

This has a decent amount of ingredients, but nothing hard to find and it all just goes into the pot together and cooks down, so it’s a fairly low maintenance recipe. I say again, as I’ve said before about canning recipes, practice safe canning, please. Do NOT listen to those who tell you it’s ok to just ladle the food into a jar, put the lid on and go on as if that’s sufficient for sealing. It’s totally NOT good enough. Even if the can seems to seal, you don’t know that it’s vacuum sealed, nor that any possible bacteria were killed. Never take that chance with your own health or that of your family. It’s too easy to do it right. πŸ™‚ Here’s a link to show you how to properly can if you’re new to it. If you want to make this but don’t want to can it, you can also freeze portions of it. Just thaw when you’re ready to use some.

Water Bath Canning

This chutney is wonderful with any Indian or Thai dish, as well as with any fattier cut of meat. The acidity of the chutney helps to cut the richness of the meat. It’s also great just off a spoon, but I am also a wee bit offbeat πŸ˜€

Spicy Tomato Chutney

  • 5 lbs tomatoes, peeled and chopped
  • 4 cloves garlic, chopped (I like to leave them in fairly decent sized chop. They add a nice look to the finished product.)
  • 2 large onions, chopped (about 1 1/2 cups)
  • 1 cup brown sugar
  • 3/4 cup sugar
  • 1 1/2 cups apple cider vinegar
  • 1 tablespoon kosher or pickling salt (non iodized)
  • juice and zest of one small lime
  • juice and zest of one small orange
  • 1 teaspoon red pepper flakes or crushed dried chiles (use more or less as desired, depending on how spicy or not you prefer it)
  • 1 1/2 teaspoons cinnamon
  • 1/4 cup finely chopped crystallized ginger (same chop idea here as for the garlic. Chutney should have texture, not be smooth.)
  • 1/2 cup golden raisins
  1. Put all ingredients into a large, deep pot and stir well to combine.
  2. Bring to a boil over high heat, stirring frequently. Once it gets to a boil, turn your heat down to a barely medium setting (I do this at 4 on an electric stove) and let it simmer, stirring occasionally to prevent sticking.
  3. Cook until it has reduced to about half of it’s original amount and has become thick and rich looking, about 2 hours. If it starts to stick to the bottom of the pot at all, lower your heat a tad and make sure you’re stirring enough. Keep in mind that it will continue to thick a LITTLE bit even after you can it so don’t get it too thick during cooking. You want a product that is about the consistency of a loose preserve.
  4. Can as per the above directions (I got 4 1/2 pints out of this), leaving 1/4 inch headspace and boil in a water bath for ten minutes. When done, remove to a towel and leave undisturbed until cool. Check your seal and if any jars didn’t seal, store them in the fridge. The sealed jars can be stored in a cool, dark place for quite a long time.

Copyright Notice: From Cupcakes To Caviar images and original content are copyright protected. Please do not publish these materials anywhere without prior permission.

Cranberry Fun, Part two (Pithiest Title I Can Think Of Right Now)

Nothing to put with this to make it decorative *sobs*

November 22nd and it is 59 degrees out right now. What’s wrong with this picture? I know I live in Kentucky and all but even for here this is weird. I want cold weather, mannnnnn!!! Snow!! Avalanches! Blizzards! The need to use my wood stove and make a blazing “omg, this makes the pyromaniac in me happy” sort of fire.

But noooo, it’s 59 degrees and it’s supposed to get up to 67 today and 60ish on Thanksgiving. Mind you, it doesn’t seem that warm because it is also raining the proverbial cats and dogs and very dreary and depressing outside. At times actually, I am pretty sure it was raining Mastodons and Hippos it was coming down so hard. My driveway is totally flooded out. One of the joys of country living I guess hehe. Maybe I can conserve water and go out in my front yard nakkie butt, shampoo in hand and take my shower. Nahhhhh, the neighbors would be traumatized. Heck, I’D be traumatized. I close my eyes when looking at myself in the mirror. Makes it a bit hard to see what I’m doing, but I figure it’s safer for my mental and emotional health.

I. Need. Caffeine. Now.

Seven in the morning comes too darn early. Someone needs to pass a law saying that seven am can’t get here until say, noon. Better yet, that we are not allowed to do ANYTHING but sleep until noon and society as a whole doesn’t function until then. Who wants to go petition congress with me?!

In case it’s not obvious, I’m not in top form today πŸ˜› Two nights of a whiny toddler and about 5 hours sleep between the two nights is taking a toll. My wit, such as it is, has taken a vacation. It’s in Bali right now… enjoying a warm breeze and a tropical drink ogling the shirtless men. I mean… um, darlin, if you’re reading this, it’s turning away from the shirtless men in abject horror that they would dare show me their naked rippling abs. Honest!

Hmm, might be time to move on now to the recipe for today.

I’m still in cranberry mode here and will be for one (maybe two) more recipe(s) after this. I mentioned yesterday my love for the cranberry sauce part of Thanksgiving dinner & that  carries over into other forms of cranberry adoration. The following is one of my favorites.

Have you ever had cranberry mustard? Maybe you bought some from the store and thought it was ok. If you’re like me, you did, thought it was decent but kind of…boring. Little too sweet but ok. Years back, that was me. I had tried I believe it was the cranberry mustard from Hickory Farms. It was ok. I liked it on turkey sandwiches but that was really all it was good for. The texture was rather thick and gelatinous. So when I ran across a recipe on Epicurious years back for home made cranberry mustard, I knew I had to try it. I am SO glad I did! This mustard is fantastic. Sweet with a definite cranberry flavor and DEFINITE mustard bite. This mustard has cojones! It is amazing on sandwiches made from leftover turkey, it is great as a pretzel dip, it’s pretty darn good just to stick your fingers into… not that I do that of course. Just know that YOU might want to.

This takes a little watching; it’s rather like making a fruit curd in how it’s done. Eggs, double boiler, yada yada yada. But it’s still easy so long as you don’t go walking away because even though the recipe says to stir (only) occasionally, if you don’t stir often…pretty much nonstop, it sticks. It UN sticks easily and I may just be paranoid but I just have never wanted to take the chance of it burning and going to waste.

If you like fruity mustards or have just wanted to try them, MAKE THIS! Set it out in a pretty bowl when you make Thanksgiving dinner. This is very rustic and hearty looking because it has whole mustard seeds and bits of cranberry in it. If you wanted it smoother, I don’t think pureeing it in the food processor after cooking it would be a problem, but I’ve always liked it as is. Have this with pretty much any meat, pretzels, as a glaze… so many ways.

Home Made Slightly Spicy Cranberry Mustard

  • 1 cup (3 ounces) dry mustard powder
  • 2 tablespoons whole mustard seeds
  • 1 cup raspberry vinegar (this recipe is why I had leftover raspberry vinegar to use in yesterdays cranberry sauce)
  • 1 cup fresh cranberries
  • 3/4 cup sugar
  • 2 large eggs
  • 2 tablespoons fresh lemon juice (I have subbed bottled before and it’s fine)
  • 2 tablespoons honey
  • 3/4 teaspoon salt
  • 1/2 teaspoon pepper (I have actually never used the pepper)
  1. Mix dry mustard and mustard seeds in a bowl. Whisk in the raspberry vinegar. Cover and let mixture sit overnight. I have let it sit only about 4 hours when I’ve been in a hurry & it works fine. You just need to give the mustard seeds time to soften up is all.
  2. Blend cranberries in a food processor until finely chopped.
  3. Whisk sugar and eggs in a medium metal bowl to blend.
  4. Whisk in mustard mixture, cranberries, lemon juice, honey and salt (and pepper if using).
  5. Set bowl over a pot of simmering water and cook until thick and temperature is 180 degrees, about 45 minutes (at least according to the original recipe. It’s never taken longer than 20 to 23 minutes or so when I’ve done it.)
  6. Cool mustard to room temp. Cover and chill at least one day to allow flavors to blend. If you taste it fresh, it’s going to taste good but VERY intense. The resting time mellows it quite nicely.

Basil Basil Everywhere And Lots Of Drops For Me (Crisco Oil Review)

Yum, yum yum... and yes, that's the bottle of basil Oil next to it. Such a purty green color.

I don’t have a garden. Yet. I have a small back porch that I use for potted herbs and such. I plant them and as of recently I dream about what it will be like when we move to the new house and I can have a garden about 1/2 acre large. Me… that much land… plants… equals scary. I have a bad habit of thinking “Oooo, I LOVE such and such and need to plant lots and lots of it!!”. I kinda did that this season with potted basil. I bought five plants. Now I love basil, but there are only so many times one can make Caprese pasta or Caprese Salad or add 72 cups of basil to spaghetti sauce before you start watching your skin turn a funny shade of green and have people ask why they smell basil every time you are in the room.

So when I was lucky enough to be chosen through the FoodBuzz Tastemakers Program to receive some of the new Crisco Olive Oils, I was tickled green pink. I knew what I wanted to use it for the second I opened the box. On a side note, is it just me or is it like Christmas when you receive an unexpected box of something yummy in the mail? πŸ˜€

Moving on, I knew what I wanted to use it for. The only oil I use when it comes to vegetable or canola is Crisco because I trust the brand (no, I’m not just saying that because I received the olive oil; it’s the truth πŸ™‚ ) so I knew that their olive oil would be good. I received one of each of the three types they market- Extra Virgin, Light and Pure-

So with all the basil I have (I am thinking of trying to spin it all into Basil yarn or maybe make a Basil Pillow; possibly sell it on the Basil Black market for those addicts who can’t get enough of it.) I decided to make Basil Oil. I absolutely LOVE flavored oils and have used Crisco Vegetable Oil before to make other flavored oils (yes, I will post those recipes too). I used the Extra Virgin because I wanted to add a nice fruity olive flavor along with the basil flavor and extra virgin olive oil has the strongest flavor, not to mention a wonderful aroma. If you’ve never made basil Oil before don’t be nervous and don’t listen to all the scare stories about botulism from home flavored oils. Yes, that can happen if you use unsafe practices or leave the oil sitting out but if you make it and keep it refrigerated all will be fine. This is extremely easy. You just need a pot, a strainer, basil, a cooking thermometer and some yummy olive oil. So c’mon… stop spinning that Basil pillow and get out a pot and go buy some Crisco Olive Oil. This makes about 2 cups of oil.

Bottom line? I loved this oil. It was just as good, if not better in some cases, than many of the more expensive olive oils I have used. It had a wonderful aroma, a mellow yet nice flavor and while it may be a small thing, I liked that this comes in a plastic bottle rather than a glass one. Glass is always an issue when you have kids around. So will I get this again? Definitely.

Home Made Basil Oil Using Crisco Olive Oil

  • 3 cups packed fresh basil leaves
  • 2 cups Crisco Extra Virgin Olive Oil
  1. Rinse your basil leaves. Dry them well by rolling them around in a wad of paper towels. Don’t be afraid to use some pressure. You actually WANT to bruise the leaves anyway because that releases some oils.
  2. Take them out of the towels and just wad them up in your hands. Same reasoning applies; releasing the oils.
  3. In a large pot, combine the Crisco oil and the basil.
  4. Put over low heat and slowly heat up to 165 degrees. Keep it at that temp for about 4 minutes.
  5. Turn off heat and let the basil sit in the oil for at least one hour.
  6. Using a fine mesh strainer, strain the oil into a two cup capacity container. Store in the fridge. This will solidify some in the refrigerator but will liquify again when heated.  Keep refrigerated when not using.
  7. This can be used soooo many ways. Use to drizzle over meats or veggie; use as a dipping oil for bread (you can use as is or add herbs and spices to it), drizzle over pasta (the picture at the top is my dinner tonight- Cheese ravioli with Asiago and Mozzarella cheeses, Some Sopresseto salami, Heirloom tomatoes & drizzled with some of my basil oil. So so yummy and oh so simple!)


*I received Crisco Olive Oils as part of the Foodbuzz Tastemaker Program (Crisco Olive Oil). The opinions posted here are my own.*

Show Me The…Pork??


No, you may NOT reach in and snag a blackberry *smacks your hand* Make your own darn it!

I think that it has been established that I like pork. Maybe even love it and want to bear it’s oinky children. Though trying to imagine how said children would sound when laughing rather frightens me considering I tend to snort like a pig when laughing hard (maybe that’s not info I want out there on the web. Hmmmm…). As well as what their nose would look like. I don’t have the smallest schnoz in the world myself so join that with a piggy nose and Lord help the child socially. Plus, that only being able to cool down by rolling in the mud part could cause issues. I can see it now… “Junior, how many times do I have to tell you not to come into the house after you’ve been wallowing?!!!” But…but…*snort snort*… MOMMMMMM… I was hotttttt and…*snort snort*… you said no more 3 hour cold showers!” “No dear, no more cold showers. You’ll need those later when all the women see your nose. Now go get one of your brothers and the axe so I can make dinner”.

Maybe it would better if it were the children of a Llama. I don’t think I’d ever eat llama meat. Food for thought…. or dinner. *Snorts* I crack me up.

I started a pork loin roast marinating a few days ago. Yes, a few days. I like to do a two day marinating time usually and meant to make this last night but it didn’t happen that way. Why? Because I’m a lazy slug. What can I say?

I was worried that the three days would lead to an overly salty piece of meat with the texture of liver. I was pleasantly surprised when that was far from the case. We ended up with a pork roast that my husband ate I think 4 pieces of, I ate two pieces which is rare for me (unless I’m eating mid rare beef in which case just set a side of beef and a knife in front of me). Let’s just say that out of a four pound pork loin there is enough left for a sandwich. Add in the salsa that I made (which my husband actually tried…GASP!!) So yeah… it turned out. πŸ˜€ So if you’re a pork fan or like to have fruity relish/salsas with meat, this may be for you.

The marinade is an extreme adaptation of one from all recipes recipe. The salsa is me though as with 99.9% of the things we think we are creating, I am sure there are 500000000 variations online somewhere.

Roast Pork Loin In An Asian/Mex Fusion Marinade

With a Blackberry Peach Salsa

  • 1 3 to 5 pound pork loin
  • 1/2 cup lime juice
  • 2/3 cup soy sauce
  • 1 cup brown sugar
  • 2 teaspoons garlic powder
  • 2 teaspoons onion powder
  • 2 teaspoons sesame oil
  • 1 small jalapeno, sliced thin
  • SALSA-
  • 1 6 ounce container blackberries
  • 1 large peach, chopped
  • 6 grape or cherry tomatoes, halved or quartered depending on size
  • 1/4 cup finely chopped green pepper
  • 1/3 cup honey
  • 1/4 cup lime juice
  • 1 teaspoon salt
  • 1 jalapeno, seeded and minced
  • 3 green onions, thinly sliced
  1. Mix all the marinade ingredients in a large ziploc bag. Leave the lime halves in the marinade. Add the pork roast, turning to coat. Refrigerate for at least 12 hours and up to 3 days.
  2. Preheat oven to 450 degrees. You heard me; 450.
  3. Put roast in a foil lined pan. Again, why make more clean up for yourself if you don’t have to. I want to give a huge kiss to whomever invented foil. On a side note, remember when it was “Tin Foil” not aluminum foil. If you do, that means you too are old like me. Welcome to the club πŸ˜€
  4. Cook roast until it reaches an internal temp of 145 degrees; about 40 minutes. Start checking at 30 and frequently there after. It goes up quickly at that temp. But doing it this high, you get a nice crispy outside and a juicy inside.
  5. While it cooks, make your salsa (can also be done earlier in the day)- mix your salsa ingredients. Taste for seasoning but remember all flavors will get stronger as it sits.
  6. When pork is done, let it rest for about ten minutes before cutting. Drives me nuts when people cut meat the second it comes out of the oven. LET IT REST! The juices go back into it and make it that much juicier and more flavorful.
  7. Slice as thin or as thick as you like and serve with the salsa.


Can You Do The Salsa?


Can you… Salsa! Heh. I crack me up!!! Again, mainly because I crack up no one else and I’ll be damned if there will total silence when I make my completely inane dumb plays on words but still… I crack me up!!

I can see you all shaking your heads wondering how that was even a play on words in the first place. Well duhhhh mannnn! Cause this is a post about home canning salsa. Geee, so obvious. *Gives you all the L on the forehead gesture and then realizes that only a 100% L person would even USE that gesture and giggles sheepishly* (on a side note, do Sheep giggle? If they do something stupid do they say that they are looking human? These are the things that my mind contemplates.)

Moving on…as usual… many many moons ago I was like many of you. I bought all my jams, jellies, relishes, salsas and other yummy canned goods at the store. The store I say shamefully!!! Can you believe it!? It’s a dark part of my life I try not to look back on. the therapy took years.  Now however, I have seen the light!!! *Finds a soapbox, gets up on it and starts preaching* Yes brother, I have seeeeennnnnnn the light! And the light shines through canning jars!!!! Can we say Amen!? Say amen with me!

I really need more therapy.

As I was saying, but put more simply, over the years I have come to love home canning (as opposed to canning in say the Wal Mart parking lot). You can make so many flavors you can only find via gourmet stores or web sites (like Blueberry Lime Jam or Jalapeno Cranberry Preserves) as well as make the typical store bought flavors of different condiments and jams but do it knowing that they are fresh, there is no law allowed amounts of rat poop in it and it isn’t filled with preservatives (I guess to keep the rat poop fresh). Not to mention, that old saw about how fulfilling and dare I say empowering it is to can foods yourself is actually true. it’s a rather heady feeling to see jars of tasty foods that YOU made, not some hair netted stranger 2000 miles away.

So today I am putting up what will be my first of many (over time) canning recipes. I am NOT however going to get into the whole teaching you how to can part of it. I will give the recipes and add in a link or two to good sites to go to to learn to can. It’s much easier than what one would think. If you can think “keep it clean and think safe” you can can. This post is for homemade Peach Salsa. I love this stuff! My daughter finally had to learn to make it because I was refusing to let her continue swiping what I made πŸ˜› This has a bit of a bite (but you can make it less so) and a wonderful fruity flavor to it. It is great with chips, with meats, with cream cheese, with a spoon eating it straight from the jar….

Here is a good link to learn proper canning techniques. πŸ™‚

http://www.uga.edu/nchfp/how/can_home.html

Spicy Sweet Peach Salsa

(Canning Recipe)

  • 3 lbs ripe tomatoes, peeled then chopped
  • 2 1/2 cups chopped onions
  • 2 cups chopped green pepper
  • 2 jalapenos, seeded and finely chopped (can also omit if you want extremely mild salsa or leave in the seeds if you want hot salsa)
  • 5 ripe peaches, peeled then chopped
  • 1 cup sugar
  • 1 cup vinegar (white or apple cider)
  • 1 1/2 teaspoons salt
  • 1 1/2 teaspoons pickling spices (can be found with canning supplies or in the normal spice aisle), tied up in a cheesecloth square (a coffee filter works well too)
  1. Easiest way to peel your tomatoes and peaches is this: boil a large pot of water. Add the fruits (not all at once) to the boiling water and boil for two minutes. Then dump into a bowl of ice water and let sit for a few minutes. The skins should then slip off easily.
  2. Put chopped tomatoes and peaches into a large heavy bottomed pot along with all the other ingredients.
  3. Boil slowly, stirring often, until thickened which should take about two hours. If your maters (yes, I said maters πŸ˜› ) were really juicy it may take longer.
  4. Take out and discard the pickling spices.
  5. Ladle the salsa into half pint or pint jars, leaving 1/4 inch head space. Make sure to wipe the rims of the jars thoroughly with a CLEAN hot washrag. Put the clean lids on, making sure to just finger tighten. Don’t over tighten them.
  6. Process in a boiling water bath for ten minutes.
  7. This makes about 3 and a half pints.
  8. Let cool and then undo all your hard work by popping open a jar and getting out the tostitos πŸ˜€
  9. If you have never canned before, please please don’t be scared off thinking it is too much work, too much trouble or too frightening to do. It’s really quite easy and more than worth any work you put into it. I PROMISE you this. If you have any canning questions, please feel free to ask me in a comment here or write me at my gmail address (in my “about me” section)

Call Them Delicious But Don’t Call Them Sliders

I’m not sure if I have mentioned before that I was born and raised on the South Side of Chicago (yes, that gets capital letters… πŸ˜› ). I have been here in Kentucky since 1988 (Sobs as I realize I have lived here longer than some of my readers have been alive) but I am originally a city girl.

Everyone has heard of White Castle right? If you haven’t you either live outside the United States or have been here but need to periodically move away from the rock you live under. πŸ˜€ They originated right in the Midwest so I hold a rather possessive interest in them :-P. I loved them as a kid and I still love them. I was thrilled beyond sanity (not that doing something to take me past the point of sanity is difficult) when they finally opened a store not far from me. Ok, so it’s 30 miles but when you live in the sticks, near and far become very relative terms. I don’t get them often but oh my do I love those greasy little bite sized pieces of oniony heaven.

Being from the Midwest (Chicago in case I didn’t say that loud enough earlier and no, I’ve never been involved in a drive by. You have no idea how many times I’ve been asked that), I find myself getting mildly annoyed when I hear every sort of mini burger one could think of (most quite yummy but that’s neither here nor there) being called sliders. THEY AREN’T SLIDERS! THEY AREN’T THEY AREN’T THEY AREN’T!!! Ok, that’s out of my system now. However,  “Sliders” can only be bought at White Castle and even then, one doesn’t go in and place an order saying “I want 315 sliders”. Do that and the employees and other customers will know you spend far too much time paying attention to weird media sources. They are just hamburgers… or maybe “White Castles” if you are in the middle of Chicago ordering them. But the mini, small, tiny, minute, teenie, call them what you will, burgers that get made at home are not sliders. Shhh…don’t argue. They aren’t. Just trust me.

That doesn’t mean they aren’t delicious and fun as hell to eat though. So make a big batch of these mini burgers ( Did you notice I didn’t call them sliders? Did ya see? Huh huh huh?) cover them with the tangy sweet onion relish and slather some extra cheese and the Cajun mayo and eat until you burst. Since these are mini, they have no calories. You knew that right? Small means no calories. The calories dissolve before they get to your stomach. Just a little FYI for you there.

CHEESY CHIPOTLE MINI BURGERS WITH AN ONION RELISH

&

A SPICY CAJUN MAYO

  • For the burgers-
  • 3 pounds ground chuck
  • 1/2 of a 7 ounce can chipotle peppers in adobo sauce, finely chopped
  • 12 ounces shredded Colby jack cheese (sub your favorite if Colby jack doesn’t do it for you)
  • 2 cloves minced garlic or 2 teaspoons garlic powder
  • 2 teaspoons onion powder
  • 1 teaspoon salt
  • 2 12 packs of mini burger buns
  • For the onion relish-
  • 3 large onions, sliced thin
  • 2 tablespoons olive oil
  • 3 tablespoons balsamic vinegar
  • 1/4 cup brown sugar
  • 1 teaspoon salt or to taste
  • For the spicy Cajun mayo
  • 1/3 cup mayonnaise
  • 2 tablespoons spicy brown mustard
  • 2 tablespoons salt free cajun seasoning (if you only have salted, be more careful on amounts and taste as you go so it doesn’t end up over salted)
  • 1 clove minced garlic
  • 2 green onions, finely chopped
  • salt to taste if using the salt free seasoning
  1. For the mayo, mix all the ingredients together and then refrigerate until serving time. See how easy that was? πŸ˜›
  2. For the relish, add the olive oil and sliced onions to a medium saucepan. Cook over medium heat until the onions are softened, about 5 minutes. Stir frequently. Turn heat down to low (about 3 on an electric stove) and cover the pan, Stirring occasionally, cook the onions until they are golden brown, about 20 minutes. Add the balsamic vinegar, salt and brown sugar. Stir well and cook over medium heat until the vinegar is totally absorbed, about five minutes. Set aside until ready to serve.
  3. For the burgers, mix all the burger ingredients together. Don’t over work it; just mix until combined. Shape the meat into 24 small burgers. Cook via your favorite method. I used my George Foreman grill. If you’re going to use a regular grill, I highly suggest using one of those wire grill pans that holds small things unless you LIKE digging through the coals for your food πŸ˜›


You Put Da Lime In Da Coconut


And then you feel better,
Put the lime in the coconut, drink them both up,
Put the lime in the coconut, and call me in the morning.

One of the strangest songs ever written. Every time I think of it, I think of the Muppets Episode where Kermit sang it.  Yes, I realize my TV viewing leaves something to be desired… like maybe sophistication and intelligence but in my defense, I’ve been surrounded by kids since I was 21. What do you expect? Just please…. don’t get me started on The Fresh Beat Band *shudders* or Yo Gabba Gabba. I’ve been known to rant on the subject of our children’s brain cells being fried by the junk they advertise as educational television these days. Not to mention the perception kids must have of adults as babbling idiots by the time they reach school age if they watch those shows. Ok, I got myself started didn’t I? Ummm…oops?

Sunny Dayyyy… chasing my caressss awayyyyyyy!!! Lalalalalalalalalaaaaaaaa. Can you tell me how to get- how to get to Sesame Street!?

Now THAT was good kids TV. Cute puppets, kids learned their letters and numbers as well as moral lessons. We already know I’m easily amused so stop laughing; it’s not nice. Sesame Street taught you that. I know it  did. πŸ˜›

I’ve also mentioned that I love anything curry. So today I was playing around and wanted to do something interesting with the boneless pork Loin roast I had. Methinks I succeeded. I cut the roast into chops and marinated them in a coconut milk/lime/curry marinade and then cooked them up in the same marinade. By the time it was done, they were fall apart tender infused with the luscious taste of the marinade which had cooked down into a creamy sauce. I served this with a spicy peach & cranberry chutney I’ve been making for years, an extra squeeze of lime over the meat, basmati rice that we covered in the sauce and Broccoli florets. I tried to carry the flavors over from the sauce to the chutney and I think it worked well here.

Boneless Pork Loin Chops in a Coconut Curry Sauce

  1. 3.5 pound pork loin roast, cut into chops of desired thickness ( I made 10 chops from it. This gives us enough for 2 meals. You can make them thicker or thinner but that will affect cooking time so be aware of that. This can also be cut in half just using boneless chops for less people if you don’t want to use a whole roast)
  2. 2 15 ounce cans coconut milk
  3. 2 tablespoons red curry paste
  4. 1/4 cup lime juice
  5. zest from one lime
  6. 1 teaspoon ground ginger
  7. 1/2 teaspoon cinnamon
  8. 1 teaspoon onion powder (NOT onion salt)
  9. 1 teaspoon garlic powder
  10. 1/2 teaspoon red pepper flakes
  11. 1/2 cup brown sugar
  • Mix all the marinade ingredients together in a large bowl. Put your chops in and push them down under the marinade. Cover and refrigerate for at least an hour. Longer is even better. You can marinade for up to a day. Mine was in for about 3 hours and I think it would have been even better for a full day.
  • Preheat your oven to 350 about 20 minutes before you need to get the meat started. Foil line a 13×9 inch pan then spray it with cooking spray. That will reduce your mess plus the chops won’t stick as much.
  • Put your chops, one by one, into the foil lined pan. Carefully pour 1 1/2 cups of your marinade over the chops (just discard the rest) and cover the pan with more foil. Cook in the preheated oven for 60 to 90 minutes, depending on how thick you cut your chops, uncovering the pan after 45 minutes to give your sauce time to thicken up some. When you can  easily pull a piece off of a chop with a fork, they are done. Serve them with the chutney and preferably with some rice to soak up all the saucy goodness. Make sure you squeeze some lime juice over the meat for each serving. It adds that indefinable oomph that makes the dish great.

Sweet & Spicy Peach Cranberry Chutney

  1. 2 15 ounce cans sliced peaches in juice or light syrup
  2. 1 15 ounce can whole berry cranberry sauce (you can also do this w/out the cranberry sauce if you just want a Peach chutney. I have done it both ways.)
  3. 1/2 cup raisins
  4. 1 red onion, chopped
  5. 1 clove minced garlic (again; I used the kind in the jar. Ninety percent of the time, it works perfectly for your garlic needs)
  6. 2 teaspoons cinnamon
  7. 1/2 teaspoon ground cloves
  8. 1/2 teaspoon ground ginger
  9. 1 teaspoon red pepper flakes (use less if you don’t like spicy)
  10. 1 cup packed brown sugar
  11. 1/2 cup cider vinegar
  • Dump everything into a medium sized sauce pot. Stir well to combine. Cook over medium heat until reduced by about half and thickened. This will take anywhere from an hour and a half to 2 and a half hours. Stir frequently to prevent sticking and if it starts to stick, turn your heat down to about 3 or 4 on an electric stove, low heat on a gas stove. This can be used the day it is made but it’s even better the next day.