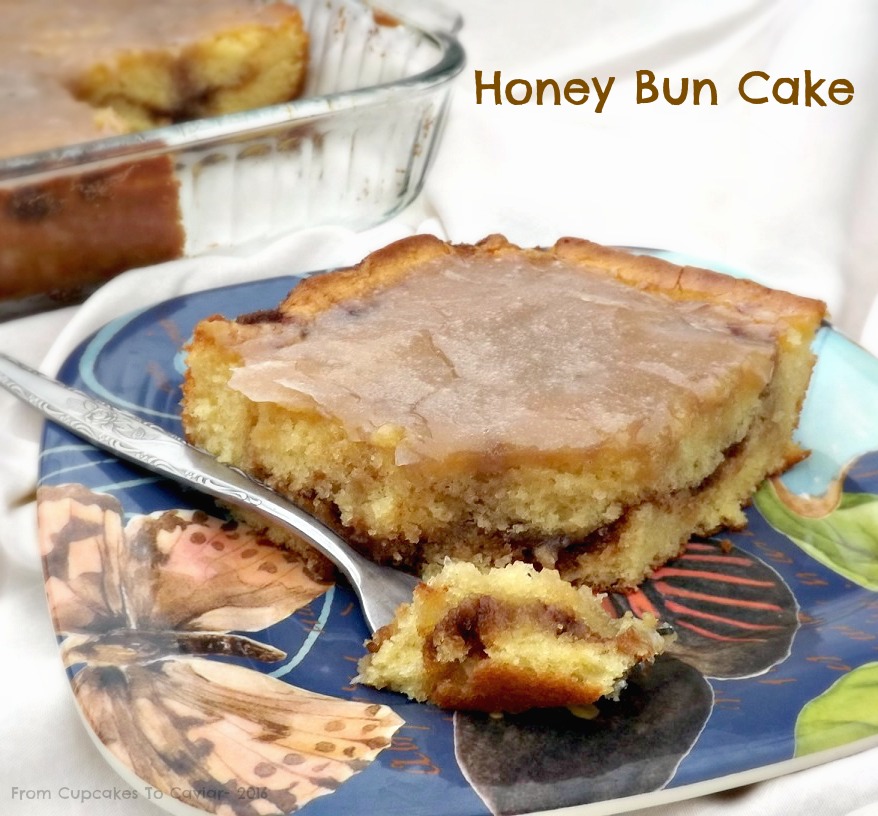
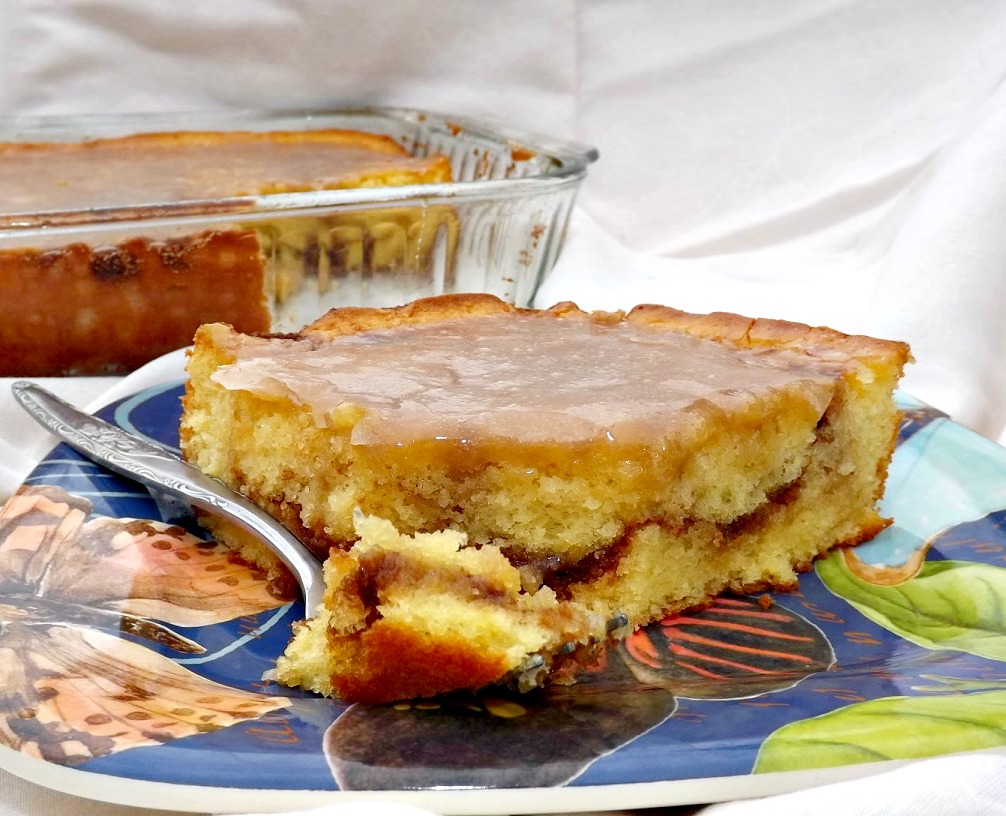
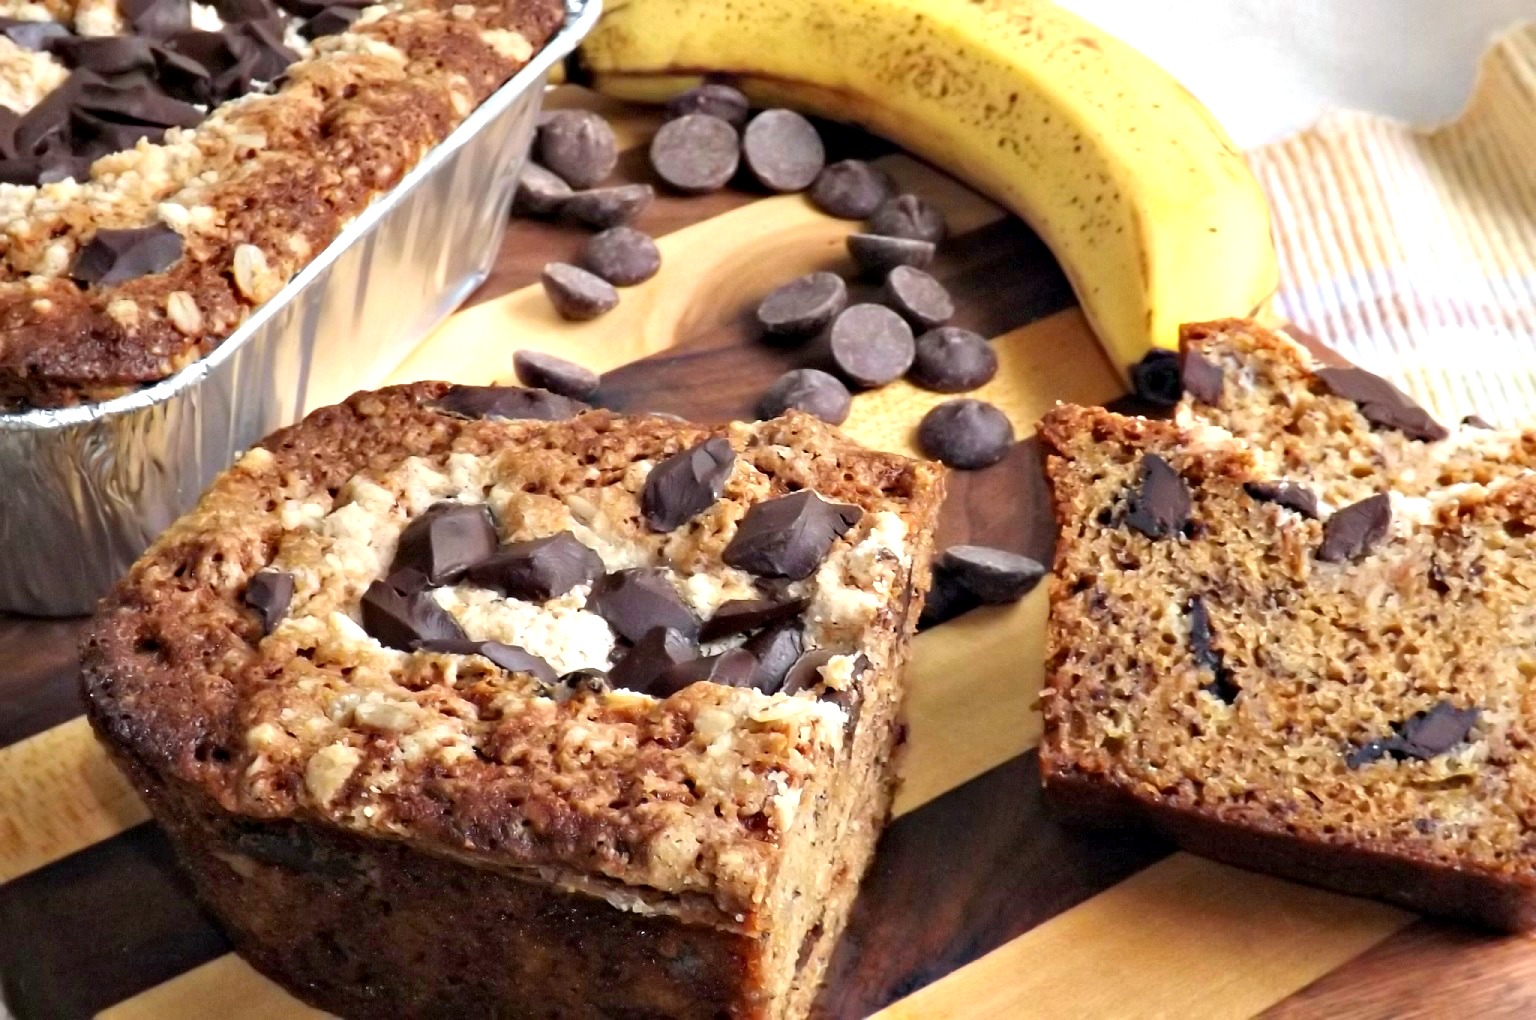
Honey Bun Cake


Honey Bun Cake

Honey Bun Cake

When my three older kids were little (they range from 30 to 26 now), we were stone broke. I’m talking momma eats the tail of the chicken and says that is enough for her so that there was enough for an extra meal for the kids kind of broke. Needless to say, store bought treats were a rare…well, treat for them. One of the things they loved was when I would spend 75 cents (yes, I’m old enough that that was how much they were) on a box of Little Debbie Honey Buns for them. My son Cameron, now 28, especially loved those and I’d have to hide them from him. Personally, I never liked them. Too sweet, too goopy, too relatively flavorless. Even back then, while I couldn’t afford it, I was an ice cream sort of a gal.

All that said, when I was at the library recently, I took out the book “Blue Ribbon Baking From A Red Neck Kitchen”. I mean, I live in rural Kentucky. How could I resist anything with that title, right? While I didn’t find a million recipes in it that interested me, I just had to tab the one for Honey Bun Cake. Just the name made me think of my kids when they were little, so it was a moral imperative that I make it. πŸ™‚

This is quite a bit better than the Little Debbie ones. It is still really sweet, but it’s a sweet with flavor due to the cinnamon and brown sugar, not just a generic sweetness that overwhelms and gives you a toothache or 9. The cake is moist with a crispy edge and is perfect for the kiddos. It’s also really nice with a cup of coffee. It goes together in like 5 minutes max and that’s if you’re slow. So make this for a nice last day of school snack or a family dessert or maybe even a sweet treat to start the day. I promise; you’ll like it. πŸ˜€

You know the drill….

Honey Bun Cake

  • 3/4 cup (1 1/2 sticks) unsalted butter, melted
  • 1 box yellow cake mix
  • 4 eggs
  • 1 cup sour cream
  • Filling-
  • 1 cup dark brown sugar
  • 1/2 cup chopped pecans (I didn’t use those)
  • 1 tablespoon cinnamon (truthfully, I didn’t measure; just sprinkled it over the brown sugar straight from the jar)
  • Glaze-
  • 3 cups powdered sugar
  • 1/3 cup milk (she called for 1/2 cup but it was REALLY thin with that amount, so it needs cut down a bit)
  • 2 teaspoons vanilla extract
  1. Preheat your oven to 350 degrees and grease and flour a 13X9 inch pan.
  2. In a large bowl, beat together on medium speed the cake mix, eggs, melted butter and sour cream. Beat for about two minutes, until the batter is thick and creamy looking.
  3. Pour about 1/2 of the batter into the prepared pan. Sprinkle with the brown sugar and cinnamon. Carefully dollop and spread the rest of the batter over the top. Do your best to get to the corners, but life will go on if you don’t have every inch covered. it will spread as it bakes.
  4. Bake at 350 for about 40 to 45 minutes, or until the top is golden brown and a skewer inserted in the middle comes out clean.
  5. While the cake is baking, prepare the glaze, which is simply a matter of whisking together the glaze ingredients. Not hard at all πŸ˜›
  6. While the cake is still hot, poke holes all over the top. Pour the glaze over the top of the cake, spreading to try to get it down into the holes also.
  7. Let it finish cooling in the pan, then slice and serve.

Copyright Notice: From Cupcakes To Caviar images and original content are copyright protected. Please do not publish these materials anywhere without prior permission.

Honey Bun Cake

Honey Bun Cake


Streusel Topped Chocolate Chip Banana Bread

Streusel Topped Chocolate Chip Banana Bread 3

I would apologize for having been gone so long, but you’ve all heard it before. I’ve become like that straying spouse that says for the 12th time, “I promise; it won’t happen again! Trust me!” and then they step out on you again πŸ˜› I do what I can post wise lately and I know that those of you who have been around for pretty much my full five years (Yes! We passed the five year mark early this month. D’you believe it!?) love me anyway.

Are you all as totally sick as me of all the political crap on facebook anymore? I love my friends, but I swear, I can’t scroll half an inch there without being bombarded with “Democrats are evil; no, Republicans are evil!” posts. It is enough to make one want to go live on a deserted island in the south pacific with only a banana tree for food and a macaw for company.  Wait; I wanted to do that anyway. I mean, really, think about it. Bananas are a perfectly good food to live off of (though if I wanted protein, I imagine my buddy the macaw would start looking tasty hehe) and you can’t beat a nice sunny tropical island. Just send me with a few crates of books and a way to play music and it’s all good.

This wasn’t originally going to be a post, but it was too tasty to keep to myself. It’s nothing earth shaking. I was making my original banana bread and I noticed that I had a partial bag of chocolate chips I needed to use up. Then, when I glanced in the freezer for something else, I saw my stored bag of streusel. The two brain cells I have left decided to use both of these things in the bread. I have to say, it’s really quite good. I added a layer of streusel to the middle of each loaf along with a small handful of chocolate chips, then topped each loaf with more of the same. Simple, yet delicious. I sent some in with Joshie for his teacher today and she texted me saying it was fantastic. I soooo love when people enjoy what I’ve made. πŸ™‚

This is a perfect after school snack, great with coffee for a quick and somewhat decadent breakfast (but it has bananas! It must be good for you, right?!), a nice late night treat; just an all around nice baked good to have around. And, as as in the case for most quick breads, this is easy to throw together and get in the oven.

You know the drill…. πŸ™‚

Streusel Topped Chocolate Chip Banana Bread

  • 2 1/2 cups flour
  • 1 teaspoon salt
  • 2 teaspoons baking soda
  • 1 cup solid shortening
  • 1 3/4 cups sugar
  • 2 cups of mashed bananas (this is about 5 to 6 medium bananas)
  • 1 tablespoon vanilla extract
  • 1 teaspoon banana flavoring
  • 1 teaspoon butter flavoring (optional, but it adds a nice flavor)
  • 4 eggs
  • 1 cup coarsely chopped toasted walnuts or pecans (toast in a single layer in a 350 oven until they are a light golden brown)
  • 1 cup semi sweet or dark chocolate chips or chunks
  • Streusel-
  • 1/2 cup sugar
  • 5 tablespoons flour
  • 1 1/2 teaspoons cinnamon
  • 1/4 cup unsalted butter, cold
  • 1/4 cup chopped toasted walnuts or pecans (optional; with me, nuts in streusel depends on my mood)
  1. Preheat your oven to 350. Grease 6 mini disposable foil loaf pans and set aside. Alternately, you can do this in a 9 inch loaf pan, but you’ll have extra that you’ll need to make muffins with.
  2. In a small bowl, whisk together the flour, salt and baking soda.
  3. In a large bowl, on low speed, cream together the shortening and the sugar until well combined. Add in the mashed bananas, vanilla, banana and butter flavorings and eggs. Beat well.
  4. Dump in the flour mixture and using a large spoon or rubber spatula, combine JUST until mixed. ItÒ€ℒs fine if there are a few lumps or white streaks. I have said before and will say again, you do NOT want to over beat quick breads and/or muffins. You end up with tough rubbery final products doing that. Resist that urge.
  5. Fold in the toasted walnuts. Again; donÒ€ℒt over mix.
  6. Fill each mini loaf pan about half full. Sprinkle with about 2 heaping tablespoons of the streusel and then about a tablespoon of the chocolate chips. Divide the rest of the batter evenly over each loaf, carefully smoothing the top to get it over the streusel. Top each loaf with another 2 tablespoons of streusel and some chocolate chips. If you have streusel left over, it freezes wonderfully.
  7. Bake at 350 for 35 to 45 minutes minutes or until a wooden skewer inserted in the middle comes out clean  If this starts to brown too much, just lay a piece of foil over the top as it bakes.
  8. Let it sit in the pan for ten minutes, then gently squeeze the bottom of the pan to loosen the loaf and turn it out carefully to a rack to finish cooling.

Copyright Notice: From Cupcakes To Caviar images and original content are copyright protected. Please do not publish these materials anywhere without prior permission.

Streusel Topped Chocolate Chip Banana Bread 5


Angel Biscuits

Angel Biscuits

Angel Biscuits

Ever have one of those meals where you are running around like proverbial headless chicken, trying to make a nice dinner, and yet still, you do 456 things incorrectly while cooking? Please tell me you have evenings like that. If nothing else, lie to me. I’m cool with that.

I made fried chicken for dinner tonight. Ultimately, it was fine, but the burner I prefer to use seems to be having hissy fits lately and has no medium temp. It’s either high enough that the food (in this case, the fried chicken) is somewhat burned on the outside and half raw inside or the oil temp is too low and the chicken ends up greasy. Yes, yes, I know, I could just move to another burner, but one, I LIKE the left hand side and two, that seems defeatist. Please don’t ask me why I stick with it and have food come out poorly, because I have no answer for that other than orneriness.

Then, the socket that I plugged the rice cooker into decided to go on the fritz and it wasn’t until the rest of dinner was done that I realized that the rice had never cooked. I had to plug it in elsewhere and try again. So, now we have 3 cups of cooked rice because no one wanted any by the time they finished the rest of dinner.

One part that turned out wonderfully was these biscuits. I have a lot of friends who aren’t comfortable using yeast and if you fall into that category yourself, these are the biscuits you want to try. They use both yeast and baking powder, so are virtually foolproof, and are so light and fluffy. These come together so easily; you don’t need a mixer of any kind. A couple hours chilling time, bake, and you have a pan or two of amazingly delicious biscuits. These are fantastic plain, or with butter and jam.

You know the drill…. πŸ™‚

Angel Biscuits

  • 1/2 cup warm water (between 105 and 112 degrees)
  • 1 envelope yeast
  • 1 teaspoon sugar
  • 5 cups flour
  • 3 tablespoons sugar
  • 5 teaspoons baking powder
  • 1 1/2 teaspoons salt (just plain old salt; nothing fancy)
  • 1 teaspoon baking soda
  • 1/2 cup cold shortening, sliced thin
  • 1/2 cup cold unsalted butter, sliced thin
  • 2 cups buttermilk
  • 1/4 cup melted butter
  1. In a small bowl, combine the warm water, yeast and one teaspoon sugar. Stir and let sit for five minutes. it should get foamy and bubbly. If it doesn’t, your yeast is dead; use a different pack.
  2. In a large bowl, whisk together the flour, sugar, baking powder, salt and baking soda.
  3. Use a pastry blender to cut in the cold shortening and butter until the mixture is crumbly with pieces of butter ranging from pea to nickel sized. Pour in the yeast mix and the buttermilk, all at once. then stir until the dough is thoroughly moistened and you can mash it together into a ball.
  4. Cover the bowl with plastic and put it in the fridge for at least 2 hours and up to 24.
  5. When ready to bake, preheat oven to 400 and lightly butter two 10 inch cast iron skillets (or a buttered baking dish). Dump dough out onto a lightly floured board. Pat into a 1 inch thick circle; fold in half; repeat process twice.
  6. Finally, pat or roll the dough into a 3/4 inch thick round. Cut the dough with 2 inch biscuit cutters. You can use smaller or larger cutters, but adjust your cooking time to suit.
  7. Place the biscuits, sides touching, in the prepared pans. Brush with half the melted butter.
  8. Bake at 400 for 15 to 20 minutes, rotating the pans once during baking, until the tops are golden brown. Brush with the rest of the melted butter and serve.

Copyright Notice: From Cupcakes To Caviar images and original content are copyright protected. Please do not publish these materials anywhere without prior permission.

Angel Biscuits

Angel Biscuits

Revamped Morning Glory Muffins

Revamped Morning Glory Muffins

Revamped Morning Glory Muffins

It’s no secret that I don’t like carrots. I whine about it every time I post a recipe that uses carrots in it, I make mention of it on my personal page in facebook every time my husbands dares to want carrots with dinner, I moan when my youngest child eats carrots dipped in ketchup (don’t ask). Carrots are just…icky. They’re fibrous and hard to chew and don’t have a ton of flavor unless they are roasted (which is one of the few ways I willingly eat them). Did I mention that I think they’re icky.

Except when they aren’t.

These muffins are a definite case of they aren’t yucky. I mean, I know a bunch of you have already heard of Morning Glory Muffins. They’re pretty much a breakfast standard, and can be found in a bunch of home style cookbooks. But let’s keep one thing in mind, please.

This is me. I don’t do ANYTHING normally. That includes making these muffins. I wanted to ramp up the flavor a bit, add a bit more to make these interesting enough that even the kids wouldn’t scoff over having a muffin full of fruits and vegetables. I think I succeeded. These have all the nutrition of the original muffins, but with a blast of flavor that comes from a small amount of dark chocolate, some dried apricots and a fair amount of orange zest, along with some other minor changes I made. These aren’t the prettiest of muffins, since you have a boatload of fruits and veggies with just enough batter to bind them together, but darn, they taste good. I scarfed one down hot from the oven and it was heavenly. Moist, tender, with crunch from the toasted nuts and coconut as well as the carrots and the varied flavors of everything else in there, all finished with gooey chocolate.

You know the drill…. πŸ™‚

Revamped Morning Glory Muffins

  • 2 cups flour
  • 1 1/3 cup sugar
  • 2 teaspoons baking soda
  • 1/2 teaspoon salt
  • 1 teaspoon cinnamon
  • 2 cups grated carrots
  • 1 1/2 tablespoons orange zest
  • 1/2 cup raisins (make sure you use good ones, not dried shriveled ones)
  • 1/2 cup shredded sweetened coconut, toasted*
  • 1/2 cup chopped pecans, toasted*
  • 1/2 cup chopped dried apricots
  • 1/2 cup chopped dark chocolate (or dark chocolate chips)
  • 1 8 ounce can crushed pineapple, drained
  • 1 tablespoon vanilla extract
  • 3 eggs, lightly beaten
  • 1 cup vegetable oil
  1. Preheat oven to 350 degrees and line two 12 cup muffin tins with liners. Alternately, grease them well.
  2. In a large bowl, whisk together the flour, baking soda, salt and cinnamon. Add in the carrots and orange zest and stir to combine.
  3. Dump in the raisins, coconut, pecans, apricots and dark chocolate. Stir well.
  4. Make a well in the center and dump in the oil, eggs, vanilla and crushed pineapple. Stir just until combined. Don’t overbeat or you’ll end up with tough muffins full of holes.
  5. Fill each muffin cup 2/3’s full of the batter. Bake at 350 degrees about 20 to 25 minutes, until the muffins are a golden brown color. Let rest in the tin for a bout 2 minutes, then use a butter knife or spoon to get them out to a cooling rack to finish cooling.
  6. These are a great breakfast and/or an after school snack you can feel ok giving the kiddos. Drizzle with some honey and butter for a real treat!
  7. * To toast the coconut and nuts, simply place in a single layer in a baking pan in a 350 oven and let cook for about 10 minutes, or until lightly browned. Watch carefully; both nuts and coconut can go from nicely browned to burnt very quickly.

Old Fashioned Banana Bread & Hamilton Beach Freebies (maybe for YOU!?)

Old Fashioned Banana Bread

Old Fashioned Banana Bread

Yes, yes I am still alive. As Mark Twain is said to have remarked, “Rumors of my death have been highly exaggerated”. Mind you, even as ancient as I am, I wasn’t around back then, so I don’t know that he actually uttered those words. But if one goes by the claims of the internet, he, Abraham Lincoln, Samuel L Jackson and Morgan Freeman are the only people who ever said anything worth quoting, other than a few random quotes attributed to Thomas Jefferson or Patrick Henry.
But I digress. Imagine that. I am here to bring you food!! Plus a giveaway. You all know I have had the much envied position of being a Hamilton Beach Ambassador for a couple of years now. As one, I get the opportunity to review their products from time to time and then offer those same products to you, my faithful (and slightly offbeat and rather warped) readers.
Today, I am bringing you two of the most iconic small appliances from Hamilton Beach– their 6 Speed Hand Mixer and their pretty darn awesome Stand Mixer. Let me tell you my thoughts on both now- First, the 6 Speed Hand Mixer-

Hamilton Beach Hand Mixer

Hamilton Beach Hand Mixer

I love this bad boy. This is the type of mixer one reaches for when doing the typical cooking/baking that requires a mixer. it is sturdy, easy to use ( I love the hand grip. It fits comfortably in my hand) and this one comes with some cool attachments,Hamilton Beach Attachments including a milkshake mixer (think of it rather like an immersion blender). I also love the storage area underneath. it’s a nice, convenient and NEAT (I have a thing for anything that leads to less drawer clutter) way to keep the attachments nearby. This mixer works well for everyday thing and has a “burst” button that gives you some extra power when you need it. it’s pretty much the perfect everyday mixer.
Now on to the Hamilton Beach Stand Mixer

Hamilton Beach Stand Mixer

Hamilton Beach Stand Mixer

. This one is a bit more powerful than the hand mixer and has the convenience of the bowl and hands off usage. It doesn’t have the horsepower, so to speak, to do heavy doughs easily, so no, this isn’t one to try to make 4 loaves of whole wheat bread in. But for regular baking and mixing, this is a workhorse. It worked fine for me when I made chocolate chip cookie dough in it and we all know that that dough can be rather dense. The only thing I DIDN’T like though I know I may be in the minority with this, were the stability suction cups on the bottom to hold it still when mixing. They are a great idea, but if one tries to move the mixer from one spot to another, the way it sticks to the counter makes it pull up forcefully and can make the contents of the bowl go everywhere. Don’t ask me how I know this, please. Ahem. This one comes with a standard flat beater hook, a dough hook and a whisk attachment.Stand Mixer AttachmentsYou want to win these. Trust me. You do. Both together are close to a $150.00 value and with the attachments, are sooooo helpful in the kitchen! I made my famous (hey, it is… in my household! πŸ˜› ) Old fashioned Banana Bread using the hand mixer and it worked wonderfully. Oh, you want the recipe, you say? Well, ok, if I MUST *gives you an evil glare and gets on to the recipe* πŸ˜› <3

Old Fashioned Banana Bread

  • 2 1/2 cups flour
  • 1 teaspoon salt
  • 2 teaspoons baking soda
  • 1 cup solid shortening
  • 1 1/2 cups sugar
  • 2 cups of mashed bananas (this is about 5 to 6 medium bananas)
  • 1 tablespoon vanilla extract
  • 1 teaspoon banana flavoring
  • 1 teaspoon butter flavoring (optional, but it adds a nice flavor)
  • 4 eggs
  • 1 cup coarsely chopped toasted walnuts (toast in a single layer in a 350 oven until they are a light golden brown)
  1. Preheat your oven to 350. Grease a 10 inch loaf pan (if you don’t have a 10 inch pan, make this in a 9 inch, and pour about 2/3 of a cup of batter into a mini loaf pan, a couple of muffin cups or a ramekin and bake it in there or you’ll end up with overflow everywhere) and set aside.
  2. In a small bowl, whisk together the flour, salt and baking soda.
  3. In a large bowl, on low speed, cream together the shortening and the sugar until well combined. Add in the mashed bananas, vanilla, banana and butter flavorings and eggs. Beat well.
  4. Dump in the flour mixture and on the lowest speed, combine JUST until mixed. it’s fine if there are a few lumps or white streaks. I have said before and will say again, you do NOT want to over beat quick breads and/or muffins. You end up with tough rubbery final products doing that. Resist that urge.
  5. Fold in the toasted walnuts. Again; don’t over mix.
  6. Pour the batter into the prepared pan/pans.  Bake at 350 for 55 to 75 minutes (yes, that’s a large gap. I’ve had it done by both both times. I have no idea why other than my oven is stupid πŸ˜› ) or until a wooden skewer inserted in the middle comes out clean. If this starts to brown too much, just lay a piece of foil over the top as it bakes.
  7. Let it sit in the pan for ten minutes, then gently invert it over your hands and transfer it to a rack to finish cooling.

In the interest of full disclosure, Hamilton Beach provided me with both mixers for review and my personal use. But all opinions in here are 100% my own.

Now! On to the giveaway!!! Use the PromoSimple entry form below to enter to win both of those cool mixers!

[promosimple id=”8e42″]

Easy Spiced Applesauce Oatmeal Quick Bread


Easy Spiced Applesauce Oatmeal Quick Bread 1


It’s FINALLY starting to get chilly during the day here. Am I the only weirdo who does a cheer for that? We’ve been able to leave the windows open and get fresh air, but it’s been warm during the day and only cooled off at night. Now, I had to close all but one window and it’s 66 in the house; a bit chilly, but nothing that socks and a sweater don’t take care of. I’m ready for comfort food weather; for nesting inside with a cup of tea and a blanket over my lap. I’m ready to be standing in front of the wood burning stove, listening to the crackling wood. I want to breathe in crisp air that smells of coming snow.

Ok, enough rhapsodizing. Yes, I know. Another apple recipe. But how can I resist? It’s apple season and they taste so good this time of year before they get shoved into cold storage! While I’ve said before that I have the type of cooking personality that doesn’t always pay attention to season- chili in August, anyone, Pumpkin bread in April?, there are some things that simply begged to be made at specific times of the year.

My husband picked up a handful of gorgeous Gala apples about a week ago and I held back one for this bread. The original recipe for applesauce oatmeal bread that I got from the King Arthur website didn’t call for fresh apples, but I couldn’t resist. That recipe also didn’t call for raisins or crystallized ginger or as much spice or wheat germ or toasting the nuts. In a nutshell (see what I did there? Huh, huh huh? πŸ˜› ), it was pretty boring. Not anymore. My seven year old told me I need to make this bread every day because, “it’s soooo good, momma!”. High praise from a little boy for something that is not overly sweet.

This bread is nice and moist. With applesauce, diced apples and a small amount of oil, it was bound to be. Add in the spices, raisins, toasted nuts, toasted wheat germ, and crystallized ginger and this is actually both quite tasty AND not totally bad for you. It goes together quickly. Just keep in mind… “Mise En Place”. I’ve said it before and I’ll say it again; having what you need already measured out and near your work space helps so much. When I don’t do this, that’s the times when I forget to add something. Don’t be me. πŸ˜›

You know the drill… get to cooking!

Easy Spiced Applesauce Oatmeal Quick Bread

  • 1 cup sugar
  • 2 eggs
  • 1/2 cup vegetable oil
  • 1 1/2 teaspoons vanilla extract
  • 2 tablespoons boiled cider (you could sub apple juice concentrate)
  • 1 cup diced apple (one medium apple)
  • 1/2 cup raisins
  • 1 1/2 cups flour
  • 1/4 teaspoon baking powder
  • 1/2 teaspoon baking soda
  • 2 teaspoons cinnamon
  • 1/2 teaspoon allspice
  • 1/2 teaspoon nutmeg
  • 1/4 teaspoon ground cloves
  • 1/2 teaspoon salt
  • 1/2 cup oats (NOT the instant crap)
  • 3/4 cup unsweetened applesauce (if you prefer a sweeter bread, feel free to use sweetened applesauce)
  • 1/2 cup chopped, toasted pecans (toast for ten minutes in a 350 degree oven, then cool.)
  • 1/2 cup wheat germ ( you can sprinkle them over the nuts and toast them in the same pan with the pecans, but watch carefully; the wheat germ can burn easily)
  • 3 tablespoons diced crystallized ginger
  1. Preheat the oven to 350 degrees and grease a 9×5 inch loaf pan. In a large bowl, whisk together the sugar, eggs, oil, vanilla extract and boiled cider (or apple juice concentrate). Add in the raisins and diced apple.
  2. In another bowl, combine the flour, baking powder, baking soda and the spices. Mix with the wet ingredients, stirring until just barely combined.
  3. Add in the oats, applesauce, pecan/wheat germ mixture and diced ginger. Stir until just combined.
  4. Pour the batter into the prepared pan. Sprinkle with some oats to make it purty πŸ˜›
  5. Bake at 350 degrees until a wooden skewer comes out clean, about 55 to 65 minutes. Let cool in the pan set on a rack for ten minutes, then turn it out onto the rack to finish cooling. Serve this warm with butter and jam or maybe some honey butter.

Easy Spiced Applesauce Oatmeal Quick Bread 3Copyright Notice: From Cupcakes To Caviar images and original content are copyright protected. Please do not publish these materials anywhere without prior permission.


Streusel Topped Cinnamon Rolls With A Creamy Vanilla Drizzle

Streusel Topped Cinnamon Rolls With A Creamy Vanilla Drizzle

Streusel Topped Cinnamon Rolls With A Creamy Vanilla Drizzle


You ladies and gentleman know I love you to pieces (preferably small, easy to vacuum pieces. Just sayin’. I hate messes.), but no long post today. It’s one of those rare days where my silly factor is taking a nap. Now if I could just get my body to follow suit. πŸ™‚

I wanted to play around with the ubiquitous cinnamon roll. Why? Because I can and because have you ever known me to make ANYTHING the “normal” way? So I added streusel. …………….

Why is it that I don’t see surprise on even one face? Here I thought that my usage of streusel would come as a shock!

I also added a bit more richness (cause cinnamon rolls just AREN’T rich enough typically, right?) by adding a layer of butter into the dough. It’s nothing to be fearful of doing; it’s not quite as if you’re making croissant dough or any other type of touchy dough. This is simply one layer of butter, two folds of the dough and rolling and voila; JUST enough to add a touch more layer to the rolls, similar to, but not as layered as those flaky layer biscuits from a can that every single human alive loves to peel into as many layers as possible.

This is an easy yeast dough; not temperamental at all. Since it is butter and egg rich, it takes a while to rise so don’t stress it when it hasn’t risen in 45 minutes or so as many doughs do.

The finished rolls are rich and tender, but surprisingly not too sweet. If you like a sweeter roll, either add more cinnamon sugar as the filling or maybe sprinkle some on top of the rolls before putting on the streusel. Personally though, I think they are fine as is. You have the soft fluffy roll, the sweet cinnamon sugar filling, all topped with crunchy streusel and then finished with a creamy glaze.

You know the drill…

Streusel Topped Cinnamon Rolls With A Creamy Vanilla Drizzle

  • Cinnamon Roll Dough-
  • 2 packets dry yeast
  • 1/4 cup warm water (about 110 to 115 degrees. No hotter or you’ll kill your yeast.)
  • 1 cup milk, warmed to 115 degrees (it’s ok if it is a COUPLE of degrees more or less, but again, no more that that)
  • 1/2 cup sugar
  • 2 teaspoons salt (please don’t omit. I have people write me and ask why I put salt in baked goods. Beyond boosting flavor, it also tends to act as a stabilizer to the yeast)
  • 1/2 cup unsalted butter, room temp
  • 3 eggs, room temp
  • 5 to 5 1/2 cups flour
  • 1/2 cup unsalted butter, cool, but not refrigerator cold; let sit out for about 30 minutes (no, this isn’t a typo. This is for the added layer. Feel free to omit it if you just want regular cinnamon rolls.)
  • Filling-
  • 1/2 to 3/4 cup sugar
  • 2 1/2 tablespoons cinnamon
  • 6 tablespoons unsalted butter, melted
  • Streusel-
  • 3/4 cup flour
  • 1/2 cup sugar
  • 1/8 cup brown sugar, packed
  • 1/4 teaspoon salt
  • 1/2 cup oatmeal
  • 1 teaspoon cinnamon
  • 1/2 teaspoon nutmeg
  • 1/2 cup (1 stick) unsalted butter, cold and sliced thin
  • Glaze
  • 3 ounces cream cheese, room temp
  • 1 cup powdered sugar
  • 1 teaspoon vanilla extract
  • 1/4 teaspoon almond extract
  • 1 to 3 tablespoons milk (will vary depending on how thin you want your glaze)
  1. Sprinkle the yeast over the warm water. Let sit for about five minutes. The yeast will begin to foam and get bubbly. In the bowl of a stand mixer (you can do this all by hand or with a strong hand mixer, but both will take more arm strength. I love my stand mixer, lol), combine the milk, sugar, salt, room temp butter and the eggs. Use the paddle hook to blend well.
  2. Put the dough hook on now. Stir in the dissolved yeast and 2 1/2 cups of the flour. Beat until it is a ragged looking mass. Add in the flour, one cup at a time, and let the machine knead each cup in before adding another. Continue letting the mixer knead it until it is a smooth, silky cohesive dough that still has a very slight tackiness to it. It took me 5 1/4 cups but it may take you a bit more or less.
  3. Lightly oil a large bowl. Dump the dough into the bowl. Turn it to coat both sides with the oil, then cover with a clean cloth and set in a warm place to rise. I usually turn my oven on for about 45 seconds, then turn it right back off and place the bowl on a cookie sheet in there. Let the dough rise until it is roughly doubled in size. This will take anywhere from an hour to two hours.
  4. While the dough rises, make the butter layer. Cut the butter into three equal pieces. Lay them on a sheet of wax paper, then cover with another sheet. Use a rolling pin to gently beat them down into a flatter piece. You may have to scoosh them back together a couple of times. Once they are mushed somewhat (I know; such technical terms I’m using today), use the rolling pin to roll them into a flat layer of butter. Take this and place it flat in the freezer while the dough rises.
  5. Now go ahead and make your filling and streusel. For the filling, simply combine the sugar and cinnamon. Voila; filling.
  6. For the streusel, combine all the dry ingredients. Use a pastry cutter to cut the butter into the flour.sugar mixture. When it has large clumps, put down the pastry cutter and get your clean hands in there. It’s the best way to make a streusel. Just rub your fingers together in the mix, picking up, rubbing, rinse, repeat, until you have a nice crumbly streusel with some large pieces and some small. Set it in the fridge for now.
  7. When the dough is ready, lightly flour a large board or clean counter. Punch down the risen dough. Dump it out onto the floured board and knead it a handful of times, just to smooth it out. Roll the dough out into a 18 by 12 rectangle (this does NOT have to be exact.). Get the butter out of the freezer and peel off one sheet of the waxed paper. Place it butter side down onto the dough. Peel off the other sheet. Now fold the dough into thirds, as if you were folding a letter to fit into an envelope.
  8. Let the dough rest for five minutes. Now, reroll it (it’s going to be harder to roll now. You just added frozen butter into it, lowering the dough temp considerably) into an 18 by 12 rectangle again. Fold it into thirds one more time. Let it rest five minutes. Now roll it into a 26 by 12 rectangle.
  9. Brush the melted butter evenly over the dough. Sprinkle the sugar/cinnamon mix evenly over the top of the butter.
  10. Going from one of the long sides, slowly and carefully roll the dough into a log. Try to keep it as tight as possible so that you don’t end up with cinnamon rolls with big gaping holes through them.
  11. Cut the ragged end of of each end of the roll.
  12. Use a sharp knife ( or thread, which is how I do it) to cut the remainder of the log  into 19 pieces. I know; strange amount, but that’s how it ended up πŸ˜›
  13. Butter a 13×9 inch pan and a 9 inch round cake pan. Place 12 of the rolls, about an inch apart in rows of three, in the 13×9 inch pan. Place the other 7 around the edges of the cake pan, not touching. Sprinkle evenly with the streusel, patting it down gently to help it adhere. Places the pans in a warm place (not the oven this time) to rise. Let rise until they are roughly double in size, about 45 minutes to an hour.
  14. Meanwhile, preheat the oven to 350 degrees.
  15. When the rolls have risen. Place them on a middle rack in the 350 degree oven. Bake until they are puffy and golden brown and the streusel is also browned, about 25 to 35 minutes. Remove form the oven and let cool in the pans, set on a rack.
  16. When they are totally cool, make your glaze. Simply whisk together all the glaze ingredients until creamy. Drizzle over the tops of the cooled rolls.

Streusel Topped Cinnamon Rolls With A Creamy Vanilla Drizzle.jpg 1

Copyright Notice: From Cupcakes To Caviar images and original content are copyright protected. Please do not publish these materials anywhere without prior permission.


Cheesecake Carrot Cake Muffins With Streusel Topping

Cheesecake Carrot Cake Muffins With Streusel Topping

Cheesecake Carrot Cake Muffins With Streusel Topping


I hate carrots. No; really. I do. Fine, I just kind of hate carrots. I totally can’t stand raw carrots. As for cooked and savory, I only like baby carrots cooked with a ton of salt and butter. Rather like a crunchy orange salt and butter delivery system, one might say. I DO however, love carrot cake. Go figure. I also dislike zucchini but love zucchini bread. I would wager the obvious reason is that the veggies add moistness but don’t leave behind a lot of their icky poo flavors. Yes, I’m 51 and just said “icky poo”. Just shush. If you’ve been reading my blog for a while, you already know not to expect normality in any way, shape or form.

Long story short, I wanted carrot cake. But I’m too lazy to make carrot cake. So, when I realized I had a bag of the funky orange sticks taking up room in my veggie drawer and no intentions of actually using them for the cake I had envisioned, I had to improvise. When I noticed that I hadn’t done a muffin recipe in a while, that made up my mind. Carrot Cake muffins it was! And what, I hear you saying, is the best part of carrot cake? Certainly not the carrots! πŸ˜› It’s the cream cheese frosting. So i used what few working brain cells I have left and I came up with these. Carrot cake muffins stuffed with a creamy cheesecake filling and then for total overkill, just because I could, I topped them with some streusel I had in the freezer. Because the world would be a happier place if everyone had streusel all the time AND no freezer is complete if it doesn’t have a bag of streusel in it just waiting for times like this.

These turned out darn tasty. I know…wonderfully descriptive today, aren’t I? But really; they are. The muffins have just enough batter to hold together the carrots, raisins, pineapple and nuts. Then there is a creamy center, reminiscent of a good cheesecake. All of that is topped with a crunchy streusel. What more does on need in life? Fine, you can get a cup of coffee or tea to go with them. But seriously… that’s it. Your breakfast or mid afternoon snack will be complete with just those two things.

You know the drill…. πŸ˜€

Don’t let the long ingredient list throw you. This is pretty quick.

Cheesecake Carrot Cake Muffins With Streusel Topping

  • Streusel-
  • 1/2 cup sugar
  • 5 tablespoons flour
  • 1 1/2 teaspoons cinnamon
  • 1/4 cup unsalted butter, cold
  • 1/4 cup finely chopped toasted walnuts (optional; sometimes I use nuts in my streusels, sometimes not)
  • Cheesecake filling-
  • 6 ounces cream cheese, room temp
  • 1 egg yolk
  • 1/2 teaspoon vanilla extract
  • 1/2 teaspoon cinnamon
  • 1/4 cup sugar
  • Muffin-
  • 1 1/3 cups flour
  • 2 teaspoons cinnamon
  • 1/2 teaspoon nutmeg
  • 1/4 teaspoon ground cloves
  • 1/2 teaspoon salt
  • 1 teaspoon baking powder
  • 1/2 teaspoon baking soda
  • 1 cup finely chopped toasted walnuts (easily toasted by placing in a layer in a baking dish and toasting at 350 for about ten minutes; just until lightly browned)
  • 2 eggs
  • 2/3 cup honey
  • 1/3 cup neutral oil, like vegetable
  • 2 teaspoons vanilla extract
  • 2 cups grated carrots (It will take about 4 large carrots)
  • 1 8 ounce can pineapple tidbits in juice, well drained (Use the lid to press down on the pineapple to get excess juice out so you don’t end up with soggy muffins)
  • 1/2 cup raisins
  1. Preheat the oven to 375 degrees. Lightly grease or line with liners 12 muffin cups. You will have a bit of batter left, so use it for one jumbo muffin or another couple of regular sized ones.
  2. Make your filling and streusel and set both aside- for the filling, beat together all the ingredients in a small bowl until creamy. Simple as that.
  3. For the streusel, in a small bowl, whisk to combine the flour, sugar and cinnamon. Use a pastry blender to cut in the butter until you have chunks ranging from pea size up to nickel sized.
  4. For the batter, in a large bowl, combine all the wet ingredients- the eggs, honey, oil, vanilla, carrots, pineapple and raisins. Stir well.
  5. In another bowl, whisk to combine all the dry ingredients- the flour, spices, baking powder and baking soda and salt.
  6. Dump the dry ingredients into the bowl of wet one and stir JUST until combined. Don’t over stir. You’ll end up with tough, tunnely (yes, tunnely is now a word) muffins if you do.
  7. Fill each muffin cup with just enough batter to cover the bottom. Then top that with about a tablespoon of the cheesecake filling. Then, cover the filling with a healthy dollop of the muffin batter. You want to end up with filled, but not overflowing muffin cups.
  8. Sprinkle streusel over the tops of each muffin, gently pressing down to get it to adhere better.
  9. Bake at 375 until the muffins are golden brown and a wooden pick inserted through the side comes out clean (it’s fine if there is some cheesecake filling on the pick, just no loose muffin batter itself), about 20 to 24 minutes.
  10. Let cool in the pan for a minute or two, then gently pull them out (I use a spoon) and set them on a rack to finish cooling.

Cheesecake Carrot Cake Muffins With Streusel Topping 2

Copyright Notice: From Cupcakes To Caviar images and original content are copyright protected. Please do not publish these materials anywhere without prior permission.

Easy Pumpkin Cranberry Bread (Recipe Redo)

Easy Pumpkin Cranberry Bread

Easy Pumpkin Cranberry Bread


Both times I posted this, I debated for weeks, WEEKS I say, as to whether it should be called pumpkin cranberry bread or cranberry pumpkin bread. I walked the floors, I lost weight from not being able to eat, I didn’t sleep for days at a time! Why, you ask!? (Pretend you asked) All for YOU! Yes, YOU, dear and faithful reader! All two of you. For this show of love, I believe I should have multiple boxes of Godiva truffles sent to me, along with large cars, house and land deeds and cold, hard cash.

I am redoing this recipe for two reasons- 1) because the original photo I took sucked donkey toes. I mean, we’re talking really really bad. Then, there is 2) which is that as good as the bread was back then, it could still be better. Now however? It’s awesome. It can’t be better. It is pumpkin cranberry (cranberry pumpkin?) nirvana. You eat this and angels weep, but only because they don’t have any. It has the perfect blend of squashy pumpkin flavor and tart sweet cranberry flavor, all mixed up in a perfectly moist bread redolent of warm Autumn spices and a touch of orange for zing.
This is a very easy bread to make. No chopping of this ingredient, dicing of this one. It uses canned pumpkin and canned cranberry sauce. Both of which also add incredible moistness as well as flavor to this.

You know the drill… git to cooking.

Easy Pumpkin Cranberry Bread

  • 3 1/2 cups all-purpose flour
  • 2 teaspoons baking soda
  • 1 teaspoon baking powder
  • 3/4 teaspoon salt
  • 1 tablespoon cinnamon
  • 1/2 teaspoon nutmeg
  • 1/2 teaspoon allspice
  • 1 teaspoon ginger
  • 1/2 teaspoon ground cloves
  • 1 2/3 cup sugar
  • 1 teaspoon vanilla extract
  • 1 tablespoon fresh orange zest
  • 3 tablespoons fresh orange juice
  • 1 (16 ounce) can whole berry cranberry sauce (use a good quality brand; I have found over the years that the cheap store brand ones use more sugar then fruit and it shows in the taste. I prefer Ocean Spray )
  • 1 (16 ounce) can pumpkin (not pumpkin pie filling; just pureed pumpkin)
  • 2/3 cup vegetable oil
  • 1 egg yolk
  1. Preheat oven to 350 degrees. Butter or use cooking spray on one 8 inch and one 9 inch loaf pan. You can use both 9 inch pans if that is all you have, but you will have much flatter loaves and you’ll need to adjust your cooking time. Over the years, I have found this to be the best combination.
  2. In a large bowl, combine the flour, baking powder, baking soda, salt and spices. Whisk well. Set aside for now.
  3. In another bowl, combine the vanilla extract, orange zest and juice, cranberry sauce, pumpkin puree, oil and egg yolk. Mix well until it is relative smooth. You’ll have lumps from the cranberries of course.
  4. Dump the wet ingredients into the dry ones all at once. Use a wooden spoon or rubber spatula to combine them together JUST until mixed. You don’t want a bunch of flour of the bottom of the bowl, but don’t over mix it. That causes tough bread.
  5. Divide between the two prepared pans. Smooth the tops and bake at 350 until a wooden skewer inserted in the middle comes out with just a few moist crumbs, no loose batter, about 45 to 60 minutes. The 8 inch pan will probably finish before the 9 inch.
  6. Let cool in the pan on a rack for ten minutes, then carefully invert it into your protected hand and then re-invert it onto the rack. Let cool for about an hour before attempting to cut.

Copyright Notice: From Cupcakes To Caviar images and original content are copyright protected. Please do not publish these materials anywhere without prior permission.

Easy Pumpkin Cranberry Bread

Easy Pumpkin Cranberry Bread


Cinnamon Spice Apple Coffee Cake

Cinnamon Spice Apple Coffee Cake

Cinnamon Spice Apple Coffee Cake


Growing up in Chicago, places like apple orchards weren’t exactly on the list of weekend getaways. When my dad lived in one of those old hotels in Hyde Park, this one called The Saranac, he used to take me to The Museum Of Science And Industry or maybe The Field Museum when I visited him. On rare occasions during the Summer, we might head out to the Indiana State Dunes and spend the day getting sunburned…I mean, playing in the lake. Nahhh, I mean getting sunburned. Nobody worried about sunscreen back then. By all rights, none of us who grew up in the 60’s and 70’s should have any skin left. I remember a sunburn I got when I was 17 that left me the color of a Coke can and blistered. My dad wanted me to go to the ER, but I refused.

But I digress. Imagine that. Me. Going off on tangents.  As I was saying, there were no orchards in the middle of Chicago. Since living in KY (half my life now, actually), and raising my kids here, it has never failed to make me a bit jealous when my kids would go on field trips to apple orchards or “pick your own pumpkin” spots. It was always just so…. southern to me. In a wonderful way, mind you. So when the idea to go to an orchard with the boys popped into my head, I ran with it. The one we went to is so cool. The apples were fairly well picked over this late in September, but we still got some. But there was also a huge play area that Joshie and Jordan loved, a cafe that we hope to eat at next time and tons of homey apple and “countryish” products at a store there. I hate that it took me until I was this ancient to discover orchards!

So what did I make with what apples we got? Not a darn thing. We didn’t get enough to spare for anything but out of hand eating. It was just coincidental that I had made this cake Saturday.

This is one awesome coffee cake, if I do say so myself *preens a little* It’s a tamer version of a crumb coffee cake. I stuffed this with apples, cranberries and cinnamon chips, as well as a crumbly mixture on top and in the middle. This is ultra moist due to the apples with a lovely flavor due to, well, all the varied ingredients. This is such a perfect Autumn cake. Typical of many coffee cakes, this is even better in the days following baking it, as opposed to fresh from the oven. The flavors need time to meld and then it is spectacular. The recipe was very loosely based off of one I got from a yahoo groups newsletter over a decade ago. Anyone else remember those groups fondly!?

This is a tiny bit more involved than “throw and dump”, but nothing you can’t handle. Trust me.

You know the drill….

Cinnamon Spice Apple Coffee Cake

  • Filling/Topping-
  • 1 1/4 cups brown sugar
  • 1/2 cup lightly toasted, finely chopped pecans or walnuts.
  • 1/3 cup flour
  • 1/3 cup unsalted butter, melted
  • 1 tablespoon cinnamon
  • Cake-
  • 1/2 cup unsalted butter, room temp
  • 1 cup sugar
  • 2 eggs, room temp
  • 1 tablespoon vanilla extract
  • 2 2/3 cups flour
  • 1 1/2 teaspoons baking powder
  • 1/2 teaspoon baking soda
  • 1/2 teaspoon salt
  • 1 1/2 teaspoons cinnamon
  • 1/2 teaspoons ground cloves
  • 1/2 teaspoon ground nutmeg
  • 1 teaspoon ground ginger
  • 3/4 cup buttermilk
  • 1/4 cup of either fresh apple cider or (preferably, if you have it) boiled cider**
  • 2 1/4 cups of peeled and chopped apples (about 4 small apples)
  • 2/3 cup dried cranberries, soaked for 20 minutes in 3 tablespoons hot water, then drained
  • 1 bag Hershey’s Cinnamon Chips (you COULD make this optional, because I know these can be hard to find, but please try to find them!)
  1. Preheat your oven to 350 degrees and grease and flour a tube pan. Alternately, spray it with a flour/oil baking spray such as Bakers Joys Or Wiltons (which is my favorite) Set aside
  2. Make your filling- In a small bowl, combine the brown sugar, flour, cinnamon and nuts. Add in the melted butter and mix until it is thoroughly moistened and crumbly. Set aside.
  3. For the cake, in a large bowl, combine the butter and the sugar. beat on low speed with a hand mixer until light and creamy, about 2 minutes. Scrape the bowl down and add the eggs and vanilla extract. Beat until well combined.
  4. In a small bowl, whisk to combine the flour, baking powder, baking soda, salt and spices.
  5. Combine the buttermilk and apple cider/boiled cider in a measuring cup.
  6. Alternately add the flour mixture and the buttermilk mixture to the bowl with the butter, starting and ending with the flour (1/3 of the flour, 1/2 of the buttermilk, 1/3 of the flour,  remaining buttermilk, remaining flour), beating on low speed JUST until combined after each addition.
  7. Gently fold in the apples, cranberries and cinnamon chips.
  8. Spoon half the batter into the prepared tube pan. Evenly top with half the crumb mixture, then the other half of the cake batter. Then top with the last half of the crumb mixture. Gently pat it down to help it adhere to the top.
  9. Bake at 350 for 60 to 70 minutes or until golden brown and a wooden skewer inserted in the center comes out with just a few moist crumbs on it, no loose liquidy batter. Let it cool in on a rack in the pan for about ten minutes, then carefully run a butter knife along the sides of the pan and around the center hole. Do this a couple of times just to make sure it’s completely loosened.
  10. Carefully (use pot holders and/or a towel. This is till gonna be hot) invert the pan over your (protected) hand (works even better if you can use two hands and someone else does the inverting and shaking. Don’t ask me how I know this. Ahem.) and carefully shake the cake out. Invert it immediately back onto the rack to finish cooling.
  11. Let cool until completely cool before slicing, about two hours. Like I said above, this is even better the next day.

Copyright Notice: From Cupcakes To Caviar images and original content are copyright protected. Please do not publish these materials anywhere without prior permission.

**If you want to make your own quickie version of boiled cider (boiled cider has a much more intense apple flavor than regular cider, so is worth the trouble.), take 1 cup of fresh cider and pour it into a small pot. Bring to a boil over medium heat, then reduce the heat a bit and continue boiling until the cider has reduced down to about 1/4 cup. Let it cool before using.

Cinnamon Spice Apple Coffee Cake

Cinnamon Spice Apple Coffee Cake