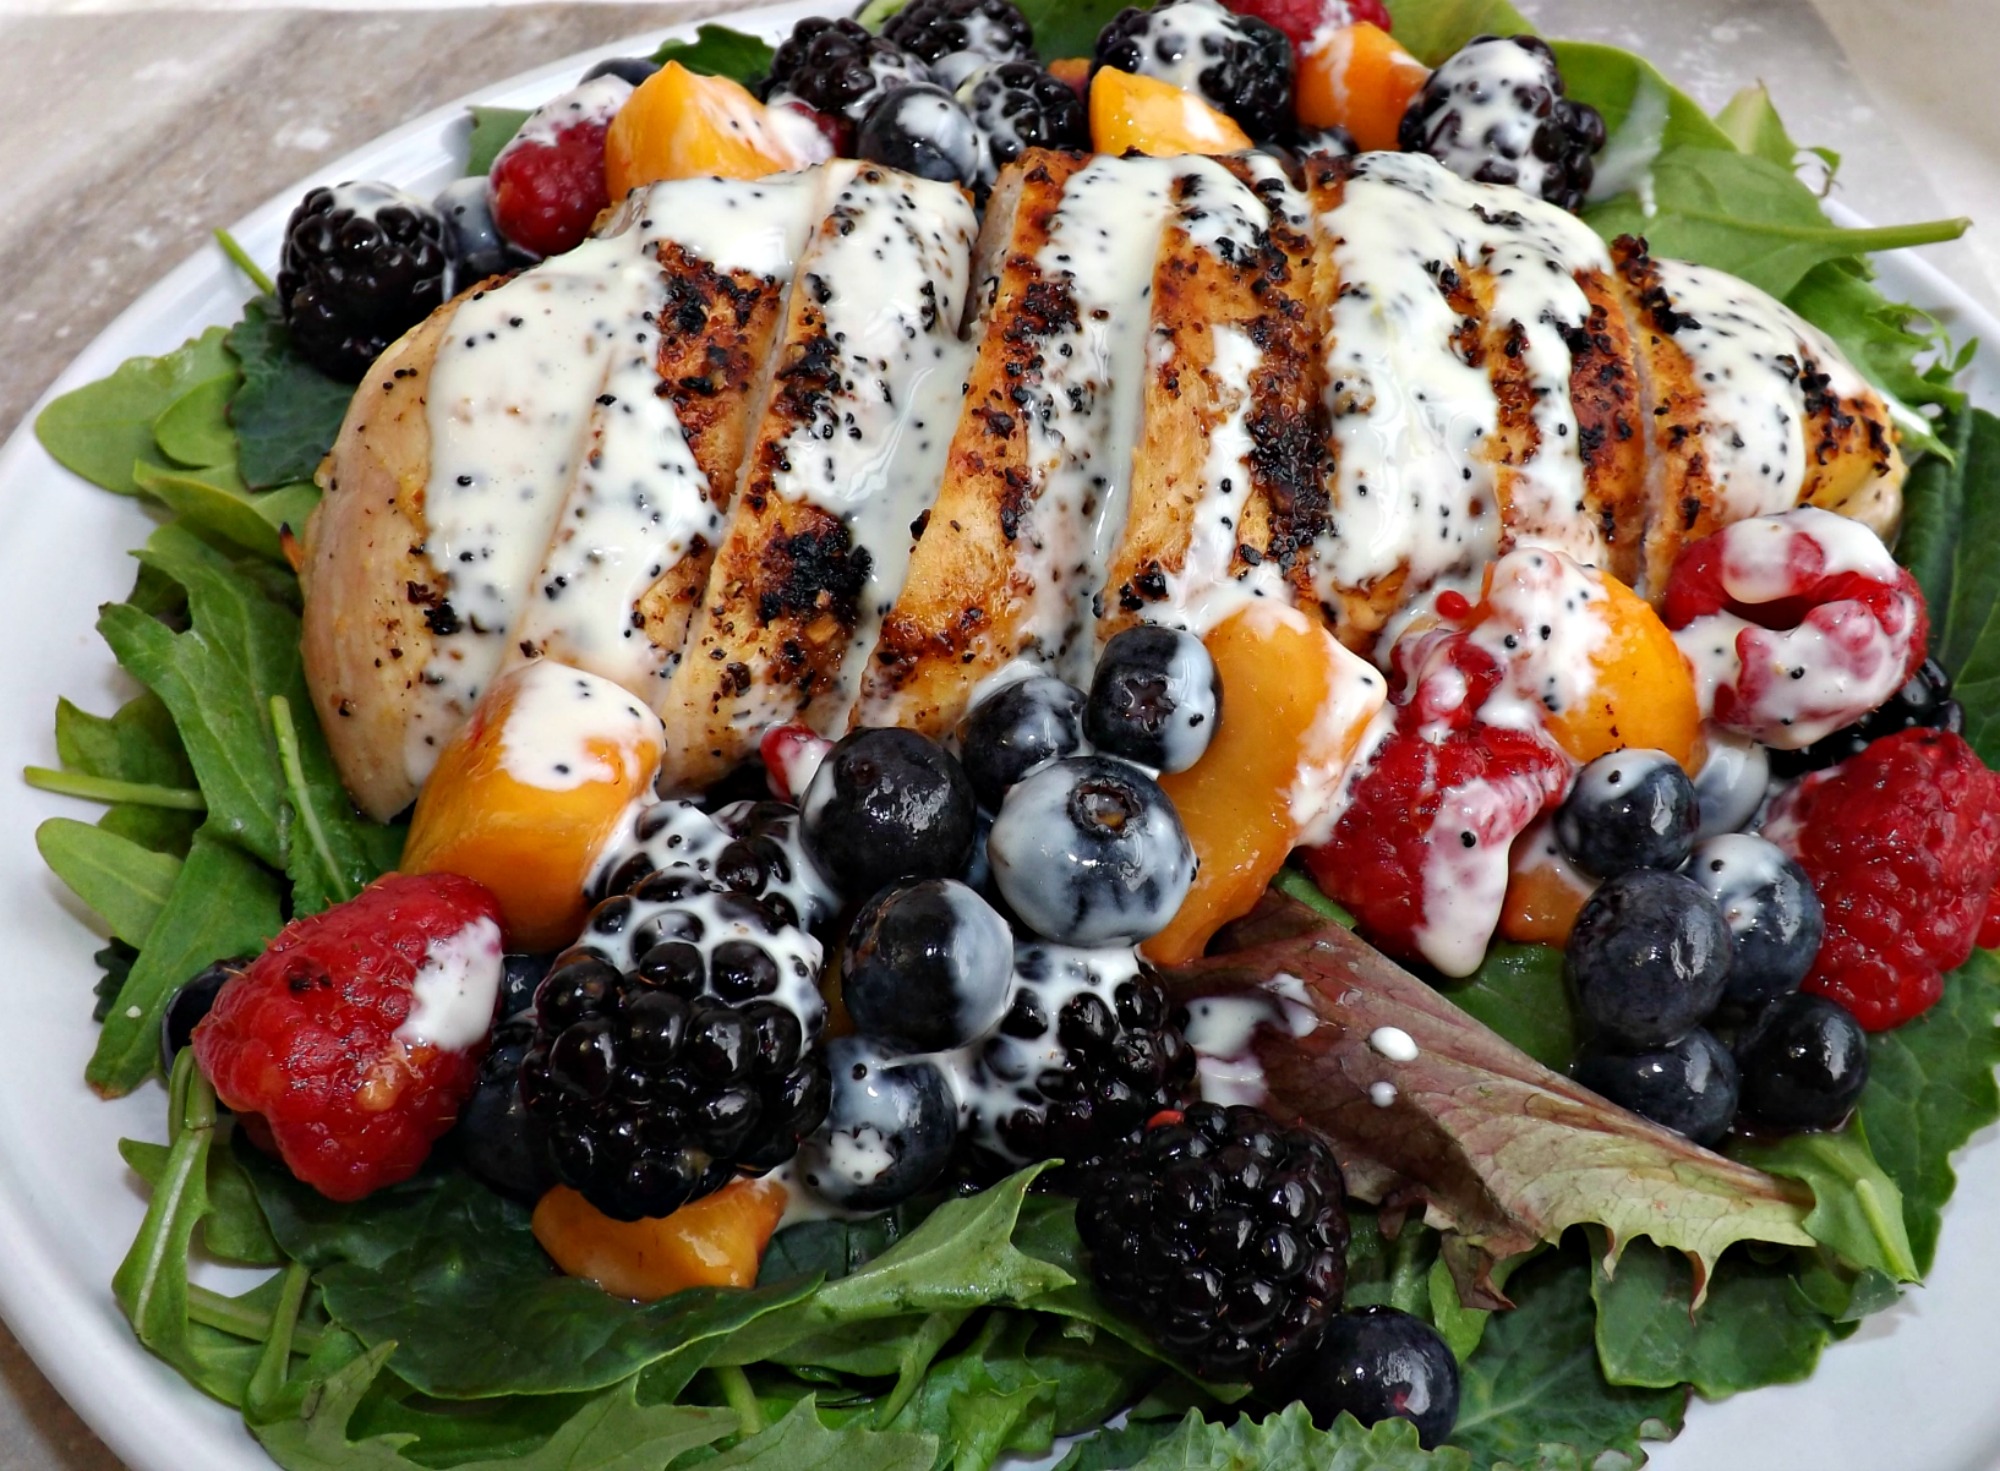
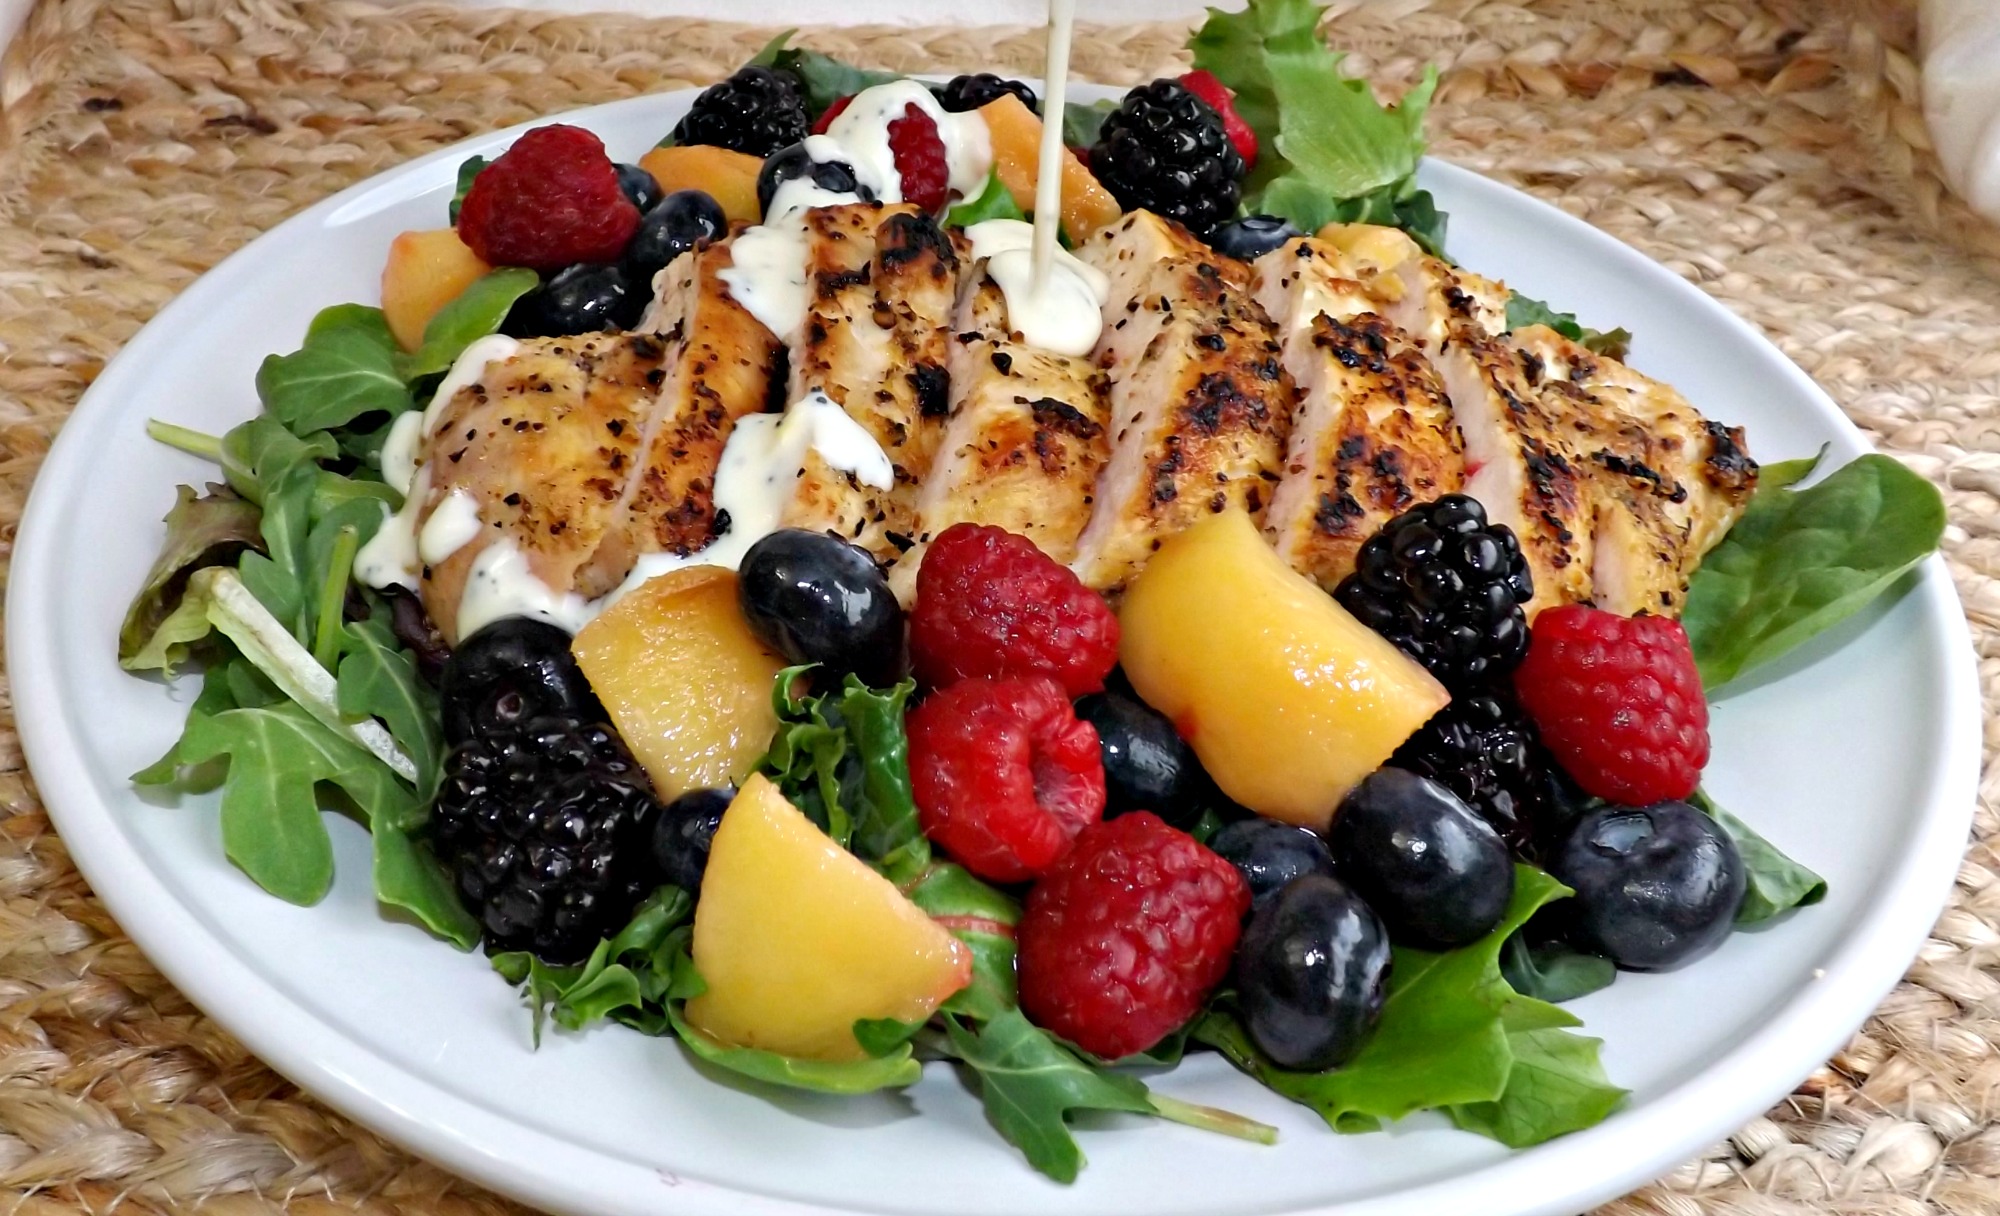
Red, White & Blue Grilled Chicken Salad With Lemon Poppyseed Dressing
For many years now (we won’t discuss how many, thank you very much), I have loved watching the Summer Games when they air every 4 years. When I was young, I would sit and watch the swimmers and the gymnasts with my mom, telling her that someday I totally WOULD be doing that. While it made for great family time with my mom (something I have continued with my kids), it didn’t quite turn out how I had hoped. When it came to being a gymnast, I was too tall by the time I was ten. There are no 5’8†gymnasts. As for swimming, I can honestly say that if they ever create a category called “Floating In The Pool While Dozing And Getting Sunburnedâ€, I’m the gal who will win the gold. Until then, not so much.
The athletes at both the Summer and Winter Games amaze me. The total dedication to their sport, the passion to succeed. I can be that passionate over a pint of ice cream, but to work as hard as they do to be the best? Again; they amaze me and have my undying admiration, especially these tiny little girl gymnasts who are so strong, so creative and so wonderful at what they do. I could never be one of the judges. I’d want to give everyone gold, then feed them all cookies and milk and tuck them in for a good nights sleep.
The thing is, we all live our lives the best we can, and while this may not be as exciting as competing in the games in Rio this year, it can be so medal worthy regardless. Admittedly, some days, you’re lucky to get a bronze, but life is about so much more than the gold, don’t you agree? For me, it’s finding my favorite flavor of ice cream on sale, it’s getting to the satisfying ending of a book I’ve loved and knowing that everyone lived more or less happily ever after, it’s time spent with family, enjoying the Summer games together and listening to my youngest son tell me that someday he will be a gymnast (he is already too tall. I’ll let him figure it out for himself) or a swimmer (we just got him out of the safety vest. Let’s NOT scare the momma), it’s listening to the wind rustle through the trees as I lie in the pool dozing, it’s creating a recipe that I know my family loves. Those are MY moments of gold and I’m honored to have been able to share them with you. What are yours?
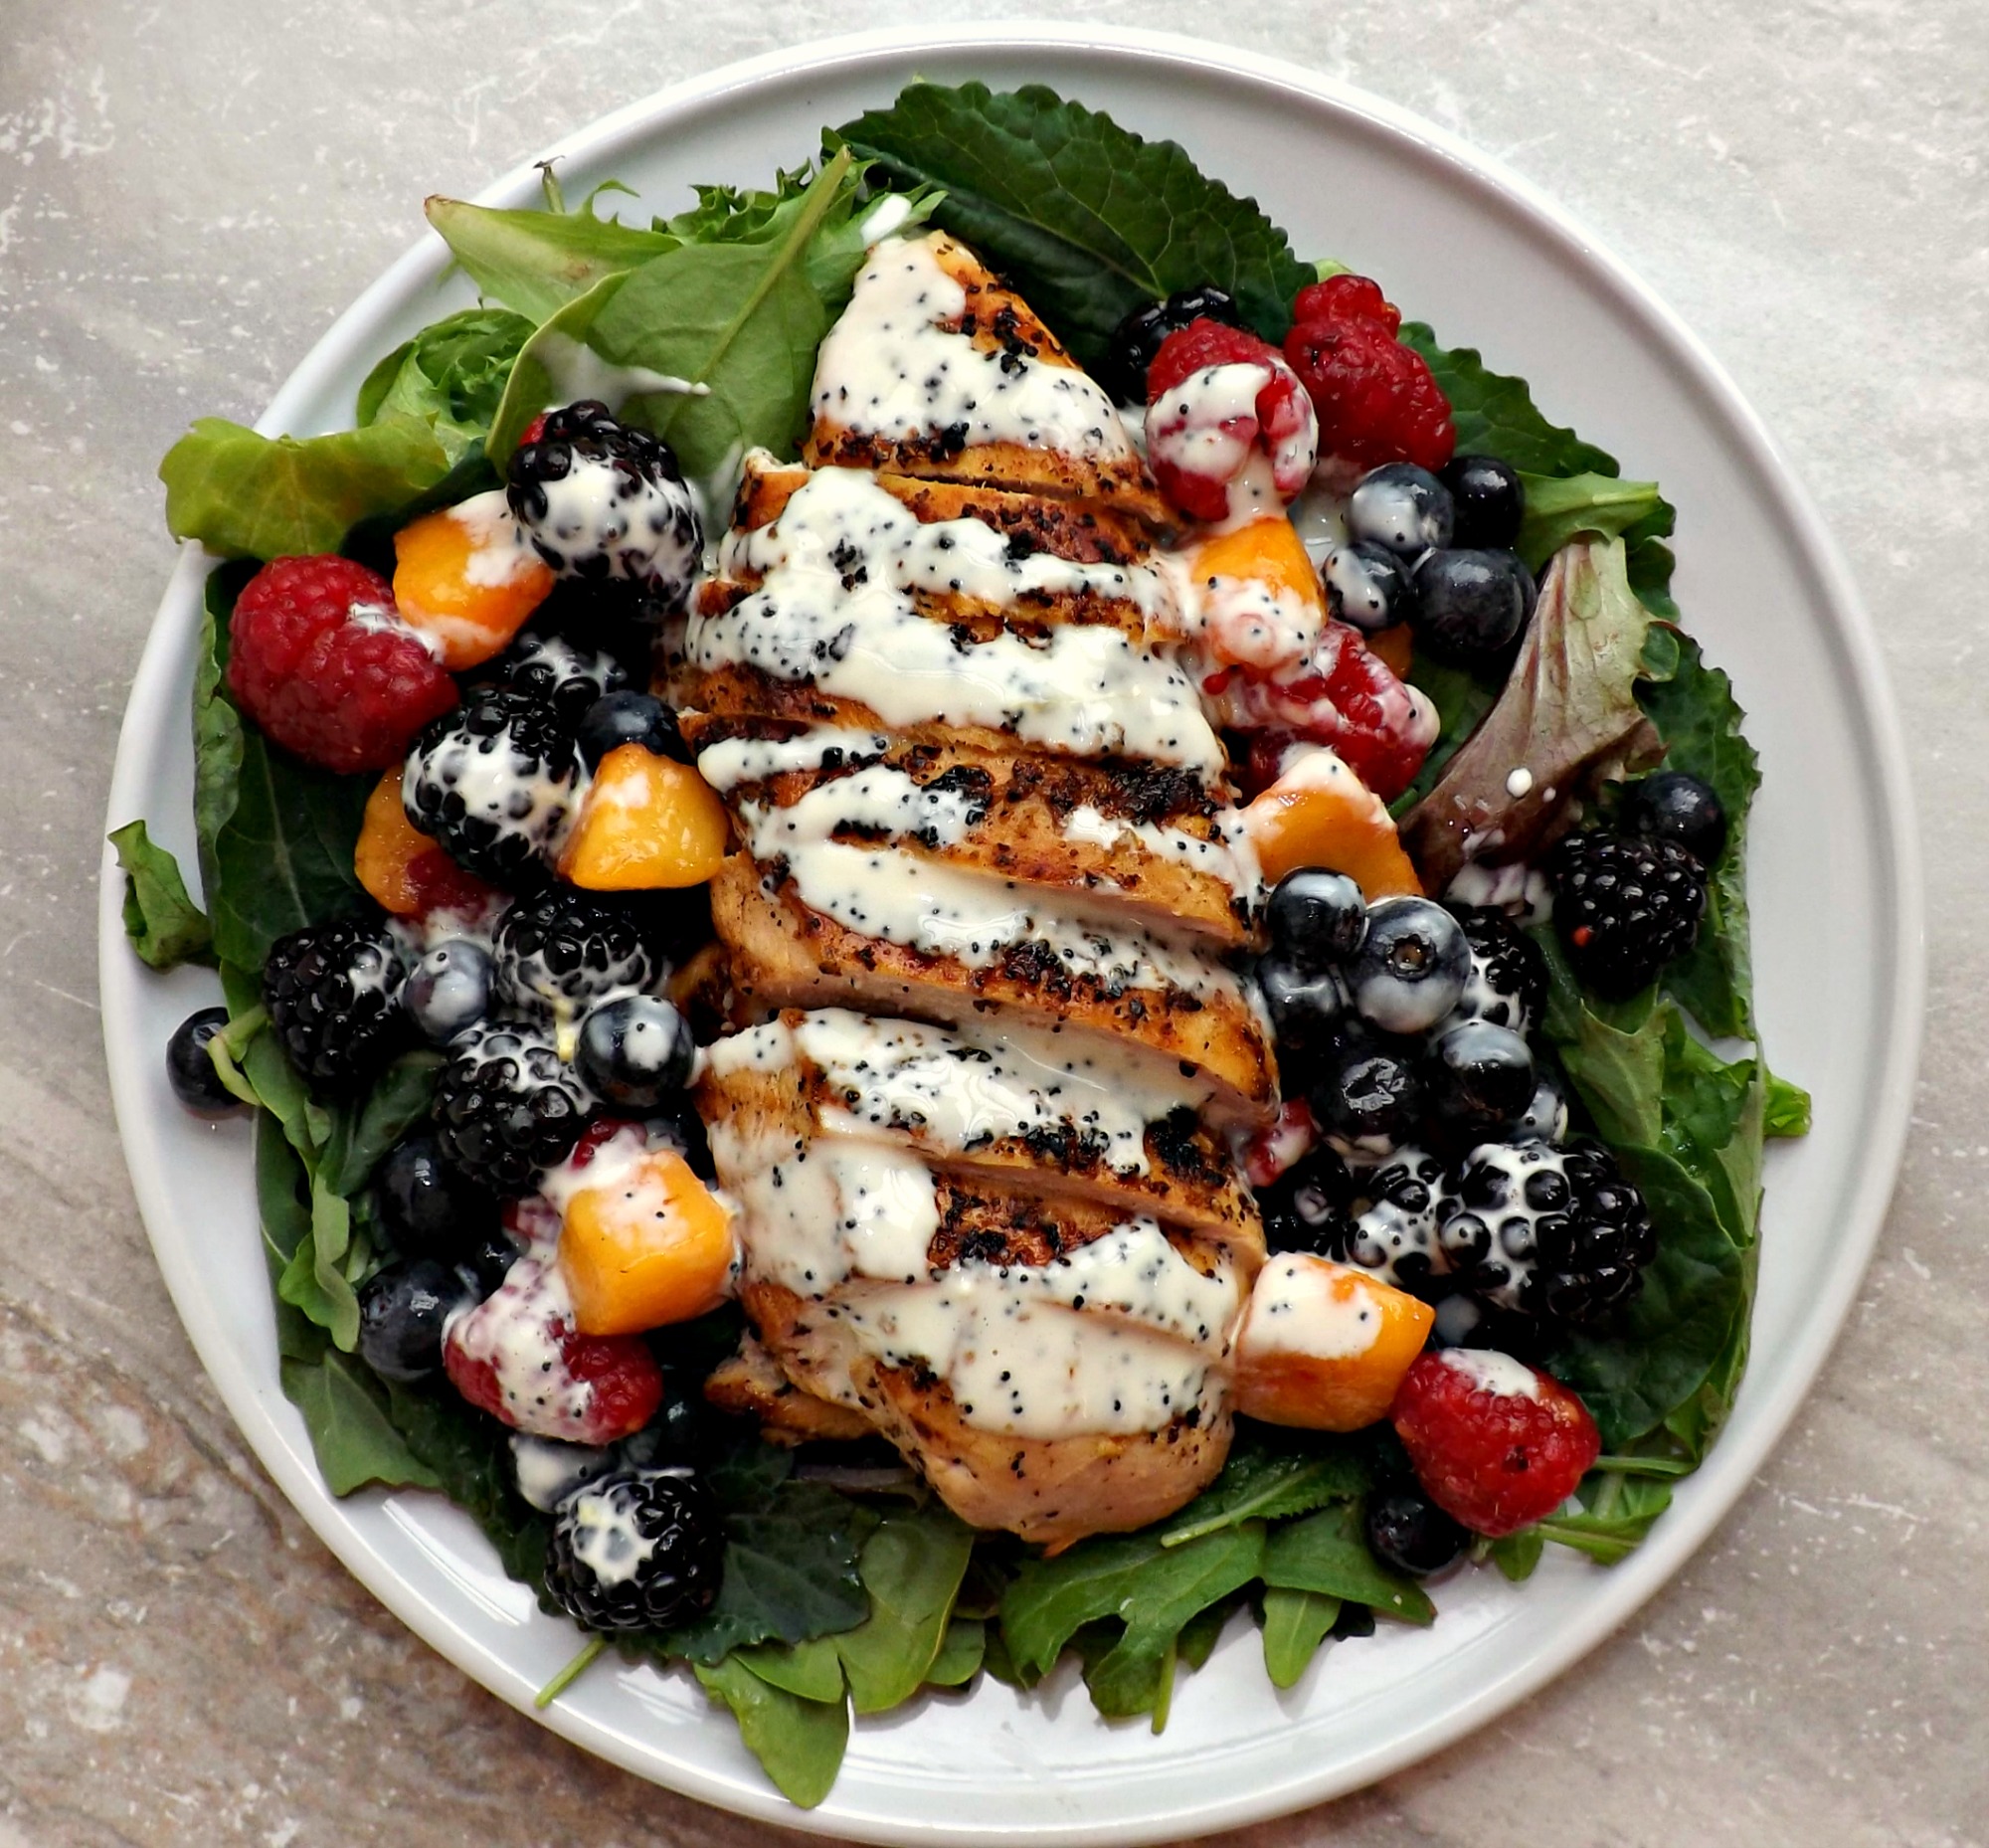
Meijer asked me to create a recipe for their More Than A Medal campaign. I knew IÂ wanted to create a recipe that I thought any athlete of the games in Rio or aspiring athlete would love and also could eat with no guilt. I have to admit, this salad fits both criteria. It’s completely delicious. The chicken is moist and tender with a crispy outside and a tiny bite from the pepper. Mix that with the juicy berries and peaches, the crunchy greens and the creamy lemon poppyseed dressing and you have a definite gold medal winner here. All with no guilt. This is a perfect Summer entree for two that is easily doubled or more to feed extra hungry mouths. I hope you all love it as much as we did!!
Red, White & Blue Grilled Chicken Salad With Lemon Poppyseed Dressing
- Lemon poppyseed dressing-
- 1 6 ounce container Chobani non fat plain yogurt
- 1/2 mayonnaise
- 1/4 cup good quality honey
- 2 tablespoons Minute Maid lemon juice
- 1 tablespoon lemon zest (optional, but recommended)
- 1/2 tablespoon white balsamic vinegar
- 1 tablespoon poppy seeds
- 1/4 teaspoon salt
- Chicken-
- 1 large Meijer True Goodness Boneless, Skinless chicken breast (about 8 to 10 ounces)
- 1 tablespoon vegetable oil
- 1/2 tablespoon salt free onion/herb seasoning blend
- 1/2 tablespoon lemon pepper
- 1/2 tablespoon freshly ground black pepper
- salt to taste (be careful with this if your lemon pepper is salted)
- 1/2 to one full bag salad greens of choice
- Fruit Mixture-
- 1/2 cup fresh blueberries
- 1/2 cup fresh blackberries
- 1/2 cup fresh raspberries
- 1 small ripe white peach, peeled and cut into bite sized pieces
- 3 tablespoons white balsamic vinegar
- 1 tablespoon sugar or 1 1/2 tablespoons honey
- Â Make your dressing- In a small bowl, combine all the dressing ingredients. Whisk well to combine. Taste for seasoning. When ready, pour into a covered container (a mason jar works wonderfully) and store in the refrigerator for at least an hour to combine the flavors.
- About half an hour before you start the chicken, you need to get the berries ready. These couldn’t be easier. In a small bowl, combine the white balsamic vinegar and the sugar and honey and give it a quick whisk. Spoon the berries and peach chunks in with the vinegar mixture and toss gently to coat the fruit. Set it in the fridge until you make the salad, making sure to give it a good stir just before you add it to the salad.
- When ready to grill, preheat your grill to medium high if using an electric or propane grill. This can also be done easily inside using a grill pan. Pat the chicken breast dry. Coat with the vegetable oil on both sides. Sprinkle half the seasonings on one side of the breast and press it gently into the surface of the meat. Repeat on the other side.
- When the grill and the chicken are ready, place the chicken in the pan (or on the grill) and cook on one side until golden brown. Flip carefully to the other side using tongs and continue to cook, turning as needed, until the internal temp of the chicken breast is 165°f. Remove the chicken to a plate and let rest for about 5 minutes.
- While it rests, divide your salad greens between two plates. Slice your chicken breast on the bias and place half on each plate. Give your fruit a stir and divide it between the two plates. Whisk the lemon poppyseed dressing one last time and drizzle it over the greens, chicken and fruit. Serve.
Disclosure- I was compensated by Meijer for this post. All contents within are original and developed by myself.
%20Cajun%20Chicken)