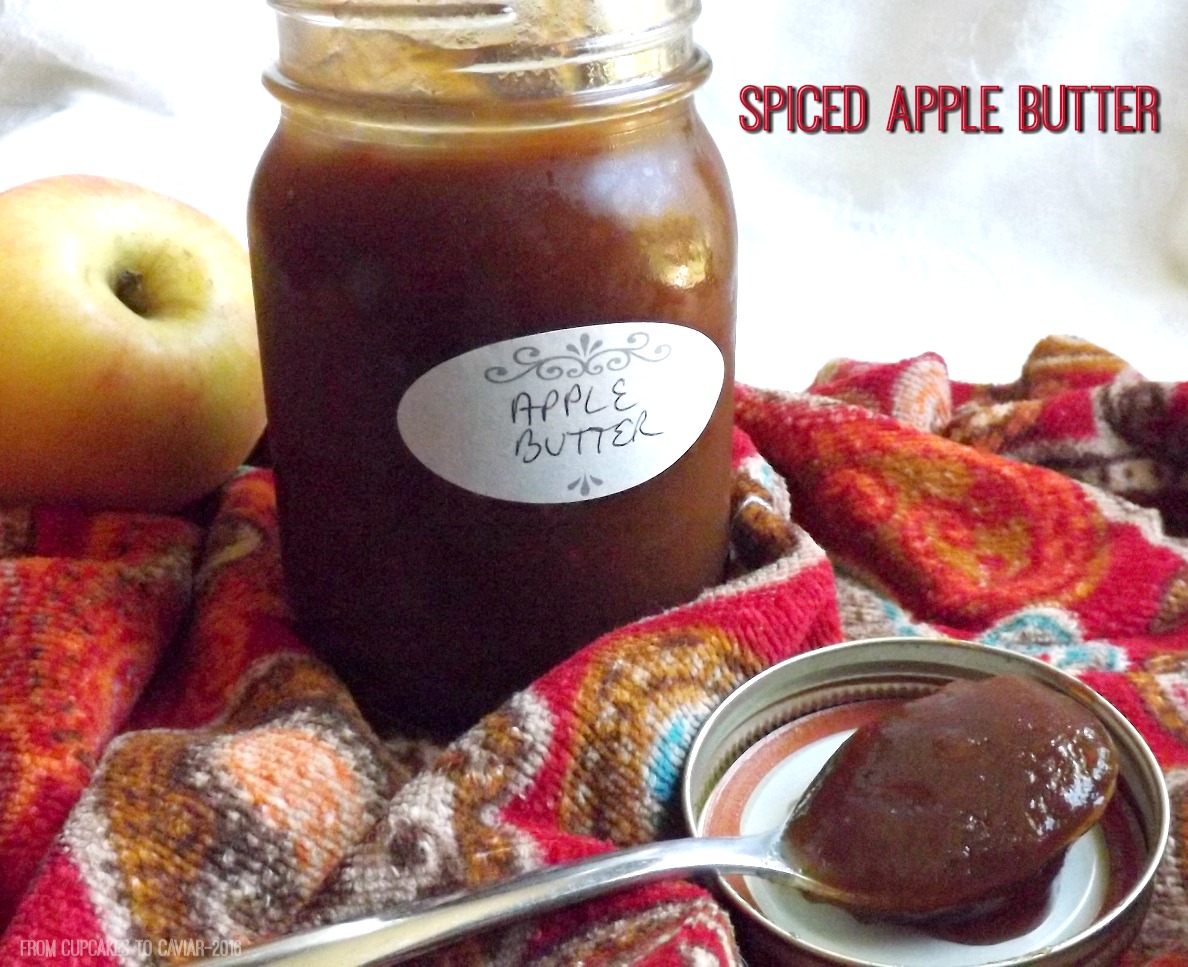
Spiced Apple Butter

Spiced Apple Butter

Spiced Apple Butter

I remember when I was a kid (back when dinosaurs roamed the earth and all children wrote on rock tablets and walked five miles to school, uphill both ways), sometimes for a few days during the Summer, we would go visit my mothers family in Alabama. I loved going to see mommer and popper. It was a totally different world in Alabama than it was on the south side of Chicago. I had cousins to play with, aunts who seemed so much more lighthearted than my mother, though I know now that that was just the viewpoint of a child, and a grandfather who seemed to adore me (that was Popper).

Back then, once breakfast was over, the leftover food was simply covered with a tablecloth to await the next meal. Two of the things that were always on that table were what they called hoecakes (simply a large skillet made biscuit that everyone tore pieces off of) and apple butter. It was just store bought apple butter, but it was something Popper loved, so it was always there. It wasn’t something our mom bought often, and I loved it myself, so I would pig out on it. I recall one time finishing off the last of the hoecake and apple butter and popper laughing his butt off about it, though the aunts were horrified because you just didn’t eat up all of Poppers hoecakes and apple butter.

When I grew up and started canning, one of the first things I made was homemade apple butter. That was one of my first experiences with how much better home canned goods are than then their store bought counterparts. Over the years, I have tweaked the recipe I originally found into the one I use today. It is sweet but not cloying like some I’ve had and has a nice kick of spice to it, but not enough to overwhelm the fresh apple flavor. I have been known to stand in front of the jar in the fridge with a spoon. What? Don’t judge.

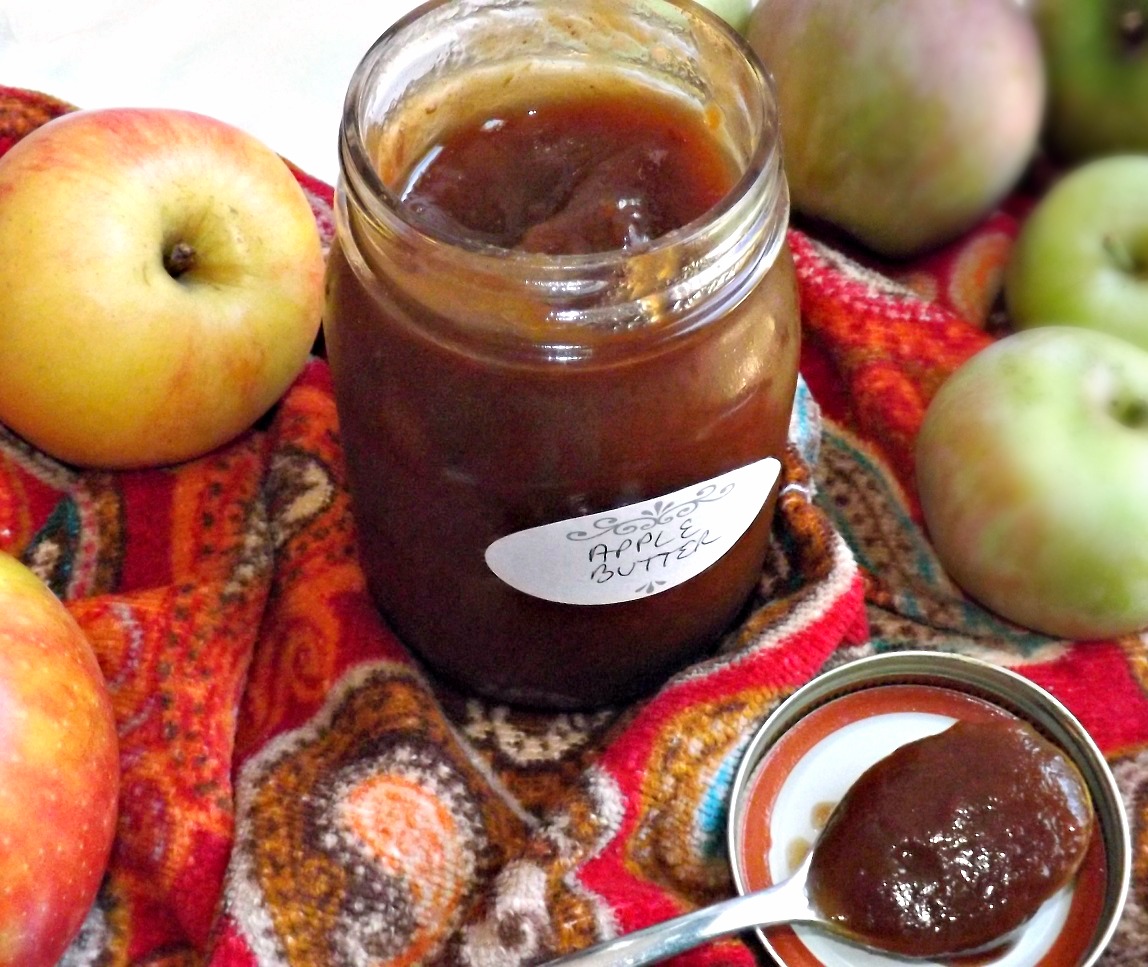
If you’re new to canning, don’t stress it. If you can boil water and put a lid on a jar and just be smart and clean, you’ll have no problem. The hardest part of this apple butter is cutting the apples and if you use an apple corer/slicer, it goes quickly This apple butter is totally worth it. Sweet, thick, spicy, it’s delicious spread on a warm biscuit, in a PB&J sandwich, used in baking, or just from a spoon as you stand in front of the fridge πŸ˜€ This is a wonderful way to use some of Autumns best apples.

You know the drill… πŸ™‚

Spiced Apple Butter

  • 8 lbs fresh apples, sliced and cored (no need to peel)
  • 3 cups apple cider
  • 1 cup apple cider vinegar
  • 2 1/2 cups sugar
  • 2 cups firmly packed brown sugar (use light or dark; you choice. I prefer dark)
  • 1 rounded tablespoon ground cinnamon
  • 2 teaspoons ground cloves
  • 1 1/2 teaspoons ground ginger
  • 2 teaspoons ground nutmeg
  1. Pour the cider and cider vinegar into a large pot. Over the years, I’ve found that a tall, narrow pot works better than a short wide one. You get less splatter on the stove and as apple butter thickens, it DOES splatter.
  2. Dump your apple slices into the cider/vinegar mix. Cover and cook over low heat for about 20 to 30 minutes, until completely soft and limp. Give it a stir a couple of times to make sure the apples on top get down in there. A little while in, the apples will start releasing a lot of juice and all of the slices will soften up.
  3. At this point, I let them sit for about an hour to cool down. You can do this, or if you’re brave (translate; foolhardy πŸ˜› ), you don’t need to. Either way, next step is just pureeing the apples. I scoop them up in my 4 cup measuring cup, blend them on puree in my blender, transfer each batch to a large bowl until I get them all done, then just transfer them back to the pot.
  4. Once back in the pot, add in the two types of sugar and all of the spices. Stir well to break up the brown sugar.
  5. Cook the apple butter on low heat, stirring frequently, until it is thickened. You want to be able to take a spoonful of it, put it on a chilled plate and not have it get surrounded by a puddle of liquid. It’s ok if there is some, but you want thickened butter with just a bit of liquid around it. This is going to take a few hours. You don’t want to raise your heat to try and make it go faster, because once it starts to thicken, it will burn to the bottom of the pot pretty easily. Another way to check doneness is if you spoon up a spoonful and it doesn’t leak off of the spoon, but stay mounded.
  6. When it’s ready to go, ladle it carefully into sterilized (I get 6 to 7 pints) pint jars, to a quarter inch of the top. Clean the rims with a clean, hot damp cloth and place the lids and rims on the jars, finger tight. Don’t tighten the bands or they could cause the jars to break when boiling.
  7. Boil in a boiling water canning bath for 10 minutes. Carefully take out of the pot and set on a clean towel to cool. You’ll hear the pop of the lids as each one vacuum seals. When completely cool (always give about 24 hours), label the jars and transfer to a cool place for storage.
  8. The following if a canning tutorial if you’re new to canning. I promise; canning is easy. Just stay away from the sites that say it’s ok to just invert your jars once you add the hot contents or any other practices that could cause safety issues. Your health and that of your family isn’t worth the risk. canning tutorial Now go make some biscuits for this!

Copyright Notice: From Cupcakes To Caviar images and original content are copyright protected. Please do not publish these materials anywhere without prior permission.

Spiced Apple Butter

Spiced Apple Butter


Save

Quick & Easy Refrigerator Pickles

Quick & Easy Refrigerator Pickles

Quick & Easy Refrigerator Pickles

Last post I wrote, I mentioned that we had recently gone for a two day visit to my son and daughter in law in Tennessee. Beyond the fact that they made us sleep in the worlds most uncomfortable bed and I think my body was wrecked for life because of it, there was at least the consolation of good food πŸ˜› I did teach the boy to cook, after all. Okay, so I stink at teaching anyone to cook because I hate when anyone hovers. He learned by watching and learning to appreciate food. Yeah, that’s the ticket. πŸ˜€

One of the things he made was some refrigerator pickles. I love to can, but have never made pickles because they seem to be too much trouble, plus I’ve heard horror stories about home canning them. For some odd reason, it never occurred to me to try refrigerator pickles. But, he had made them and I tried them out of politeness. And loved them. Usually, I’m really picky when it comes to pickles; bread and butter ones are about it and then, not very often. After looking at the recipe however, these seemed so easy, so foolproof, that I wanted to give them a try.

While keeping the brine basically the same, I DID change it up enough to make it my own and the great thing about this recipe is that you can do the same. I wanted them to be a touch sweeter, plus I added some sliced onions to the jars to give them a touch more flavor. I threw some hot pepper flakes in one of the jars to give them a kick and I think those are my favorites. Sweet, vinegary, spicy, perfect for just grabbing from the jar for a quick bite. A couple of my cucumbers had gotten mushy, so I only got 3 and a half pints out of this. With the full 2 lbs of cucumbers, plan on a full four pints. These will keep for weeks in the fridge, but I promise, they won’t last that long. These would also make great hostess gifts or if you can find some decent cukes in the Winter, good Christmas gifts.
You know the drill… πŸ™‚

I am posting this how I made them, but feel free to change up the spices, add in some sliced zucchini or whatever veggie you’d like (cauliflower, maybe?), add some hot peppers, more of a favorite spice, some dill… you get the idea. Make these YOUR pickles. Just keep the basic brine the same with respect to vinegar, water and sugar. The brine is simple to make if you need more brine.

Quick & Easy Refrigerator Pickles

  • 2 lbs firm, small cucumbers (I used a 2 lb bag of small “salad cucumbers” from WalMart), thinly sliced (do that how it makes you happy. I did chips, but you could use a mandolin to slice long ways for sandwich slices.)
  • 1 cup thinly sliced onion
  • 1 cup vinegar (I used cider- use white if you want a sharper flavor)
  • 1 cup water
  • 2/3 cup sugar (plain white sugar) (if you want a pickle that is less sweet, you can make it 1/2 a cup instead)
  • 1 tablespoon pickling spices (in the spice section of the grocery store; or with the canning supplies)
  • 1/4 teaspoon celery seed
  • 1/2 teaspoon mustard seed
  • 1 teaspoon red pepper flakes (If you don’t want to put it in the whole batch, just sprinkle some in the jar you want spiced up after you add the brine)
  • 1 tablespoon kosher salt
  1. Get out four pint jars and scrub them thoroughly with soap and hot water. Dry them and then pack each one tightly with the cucumber slices and onion, or whatever veggies you’re using.
  2. In a medium pot, combine the rest of the ingredients (remember, hold off on the red pepper flakes if you don’t want the full batch to be spicy). Stir, then bring to a full rolling boil.
  3. Carefully pour the brine over the contents of each jar (remember, you can easily boil up some more brine if that isn’t enough), filling to near the top of the jar, trying to make sure the veggies are covered. Cap the jars with clean lids and bands, let cool, then refrigerate for at least 24 hours to let the flavors develop. I went into the fridge and gently shook mine up a few times just to make sure the top veggies were getting brined too.
  4. Eat. Enjoy. Serve plain, on burgers or sandwiches, use in potato salad, etc etc.
Quick & Easy Refrigerator Pickles

Quick & Easy Refrigerator Pickles

Save

Sweet & Tangy Strawberry-Vanilla-Banana Jam

Sweet & Tangy Strawberry-Vanilla-Banana Jam


I remember when I first started canning about 15 years ago. I thought I owned the world. To be able to create jams, jellies and preserves in flavors no store would ever have; to feel so danged “Earth Mother-ish”. It was empowering in its own weird way. The first thing I ever made was orange marmalade. It was, yet again with me, a case of not even realizing I had picked something that experienced cooks/canners don’t like to do and that the inexperienced canners balk at. I have a habit of that. Same thing happened the first time I made croissants not long after I started baking with yeast. I found out later that many experienced home bakers don’t like to attempt croissants because they can be touchy. I’ve always been like, “This sounds good… I want to make it” and I give it a try. Usually things go well. I suppose ignorance really is bliss, ehh? This particular jam is a favorite in my family. My son Jordan has to be stopped from just eating it out of the jar as dessert and my husband, who is diabetic, loves it even though it’s so NOT good for him. If you like the classic mix of strawberry banana, you will love this jam. And contrary to what you may think, home canning isn’t difficult at all. If you can mix, stir, ladle into jars and then boil sealed cans, you’ve got this. I will say what I say every time I post a canning recipe, however. Steer clear of recipes/web sites/blogs that tell you it is just fine and dandy to do things like seal your jars by turning them upside down or just putting a lid on and letting the inner heat seal them, etc. These methods are NOT safe. You’ll run into people who will say, “Oh, my gramma/great gramma/gramma 35 generations ago did it this way and everyone was just fine.” They’re wrong, plain and simple. We have no way of knowing how many illnesses, “Oh, she has a stomach virus” or even deaths back in the day were from food poisoning. Seal your cans the correct way and you’ll have tasty food that is safe. Here’s a wonderful site to check out if you’re new to canning- Fresh Preserving . It will guide you along in easy terms and make you see how simple this really is! You know the drill…. git to cooking. Erhmmm, canning. This makes about 8 half pint jars.

Sweet & Tangy Strawberry-Vanilla-Banana Jam

  • 4 3/3 cups prepared fruit (about 2 1/2 containers strawberries and 3 to 4 medium bananas)
  • 3 tablespoons lemon juice (bottles is fine)
  • 1 box pectin (the powdered kind, not the liquid)
  • 1/2 teaspoon butter to help prevent excessive foaming
  • 1 tablespoon vanilla extract
  • 6 3/4 cups sugar (yes, this is the correct amount; jams take a fair amount of sugar to set properly and are NOT diet food πŸ˜› )
  1. Prepare your jars as directed in the above link and set your lids in a bowl of bowling water to sterilize them.
  2. Stem your strawberries. Crush them and measure out exactly 3 1/4 cups of the mashed berries (if there is any left over, which is doubtful, just find another use for them). Mash the bananas and add exactly 1 1/2 cups of them in a large pot along with the mashed strawberries. Stir in the lemon juice and the vanilla.
  3. Stir the powdered pectin into the pot with the fruit. Make sure you have your sugar measured and at hand.
  4. Add the butter and bring the fruit/pectin mixture to a full rolling boil (a boil that can’t be stirred away), stirring constantly.
  5. Pour in the sugar all at once. Still stirring constantly, bring the mixture back to a full rolling boil Once it gets there, boil for a full minute. Immediately remove form the heat and skim off any foam that has collected on top. Let the pot sit for five minutes, stirring about once every minute to help make sure the fruit doesn’t settle, but stays suspended throughout the mixture.
  6. Ladle into the prepared jars; wipe the jar rims and threads with a clean hot, wet cloth. Cover with the lids and process in boiling water for ten minutes. Remove form the water and let cool, set on a clean towel. You’ll hear a satisfying “ping!” as each jar seals.
  7. Label and store in a dark, cool place.

Sweet & Tangy Strawberry-Vanilla-Banana Jam 2   Copyright Notice: From Cupcakes To Caviar images and original content are copyright protected. Please do not publish these materials anywhere without prior permission.

Spicy Tomato Chutney

Spicy Tomato Chutney

Spicy Tomato Chutney


We didn’t have a whole lot of luck with our tomato plants this year. It was such a wet, unseasonably cool Summer that they didn’t stand a chance. They would get decent sized and green, but few got enough sun to finish ripening. Out of about 12 plants, we got enough tomatoes for one session in the dehydrator, which we ended up eating like candy  and enough for this batch of chutney. I can sincerely say that this chutney was worth the wait for ripe tomatoes.

I’ve been canning for about 17 years or so now. I tend to stick to jams, relishes and chutneys. One of these days I’ll branch out and do pressure canning. I have the canner, just not the motivation or expendable cash. I keep saying that if I come across some fantastic sale on meat, I’ll can some, but who ever finds a fantastic sale on meat nowadays? Most of us are instead practicing meatless dinners a time or two a week because it’s so darned expensive to buy meat of any kind.

Is it horrid of me that I am enjoying this chutney so much that I keep going over to the bowl of it that is in the photo and snagging bites? Hehe This has a wonderfully unique taste in comparison to other, fruitier chutneys I have made in the past. You have the sweet acidity of the tomatoes, the bite from the peppers and garlic, the tang of the vinegar…. all melded together into a textural delight. Darn, I’m just soooo poetic today πŸ˜›

This has a decent amount of ingredients, but nothing hard to find and it all just goes into the pot together and cooks down, so it’s a fairly low maintenance recipe. I say again, as I’ve said before about canning recipes, practice safe canning, please. Do NOT listen to those who tell you it’s ok to just ladle the food into a jar, put the lid on and go on as if that’s sufficient for sealing. It’s totally NOT good enough. Even if the can seems to seal, you don’t know that it’s vacuum sealed, nor that any possible bacteria were killed. Never take that chance with your own health or that of your family. It’s too easy to do it right. πŸ™‚ Here’s a link to show you how to properly can if you’re new to it. If you want to make this but don’t want to can it, you can also freeze portions of it. Just thaw when you’re ready to use some.

Water Bath Canning

This chutney is wonderful with any Indian or Thai dish, as well as with any fattier cut of meat. The acidity of the chutney helps to cut the richness of the meat. It’s also great just off a spoon, but I am also a wee bit offbeat πŸ˜€

Spicy Tomato Chutney

  • 5 lbs tomatoes, peeled and chopped
  • 4 cloves garlic, chopped (I like to leave them in fairly decent sized chop. They add a nice look to the finished product.)
  • 2 large onions, chopped (about 1 1/2 cups)
  • 1 cup brown sugar
  • 3/4 cup sugar
  • 1 1/2 cups apple cider vinegar
  • 1 tablespoon kosher or pickling salt (non iodized)
  • juice and zest of one small lime
  • juice and zest of one small orange
  • 1 teaspoon red pepper flakes or crushed dried chiles (use more or less as desired, depending on how spicy or not you prefer it)
  • 1 1/2 teaspoons cinnamon
  • 1/4 cup finely chopped crystallized ginger (same chop idea here as for the garlic. Chutney should have texture, not be smooth.)
  • 1/2 cup golden raisins
  1. Put all ingredients into a large, deep pot and stir well to combine.
  2. Bring to a boil over high heat, stirring frequently. Once it gets to a boil, turn your heat down to a barely medium setting (I do this at 4 on an electric stove) and let it simmer, stirring occasionally to prevent sticking.
  3. Cook until it has reduced to about half of it’s original amount and has become thick and rich looking, about 2 hours. If it starts to stick to the bottom of the pot at all, lower your heat a tad and make sure you’re stirring enough. Keep in mind that it will continue to thick a LITTLE bit even after you can it so don’t get it too thick during cooking. You want a product that is about the consistency of a loose preserve.
  4. Can as per the above directions (I got 4 1/2 pints out of this), leaving 1/4 inch headspace and boil in a water bath for ten minutes. When done, remove to a towel and leave undisturbed until cool. Check your seal and if any jars didn’t seal, store them in the fridge. The sealed jars can be stored in a cool, dark place for quite a long time.

Copyright Notice: From Cupcakes To Caviar images and original content are copyright protected. Please do not publish these materials anywhere without prior permission.

Oops, I Did It Again

Apple Pie Jam

I have a handful of canning recipes here on the blog. I have been an avid canner for about a decade or so now. I’m one of those people who is really picky on the canning rules/guidelines as well. When I see other sites/blogs where they are showing the results of their canning session and it has a jar only half filled or they have said something to the effect of “don’t worry about water bathing it; just invert the jars and it will seal just fine”, I shudder. Most of them, when inevitably lambasted about that (I am not the only picky canner in the world lol), they say something like “well, I’ve always done it that way and we haven’t died yet.” I always feel like saying “and therein lies the key word…. YET”. Like I have told my kids a bazillion times, you can do something stupid 1000 times and get away with it and it’s the very next time that gets you. I’ve often wondered how many “natural” deaths back in the day were from things like food poisoning/botulism.

My long winded rambling point there was practice safe canning. No, that doesn’t mean put a condom on your jars or make sure your apples have been monogamous :-P  It means, if you haven’t canned before or you have but you’re not sure you’re doing it quite right, go to the following site- Getting Started On Safe Canning and read it first.

Making sure you read the recipe correctly is always smart too. I know this for a good reason. Today, upon making this recipe; one that I have made quite a few times before actually- I wasn’t paying attention. Where it says to have 4 cups of apples, about 1 pound, I saw as have 4 pounds of apples. So there I was, looking down into a pot with 4 times the amount of apples I needed for a batch of jam. So what did I do? I went into frantic automaton mode. I divvied up the ingredients into separate batchs and made more than one batch of jam. Problem was, I only have one pot large enough to hold jars as I sterilize them or after canning so I was there for quite a while, making the jam, canning it, sterilizing more jars, making more jam, canning it… ey yi yi.Use me as your example of don’t get distracted while making jam. Thank God my family loves Apple Pie Jam cause we have a ton of it now hehe

So if you like apples, like jam and love the flavors inherent in apple pie ( apples, spices, raisins) you’ll love this. It makes a fantastic PB&J sandwich, i (and if you’ve been reading my blog for a while, you know I’m not a huge PB fan so that’s saying something), is Heaven on a buttermilk biscuit, is wonderful spooned liberally over vanilla ice cream, great in thumbprint cookies, awesome on a spoon and then shoveled into your mouth. Erhmmmm, I’ve just heard about that last way… I’d never do that myself. Honest.

If you’ve never canned before but want to try it, this is a good recipe to try. It’s easy and the results are delicious. I promise you, if you can read and follow directions, you can can. It is NOT hard, contrary to what you may have heard. Just promise me to not listen to the people who say “just invert your jars; don’t worry about a water bath” or show photos of jars only half filled yet processed. There are reason for the canning rules. It’s to keep you and your family safe…and breathing.

Apple Pie Jam

  • 4 cups prepared fruit (about 1 lb granny smith or other tart apples)
  • 1 1/4 cups water
  • 1/2 cup raisins
  • 2 tbsps lemon juice
  • 1 teaspoon cinnamon (I use a touch more)
  • 1/4 teaspoon allspice
  • 1/4 teaspoon nutmeg
  • 1 box powdered fruit pectin
  • 1/2 teaspoon butter
  • 4 cups white sugar
  • 1 cup light brown sugar
  1. Sterilize jars in a boiling water bath. Keep at a low simmer while you prepare the jam. Pour boiling water over the lids and screw bands and let sit. Measure out your sugar and have it right next to where you’re cooking.
  2. Peel and core apples/ Finely chop. Add the water and raisins. Measure 4 cups into a large pot. Add spices and lemon juice.
  3. Stir the powdered pectin into the mixture. Add the butter. Bring the mixture to a full rolling boil (one that can’t be stirred away), stirring constantly.
  4. Stir in all the sugar. Return to a full rolling boil and let boil for one minute. Remove from heat and skim off any foam.
  5. Ladle quickly into your prepared sterilized jars. Leave a 1/8 inch headspace. Do NOT leave a large headspace. It causes the vacuum seal to not be as strong because there is too much oxygen left in the jar for it to draw out. Do not leave too little of a headspace because the jam can boil up into under the lid thus also causing a poor seal. Wipe down the rims of the jars with a clean damp hot washcloth to get any drips. Drips can cause bacteria to grow under the lid, thus possibly ruining all the jam inside. Put the lids and screw bands on the jars, finger tight. Don’t over tighten.
  6. Place jars in pot of boiling water (please buy some canning supplies including the thingamajigger (hope that’s not too technical of a term πŸ˜€ ) that lowers the cans down for you. Return water to a boil and process jars for a full ten minutes.
  7. Let jars cool, then check seals. If any of the lids didn’t seal, refrigerate them. Those that did seal can be stored in the pantry, same as any jars of jam you buy at the store.
  8. Eat. Enjoy. Thank me later. Or now.

Apple Pie jam…yummy! I know; boring photos but I was too tired to make them purty hehe


Print Friendly and PDF

Doing The Can Can :-P

Yes, yet another bad pun from me. This one is based on the fact that I did a little bit of canning yesterday. What did I make you ask? You DID ask didn’t you? Please tell me you asked. Otherwise I’ll cry and believe you me, I do NOT look pretty when I cry. Middle aged fat women lacking good teeth rarely do.

On topic… I’m a jam, jelly, preserve, marmalade fanatic. Also chutneys, relishes, etc etc. If it can be spooned up out of a jar, chances are that I’ll like it. So it was natural that at some point I would teach myself to do home canning. I started about ten years or so ago and haven’t stopped since. I absolutely ADORE canning my own jams and such. I like coming up with new flavors and I like knowing what is going into them.

So yesterday, I wanted to find a way to preserve some of the precious Meyer Lemons I had on hand. As much as I loved the pound cake I made, I wanted something that would keep the flavor going for a few months. So what else would I do other than can some?

My family isn’t as big on marmalade’s as I am, but I could eat it straight out of the jar. The chewy peel, the sweet tart jelly…yum! This one was particularly good being made with the Meyer lemons. There isn’t as much pith in Meyer lemons (the bitter white part) so this didn’t have that slightly bitter edge to it that some marmalades can have and while I don’t really MIND that, I like it better if it isn’t bitter. This was slightly chewy from the peels, nicely tart but not overwhelmingly so as it could be from regular lemons. I swear, I could just stand there with a spoon and the jar.

Give this a try. If the idea of canning scares you, you could also refrigerate this. Just put it into plastic or glass containers with lids. It will last a few months stored cold. This recipe comes from Gourmet.com

Now excuse me while I go  eat this straight from the jar.

Meyer Lemon Marmalade

  1. 6 Meyer Lemons
  2. 4 cups water
  3. 4 cups sugar
  • Halve lemons crosswise and remove seeds. Tie seeds in a cheesecloth bag. I used a coffee filter tied shut with a bread tie lol. Hey, whatever works right?
  •  Quarter each lemon half and thinly slice. Combine with the bag of seeds and water in a large pot (non aluminum) and let mixture stand, covered, at room temperature 24 hours.
  • Bring the lemon mixture to a boil over moderate heat.
  • Reduce heat and simmer, uncovered, until reduced to 4 cups, about 45 minutes. Stir in sugar and boil over moderate heat, stirring occasionally and skimming off any foam, until a teaspoon of mixture dropped on a cold plate gels, about 15 minutes. This part took 35 minutes for me. Just don’t let it cook TOO much or you will end up with impossible to chew lemon goop.
  • Ladle hot marmalade into jars, filling to within 1/4 inch of top. Wipe rims with dampened cloth and seal jars with lids.
  • Put jars in a water-bath canner or on a rack set in a deep pot. Add enough hot water to cover jars by 1 inch and bring to a boil. Boil jars, covered, 5 minutes and transfer with tongs to a rack. Cool jars completely
  • Alternately, store this in tightly covered containers in the fridge. I got a little over 4 half pints from this recipe. I canned the 4 half pints and used the extra 3/4 cup or so in a chicken dish last night.


Momma Hands

When I was younger I hated my hands. I would look at the hands of other women and then compare them to my own. Theirs would be slender and dainty with nicely shaped nails that were usually painted a beautiful color. Mine however were big and squarish with long fingers and I rarely painted my nails because I could almost never get my nails long enough to paint. Even when I tried it didn’t work because my big bulky somewhat clutzy fingers would have me end up with more polish on my fingers than on my nails. And as I got even older and had more kids and the life that goes with that, things like wanting nice nails had to be put aside. My hands were, in my mind, just tools and not very pretty ones either. My only pride was that they were soft and smooth and I never got age spots and all the rest of the signs of getting older that tend to show on a womans hands.

But as I’ve aged (I’m an ancient 46 now πŸ˜› ), I’ve realized that my hands were never just tools; they were instruments. One day, they would be the sound of a flute as I would tickle my children and make them laugh. At other times, they would be the discordant but necessary bang of an out of tune piano when I had to deliver a spanking. Then later, they would be the whisper of a harp as I used them to brush back the hair of a sleeping child. Over time, my hands have played a symphony of different instruments. They have seen a life that while rarely easy and sometimes harsh, was one that has been useful, has maybe made some difference.

I looked at my hands yesterday and saw age. They are still soft, but the smoothness is giving way to the ravages of time as my skin thins. I see wrinkles and I still see nails that rarely look feminine, rarely look pretty. But I also saw so much more. I saw hands that were used in  raising three children to adulthood and happy independent lives and are still being used to take care of three that aren’t grown yet.  I saw hands that have tenderly and gently held the heads of so many tiny babies in them, that have stroked the faces of crying toddlers, have held the hand of angry young adults and have now begun the same cycle with my grandchildren. I saw hands that have been used to knead pain out of my husbands shoulders; something I couldn’t do as well with tiny dainty hands and short fingers. I saw hands that have held his face between them when he was in pain and comforted him with my touch. These hands of mine are so much more than just utilitarian. They are instruments given to me and yes they are also tools but tools that have done so much. These hands have been used in love and in anger, to give pleasure and to, unfortunately, at times, to give a miniscule measure of pain meant to help someone grow. They have been mistreated and not well cared for and have begun to get knobby looking at the knuckles as arthritis begins to ravage them, but they have always served me well. I use them every day to create food that gives my family nourishment and joy, to take care of four human beings that depend on me. They bathe a toddler, they hug two teenagers, they love a husband. They hold a phone while I talk to my other children who live far away now and they cuddle grandchildren. I see now that I have momma hands and that, because of that, they are indeed…beautiful.


Honey & Spice Blueberry Apricot Jam

This is a sweet yet tart jam that combines the flavors of the two fruits wonderfully. The predominant flavor is Blueberry and then you get the subtle taste of Apricots, honey and spice. I was loved how this turned out. It’s a small batch, only three half pints because when I’m making new jams, I prefer to start small just in case. But this could be easily doubled or tripled. Just expect a longer cooking time. As I’ve said before, I’m not going to try to teach full out canning techniques. There are web sites that can do that much better than I and here is one of the best of them.

Here is a good link to learn proper canning techniques. πŸ™‚

http://www.uga.edu/nchfp/how/can_home.html

  • 1 lb fresh apricots, finely chopped (See step two)
  • 1 pint fresh blueberries, crushed
  • 1 cup good quality honey
  • 2 cups sugar
  • 3 tablespoons lemon juice
  • 1 teaspoon cinnamon
  • 1/4 teaspoon nutmeg
  1. Wash and sterilize 3 half pint canning jars. Keep ready in hot water while preparing the jam.
  2. For the apricots and blueberries- you can use a food processor to do the chopping, but don’t puree this. You want to leave some small bits and pieces.  Just do a couple of short pulses.
  3. Combine the fruits, honey, sugar and spices in a large heavy bottomed saucepan. Add the lemon juice and stir well. Bring to a boil over medium high heat, stirring constantly.
  4. Reduce heat to a simmer and cook the jam until it has thickened, stirring frequently to prevent sticking, about 35 to 45 minutes.
  5. Ladle the jam into the prepared jars, leaving a 1/4 inch head space. Wipe the rims of your jars well with a clean, hot damp washcloth. As I have said before, when it comes to canning, you HAVE to have everything scrupulously clean to prevent bacteria and germs from growing when the jars are stored.
  6. Process in a boiling water bath for ten minutes. Removed from canner (or plain old large pot in my case πŸ˜› )and let sit until cool. Wipe down jars, label, then store in a cool dark place.

Momma Hands


Memories Are Made Of This

One of my favorite photos of my dad. It is just so HIM

It’s Fathers Day once again. My recipe won’t have anything to do with Fathers Day; my dad would have pretended to gag and turned his nose up saying I was getting too fancy when he saw what I had done to perfectly good peach jam. He would have then scarfed down half a jar on burnt toast (he liked it that way) when no one was around πŸ˜€ The man did love his sweets.

I miss my dad. He died in April of ’06. He was ornery, opinionated (you could not be right with my dad even if HE was obviously wrong lol), stubborn, narrow minded, broody and had problems with his temper. He was also funny as hell,  tenderhearted and easily hurt by inattention and feeling he was unloved. He was generous to a fault, loved to cook (he made one hell of a Giardiniera) and loved to eat (his favorite tease for me would be to eat a gazillion pieces of my fried chicken, which he loved and tell me it was ALMOST as good as a Swansons TV dinner.) and was one of my biggest fans. He lived next door to me for the last 8 years of his life and I made 99.9% of his meals. I would cook dinner, plate his up, take it over and he would usually be sitting there watching Wheel of Fortune or Jeopardy. He’d ask what we were having tonight, give the requisite “oooo’s and ahhhs”, I would get him what he needed to eat and he would go back to his TV show while I sat next to him and we chatted while he ate if I had time to sit for a while.

I remember long hours of Scrabble where he would teasingly gripe cause it made no sense to him that I always kicked his ass at the game πŸ˜› . We would have Rummy marathons that would last for days. Back when he drank (he stopped later in life because he was on so many medications for various health problems and couldn’t drink with many of them) these game sessions would involve his contagious giggle when something made him happy. He had a giggle like a little boy…except when he started snorting lol. I also remember hours of talking during all of this. I could tell him anything and often did.

When I took him to do his grocery shopping, I learned to not eye anything on the shelf or pick things up or say that something sounded good. If I did, it invariably went into his cart no matter how much I protested. My kids of course loved to go shopping with him for just that reason πŸ˜€

I miss his smile. I miss hearing him say “Hey hon. Come in and sit a while” when I’d come over. He would be sitting at his kitchen table working on his sweepstakes entries, candles or incense lit and classical music playing. I miss his overly greasy spaghetti or chili (took me years to get him to drain the grease lol.). I miss how everything he cooked had 300 jalapeno peppers in it. I miss his laugh. I miss our Scrabble games and card games. I miss hearing him cuss when people gave stupid answers on Jeopardy. I miss him saying “you’re gonna mess my hair up, girl!” when I would ruffle his mostly bald head. Most of all, I miss the man who was my best friend and my biggest cheerleader. He wasn’t perfect, but he was mine. Happy Fathers Day Daddy.

Lavender Peach Jam With Vanilla

Adapted from the Peach jam recipe in the book “Blue Ribbon Preserves”

  • 3 lbs peeled and crushed peaches (refer back to my Peach Salsa recipe to learn how to peel them easily)
  • 1/4 cup fresh lemon juice
  • 7 1/2 cups sugar
  • 1/2 teaspoon butter
  • 5 large sprigs lavender (don’t chop; leave whole) plus more for adding to the jars if desired
  • 1 tablespoon vanilla extract
  • 1 teaspoon almond extract
  • 1 3 ounce pouch liquid pectin
  1. In a large heavy bottomed saucepan, combine the peaches, lavender and half the sugar. Cover the pan and let sit for about 2 hours, stirring frequently to infuse the Lavender flavor throughout.
  2. Remove the cover. Stir in the remaining sugar, the butter and the extracts.
  3. Over medium low heat, bring the mixture to a boil, stirring constantly to dissolve the sugar.
  4. When sugar is completely dissolved, turn heat up to medium high and bring the mixture to a full rolling boil (a boil that can NOT be stirred down), stirring constantly. Remove the pan from the heat and skim off any foam (a ladle works best for this)
  5. Return the pan to the heat and again bring to a full rolling boil. Stir in the contents of the pouch of pectin. Again return to a full boil, stirring constantly. Boil for one minute and then remove the pan from the heat. Skim off any foam.
  6. To prevent the jam from separating, allow it to cool for five minutes, stirring every minute to help distribute the peaches evenly. Ladle the jam into hot sterilized jars, leaving a 1/4 inch head space and adding a small sprig of Lavender to the jars if desired. Make sure to wipe the rims well with a clean cloth. Apply the lids and boil for ten minutes in a boiling water bath. The recipe said that this made 8 half pints but I actually got 11 out of it.

This jam is really quite tasty. I was kind of tickled with it. It has a subtle (Almost too subtle; next time I think I’ll use more Lavender) Herby flowery flavor that melds very well with the delicate flavor of the peaches. I can see using this as a glaze for roast poultry with some Herbs De Provence added to intensify the hit of Lavender you get. Also just adding it to a plain old English Muffin is pretty yummy too :-D. If you try it, please let me know what you think of it. πŸ™‚


I Always Loved Count Chocula

Yes, that is a used jar with an old label there. I was too lazy to peel it all off. πŸ˜€


Though thinking about it and posting in all honesty, I’m not sure why I used past tense in that title; I STILL love Count Chocula the best. He’s my man. Don’t even try telling me he isn’t real and the relationship can never work. It’s fate that we stay together even when I am 96 years old and gumming oatmeal for breakfast, lunch and dinner. I’ll just have to let the yummy chocolatey goodness sit in the milk a little longer is all. I’m also a sad portrait of a Cap’n Crunch addict but don’t tell the Count; he’s a jealous sort.

What are your favorite cereals. If you say you are madly in love with say, Shredded Wheat in soy milk I am going to worry about you. Same if you answer Grape Nuts. I mean c’mon, we’re all friends here… let’s quit trying to be all adult and pretend we really eat that crap for any other reason that it’s good for us and we know we need to take care of ourselves πŸ˜€ What cereal do you want when a cereal craving hits or you want something sweet and reminiscent of childhood?

Calvin is my hero btw.

While I like Count Chocula, I never cared for his friends, Boo-Berry and Franken Berry (that was today’s poor attempt at a lead in by the way. I wanted to make sure you caught it πŸ˜› ). Even as a kid, I knew the flavors were completely fake. They were like settling for a Tootsie Roll when what you really wanted was a Hershey bar but you only had a nickel (ok, a penny back in MY childhood but I’m hedging on that here. Shhh.). As an adult, I’m no different. I want real flavors when I’m eating not something made from chemicals and red dye number 4,328. Well, other than that Twinkie, Cheeto, Grape Laffy Taffy and Lemonheads issue. Those don’t count. Really. They don’t. Quit rolling your eyes at me youngun or I’ll put you to bed without dinner!

Going on the “I want real flavors” idea, today I made some homemade chutney. This is a canning recipe but it can be put into refrigerator or freezer containers too. It’s won’t keep forever but it will last about 2 months it kept refrigerated and longer in the freezer. Canning it however gives you the lovely sweet tart berry flavor for a year or twelve. I had some blueberries I needed to use as well as cranberries in the freezer (in case you didn’t know, you can buy a ton of them in season and they will keep for up to a year in the freezer. Just an FYI.) that I wanted to tell you.)  It is sweet and also quite tart as well as spicy and savory. It would be great with a nice salty piece of ham or a rich fatty pork chop or a piece of roast chicken. I can also see using it with ye olde block of cream cheese and crackers. Let me know what you think.

Spicy Sweet Blueberry Cranberry Chutney

  • 2 cups sugar
  • 1 1/4 cups raspberry vinegar
  • 1 large onion, finely chopped
  • 1/4 cup finely chopped crystallized ginger
  • 1 teaspoon cinnamon
  • 1/2 teaspoon salt
  • 2 teaspoons red pepper flakes (adjust to personal taste)
  • 7 cups blueberries (about 4 containers)
  • 2 cups fresh or frozen cranberries (NOT canned sauce)
  1. In a large non stick saucepan, stir together sugar, vinegar, onion, ginger, cinnamon, red pepper and salt. Stir well to mix. Bring to a boil over medium heat, stirring frequently to dissolve sugar. Simmer uncovered for 15 minutes.
  2. Stir in the fruits. Return to boiling, stirring constantly, then reduce heat to a simmer.
  3. Stir frequently because this WILL stick to the bottom if you don’t. Simmer uncovered for about 30 minutes or until desired consistency. It will thicken up some as it cools so don’t let it get too thick while cooking. You want it thickened but still syrupy.
  4. Ladle the chutney into hot sterilized jars, leaving a 1/2 inch head space.. Make sure to wipe the rims well because anything left on the rims now can be future germ territory later. Process in a boiling water bath for ten minutes. Let cool and store in a cool dark place. It’s like Count Chocula; it likes the dark. πŸ˜›

I know; not the worlds most exciting photography today. It's hard to really showcase a dark colored condiment. Just make it and eat it πŸ˜›

Can You Do The Salsa?


Can you… Salsa! Heh. I crack me up!!! Again, mainly because I crack up no one else and I’ll be damned if there will total silence when I make my completely inane dumb plays on words but still… I crack me up!!

I can see you all shaking your heads wondering how that was even a play on words in the first place. Well duhhhh mannnn! Cause this is a post about home canning salsa. Geee, so obvious. *Gives you all the L on the forehead gesture and then realizes that only a 100% L person would even USE that gesture and giggles sheepishly* (on a side note, do Sheep giggle? If they do something stupid do they say that they are looking human? These are the things that my mind contemplates.)

Moving on…as usual… many many moons ago I was like many of you. I bought all my jams, jellies, relishes, salsas and other yummy canned goods at the store. The store I say shamefully!!! Can you believe it!? It’s a dark part of my life I try not to look back on. the therapy took years.  Now however, I have seen the light!!! *Finds a soapbox, gets up on it and starts preaching* Yes brother, I have seeeeennnnnnn the light! And the light shines through canning jars!!!! Can we say Amen!? Say amen with me!

I really need more therapy.

As I was saying, but put more simply, over the years I have come to love home canning (as opposed to canning in say the Wal Mart parking lot). You can make so many flavors you can only find via gourmet stores or web sites (like Blueberry Lime Jam or Jalapeno Cranberry Preserves) as well as make the typical store bought flavors of different condiments and jams but do it knowing that they are fresh, there is no law allowed amounts of rat poop in it and it isn’t filled with preservatives (I guess to keep the rat poop fresh). Not to mention, that old saw about how fulfilling and dare I say empowering it is to can foods yourself is actually true. it’s a rather heady feeling to see jars of tasty foods that YOU made, not some hair netted stranger 2000 miles away.

So today I am putting up what will be my first of many (over time) canning recipes. I am NOT however going to get into the whole teaching you how to can part of it. I will give the recipes and add in a link or two to good sites to go to to learn to can. It’s much easier than what one would think. If you can think “keep it clean and think safe” you can can. This post is for homemade Peach Salsa. I love this stuff! My daughter finally had to learn to make it because I was refusing to let her continue swiping what I made πŸ˜› This has a bit of a bite (but you can make it less so) and a wonderful fruity flavor to it. It is great with chips, with meats, with cream cheese, with a spoon eating it straight from the jar….

Here is a good link to learn proper canning techniques. πŸ™‚

http://www.uga.edu/nchfp/how/can_home.html

Spicy Sweet Peach Salsa

(Canning Recipe)

  • 3 lbs ripe tomatoes, peeled then chopped
  • 2 1/2 cups chopped onions
  • 2 cups chopped green pepper
  • 2 jalapenos, seeded and finely chopped (can also omit if you want extremely mild salsa or leave in the seeds if you want hot salsa)
  • 5 ripe peaches, peeled then chopped
  • 1 cup sugar
  • 1 cup vinegar (white or apple cider)
  • 1 1/2 teaspoons salt
  • 1 1/2 teaspoons pickling spices (can be found with canning supplies or in the normal spice aisle), tied up in a cheesecloth square (a coffee filter works well too)
  1. Easiest way to peel your tomatoes and peaches is this: boil a large pot of water. Add the fruits (not all at once) to the boiling water and boil for two minutes. Then dump into a bowl of ice water and let sit for a few minutes. The skins should then slip off easily.
  2. Put chopped tomatoes and peaches into a large heavy bottomed pot along with all the other ingredients.
  3. Boil slowly, stirring often, until thickened which should take about two hours. If your maters (yes, I said maters πŸ˜› ) were really juicy it may take longer.
  4. Take out and discard the pickling spices.
  5. Ladle the salsa into half pint or pint jars, leaving 1/4 inch head space. Make sure to wipe the rims of the jars thoroughly with a CLEAN hot washrag. Put the clean lids on, making sure to just finger tighten. Don’t over tighten them.
  6. Process in a boiling water bath for ten minutes.
  7. This makes about 3 and a half pints.
  8. Let cool and then undo all your hard work by popping open a jar and getting out the tostitos πŸ˜€
  9. If you have never canned before, please please don’t be scared off thinking it is too much work, too much trouble or too frightening to do. It’s really quite easy and more than worth any work you put into it. I PROMISE you this. If you have any canning questions, please feel free to ask me in a comment here or write me at my gmail address (in my “about me” section)