RumChata Tres Leches Cake With A Creamy Cinnamon Mascarpone Topping

RumChata Tres Leches Cake With A Creamy Cinnamon Mascarpone Topping 2

*Stands up at the front of the room and clears my throat* Hi there. My name is Janet and I’m a slacker. I mean, how else can I explain away an absence of almost a month? Sure, I could give you a line (truthful though it may be) about being under the weather in recent weeks. I could say that life has been busy, which it has. No one with a seven year old, other kids, a spouse and a household to care for can deny that one. But none of that is good enough. Had I really TRIED, I could have found the time and energy to post here. You ladies and gentlemen deserve nothing less than my all. In my defense, I made something (a chocolate/peanut butter bundt cake) about a week ago that I was going to post, but it turned out so badly even the kids didn’t like it. So no go. I won’t post less than delicious foods.
But I’m back. You can now be frightened. :-p
It’s been an interesting few weeks. Lots of snow, missed school days due to said snow because we live in the south, lots of cussing when the fire goes out in the house and we start to freeze to death (I died four time during the last month, but then my husband remade the fire and revived me. 😀 My toes, however, are still frozen.) and many moments of “The Momma” (that would be me) verging on insanity when no one could go outside and I got no alone time.
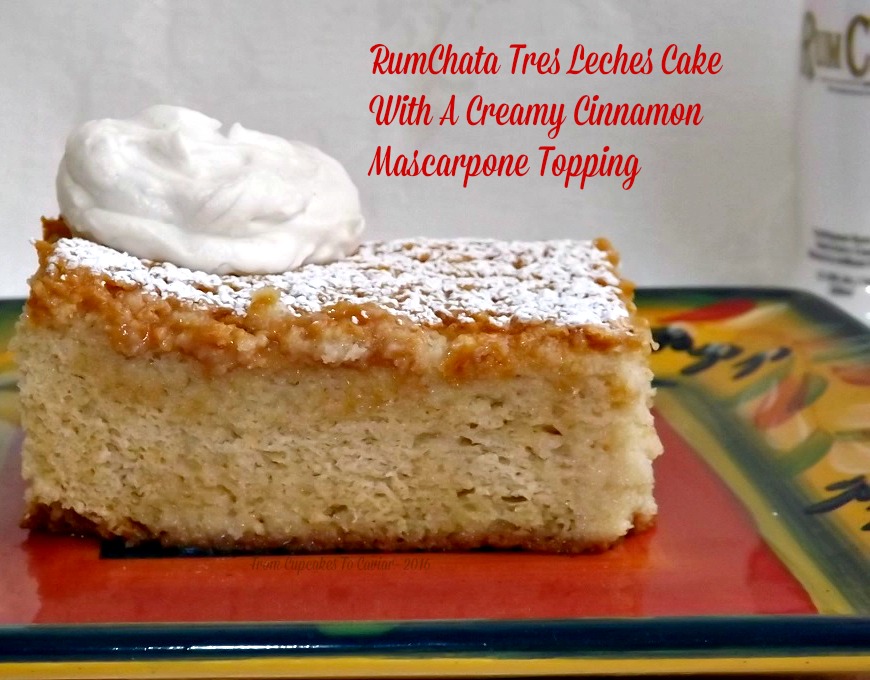
So what am I back with on this snowy Valentines Day? Well, anyone who likes sweet foods has heard of Tres Leches Cake, correct? It is a sponge cake that is soaked in three different types of milk. Theories abound as to where it originated, but generally, it is seen as a treat stemming from South and Central America. While I like the typical one just fine, I wanted to play with the soaking liquid a bit, so I used Rumchata in place of some of the milk.
About a year ago, I discovered the liqueur called RumChata. It’s a creamy liqueur based on Horchata, the delicious rice and milk beverage (the origins of horchata are also disputed, so I am so NOT going to get into where it came from) that is enjoyed in Mexico and has become a trendy drink in the states now, too. While we all know I tend to balk at trendiness, I bought an airplane sized bottle of the RumChata on a whim one day and absolutely loved it. I describe it as alcoholic liquid rice pudding. That is truly what it tastes like.
This cake is pretty darn easy. It’s a sponge cake, so yes, you have to separate your eggs and whips up the whites, but I have complete faith in your egg beating abilities. :-p Then all you do is whisk together the milks for the top, poke some holes in the cake and pour. Top it with the easily mixed together topping and voila, a delicious, somewhat boozy dessert (obviously just for the adults). This is the perfect treat to bring along to a book club, a dinner for adults (bring some cookies for the kids), and cut in half, makes enough for you and your sweetie with some left over. The original tres leches cake recipe that I adapted comes from Bon Appetit.
You know the drill… 🙂

RumChata Tres Leches Cake With A Creamy Cinnamon Mascarpone Topping

  • 1/8 teaspoon cinnamon
  • 1/2 teaspoon vanilla
  • 2 tablespoons sugar
  • 2 tablespoons Rumchata
  • 1/2 cup heavy cream
  • 4 ounces mascarpone cheese, softened
  • Mascarpone topping-
  • 1/4 teaspoon cinnamon
  • 1 cup sweetened condensed milk
  • 1 cup heavy cream
  • 1/2 cup whole milk
  • 1/2 cup RumChata
  • Soaking liquid-
  • 1/2 cup RumChata
  • 1 tablespoon vanilla extract
  • 3 egg yolks (save the rest for something like creme brulee)
  • 1 1/2 cups sugar
  • 6 egg whites
  • 1/4 teaspoon cinnamon
  • 1/4 teaspoon salt
  • 1 tablespoon baking powder
  • 1 1/2 cups flour
  1. Preheat oven to 350 degrees. Grease and flour a 13×9 inch pan, preferably glass.
  2. In a small bowl, whisk together the flour, baking powder, salt and cinnamon
  3. In a large, scrupulously clean bowl, beat the egg whites at medium to high speed (I tend to start out lower and speed it up as they get firmer) until firm peaks form, about 6 minutes or so.
  4. Gradually add in the sugar, beating well. Then add in the egg yolks, one at a time, beating well after each addition..Mix in the vanilla extract.
  5. Add the flour mixture, alternating it with the 1/2 cup RumChata, starting and ending with the flour (flour, Rumchata, flour, Rumchata, flour).
  6. Pour the batter into the prepared pan and smooth the top.
  7. Bake at 350 for 25 minutes, then turn the heat down to 325 and continue baking until the cake is golden brown and the center springs back if gently pressed.
  8. Let it cool in the pan for ten minutes, then invert it onto a rack that has been placed over a rimmed cookie or baking sheet.
  9. Whisk together the milk ingredients. Poke holes all over the cake using a skewer and pour about half of the liquid slowly over the top of the cake. Let that soak in for ten minutes.Invert the cake over a large platter and drizzle the rest of the milks over the top of the cake.
  10. For the topping, simply beat together those ingredients until creamy. Dust the cake with powdered sugar, slice and serve with a dollop of the creamy topping.

Copyright Notice: From Cupcakes To Caviar images and original content are copyright protected. Please do not publish these materials anywhere without prior permission.

RumChata Tres Leches Cake With A Creamy Cinnamon Mascarpone Topping


Tangy Key Lime Bars With A Vanilla Bean Marshmallow Meringue

Tangy Key Lime Bars With A Vanilla Bean Marshmallow Meringue

Tangy Key Lime Bars With A Vanilla Bean Marshmallow Meringue


I’ve decided that Key Limes are a pain in the butt and I totally prefer working with Persian Limes. Why? Because I’m lazy and zesting little teeenieeeee tinyyyyy limes takes 500 years and I’m already old. I don’t have time for that stuff. Who would finish baking if I were to keel over in the middle of zesting, dead from a zesting induced coronary?

Well, I have now managed to use the word zesting (which spell check says isn’t even a word in the first place) more in a few sentences than I had in the previous year. Zesting, zesting, zesting, zesting. There. That should take care of the next year or two.

I had planned to go on a raging bender tonight, which for me means two beers and then I fall asleep. But I came to the realization that 3 and a half hours of sleep the night before doesn’t leave much room for even picking up a beer bottle, much less enjoying it. So I shall instead drink tea fixed for me by my loving husband, eat dinner, inhale two one of these utterly delicious lime bars, then fall asleep watching M*A*S*H on Netflix. Yes, I live on the edge like this often. It’s an adrenaline filled life that few can handle. Feel free to live vicariously through me.

In the meantime however, bake these bars. Crunchy graham cracker crust, creamy, tangy lime filling, all topped with a sweet vanilla bean meringue. These are soooo good. Have I led you astray yet? WHAT!? DARN! Quit bringing up the danged Emu!!!

You know the drill…. 🙂

Mrs. Cupcake, who is too pooped to pucker

Tangy Key Lime Bars With A Vanilla Bean Marshmallow Meringue

  • 1 1/2 cups graham cracker crumbs
  • 1/2 cup sugar
  • 6 tablespoons unsalted butter, melted
  • Filling-
  • 2 14 ounce cans sweetened condensed milk
  • 1 cup key lime juice (you can sub regular lime juice)
  • 2 to 3 tablespoons lime zest
  • 1/2 cup sour cream
  • 2 eggs
  • a few drops of green food coloring (optional)
  • Meringue-
  • 4 egg white, room temp
  • 1/2 teaspoon cream of tarter
  • 1/2 cup sugar
  • one vanilla bean, seeds scraped out (or sub 1/2 teaspoon vanilla extract)
  1. Preheat your oven to 350 degrees and line a 9 inch square pan with non stick foil. Combine the crust ingredients in a bowl and mix well, until you have a crumbly mass. Press down into the bottom of the prepared pan. Bake at 350 until browned, about 15 minutes. Let it cool down completely before adding the filling. Turn the oven down to 325 degrees.
  2. In a large bowl, combine the sweetened condensed milk, lime juice and zest and sour cream. Whisk until thoroughly blended, then add the eggs and food coloring (if using); whisk until mixed.
  3. Pour the filling into the cooled crust. Bake at 325 degrees for 15 minutes. Remove from the oven and chill for two hours at least, or until needed.
  4. About 30 minutes before serving, make your meringue- start a pot of water simmering.  In another, slightly smaller pot, whisk to combine the egg whites, cream of tarter and sugar. Place over the pot of simmering water, making sure it doesn’t actually touch the water, but is just above it. Whisk the egg white mixture continuously until it reaches a temp of about 120 to 125 degrees; enough to feel somewhat uncomfortable on your fingertip, but not burning hot. It will take just a few minutes at most. Remove from the heat and add in the scraped vanilla bean or vanilla extract. Whisk just to combine.
  5. Pour the still warm mixture into either the bowl of a stand mixer or a large bowl. Beat at medium high speed until the meringue is fluffy and holds a firm peak. Spread over the top of the chilled pan of bars. Use a kitchen torch to lightly brown the top of the meringue. You can also place it under the broiler with the oven door open for a minute or two, but watch it carefully if you do this as it doesn’t take long to burn.
  6. You can serve now or re-chill the bars. Use the foil to pull the bars out of the pan and place on a large cutting board. Peel off the foil from the sides and cut into desired serving sized pieces. I wouldn’t cut them as large as the ones I have here. That was just for photo purposes :-p
Tangy Key Lime Bars With A Vanilla Bean Marshmallow Meringue

Tangy Key Lime Bars With A Vanilla Bean Marshmallow Meringue


Copyright Notice: From Cupcakes To Caviar images and original content are copyright protected. Please do not publish these materials anywhere without prior permission.

Easy Creamy Banana Pudding

Easy Creamy Banana Pudding

Easy Creamy Banana Pudding


A little bit ago (which, in the south, can mean anywhere from ten minutes to two weeks ago) I asked my facebook fans which they would prefer- Creamy Banana Pudding or Apple Spice Cake With Creamy Vanilla Sauce. While I didn’t get many comments, the apple cake won by one vote. But I still wanted to do the banana pudding, too. This is one of those desserts that I used to make all the time when my older, now grown kids, were little. It’s easy, it’s tasty and when you have three to five kids running around, you need easy. You also need copious amounts of Xanax, intensive therapy and cheap booze, but that’s a post for another time. But for some reason, it fell by the wayside. I think that sometimes I get so caught up in making new treats, making something different, that I forget that my family loves the old standards too.

This isn’t my recipe. It comes from the Eagle Brand site, although when I started using it back in the day, there WAS no Eagle brand site… there was barely an internet lol. I got it from a magazine. The only thing I do differently is to add some vanilla extract to the mixture. It just adds a little something to it. You can also do this with instant banana, French vanilla, cheesecake or white chocolate puddings. It doesn’t change it enough to make it a sacrilege 😛 but it just makes it a little different.

The difference between this and the old fashioned version is technique. The old ones uses a cooked pudding base. It’s delicious but more time consuming. This one uses instant pudding that is whisked together with some other deliciously creamy ingredients and then layered. You can layer it in a large bowl or individual servings. For the sake of my waistline, I did individual servings this time. Otherwise, my mind says, “Honest Janet, this 8 inch thick layer of pudding that is practically overflowing the bowl is perfectly acceptable!”

You know the drill… get to cooking. Or not cooking in this particular case.

Creamy Banana Pudding

  • 1 14 ounce can sweetened condensed milk
  • 1 1/2 cups cold water
  • 1 1/2 teaspoons vanilla extract
  • 1 (4 serving size) package instant vanilla (or banana or cheesecake or snozzberry) pudding mix
  • 2 cups heavy cream, whipped to soft peaks
  • 1 box vanilla wafers
  • 3 to 5 bananas, sliced and dipped in a mix of lemon juice and water and drained on paper towels (prevents them from turning brown)
  1. In a large bowl, whisk together the water, vanilla extract and sweetened condensed milk. Add in the pudding mix and whisk until well blended.
  2. Chill for five minutes, then fold in the whipped cream.
  3. If using a large bowl, layer about one cup of the pudding in the bowl, then top with the desired amount of vanilla wafers, then about a third of the sliced bananas. Repeat this layering two more times.
  4. If doing individual servings, do the same layering, but in separate glasses. When doing individual ones, I also like to coarsely crush the cookies too because whole cookies just don’t fit well in smaller glasses.
  5. Chill for about an hour or so, then serve.

Copyright Notice: From Cupcakes To Caviar images and original content are copyright protected. Please do not publish these materials anywhere without prior permission.

Coconut Hot Chocolate With Almond Fluff Whipped Cream

Coconut Hot Chocolate With Almond Fluff Cream

Coconut Hot Chocolate With Almond Fluff Cream


I’m one of those weirdos who loves Winter. I love the coziness, the enforced family time (helpful for seeing ones kids when they’re teens. They simply can’t get away in the Winter. Buahahahahaaaa!), the foods (mmm, soups and stews), the clothes. I mean, what woman doesn’t love cozy fluffy sweaters, right?

But one thing I don’t care for is extreme cold. I grew up in Chicago, so it’s not like I didn’t get used to it back in the day. But I’ve been in Kentucky for 26 years now (yes, longer than some of you have been alive, lol) and my body has acclimated to the temps here. I think I would probably just whimper and die in Chicago now. The last few years though, our part of Kentucky has been getting some pretty frigid cold fronts coming through that are very reminiscent of my growing up days. One is expected to hit tonight putting the temp down to about 1 degree with wind chills of about 15 below. Time to get the outdoor cats locked in the garage with the kerosene heater to make sure they stay safe and warm. Time to keep the wood burning fire going. On a side note from that, I have to laugh every time we need to start a fire because it kills my husband that I can get a fire going with a stick and some paper and he can barely get one going with a blow torch, a gas can and 3 full grown trees. I keep teasing him that I’m going to steal his man card.

One thing I love when it’s cold is any excuse to make a hot, soothing drink. Sometimes I like them spiked, but more often than not, I just like drinks that are booze free and creamy. Creamy and I are bff’s from way back.

Now, I’m not usually a fan of The Food Network. I tend to turn a cynical eye towards many of the people who have shows on that channel or recipes online. But I do buy the Winter issues of their magazine since, well, I buy the Winter issues of pretty much every Winter food magazine published. Because soups, stews, cozy food. Enough said.                    So, in the March 2012 issue (yes, it’s taken me this long to get to it), there was the “He Made, She Made” column where two of their cooks make recipes based on a certain food or theme. It was Bobby Flay up against Anne Burrell, making hot chocolate. I’ve had Bobby Flay’s recipe cut out from the magazine since then. I don’t even remember what Anne Burrells was, so it must not have excited me that much. But Bobby’s had a can of coconut milk in it. The words coconut milk are a siren call for me. I have been known to have to open an extra can of coconut milk when making curries because I eat too much of it straight from the can. Yes, yes I do like hardened arteries. Why do you ask?

So, this drink was wonderful. I’m one who can never decide if I want whipped cream or marshmallows on top of hot chocolate. With this, I get both because you combine whipped cream with marshmallow fluff. WooT! I was happy! Plus, you get hot chocolate. With coconut milk. Really; do I need to say more? The only thing I did differently here was to up the amounts of extracts. I like more intense flavors. 🙂
You know the drill… 🙂
Mrs. Cupcake, who wants to be swimming in a vat of coconut milk.

Coconut Hot Chocolate With Almond Fluff Whipped Cream

  • Fluff whipped cream-
  • 3/4 cup heavy cream
  • 1/2 cup marshmallow fluff (store the rest in the fridge for another time… or just eat it straight from the jar. I won’t tell)
  • 2 tablespoons Amaretto or sub with 1/4 to 1/2 teaspoon almond extract
  • 1/2 teaspoon vanilla extract
  • Hot chocolate-
  • 1 cup whole milk
  • 1 can coconut milk (NOT coconut cream.)
  • 2 tablespoons unsweetened cocoa powder
  • 3 tablespoons packed light brown sugar
  • 1/2 cup dark or bittersweet chocolate chips (I used more; I admit it.)
  • 1 teaspoon vanilla extract
  • 1/8 teaspoon of sea salt
  • 1/2 cup toasted coconut for garnish (to me, this is definitely optional. I don’t want hot chocolate with texture 😛 )
  1. Make the whipped cream and set aside- Combine the topping ingredients in a medium bowl. You can use either your stand mixer with the whisk or a hand mixer at medium speed, though I suggest starting at low so you don’t wear the splattering cream. Whip until it forms nice soft, fluffy peaks.
  2. Combine the coconut milk and the whole milk in a saucepan. Bring it to a simmer over medium heat. Add in the cocoa powder, brown sugar (your best bet is to combine the cocoa with the sugar to help avoid the cocoa lumping up), chocolate chips, vanilla extract and salt.
  3. Continue to cook over medium heat, whisking the whole time, until the chocolate is melted and the sugar is dissolved. Pour into cups and top with a dollop of the whipped topping, then some of the toasted coconut if you’re using it.

Copyright Notice: From Cupcakes To Caviar images and original content are copyright protected. Please do not publish these materials anywhere without prior permission.

Eggnog Magic Cake

Eggnog Magic Cake

Eggnog Magic Cake


I love eggnog. There; I said it. “I’m Janet and I’m an eggnogaholic”. And I have no plans to seek help. I’m also a fruitcakeaholic , which, when seen eating huge chunks of it and yes, actually enjoying the chunks of candied peel and neon red things which used to be cherries, has been known to make dogs pee themselves and small children scream in terror.
But, back to eggnog. I love it. I tend to go through about 3 half gallon containers by myself during the Christmas season. I snatch one up when I first see it near Halloween and make sure to keep my supply around through January so I have a constant fix. But up until a couple of years ago, I had never cooked with it. I was too busy hoarding my supply… hiring bodyguards, chaining Dobermans to the fridge, setting up motion sensors to catch my sons in the act of swiping my eggnog, to take the time to cook with it.

Hey.. wake up and.work with me here. I can’t be funny ALL the time! Ok, I’ll rephrase… I can’t be mildly humorous, even if only to myself, all the time. I’m bound to have off days.

I got the idea for this cake from my other magic cake, the Snickerdoodle Magic Cake . It occurred to me that store bought eggnog, that sweet, overly thick, utterly delightful product, would make a wonderful magic cake. What, some of you are asking, is a “Magic Cake”? No, it’s not something conjured up by Houdini. It’s called magic because you take a very thin cake batter, bake it and it “magically” separates into three distinct layers, a top and bottom that are cakey and a middle custardy layer. Anyone who has followed my blog for any length of time knows that one of my major weaknesses isn’t so much for sweet, but for creamy. Flan, custards, puddings, savory cream sauces, you name it, they bring me to my knees. So magic cakes are a natural go to for me…and my hips…and my thighs…and my butt. Luckily, my husband likes my tush, so it’s all good.

You know the drill… 🙂

Love you guys!

Mrs. Cupcake Of The Hefty Butt

Eggnog Magic Cake

    • 4 eggs, separated
    • 3/4 teaspoon cream of tarter
    • 2 teaspoons vanilla extract
    • 1/2 teaspoon rum flavoring (optional)
    • 3/4 cup sugar, divided
    • 2 cups dairy eggnog (store bought is preferable in this case over homemade), lightly warmed
    • 3/4 cup flour, whisked together with 1  teaspoon cinnamon, 1/4 teaspoon nutmeg and 1/2 teaspoon salt
    • 1/2 cup unsalted butter, melted
    • 1/4 cup powdered sugar mixed with 1/2 teaspoon cinnamon and 1/4 teaspoon nutmeg for dusting the top of the cake
  1. Preheat oven to 325 degrees. Line an 8×8 baking pan with foil and lightly grease the foil.
  2. In a small bowl, at high speed, beat the egg whites with 1/4 cup of the sugar and the cream of tarter until stiff peaks form, about five minutes. Set aside.
  3. In a medium bowl, at high speed, beat together the egg yolks and the remaining sugar until pale yellow and creamy looking.
  4. Mix in the flour mixture. Now, use a whisk to slowly whisk in the warm eggnog, then mix in the butter and finally, fold in the egg whites.
  5. Pour this into the prepared pan and bake at 325 degrees until the top is a nice light golden brown and the top is firm but still jiggles some when shaken, about 30 to 45 minutes.
  6. Let cool in the pan until completely cooled or refrigerate, then carefully use the foil to lift the whole thing out onto a board to cut into serving sized pieces. Dust with the powdered sugar/cinnamon/nutmeg mixture. Serve.

Copyright Notice: From Cupcakes To Caviar images and original content are copyright protected. Please do not publish these materials anywhere without prior permission.

Creamy Pumpkin Maple Flan

Creamy Pumpkin Maple Flan

Creamy Pumpkin Maple Flan


Have I ever mentioned that I keep my husband around in spite of some near fatal flaws? Well, if I haven’t… I do. I’m a sweetheart that way. I mean, this is a man who claims to not like doesn’t like sweets and is married to a blogger who makes mainly sweets. he also doesn’t like wings, which I adore, won’t eat mushrooms… which I adore… hates Bleu Cheese…which I adore…prefers white wine whereas I prefer red… and so on. You seeing a pattern here?

But the worst sin of all? He does NOT like desserts that are creamy. Unless they are ice cream, in which case all bets are off. But desserts like this cheesecake flan or this coconut flan tend to fall completely off of his radar. Some weird justification of “I don’t like the texture”. WHAT!?! What’s not to like? Creamy, silky, smooth… did I mention creamy? When I’m not looking, he probably doesn’t enjoy sunsets, pictures of cute kittens and babies or shows like “Little House On The Prairie” either. It’s all been a lie! A lie, I say! *Sobs and goes to eat his share of the flan*

That said, his not liking the type of dessert I most frequently reach for does have its benefits. I get to eat what would have been his.

This is why I keep him.

This flan is so perfectly seasonal. Pumpkin and spices combine with a subtle hint of maple and all of that is based in a creamy, silky smooth flan.  Add in the sweet caramel topping and it’s Heavenly.

You know the drill…. 🙂

Creamy Pumpkin Maple Flan

  • 1 cup sugar
  • 1/4 cup water
  • 1 1/2 cups heavy cream
  • 1 can sweetened condensed milk (they only come in one size; I believe it is 14 ounces)
  • 8 ounces softened cream cheese
  • 1/4 cup maple sugar (you can find this at any well stocked grocery store. I buy mine at Trader Joes)
  • 1 cup pumpkin puree (canned is fine)
  • 4 eggs
  • 2 egg yolks
  • 1 teaspoon cinnamon
  • 1/2 teaspoon ginger
  • 1/4 teaspoon nutmeg
  • 1/4 teaspoon cloves
  • 1 tablespoon vanilla extract
  1. Preheat the oven to 300 degrees. Start a kettle of water to boiling.
  2. Combine the regular sugar and the water in a small pot. Cook over medium heat, stirring until the sugar is dissolved. When the sugar is dissolved, turn the heat up to a medium high and cook, with NO stirring, until the caramel is a medium brown color, about 10 minutes. Do NOT walk away from this to tend to the kids, vacuum, take a nap, whatever. Stay near it and just work on the rest of the recipe and check it frequently.
  3. When it is ready, pour it onto the bottom of a deep 10 inch round pan that you have placed inside a larger pan. I use a cake pan.
  4. For the flan part,  in a large bowl, combine the cream cheese and maple sugar. Beat well at low speed with a hand mixer. Add in the pumpkin and spices and beat at low speed.  Add in the eggs and the yolks and beat until combined.
  5. Add in the cream and sweetened condensed milk and whisk (trust me… don’t continue to use the beater. Don’t ask how I know these things.) until it is thoroughly combined.
  6. Use a fine mesh strainer and strain this through it into the pan with the caramel. The straining isn’t absolutely necessary but it prevents you from having any fibrous parts in the custard and makes it much smoother.
  7. Carefully place the whole pan into the 300 degree oven. Carefully (again), pour the boiling water into the large pan surrounding the flan, being careful not to splash it into the flan itself. You want it to come about halfway up the side of the cake pan.
  8. Bake for about 60 to 70 minutes or until a butter knife inserted off center comes out clean. The center should still be jiggly, but not loose; rather like when you wiggle set jello.
  9. Cool for about 60 minutes, then put in the fridge to chill for at least 2 hours or so.
  10. Place a large plate over the flan and invert it onto the plate.
  11. Serve. Sing my praises.

Copyright Notice: From Cupcakes To Caviar images and original content are copyright protected. Please do not publish these materials anywhere without prior permission.

Rich And Creamy Baked Lemon Custard

Rich & Creamy Baked Lemon Custard

Rich & Creamy Baked Lemon Custard

I thought I would give all of you a break today from the now constant inundation of pumpkin this, salted caramel apple that, maple whatever and bring you something rich and decadent, yet bright and refreshing and anything but heavy. Lemon goes with any season and custard still has a bit of a cold weather feel to it, so this works in all worlds. Plus, it’s so darn good!

I remember when my brother, sister and I were kids, we used to make homemade custard. or at least we thought we were making homemade custard. I’m not quite sure what it really was. Steve was the first to try, I believe. And to his youthful credit, it was….edible. If nothing else, it was sweet and as I’ve mentioned before, that was about all that mattered to us as kids. If it had sugar, we ate it. I shudder when I recall us eating *gags a bit* peanut butter sandwiches in which one of the bread slices was heavily coated with sugar when there was no jelly in the house.

But the custard…ahh yes, the custard. Overly eggy with strands of scrambled like eggs throughout, usually somewhat weepy and curdled from overcooking and with no real flavor but eggs and sugar. But we ate it.

To this day though, I absolutely love custard of any type. Vanilla flan style, chocolate, citrus like this one; you name it, if it has cream in it, I’ll eat it 😀

This one is incredibly easy and fairly quick as baked desserts go. You can also eat it while still warm if you want. I personally prefer custard chilled because I love the texture it gets when cold, but the choice is yours. This is rich, creamy and bright with the fresh taste of lemon; a perfect dessert when you want something easy and non chocolate.

You know the drill… 🙂

Have I mentioned today how much I lurves all of you for coming to my little corner of the world? <3

Rich And Creamy Baked Lemon Custard

  • 2 cup heavy cream
  • 3 large eggs
  • 4 egg yolks (save those whites and make some meringue cookies or something!)
  • 1/8 teaspoon salt
  • 1 cup sugar
  • 1 1/2 teaspoons vanilla extract
  • 1/2 cup lemon juice
  • 1 1/2 tablespoons lemon zest
  1. Preheat the oven to 300 degrees. Very lightly butter 5 8 ounce ramekins and place them inside a deep baking pan. Start a pot or kettle of water to boiling
  2. Warm the cream in the microwave just until warm to the touch, not hot, about 1 minute.
  3. Using a mixer on medium speed (you can also just whisk this, but it takes longer), beat together the eggs, egg yolks, sugar, salt and vanilla until it is thick and pale colored, about 3 to 5 minutes.
  4. Whisk or beat (low speed) the cream into the egg mixture, beating constantly. Add in the lemon juice and lemon zest and beat well.
  5. Divide the mixture between the prepared ramekins. Set the pan on the middle rack of the oven and carefully pour the boiling water into the pan holding the ramekins, making sure not to let it splash into the ramekins. Carefully push the pan in and bake the custard at 300 for about 30 minutes. You want it mostly set but the center third of them should still be a tiny bit jiggly looking. It will set more as it cools.
  6. Serve warm (just above room temp) or chill.

Copyright Notice: From Cupcakes To Caviar images and original content are copyright protected. Please do not publish these materials anywhere without prior permission.

Key Lime Pie Dip

Key Lime Pie Dip

Key Lime Pie Dip


I say yet again…. weird, weird weather. May in Kentucky and it’s in the mid 50’s and we had to turn the heat on last night! Some of our area got frost and it attacked my Basil the other night and killed off the tips of all the leaves. I am pretty sure we can give up on the idea of fruit from our trees AGAIN this year due to the weather. Le Sigh.

But I will (she says yet again) NOT give up on warm weather cooking and eating. I have always said that I was a person who didn’t cook according to the season, that if I wanted pumpkin in July, I was having pumpkin in July and enjoying it. And while this is true, I am coming to realize that even I, much as I hate to be normal :-p, do tend to cook according to the seasons. Maybe it’s genetically hardwired in us to do that, since we were all hunter-gatherers at one time. We have the luxury of doing what we want cooking wise, because we were blessed to be born into bodies living in developed countries, but there is still something that makes us want to use that fresh stuff while it’s there.

Ok, enough waxing philosophical. Let’s get to the food.

I have a thing for limes. I absolutely HATE fake lime flavor, such as that found in candy, but I love the flavor and scent of real lime. When I use it, I’m convinced it’s my favorite citrus. But then again, I do the same when I use lemons or oranges hehe.

This dip is awesome. My husband, who has some sort of sensory issue with creamy foods, couldn’t stop eating it. He totally loved it. I did also of course…. it’s lime, it’s rich, it’s creamy and I’m me; need I say more? 😀 The kids loved it too, so this was a hit all around. This is simple to make. Just beat, beat more, spoon into a serving bowl and there ya go. You can serve this with whatever dippers you want; I used vanilla wafers, graham crackers and sliced up marshmallows. Let it sit out at room temp for a bit to soften. It’s fine cold but harder to scoop up.

You know the drill…. 🙂


Side Note! Don’t forget to go to the post preceding this one (GIVEAWAY) and enter my giveaway! You could win a 6 Speed Hamilton Beach Stand Mixer AND a 6 Speed Hamilton Beach Hand Mixer! Just for entering. I don’t have a bazillion entries so your chances are actually pretty good of winning!

Key Lime Pie Dip

  • 8 ounces cream cheese, room temp
  • 6 tablespoons unsalted butter, room temp
  • zest of 5 key limes (or 2 regular; about 2 tablespoons zest)
  • 2 tablespoons key lime juice (or 3 tablespoons regular lime juice)
  • 1/2 teaspoon lime oil (optional, but adds a nice zing)
  • 1/2 teaspoon lemon lime kool-aid (again; optional, but it adds the cute green color and a good amount of tang and c’mon, it costs 20 cents at wal mart :-p )
  • 1 1/2 cups powdered sugar
  • 1/2 cup graham cracker crumbs


  1. In a medium bowl, combine the cream cheese and butter. Beat at medium speed until it is smooth and creamy.
  2. Add in the zest, juice, lime oil and kool aid. Beat well.
  3. Add the powdered sugar and beat at low speed until mixture is fluffy.
  4. Spoon into a serving bowl. Top with the graham cracker crumbs. Chill for about 45 minutes minimum. It can be chilled longer, but make sure you let it sit out for 30 minutes or so just to soften a little bit.
  5. Serve with dippers of choice.

Copyright Notice: From Cupcakes To Caviar images and original content are copyright protected. Please do not publish these materials anywhere without prior permission


Chocolate Malted Milk Mousse

Chocolate Malted Milk Mousse

Chocolate Malted Milk Mousse


When I was 13, I worked at a small ice cream shack (shack is a fairly fitting word, too) called “Frosty Hut”, also called Frosty Slut, but we won’t go there. I worked there for a dollar an hour. I had had to get a work permit to even work at that age and I guess the owner, Mr. A, figured a buck an hour was sufficient even though minimum wage was $3.35. One of the perks of the job was, of course, the free ice cream. Since this was privately owned and we were paid slave wages, there was no “you have a 30 minute lunch break and can eat one small thing from the menu” rule. Nope, my sister and I (she also worked there…we were the full line up of employees that Summer) ate like pigs lol. One of my favorite things to do was work my shift, then make 2 of what were called Boston Shakes, one for me and one for my brother Steve. These were HUGE shakes that also had a about 73 pints of soft serve on top of them. I have absolutely NO idea how I didn’t weigh 500 pounds by the end of that Summer. Mine was the same each time; a chocolate malt with extra malt syrup. The flavor is still a favorite. I don’t drink shakes often but when I go to say, Sonic and get one, it’s still chocolate malt with extra malt. I’m a creature of habit 🙂

Since I also love Whoppers Candy; they are malt flavored after all, I was tickled to find this recipe in the same Better Home And Garden Cookbook/magazine (it’s one of those they keep on the shelves for a few months, then retire) that my last post came from. I am slowly working my way through all the recipes in there that I have tabbed. It was a good find; a cookbook that you actually want to make multiple recipes from. I have about a dozen pages tabbed and plan to get to them all.

This is a perfect Spring dessert; it’s rich yet light and not overwhelming. Mind you, it would also be great for a Christmas dessert or heck, any time of year lol. I don’t want to limit it. But Easter is tomorrow and if you still need just one more dessert, this would work wonderfully. It can be ready to go in less than 90 minutes and that includes chilling time. The mousse itself is sweet and creamy with a nice malted milk flavor. The topping is only very lightly sweetened and a wonderful foil to the sweeter mousse. And the crushed malted milk balls in the mousse and the topping add a nice light crunch.

You know the drill…. 🙂

Chocolate Malted Milk Mousse

  • 2/3 cup malted milk balls (plus extra for garnishing)
  • 3 cups heavy cream
  • 4 ounces milk chocolate, coarsely chopped
  • 3 ounces bittersweet or semisweet chocolate, coarsely chopped
  • 1/3 cup chocolate malted milk powder (I actually used the plain kind, not the chocolate kind)
  • 2 tablespoons amaretto, chocolate liqueur or cream (I used Kahlua cause I’m just a rebel :-p )
  • 1 1/2 teaspoons vanilla, divided
  • 1 tablespoon unsweetened cocoa powder
  • 1 tablespoon sugar (this is for the topping. Don’t be tempted to add more sugar. The small amount of sweetening is excellent against the sweet mousse)
  1. Put the malted milk balls in a large bag and crush them using a rolling pin…or a hammer…or a neighbors head, whatever works for you; no judgment here. Set aside.
  2. In a small saucepot, combine the chopped chocolates and 1/4 cup of the cream. Over low heat, stirring constantly, heat until all the chocolate is melted and the mixture is smooth. Add 1 teaspoon of the vanilla, the malted milk powder and the liqueur (or cream) Cool to room temp. Stirring speeds this up.
  3. Meanwhile, in a large bowl, whip 1 3/4 cup of the cream until stiff peaks form. Stir 1/2 cup of the cream into the cooled chocolate mixture. gently fold the rest of the cream into the chocolate. Then gently fold in the crushed malted milk balls. Spoon the mousse into either small dessert glasses or a 1.5 to 2 quart glass serving bowl. Cover and chill for one hour at least and up to 24 hours.
  4. When ready to serve, whip the remaining one cup cream with 1/2 teaspoon of vanilla, 1 tablespoon of sugar and the 1 tablespoon of cocoa powder until stiff peaks form. Spoon the topping onto the mousse and garnish with more malted milk balls.

Copyright Notice: From Cupcakes To Caviar images and original content are copyright protected. Please do not publish these materials anywhere without prior permission.


Cherry Garcia Pudding

Cherry Garcia Pudding


I love ice cream. It’s my go to treat on nights when I allow myself dessert. Well, sometimes I’ll mix it up with something else, but 99% of the time, it will still resemble ice cream in that it will have a creamy texture. I’m one of those people whose downfall is creamy and rich, whether it’s something sweet or something savory. Creamy is my friend. But Ben & Jerry are even better friends. Have any of you tried their new “Core” flavors? I tried the salted caramel one (of course) and I have to admit it, I was rather disappointed. It was….boring. The best part was the little chunks of Blondie but even that wasn’t enough to make it worth the calories.
I DO however, love many of their other flavors. My favorite will always be Phish Food. It used to be that running a close second was Cherry Garcia, but now for strangely personal reasons, I don’t eat it anymore. It brings back memories I prefer to forget because they make me mentally queasy; one of those “omg, did I really get involved with someone that disgusting” memories. Yep… from an ice cream lol. I’m strange that way. Doesn’t take much; a smell, a flavor, a sound and I’m transported to other times, some good, some bad.
But I still love the flavor combo, that creamy texture, the cherries, the chocolate and that slight almondy background. I eat other brands of ice cream with it and have *gasp* even found brands that are better than Ben & Jerry’s. But I also love a dessert I began making about 9 years ago that has the same flavor profile. I usually call it “Cherry Garcia Wanna-Be” mousse. But for the sake of brevity, Cherry Garcia Pudding works also lol.

This is a cinch to make. The most time consuming part is chopping the chocolate and cherries and that’s still pretty quick if you have a decent knife. You can have this knocked out and chilling inside of 20 minutes. Then you just let it chill and serve it. This is oh so good. Creamy and rich with all those lovely flavors meshing into puddingish (yes, that too is now a word) perfection.

You know the drill…. git to cooking 🙂

Cherry Garcia Pudding


  • 8 ounces semi sweet chocolate, finely chopped
  • 16 ounce jar Maraschino Cherries, drained, syrup reserved, cherries coarsely chopped (redrain and pat dry the cherries after chopping as they will let off more liquid)
  • 1 can sweetened condensed milk
  • 1 tablespoon lemon juice
  • 1  teaspoon vanilla extract
  • 1/2  teaspoon almond extract (I love the almond flavor so I tend to use more)
  • 1 cup heavy cream, whipped
  • 1 8 ounce container Cool Whip (you can sub sweetened whipped cream, but this is one of those rare cases where the flavor and texture of cool whip works)
  1. In a large bowl, on low speed, beat together the sweetened condensed milk, 3 tablespoons of the maraschino cherry juice (You don’t need any more of it, but it makes an awesome cherry coke, thus why I said to reserve all of it 😛 ), the lemon juice, vanilla extract and almond extract
  2. Gently fold in the cool whip and whipped cream, then the chopped chocolate and chopped cherries.
  3. Cover, then put the mixture into the fridge and chill until thickened, at least 3 hours.
  4. Pour the filling into individual glasses. You can then lightly cover it with plastic wrap and refrigerate it until ready to serve or serve now. Garnish with some extra cherries and chopped chocolate.

Copyright Notice: From Cupcakes To Caviar images and original content are copyright protected. Please do not publish these materials anywhere without prior permission.