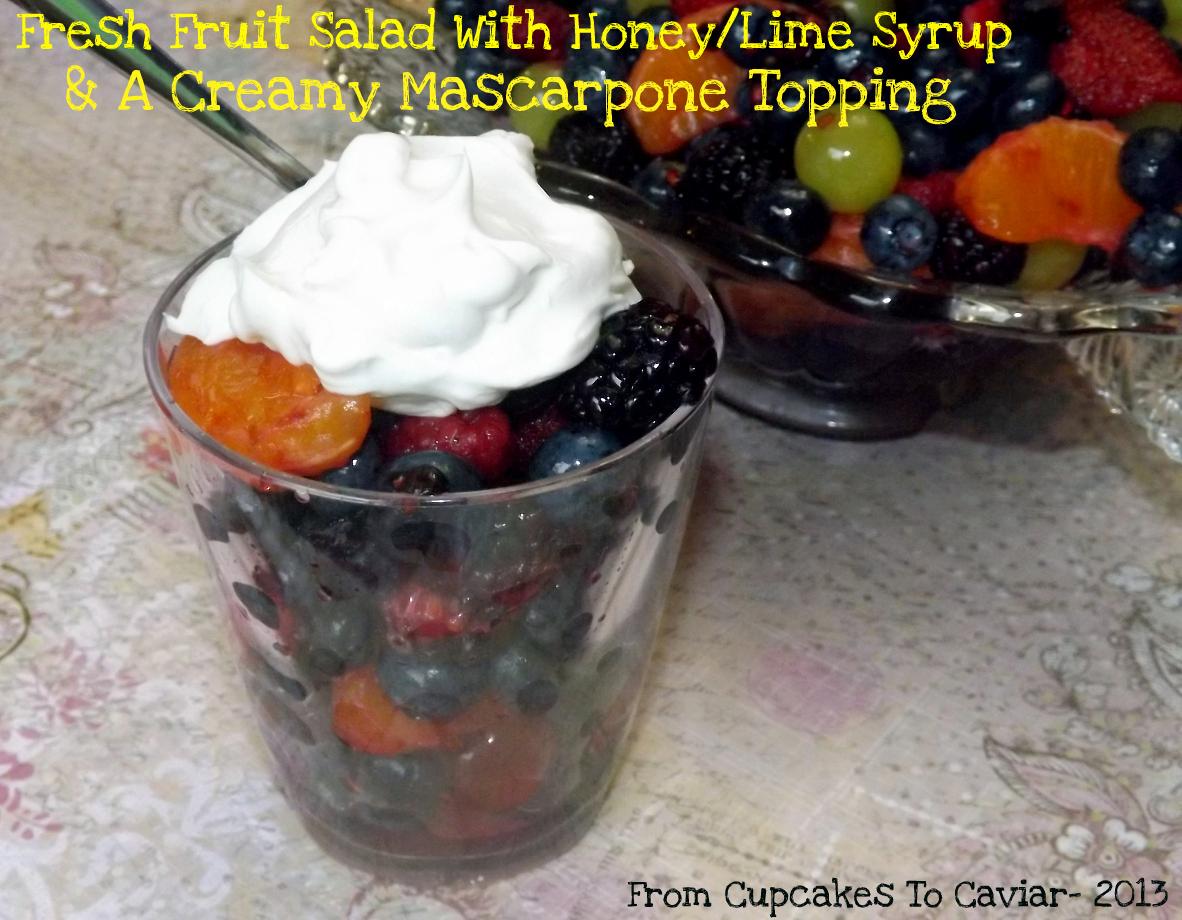
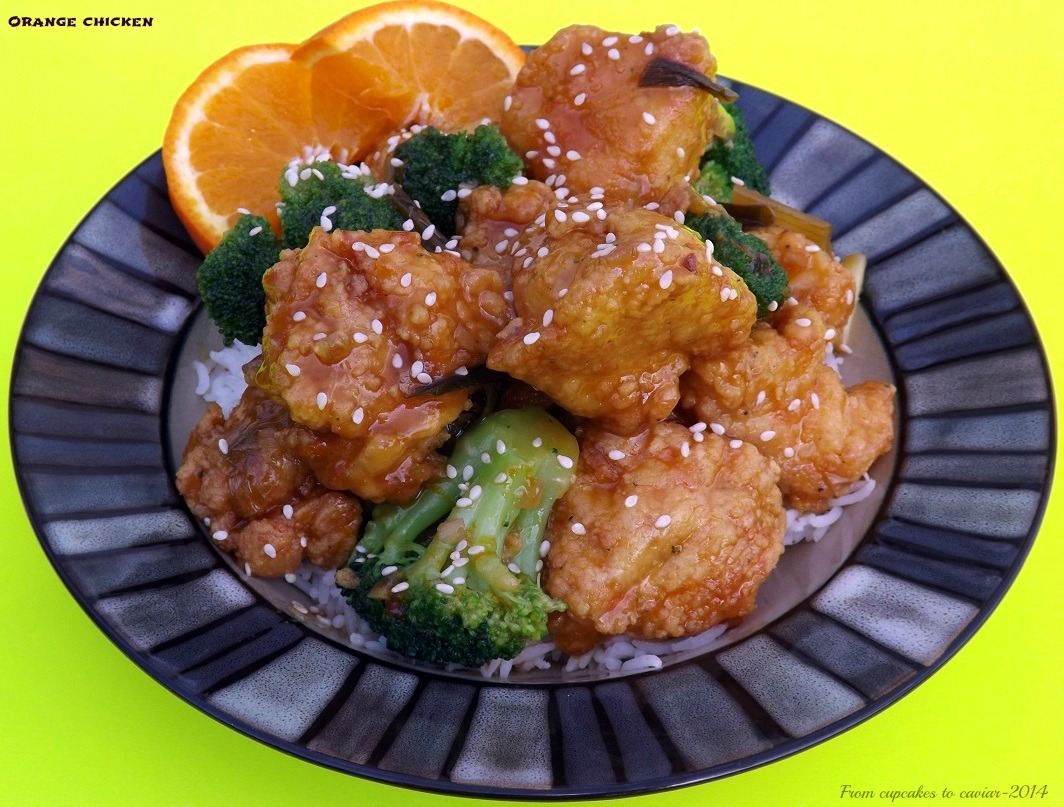
Orange Chicken

Orange Chicken

Orange Chicken


My family and  are still on a quest for a good Chinese restaurant. It has to have a buffet, because, for one, we’re feeding two teenage boys, who are simply walking hormonal stomachs. And two, I tend to be a picky and poor eater and I do better if I have variety. So far though, all the ones we’ve tried range from “omg, this sucks”, to the point where I actually left a bad review for it on Yelp and I’m not the type to do that normally, up to “ehhh, it was ok, but I wouldn’t pay for it again.” We aren’t asking much…. just food that is fresh and not sticking to the warming dishes because it’s older than my husband, food that hasn’t been salted to the point where you could use it as a salt lick to lure animals in when hunting and a decent variety of dishes.

One of my husbands favorite things from a buffet is the Orange Chicken. I’m a General Tsos kind of a gal myself, but I do enjoy a good Orange Chicken. Good being the operative word. And that’s hard to find. So I gave up for now and decided to make it myself. I have to admit, I’m rather glad I did. No, we didn’t have the variety of 17 different kinds of (Americanized) Chinese foods to choose from, but the one dish was fresh, had an amazing orange flavor that was real, not like a cook poured a bottle of orange extract in it to flavor it and I could eat lying in bed watching bad TV. Hey, don’t judge… I wasn’t feeling well yesterday. That I even MADE dinner is to my credit :-p

This is fairly easy to make. As I’ve told you many times before and will many times more, do your prep work ahead of time. have all the ingredients cut and measured, oranges zested and juice squeezed, etc, etc, etc. Doing this saves so much time and hassle. You don’t get to a certain step and suddenly realize “Oh, crap, forgot to do this or that!” and have to put everything on hold. Do. Your. Prep. Work. And you’ll breeze through this.

You know the drill… git to cooking. 🙂

Orange Chicken

  • For chicken-
  • 2 pounds boneless, skinless chicken breasts, chopped into bite sized cubes
  • 1 egg
  • 1 teaspoon salt
  • 1/2 teaspoon ground black pepper
  • 1 tablespoon vegetable oil
  • 1/2 cup cornstarch
  • 1/4 cup flour
  • oil for frying
  • For the sauce-
  • 2 tablespoons minced ginger *
  • 2 cloves garlic, minced
  • 1 1/2 teaspoons red pepper flakes (use less if you prefer less spicy)
  • 1/3 cup thinly sliced green onions
  • 1 tablespoon rice vinegar, divided
  • 1 teaspoon sesame oil
  • 1 teaspoon vegetable oil
  • 1/4 cup warm water combined with a tablespoon cornstarch
  • 1/3 cup soy sauce (low sodium is a good idea if you have it)
  • 1/3 cup sugar
  • zest of 2 large oranges
  • juice of 3 oranges
  • sesame seeds and extra sliced green onion for garnishing
  • rice and broccoli to serve with the chicken
  1. Preheat your oven to 200 degrees.
  2. Combine the cubed chicken with the egg, salt and pepper. Stir well to combine. Dump in the cornstarch and flour and stir to combine. A wooden spoon works well here. Pour enough oil in a medium pot to go up two inches. Heat the oil to 350 degrees, then fry the chicken in batches of about 8 to 10 pieces at a time, until golden brown and cooked through, about 8  minutes. Set onto a paper towel lined oven safe plate or bowl. When all the chicken is cooked, set into the oven to keep warm while you make the sauce.
  3. In a medium saucepot, combine the sesame oil, tablespoon of vegetable oil, garlic, green onions, rice vinegar and ginger. Stir fry over medium high heat until the onion is wilted and everything is fragrant, about 3 minutes.
  4. As that cooks, combine the soy sauce, sugar, orange zest and orange juice in a measuring cup. Add them to the stir fried green onion mixture. Bring to a boil, then pour the water/cornstarch mixture into it. Stir until the mixture comes back to a boil and thickens up, stirring constantly.
  5. Toss the chicken in the sauce mixture (Or serve the side on the side if you have some people who only like a little bit of sauce and others who like more.), and serve with Basmati or Jasmine rice and steamed broccoli.

*NOTE- For an easy way to peel and grate ginger, just get out a spoon and a fork. Use the edge of the spoon to scrape the peel off; so much easier and much less waste. And then lay the peeled part of the ginger down on a small plate, holding the other end with your free hand. Use a fork to scrape across the ginger. It grates it quite nicely and you can use the edge of the fork to mash/slice up any bits that come off too large.

Copyright Notice: From Cupcakes To Caviar images and original content are copyright protected. Please do not publish these materials anywhere without prior permission.


Fresh Fruit Salad With Honey/Lime Syrup & A Creamy Mascarpone Topping

Fresh Fruit Salad With Honey/lime Syrup & A Creamy Mascarpone Topping

Fresh Fruit Salad With Honey/lime Syrup & A Creamy Mascarpone Topping


It’s funny the things that you associate with certain words. Forevermore, the words fruit salad will make me think of a toy guitar my four year old had when he was a toddler. He could press certain buttons on it and it would play snippets of songs, one of them being “Fruit Salad” by The Wiggles (I STILL have no darn idea who The Wiggles are!) Warning… watch this at your own risk. Brain cells WILL melt and leak out of your ears.


That guitar disappeared one day (my theory is that I was sleep walking one night and gleefully broke it into a bazillion pieces and hid the body… I mean, pieces. and I thank God quite often for that unsolved kidnapping, murder, run away… whatever.

But fruit salad like this will only disappear one place… into mah bellah. It is yummy to the max and if you don’t use the mascarpone cream (though why you wouldn’t is beyond me 😛 ) it’s even more or less good for you. I mean… it’s fruit… and limes (which are also a fruit 😛 ) and nice natural honey. Ok, ok, so there’s sugar in there too! Sue me! But seriously, this is a great alternative to a fattening dessert. And it can be made fairly quickly so it’s great for an impromptu bring to work or a bbq dish. If you make it ahead of time, the fruits pick up a lot of flavor from the syrup, but the oranges will also take on a purplish tinge from the berries so if you don’t want that, add the oranges about 30 minutes or so before serving.

You know the drill…

            Fresh Fruit Salad With Honey/Lime Syrup & A Creamy Mascarpone Topping

  • 6 cups fresh mixed berries
  • 1 cup seedless green grapes (obviously, you can use another color but you’ll already have dark berries, thus why I did green grapes for contrast)
  • 2 oranges, sectioned, white pith removed
  • 2/3 cup lime juice
  • zest from 2 limes
  • 2/3 cup honey
  • 1 cup sugar
  • 1/4 cup water
  • 1 8 ounce container mascarpone cheese, room temp
  • 1/2 cup sour cream
  • 1/2 cup sugar
  • 1 teaspoon vanilla extract
  1. In a medium pot, combine the lime juice, lime zest, honey, 1 cup sugar and 1/4 cup water. Bring to a boil over medium high heat, then lower heat and simmer for one minute. Cool completely.
  2. In a large bowl, combine all the fruits. When syrup is cool, pour over the fruits and toss GENTLY. Cover and refrigerate for at least 30 minutes and up to one day.
  3. For mascarpone cream, combine the mascarpone, sour cream, vanilla and 1/2 cup sugar in a medium bowl. Beat at medium speed until smooth and creamy. Keep stored in fridge until ready to use. Using a slotted spoon, spoon the fruit into a serving bowl. Discard (or drink lol) the remaining syrup.
  4. Top each serving with a dollop of the mascarpone cream.

Copyright Notice: From Cupcakes To Caviar images and original content are copyright protected. Please do not publish these materials anywhere without prior permission.


Foodie Phases


Do you ever find yourself going through phases when it comes to eating and/or cooking? I know I do. And I don’t mean Twinkies or Cheetos or chocolate (oh my). Those aren’t phases. Those are needs of life that keep me functioning and breathing and keep many women from eating their young. I mean times when you find yourself cooking (or eating) the same types of food over and over again.

I tend to do this often.

My family cries.

Which means I get to eat all of things I make because they are too busy crying and saying “can’t we PLEASE have something other than dishes made with pickled herring!?’ (don’t ask)

Luckily for all of you, I am NOT going through a pickled herring phase… though talking about it right now has me craving some.

My phase right now is yeast breads. Not quick breads though I love me some Pumpkin Bread or maybe some
Pumpkin Cranberry Bread or some Spiced Brown Sugar Carrot Bread or…. ok, ok, I’ll stop now. Damn. Now I want some of those too. I need to quit talking about food.

Well, back to talking about food now. Yeast breads. Current phase…yada yada yada. Tis my current food “thing” right now however. I am enjoying honing my yeasty skills and playing around with some old recipes. I’ve mentioned before that I love artisan style breads though I still giggle when I realize that what we are all calling artisan most times simply means using grains and ideas that have been around for hundreds of years but fell out of favor to be replaced by mushy soft plastic bagged white bread. Wow… can we say run on sentence?

One style of bread I love is multi grain. I enjoy the flavor, I enjoy the texture from using something other than white flour and I love the chewiness and heartiness of a rustic artisan bread. Now if I could only hone my bread shaping skills cause I suck at that part of it lol. I always end up with these misshapen ovals instead of pretty ones. But that’s ok, they taste good anyway. And this one turned out quite well if I do say so myself. It’s a multi grain wheat bread and I added some dried cranberries to it as well. For a good place to go to get some grains and seeds to add to your breads, try the King Arthur Flour site . I absolutely love their products. My current favorite is the 12 grain artisan bread flavor . It’s a boat load of seeds and grains all mixed up into one tasty bundle and it helps make a good bread fantastic. So go get out some yeast and start baking. This one is chewy, hearty and oh so good with soup or stew.

Multi Grain Wheat & Fruit Bread

  • 1 cup 7 grain uncooked cereal (I use <a href=”http://www.bobsredmill.com/7-grain-hot-cereal.html”>Bobs Red Mill Brand</a>
  • 1/2 cup boiling water
  • 1 package yeast
  • 3 tablespoons sugar
  • 1/4 cup warm water (about 110 degrees is optimal)
  • 3 cups all purpose flour
  • 1 cup whole wheat flour
  • 2 teaspoons salt
  • 4 tablespoons oil
  • 3/4 cup warm water
  • 1 egg yolk
  • 1/2 cup King Arthur 12 grain artisan bread flavor (can use 1/2 cup sunflower seeds instead)
  • 1/2 to 3/4 cup dried cranberries
  1. Combine the 7 grain cereal and boiling water in a large bowl. Let sit for ten minutes.
  2. Dissolve the yeast, 1 teaspoon of the sugar and the 1/4 cup warm water in a measuring cup. Let it stand for about 5 minutes. It should get nice and foamy.
  3. Add the all purpose flour, whole wheat flour, remaining sugar, oil and yeast mixture to the bowl with the cereal.
  4. Mix in the 3/4 cup of warm water, then mix in the egg yolk.
  5. Dump it all onto a LIGHTLY floured board. Add in the 1/2 cup grains (or sunflower seeds) and the cranberries and knead everything together. At first you will have a rough shaggy mess of dough with lots of loose bits and pieces but keep kneading and it will all come together. Knead for about 5 minutes, then put the dough into an oiled bowl, turning the dough to get the top side oiled too.
  6. Cover the bowl loosely with either plastic wrap or a clean dishtowel. Place in a warm spot (I set mine near my wood burning stove…nice and warm) and let rise until it has doubled in bulk.
  7. Punch down and pull dough into 2 parts. Shape each into an oval shaped loaf, place on oiled baking sheets and let rise again until they have doubled in size. While they are rising, preheat your oven to 375 degrees. Bake loaves for about 30 minutes or until loaves are golden brown and sound hollow when tapped.
  8. I should tell you that these will cut better when cooled but we all know that fresh bread never gets a chance to cool, so I won’t bother hehe

Print Friendly and PDF

Psssstttt…. Remember Me?

Greek Yogurt Pumpkin Pie Parfait


Hey there everybody! Did you all have a good Summer? ready for Autumn? Me too. You back there in the corner saying “no, I want it to be 95 degrees still”… please leave. You scare me. 😛

I had to gasp a little bit when I saw that it had been almost 2 months since my last post. Sit back with a hot drink while I try to explain. In a nutshell… life just got a bit overwhelming and I needed to prioritize a little. Those of you who also blog can empathize when I say that at times you get so involved in the blogging world that the real one tends to fade away. And while that can be fun, it also isn’t healthy.

What also isn’t healthy is having a blog known for decadent treats and having to taste test all of it before you post lol. Mind you, I’ve always been good about not eating much of what I made for the blog but it was difficult having it around. The reason being, I was on a personal journey of my own to lose some of my excess weight. Have I succeeded you ask? Well, when I started I was a tight size 16 verging on 18. Now I’m more or less comfortable size 12 (depends on the brand of clothing). Almost 50 pounds of me gone with the wind…or the scale…or the Twinkies. Whichever 😛 Had I kept posting the things I normally made, I’m not positive I could have done this. Now however, I have the confidence to get back to work here.

Will everything I make now be low cal, healthy and boring? Hell no! I will still be posting decadent treats full of fat and calories. But… I will also be posting things that taste great but won’t make you need to pull out your fat girl pants.

What I am coming back with today is a mix of the two. Like I said up top, I’m ready for Autumn. To me, Autumn means pumpkin. Then I have a side of pumpkin and follow it up with some pumpkin to make it a nice rounded meal. 😀 Yeah, I kinda like pumpkin. I also like fitting into those size twelves. So that means that the decadent pumpkin treats have to be doled out carefully. Mind you, this isn’t exactly low cal. But neither is it a slice of pumpkin pie covered in home made whipped cream. And there is actually nutritional value in this. Go figure huh? Me… posting something semi good for you.

This also tastes amazing. It will take care of that pumpkin pie craving quite nicely at about 210 calories per serving. It’s also rich, creamy and decadent but made with Greek yogurt. I have this showing as one parfait but in truth that’s because I had no small glasses. This is easily enough for two people (thus the 210 calories). So go get some yogurt and open up a can of pumpkin. I think you’re going to like this.

Greek Yogurt Pumpkin Pie Parfait

  • 1 6 ounce carton vanilla Greek yogurt
  • 1 tablespoon brown sugar
  • 3 tablespoons canned pumpkin (NOT pie filling)
  • 1/3 cup granola (just use your favorite)
  • 3 tablespoons + one teaspoon light  non dairy whipped topping
  • 1/2 teaspoon cinnamon
  • 1/8 teaspoon ginger
  • 1/8 teaspoon cloves
  • 1/8 teaspoon nutmeg
  1. In a small bowl, combine the yogurt, brown sugar, pumpkin and 3 tablespoons of whipped topping by folding them together gently. Fold in the spices.
  2. In 1 regular sized or 2 small parfait glasses (or any glass…or bowl…or dog dish; up to you) sprinkle down half of the granola. Top with half the yogurt mixture. Top with more granola, holding back some for garnish if desired. Top with the remaining yogurt. Garnish with the remaining granola, the teaspoon of whipped topping and some cinnamon. Refrigerate for about an hour to soften up the granola.
  3. Dive in
  4. Put away your fat girl pants.

Print Friendly and PDF

// ]]>