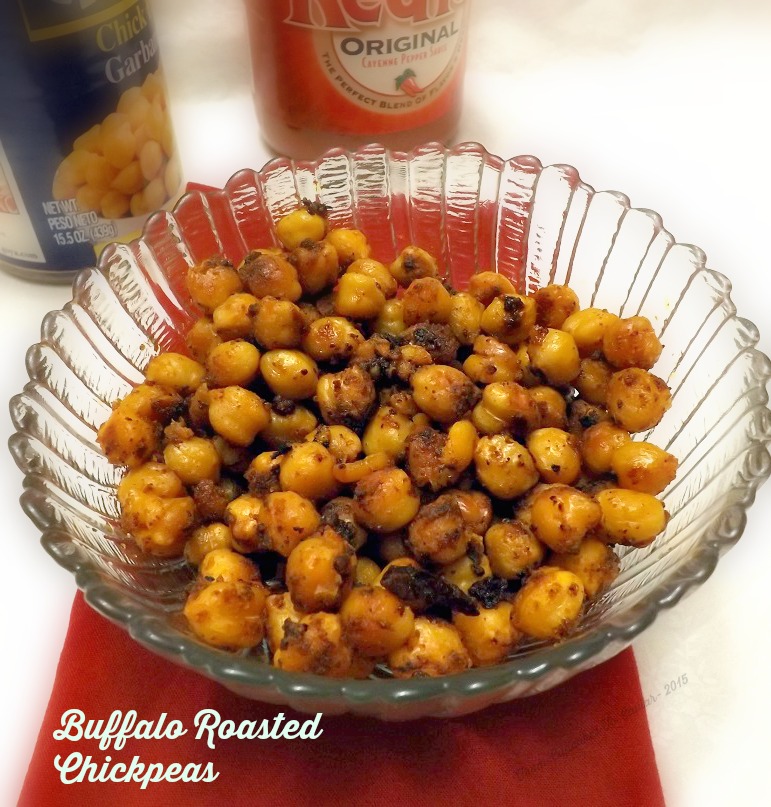
Buffalo Roasted Chickpeas

Hey everybody! Time for another month of Blogger Clue. You remember… it’s a group I’m a part of on Facebook where we peruse the blogs of one other member in the group and pick a recipe from their blog; one that fits a certain theme. This months theme was “Red”. I mean, Valentines Day and all; makes sense, huh?
I was having a hard time finding something to fit the theme on the blog I was given, which was Lemon And Anchovies run by a lovely lady named Jean. Jean’s blog is wonderful; lots of great recipes I wanted to try… just not many with red, lol. There was a gorgeous raspberry tart in her blog, but I couldn’t afford the berries right now and I will try that one in Spring when berries aren’t as high as a mortgage payment and aren’t shipped from another planet somewhere in a different solar system..
But lookee what I found! I know, chickpeas aren’t red, but these are Buffalo Roasted Chickpeas and anything buffalo style is red, right? Of course right :-p Other than in hummus, it was only fairly recently that I started using chickpeas in things. I may be weird, but to me, they taste almost exactly like boiled peanuts. Since I love boiled peanuts, that means I also love them. And they are, nutritionally, a wonderful source of protein and fiber. But who cares about nutrition. They taste good. 😀 I’ve always loved buffalo wings. I have been known to make a complete glutton of myself with them. We won’t talk about the time my son Cameron and I had a wing eating contest at Hooters once. We’ll just leave it at I won by ONE wing.
But since I don’t want to weigh 500 pounds, I have to find alternate buffalo fixes. These fit the bill quite nicely. A bit spicy, a bit garlicky and with a nice crunch. I was out of olive oil, so I used all butter with this recipe. I think it worked well, as butter is what is usually used in wings. It made it a bit less healthy, but… ummmm… this is me. I also used a touch of onion powder and I increased the oven temp to 425. Jean mentioned that hers didn’t get as crispy as she’d like so I thought a slight jump in temp might take care of that. I think my theory may have been right, because these were wonderfully crunchy.
You know the drill…
Buffalo Roasted Chickpeas
(My changes in parentheses)
- 2 15 ounce cans chickpeas ,drained, rinsed and dried well.
- 1 teaspoon melted butter (I used 1 1/2 tablespoons butter and no olive oil)
- 1 tablespoon olive oil
- 1 teaspoon granulated garlic (garlic powder not garlic salt)
- (1/4 teaspoon onion powder)
- Pinch salt
- 4½ tablespoons Frank’s Red Hot Sauce (or your favorite hot sauce)
- Preheat oven to 400 (425 is what I did). Combine all the ingredients in a small bowl; toss to coat.
- Lay in a single layer in a pan and bake for 40 to 45 (only took 30 in a 425 oven) minutes, until browned and crispy.
- Hide them from everyone else and eat them all.
- Go to Jeans blog and tell her she’s wonderful.
Here are all the participants in this months Blogger C.L.U.E. Go check out what they made. Somewhere in there you’ll find one that made a recipe form little old me. Be scared for them. Be very scared.
Copyright Notice: From Cupcakes To Caviar images and original content are copyright protected. Please do not publish these materials anywhere without prior permission.
![]()
Participating Bloggers:
- Bacon & Cheddar Savory Bread Pudding Bites by Lisa from Authentic Suburban Gourmet
- Banana Cranberry White Chocolate Muffins by Aly from Cooking in Stilettos
- Blood Orange Mojito by Anna from Anna Dishes
- Buffalo Roasted Chickpeas by Janet from Cupcakes to Caviar
- Cherry Almond Coconut Bars by Jean from Lemons and Anchovies
- Dark Chocolate Pomegranate Bark by Ramona from Curry and Comfort
- Garlicky Roasted Tomatoes by Azmina from Lawyer Loves Lunch
- Love Potion #9 w/ Raspberry Chambord Ice Cubes by Christy from Confessions of a Culinary Diva
- Madam Wong’s Pizza Rolls by Kelli from Kelli’s Kitchen
- Negroni by Kate from Kate’s Kitchen
- Paloma Naranjada Cocktail by Stacy from Food Lust People Love
- Pomegranate-Lime Granita by Debra from Eliot’s Eats
- Raspberry Amaretto Bundt Cake by Liz from That Skinny Chick Can Bake
- Raspberry-Strawberry Puff Pancake by Alice from A Mama, Baby and Shar-pei in the Kitchen
- Red-Hot Currant-Glazed Pork Chops by Stacy from Food Lust People Love
- Red Velvet Cupcakes by Lea Ann from Cooking on the Ranch
- Roasted Asparagus by Kim from Liv Life
- Strawberry Chia Jam w/ Chia Seed Pancakes by Heather from girlichef
- Strawberry Vanilla Scones by Christiane from Taking on Magazines
- Tomato Herb Compound Butter by Wendy from A Day in the Life on the Farm