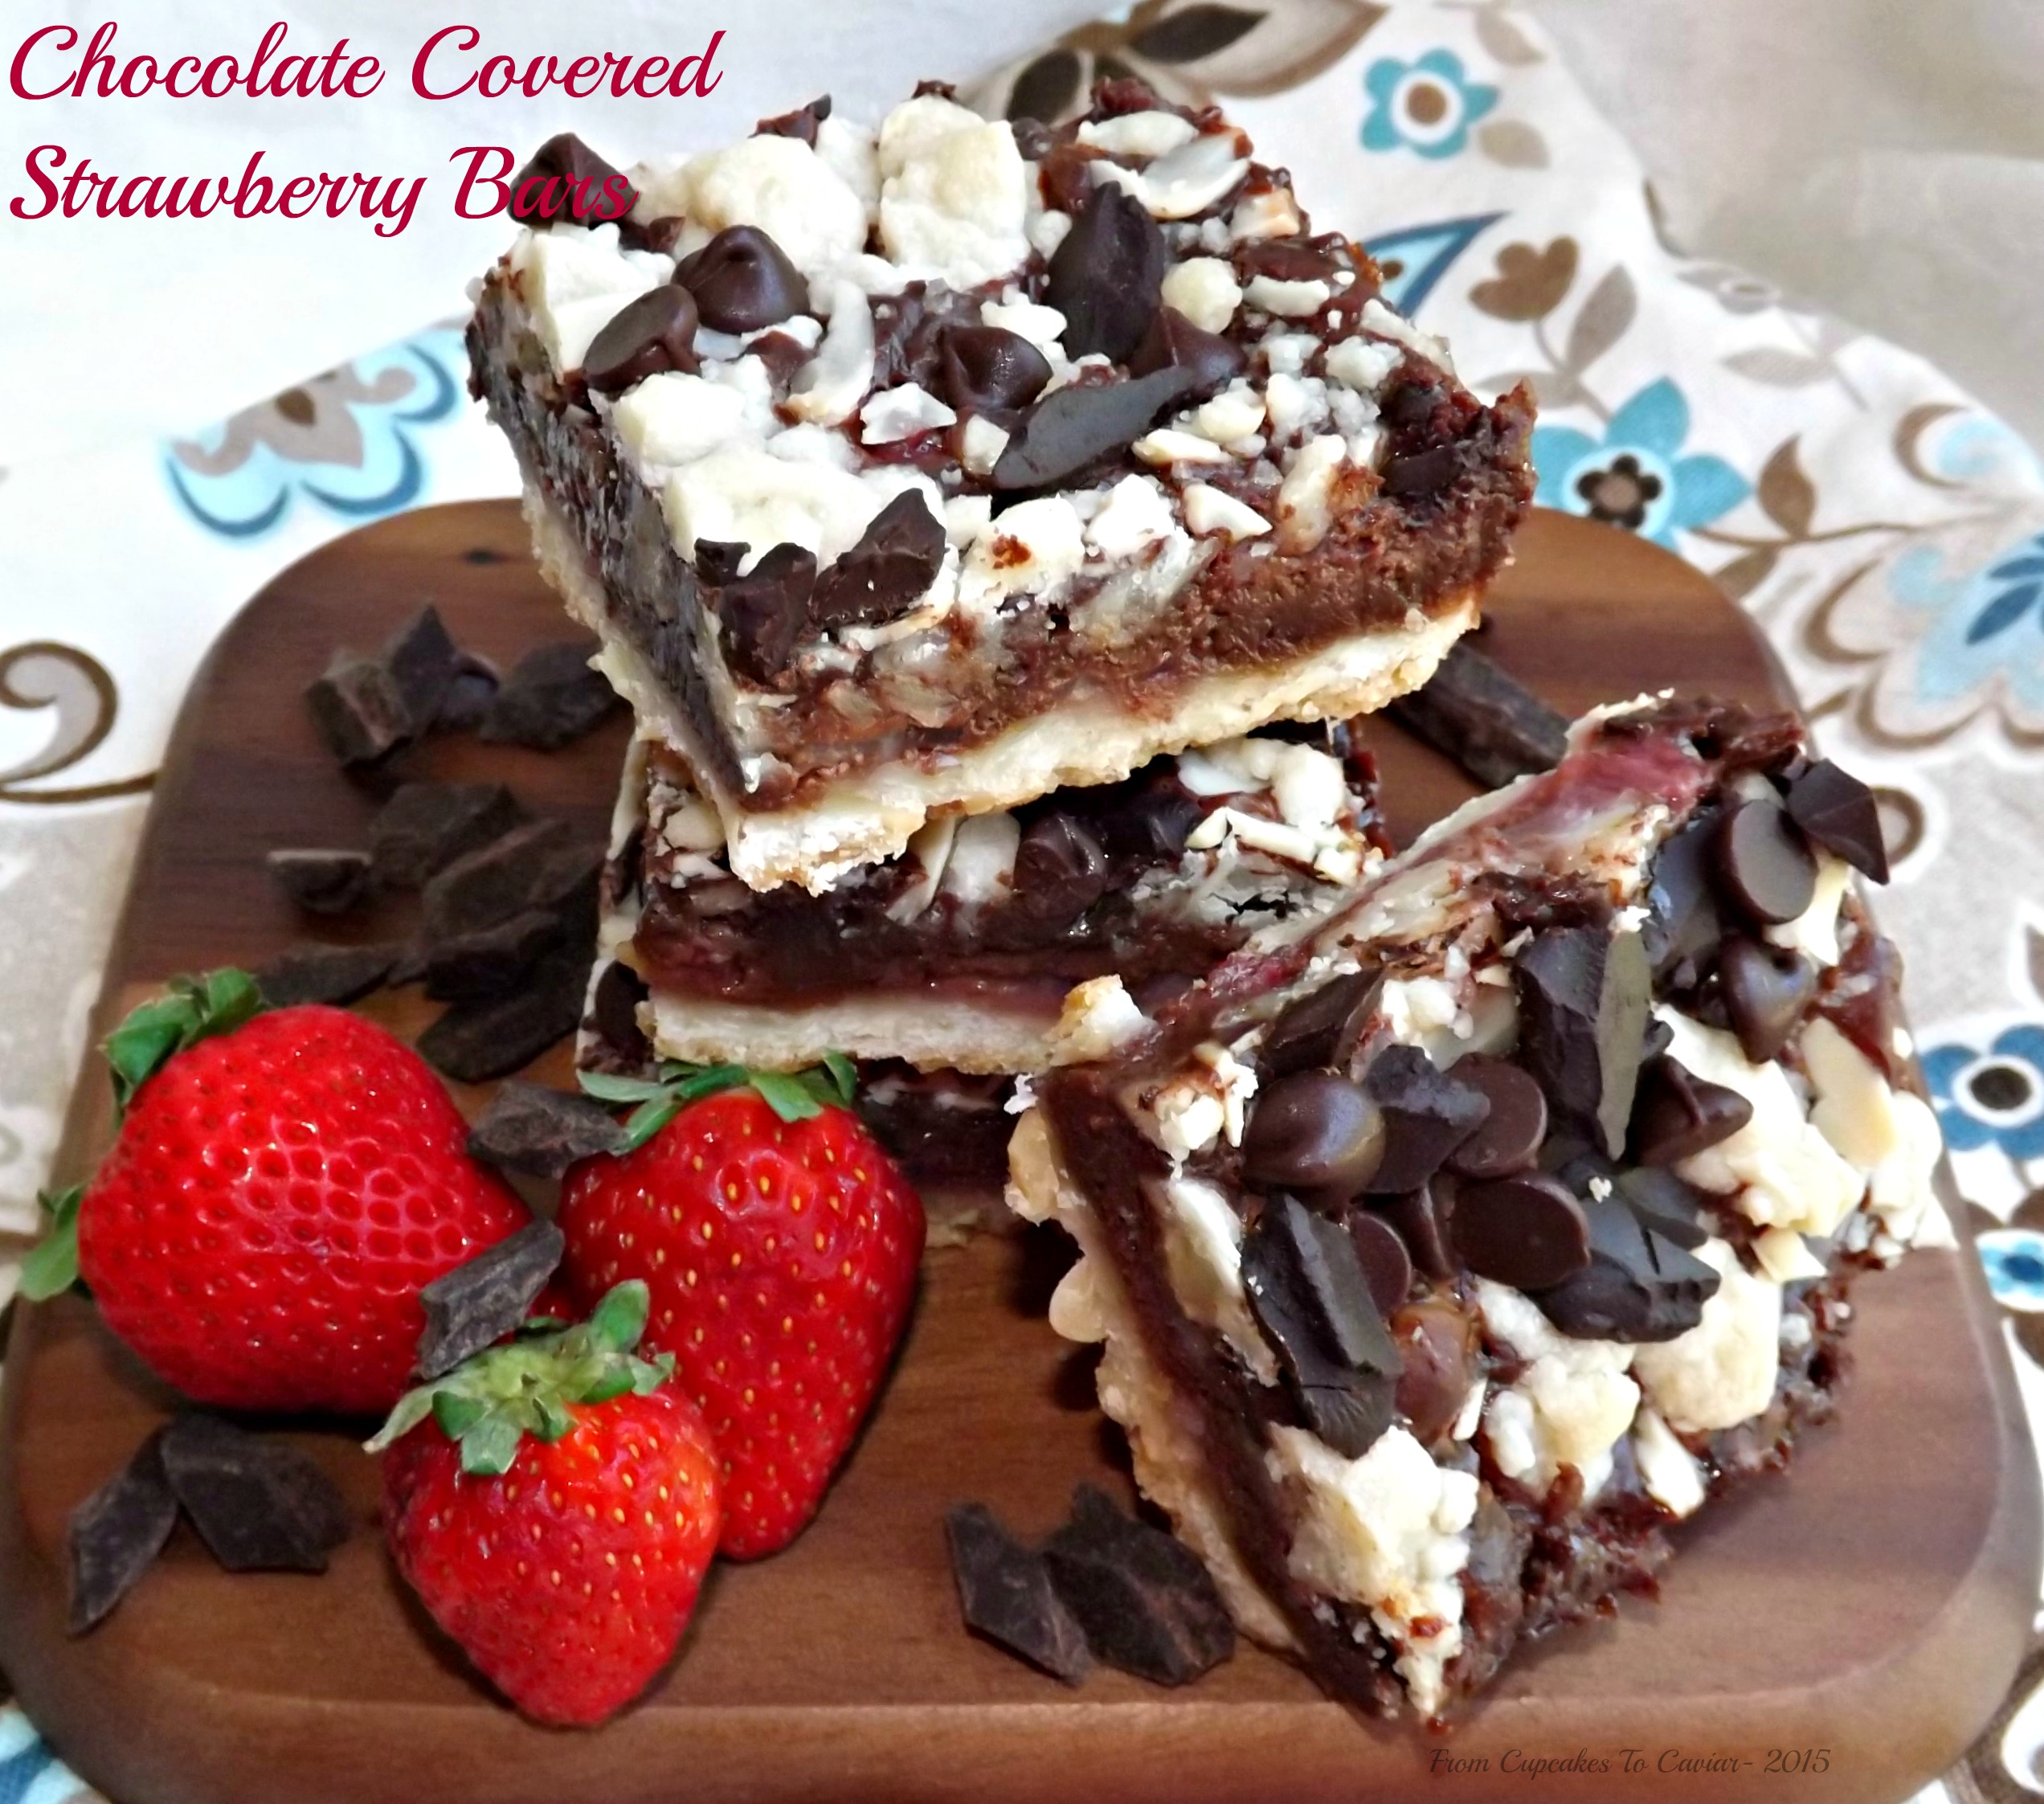
Chocolate Covered Strawberry Bars

I am constantly amazed at how bad my photography skills were a few years ago. I’m no prize now, but at least I don’t cringe (most of the time) when I see my pictures. And I am constantly amazed that I make some things and then do the whole blogger thing of not making the it again because if I do that, I can’t use it in the blog. Totally silly of those of us who blog because in doing that, as we miss out on eating the most delicious things more than once. I haven’t made these bars since the first time I did in 2011. I have no idea why I have never made them again because, dang, these are awesome! It all comes down to, I think, what I said about how when you’re a blogger, you tend to not make the same things twice because if you do, it’s no longer blog fodder :-p
I made these a bit differently than the first time. I added more flavor to the crust, a bit to the filling and I used less chocolate chips on top, because, my God, what was I thinking last time with the amount of chips on there?! It’s a chocolate filling, for pete’s sake. it doesn’t needed a covering of chocolate thick enough to put a herd of elephants into a diabetic coma. So I cut it down. Now only one or two elephants are in danger of that coma.
These are fantastic pot luck or church supper fare; rich enough to be decadent yet not time consuming in the least. But once you try a bite, suddenly, you’ll forget to take the plate with you where ever you need to go. Instead, you’ll be that person hiding in the closet from your kids so that you can eat these in peace. Wait. I’m not the only one who does that, am I?
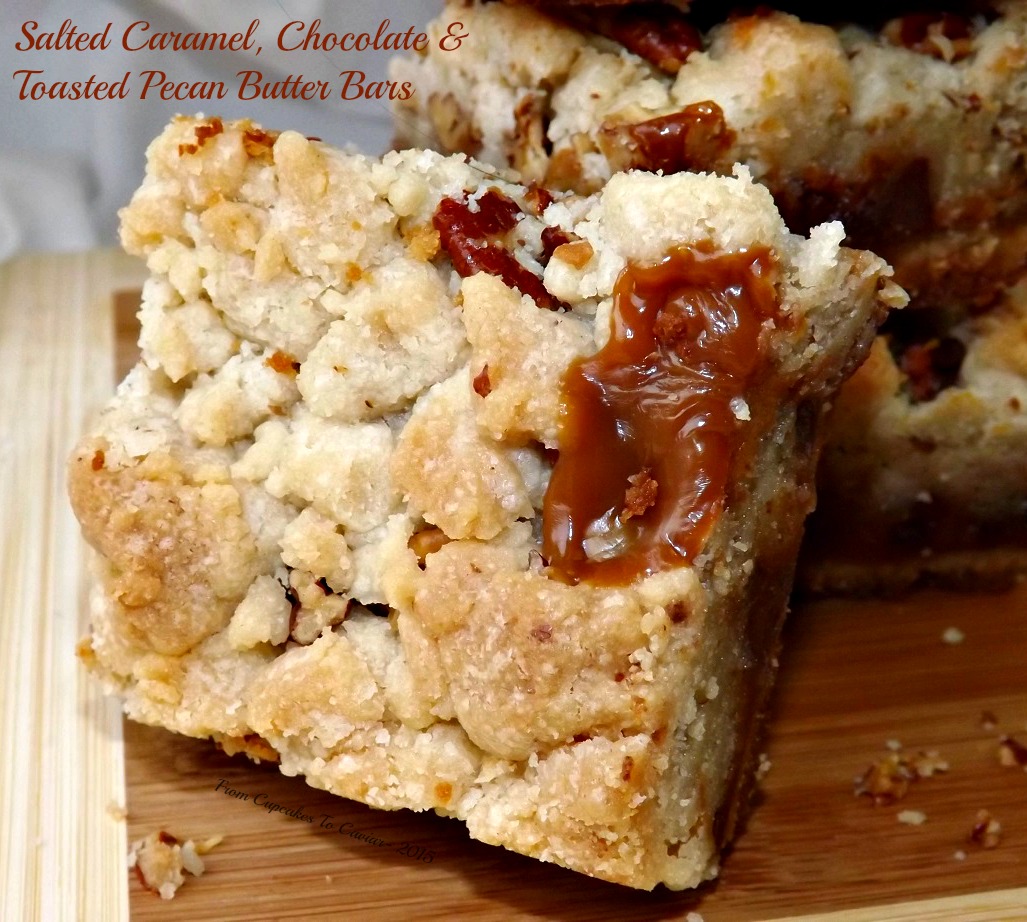
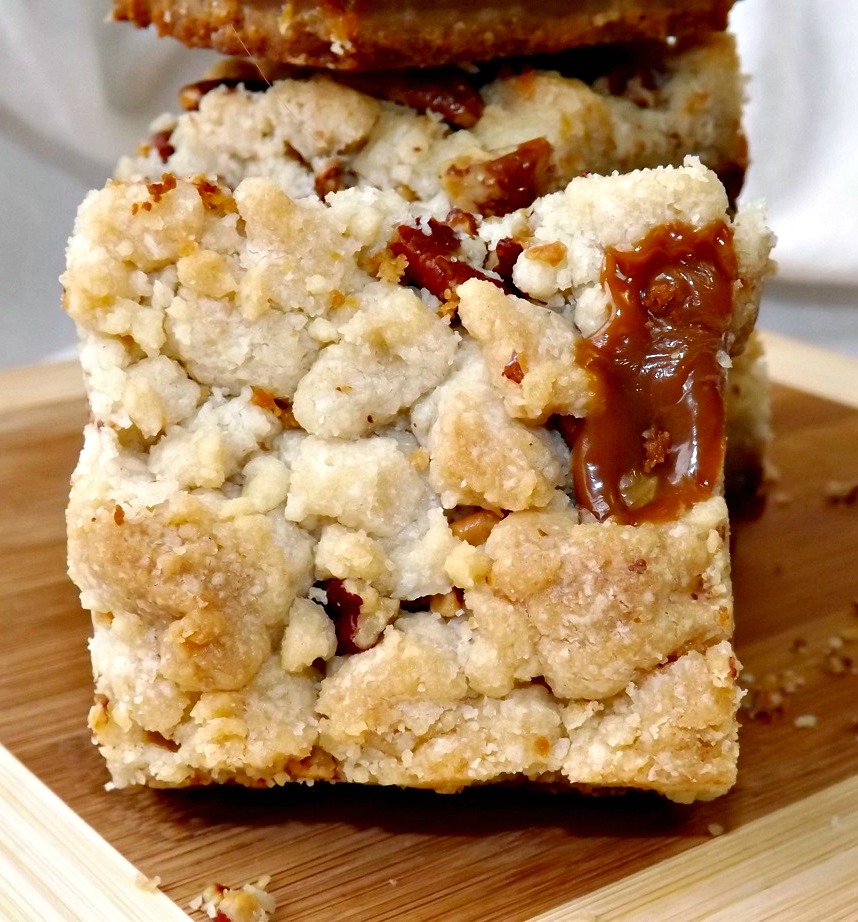
The crust for these are wonderfully crumbly to the bite, but not when you cut it. Then you have a layer of tangy sweetened berries, covered with a creamy chocolate filling, then crumbs on top. What’s not to love? Berries, chocolate, creamy and crumbs. 😀
You know the drill…
Chocolate Covered Strawberry Bars
- CRUST-
- 1 cup softened butter (2 sticks)
- 2 cups flour
- 2/3 cup powdered sugar
- 1 teaspoon vanilla extract
- 1/2 teaspoon almond extract
- 1 cup slivered toasted almonds
- FILLING-
- 1 lb container fresh strawberries, capped and thinly sliced
- 1/2 cup strawberry preserves
- 1 14 ounce can sweetened condensed milk
- 1 1/2 cups chocolate chips
- 1 teaspoon vanilla extract
- 1 teaspoon almond extract
- Preheat oven to 350 degrees.
- Lightly grease a 13×9 inch pan. Line with foil and grease the foil or spray with cooking spray.
- In a large bowl, combine flour, butter and powdered sugar. Sprinkle with the extracts. Use a pastry blender to cut the butter into the flour and sugar until you have pea sized crumbs. Fold in the slivered almonds
- Pat 2 cups of the crumb mixture into the bottom of the greased pan. Set the rest aside.
- Bake the crust for ten minutes or until a very light golden brown around the edges.
- Meanwhile, gently fold your sliced strawberries together with the preserves.
- In a small bowl, mix one cup of chocolate chips with the sweetened condensed milk and extracts and microwave on high in 30 seconds increments, stirring after each one, until the chocolate is melted and the mixture is smooth.
- Carefully spread the strawberry mixture on top of the hot crust. Then pour the chocolate/milk mix on top of the berries and spread. Sprinkle that with the reserved crumbs and the rest of the chocolate chips.
- Bake at 350 for about 30 to 35 minutes or until the center is set.
- Let cool, preferably in the fridge for a couple of hours. Use the foil to lift the bars out of the pan to a large cutting board. Use a knife dipped in hot water then wiped dry to cut the bars into serving sized pieces.
Copyright Notice: From Cupcakes To Caviar images and original content are copyright protected. Please do not publish these materials anywhere without prior permission.