Oatmeal Raisinet Cookies

Oatmeal Raisinet Cookies

I feel sorry for my husband at times. Why? He’s type 2 diabetic but man, does he love his sweets. Though he would deny that to his death bed. He also loves his savory snacks mind you but when I bake, he is all over it. There was a time I would buy him sugar free treats from the store, but he has come to realize that he prefers a few of the ‘real thing” as opposed to more of the artificial ones. He gets jealous as can be of me (in a loving way of course lol) because, even though I’m overweight (perils of food blogging) I have great blood sugar readings. If anything, I run too low. He also hates me for my low blood pressure too hehe. I am one weird fat woman physically. :-p

One of the things he loves is cookies. Non sweet lover or not (yeah, right. You know better, darlin’), he can eat his weight in cookies. Especially if it’s chocolate chip or oatmeal raisin. So I have had to make sure I have good recipes for both to keep the man supplied. The things we do for love, huh? *Bats eyes in my husbands direction and attempts to look flirtatious* But hey, the man willingly makes me cups of tea whenever I ask and sometimes, I don’t even have to ask. PLUS, he is the one who gets our 16 year old up for school in the mornings. He’s pretty awesome.

Ok, I’m done gushing now lol.

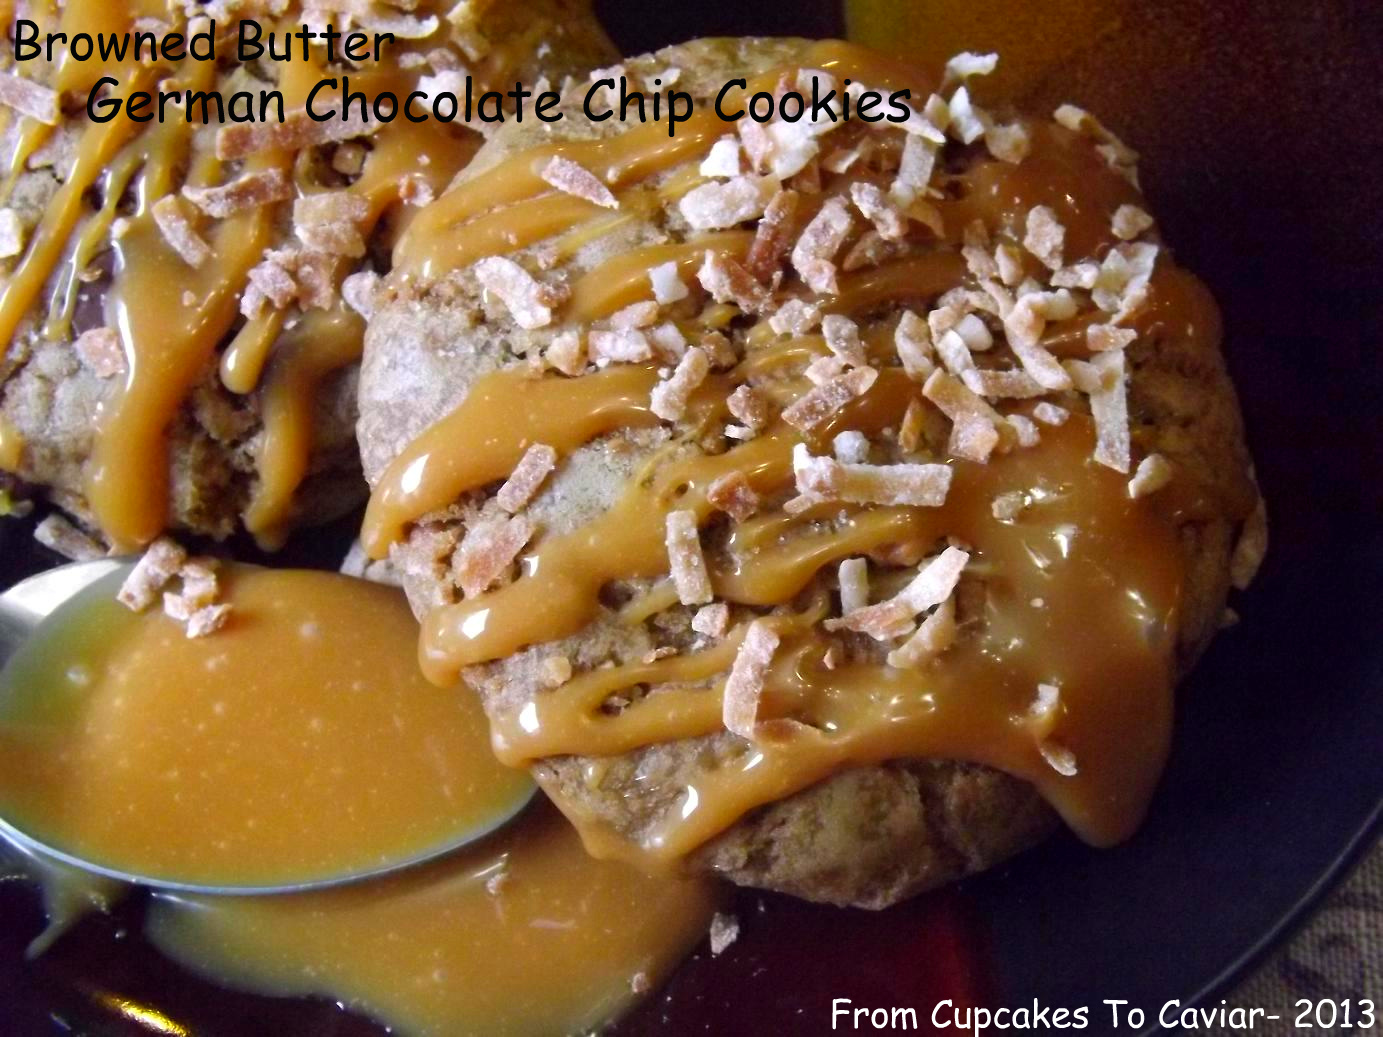
These are some pretty good oatmeal cookies. The original recipe came from food.com and I have just barely adapted it. One thing I do is just make half the recipe because the full recipe makes an ungodly amount of cookies, which is fine for say, Christmas goodie trays but not for everyday unless I’m serving cookies for dinner. The half recipe makes about 5 dozen smallish cookies. I also added the raisinets as the original just called for chocolate chips as we love raisins in oatmeal cookies here, plus I added more vanilla, some cinnamon and a little less sugar because they were far too sweet as written. Ok, so maybe I adapted it a bit more than I thought lol. When cooking these, watch them carefully. With a 375 temp, they can get overdone quickly. If you want chewier cookies, go for the lower cooking time. If you prefer crispier, go for the higher cook time. Either way though…

You know the drill. πŸ™‚

  • 1 cup unsalted butter, room temp
  • 3/4 cup sugar
  • 1 cup dark brown sugar
  • 2 eggs, room temp
  • 2 teaspoons vanilla extract
  • 2 cups flour
  • 2 1/2 cups oatmeal, divided in half
  • 1/2 teaspoon salt
  • 1 teaspoon baking powder
  • 1 teaspoon baking soda
  • 18 ounces raisinets (one bag and 2 individual sized boxes equals this amount)
  1. Preheat oven to 375 degrees. Lightly grease cookie sheets (I do two at a time) with cooking spray. Set aside.
  2. In the bowl of a stand mixer (you can do this with a heavy wooden spoon or hand mixer but it’s a fairly thick dough so it will be harder to stir) cream together the butter and sugars.
  3. Scrape down the sides of the bowl if needed, then add in the eggs and vanilla. beat well on low speed.
  4. In a food processor or blender, pulverize 1 1/4 cups of the oatmeal. In a large bowl, combine it with all the other dry ingredients, including the rest of the oatmeal. Don’t add the raisinets yet. Stir well to combine.
  5. Pour the dry ingredients into the wet ones, about 1/3 at a time, and mix well.
  6. Scrape down the bowl again, take the bowl off the base and stir in the raisinets.
  7. Use a small scoop to make cookies on the prepared sheets.
  8. Bake at 375 for 8 to 10 minutes. Let sit on sheet for one minute, then transfer to a wire rack to finish cooling.


Copyright Notice: From Cupcakes To Caviar images and original content are copyright protected. Please do not publish these materials anywhere without prior permission.


Browned Butter Chocolate Chip Caramel Pie With Salted Caramel Sauce

Browned Butter Chocolate Chip Cookie Pie With Salted Caramel Sauce-001

I am one of those weirdos who owns enough cookbooks to fill a room. It would be a small room yes, but a room nonetheless. Adding in cooking magazines like those Holiday ones that come out yearly and old issues of Gourmet and Food And Wine, etc etc, as well as paper cookbooks like the ones Pillsbury used to put out monthly (do they even still do that?) I have over a thousand cookbooks. It’s a sickness. Honest. And in our modern era, it’s a sickness that has gotten worse. How? Because now, I can get a cookbook out of the library and if it’s one that I find I’ve put about 10 or more sticky tabs in to save the pages, that means it a keeper. That used to mean that I would have a bazillion overdue books lol. But now it means that I can find the same cookbook on Amazon and buy it, sometimes for as little as 4 bucks with shipping, and tab the hell out of that bad boy.

But a lot of my favorite cookbooks are older ones that have proved to be tried and true. My Fanny Farmer Baking Book is one that I use often as are, surprisingly enough, a handful of the old Pillsbury paper cookbooks. Probably because, back when I was still learning to cook for a family, I found many recipes that went into our traditional holiday routine from them.

Another that I use is an old spiral bound Nestle Toll House cookbook. I was looking through it for inspiration the other day when I saw a recipe for Toll House Pie. It’s one that many home cooks have made… a chocolate chip cookie dough set into a pie shell. Sounded like something I could play with. The first time I made it, I undercooked it. Plus, the recipe had NO vanilla in it at all and far too much butter, to the point where I had to clean my oven because it lefts puddles of scorched butter on the bottom of it.

This time, I did it MY way. I added in some vanilla extract, used less butter, browned the butter for a nutty flavor (on a side note, with the browned butter, this batter was good enough to just eat out of the bowl! OMG, it was yummy!), added some caramel bits and topped the slices with some salted caramel sauce and chocolate sauce. All in all, made that way, it can be either a special dessert for the family or something worthy of guests.

Don’t be tempted to add extra chocolate chips or caramel to this. You know you’ll want to (we ALL do it πŸ˜› ) but I think that was part of the reason my first pie didn’t cook correctly. There was just too much in it for it to cook through even though it seemed done. Stick to the measurements here.

You know the drill. πŸ™‚

Browned Butter Chocolate Chip Caramel Pie With Salted Caramel Sauce

  • 2 eggs
  • 1/2 cup flour
  • 1/2 cup sugar
  • 1/2 cup dark brown sugar
  • 3/4 cup unsalted butter, browned to a golden brown, then cooled to room temp
  • 1 1/2 teaspoons vanilla extract
  • 1 cup semi sweet chocolate chips
  • 1/2 cup Kraft caramel bits (you can also use whole caramels; just cut into quarters to get the 1/2 cup measure)
  • 1 9 inch pie shell, unbaked (you can use store bought or homemade. I went the lazy route this time and used a frozen shell)
  • A half batch of this caramel sauce or you can use pre-jarred (I used Trader Joes Salted Caramel sauce because it’s amazing and almost as good as homemade) for drizzling…pouring…eating plain…bathing in…whatever
  • Chocolate sauce for drizzling
  1. Preheat your oven to 325 degrees.
  2. In a large bowl, beat the eggs until foamy.
  3. Add in the flour, sugar, dark brown sugar and vanilla extract.
  4. Blend in the browned butter, then fold in the chocolate chips and the caramel bits.
  5. Spoon into the pie shell and smooth top with a rubber/silicone spatula. Eat what’s left on the spatula. Make sure it’s a lot. You can thank me later.
  6. Bake at 325 for 60 to 70 minutes. The top should be golden brown and dry looking. Let cool to room temp before slicing then use a hot sharp (preferably serrated) knife to get clean cuts. Cut this into VERY thin slices as it’s quite sweet and rich. You should be able to get ten slices from this pie easily.
  7. Top each slice with a (large) dollop of salted caramel and drizzle with chocolate sauce. Sprinkle each slice with a little sea salt if you’re so inclined. If you’re really into overkill and diabetic comas, spoon on some whipped cream too. I won’t judge.

Copyright Notice: From Cupcakes To Caviar images and original content are copyright protected. Please do not publish these materials anywhere without prior permission.


Lemon-White Chocolate Pound Cake With A Lemon Honey Glaze

Lemon White Chocolate Pound Cake With A Lemon Honey Glaze

Lemon White Chocolate Pound Cake With A Lemon Honey Glaze


I have a thing for pound cake. I may have mentioned that before. While I love fancier desserts too, especially those that are rich, creamy and filled with 5000 sticky calories per serving, I also love the simple desserts. Pound cake is just so homey, comforting, and darned easy. And if you want creamy, all you need to do is top it with whipped cream, 12 scoops of ice cream and chocolate sauce. Not that I’d do that of course. Nope, nope, nope, not me *wipes chocolate sauce off chin*


I was torn between making a lemon pound cake, which I’ve been promising my husband for weeks lol, or Pumpkin Bread, because personally, I’m ready to get my Autumn on. But the followers on my facebook page voted for the pound cake (you meanie butts you!!! You’d better be glad I lurves you all! πŸ˜› ) so here you go.

As I mentioned to them, I can’t, however, make just a “normal” pound cake. I’ve said before (and will probably say again because I’m getting old and forgetful. Did I mention that I’m getting old and forgetful?) and will say again (because I’m old and forgetful) that I lack the gene that makes me capable of making a recipe as listed. Nope… gotta either drastically change one so that it is like giving plastic surgery to Justin Bieber and making him look like Madonna or I have to just make up one of my own.

This one is just your basic pound cake incarnation. But I added a ton of lemon flavor as well as a touch of ginger for zing to the batter. Then for good measure I dumped some white chocolate chunks in there. They melted entirely into the batter, leaving these little pockets of slightly crispy sweetness. And if you’ve never had white chocolate with lemon, you’re in for a treat. They go SO well together! Then I topped this with a tart lemony glaze that has a subtle hint of honey.

This is NOT a mild little cake. It’s quite sweet, so serve small slices.

You know the drill…

Lemon-White Chocolate Pound Cake With A Lemon Honey Glaze

  • 1 1/2 cups flour
  • 1 cup sugar
  • 1 teaspoon ground ginger
  • 1/2 teaspoon baking powder
  • 1/2 teaspoon salt
  • 1/2 teaspoon baking soda
  • 2 tablespoons lemon zest
  • 1 cup white chocolate chips
  • 3 eggs
  • 1 teaspoon vanilla extract
  • 1 1/2 teaspoons lemon extract (if you have an emulsion, even better, Use 1 teaspoon)
  • 1/2 cup lemon juice
  • 2/3 cup oil
  • GLAZE-
  • 1 cup powdered sugar
  • 2 tablespoons honey
  • 2 teaspoons sour cream
  • 1 teaspoon lemon zest
  • 1/4 teaspoon lemon extract
  • 2 tablespoons lemon juice
  1. Preheat oven to 350 degrees. Spray a 9 inch loaf pan with a non stick spray such as Bakers Joy.
  2. In a large bowl, combine the flour, sugar, baking powder, salt, baking soda, lemon zest and white chocolate chips. Stir well.
  3. In a medium bowl, combine the eggs, extracts, lemon juice and oil. Whisk to combine.
  4. Pour the wet ingredients into the dry ones, all at once. Stir well to combine until there are no dry floury spots left.
  5. Pour the batter into the prepared pan Bake at 350 until a wooden skewer inserted into the middle comes out clean, about 60 minutes. If it starts to get too brown on top, cover loosely with foil.
  6. When done, cool in pan for five minutes, then run a butter knife along the edges to loosen the cake and turn it out onto a wire rack to finish cooling.
  7. For glaze, combine all the glaze ingredients in a small bowl. Whisk to combine, making sure to get rid of all the lumps.
  8. Pour or spoon glaze over the cooled cake.

Copyright Notice: From Cupcakes To Caviar images and original content are copyright protected. Please do not publish these materials anywhere without prior permission.


Cheesy Sausage Potato Skillet

Yum

Cheesy Sausage Potato Skillet

Cheesy Sausage Potato Skillet

Growing up in Chicago, I have always had a love for sausage of pretty much every kind. Well, you will never get me to try blood sausage and I’m fine with that status quo. But when you are raised in a large city filled with a humongous population of Eastern European immigrants, you grow up loving the food. And sausages are extremely popular in the Midwest. Heck, there are stores that sell JUST sausage. *Sobs because I miss Chicago, if only for the food and culture*

Here in Kentucky, there is a plethora of the typical smoked sausage products, but not a lot in the way of fresh. Luckily, I also love smoked sausage as does my family :-D. My usual way of making them is just to simmer them in some water. I’m boring and a purist πŸ˜› (Saith the woman who touts Cheetos as one of the main food groups). One night last week, when the guys had had fast food (I’m NOT a fast food person normally) I was hunting for something to make for my dinner. We had some smoked sausage so I played around a little. Knowing my men, I made a full pan of this because well… they’re guys. Need I say more?

This was delicious if I do say so myself. It’s nothing Earth shaking and has been done before in different variations. But here’s MY variation. Cheesy, sausagey (yes, that too is now a word), filled with crispy potatoes, green peppers and onions and smothered in a ton of cheese. This is homey, simply, easy to throw together comfort food at it’s best. It’s also easily changed up to fit your family preferences. Don’t like onions? Don’t use them. Use YOUR favorite sausage. Not a Cajun seasoning fan? Omit it πŸ™‚ Etc etc etc.

You know the drill. πŸ™‚

Cheesy Sausage Potato Skillet

  • 1 lb of your favorite smoked sausage, sliced into bite sized pieces (I used Johnsonville Andouille)
  • 4 potatoes, cut into bite sized cubes
  • 1 green pepper, chopped
  • 1 onion, chopped
  • 1 teaspoon salt free Cajun seasoning
  • 8 ounces Colby Jack cheese, shredded (or your favorite cheese)
  • salt and pepper to taste
  • sliced green onions for garnish
  1.  Over medium heat in a medium skillet, cook your smoked sausage until browned and crispy. Remove from the pan with a slotted spoon and set aside. Leave the drippings in the pan.
  2. Using the same pan and drippings, add your potatoes, green pepper, onion and Cajun seasoning. Cook, stirring occasionally, until the potatoes are tender and crispy and can be easily pierced through with a fork.
  3. Spoon the sausage back into the skillet. Stir to combine and cook for about 2 minutes to reheat the sausage.
  4. Top the dish with the shredded cheese. Turn off the heat, cover the pan and leave it on the stove for about 5 to 6 minutes until the cheese is melted. Garnish with the green onions and enjoy!

Copyright Notice: From Cupcakes To Caviar images and original content are copyright protected. Please do not publish these materials anywhere without prior permission.


Toasted Coconut Key Lime Pie Fudge

Toasted Coconut Key Lime Pie Fudge

Toasted Coconut Key Lime Pie Fudge


Last post I made was an ode to Autumn because our weather had been so unseasonably cool and wet. Now however August is back with a vengeance. It’s hot as Hades out there and extremely humid. So my mind is back to thinking of Summery foods. And what is more Summery than key lime pie? Why, key lime pie made into fudge with some tropical coconut flavors thrown in there for good measure, of course.

On another note, today is my birthday! I am 49 years old today. Damn… I’m old. Lol. The only 49 year old I know of with a 4 year old son. So what were my birthday meals like? Totally not exciting, that’s what they were like hehe. I made smoked sausage, rice a roni and carrots. Woohoo?? And my birthday cake is from Wal mart. I have got to learn that it’s ok to make myself a nice birthday dinner the same as I do for the rest of the family. Why do we women do that anyway?  But all in all, it’s been a nice birthday. I have my kids, I have the worlds best husband who is still happy to make cups of tea because he loves me. I have books to read, food to eat and lifes little luxuries. I’m good. πŸ™‚

This fudge is quite yummy. Even the non sweets loving hubby loved it. I was originally going to make just key lime pie fudge but do you have any idea how many of those there are online?! At least 99,999,999,999,999 (please don’t ask me to say out loud what number that is). I could NOT bring myself to just repeat the version someone else made. Nope, not me. So I made this MY way. How, you ask? You did ask, I hope? T’was easy. I topped this with swirls of a homemade lime curd, added some coconut flavor to the fudge itself and topped it all off with some toasted coconut. Oh… my…gosh… this is good! I will definitely be making this again and I am pretty sure it will make into my Christmas treats too. Smooth, creamy, very rich, but saved from overwhelming sweetness by the lime curd and the toasted coconut. The lime curd is just the same recipe I use for lemon curd, with lime juice and zest subbed in there. It makes a pint of curd and you only need half a cup or so for the recipe, but I totally promise you, you won’t mind having extra. This stuff is amazingly good. I keep sneaking spoonsful of it on a spoon. You can do that, spread it on a muffin or scone, top ice cream with it…

You know the drill. Git to cookin’!

Toasted Coconut Key Lime Pie Fudge

  • 1/4 cup sugar
  • 1 1/4 cups graham cracker crumbs
  • 6 tablespoons unsalted butter, melted
  • 1 lb GOOD white chocolate, chopped (please don’t use, say, “Acme Brand White Baking Chips”. Use the real thing here. It will make a difference.
  • 1 14 oz can sweetened condensed milk (NOT evaporated milk)
  • 1 tablespoon butter
  • zest of one small lime
  • 3 tablespoons lime juice (this will take about 2 small limes t get)
  • 1/2 cup Lime Curd (Use this recipe for lemon curd, just substituting limes where it calls for lemons)
  • 1 teaspoon coconut flavoring
  • 1 teaspoon vanilla extract
  • 1/2 cup sweetened coconut, toasted
  1. Preheat your oven to 350 degrees and line a 8 or 9 inch square pan with foil Butter the foil, then set the pan aside.
  2. In a medium bowl, combine the sugar, graham cracker crumbs and melted butter. Stir well. Dump mixture into the prepared pan and press down into the bottom of the pan to form a crust.
  3. Bake at 350 degrees for about 10 minutes. Take out and set aside to cool.
  4. In a medium non stick saucepot, combine your white chocolate, a tablespoon butter and sweetened condensed milk.
  5. Cook over medium heat, stirring constantly, until mixture is smooth and all the chocolate is melted. Remove from heat and add in the lime zest, lime juice and extracts.
  6. Quickly pour into the prepared pan. Spoon dollops of the lime curd over the top of the fudge then using a butter knife (or your fingers. I won’t tell), swirl it into the fudge. Top that with the toasted coconut, pressing down lightly to make sure the coconut sticks.
  7. Refrigerate until firm, about 3 hours.
  8. Using a knife you heat under hot water and wipe dry is the easiest way to cut this (or any) fudge. You’ll get much cleaner cuts.
  9. Leftovers can be stored tightly wrapped or even better, wrap each piece individually and freeze them. When you need a sweets fix, there you have it… portion controlled fudge πŸ™‚

Copyright Notice: From Cupcakes To Caviar images and original content are copyright protected. Please do not publish these materials anywhere without prior permission.


Decadent Extra Creamy Pumpkin Pie in a Cornmeal Crust

Decadent Extra Creamy Pumpkin Pie In A Cornmeal Crust

Decadent Extra Creamy Pumpkin Pie In A Cornmeal Crust

When I started this blog, I had a hard time making certain things to post on the blog. Why? Because I am a rabid traditionalist and it tends to make me a bit rigid in my thinking at times. As much as I go against the seasonal cooking idea in some things I make (Pumpkin Cranberry Bread in June, Chili or beef stew in the middle of Summer, grilling out when my back porch is covered in snow and I can’t feel my toes) there are other things that I make ONLY on the holidays. My world famous sausage stuffing is only for Thanksgiving. Honest… world famous…. it’s been eaten and enjoyed by major celebrities, heads of state of at least 32 countries, 4 popes and Queen Elizabeth. We just call her Liz here cause we’re BFF’S like that. My Pecan Pie? Only Christmas and Thanksgiving. My Turtle Cookies? Christmas. The pumpkin pie I have been making since my oldest son, now 27, was about 4? Only at Thanksgiving and since the older kids have grown and moved out, sometimes at Christmas if they didn’t make it home for Thanksgiving.

But the other day I realized something. By doing that, I was going against the whole reason I started this blog. For years, I heard what a good cook I was, how I needed to write a cookbook of country/homey classics, etc etc etc. So I started blogging. And when I started, one of the things I wanted to do was share our families favorite dishes. But by being so darn rigid, I wasn’t able to do so. Because if I only make this pumpkin pie at Thanksgiving, how can I share it with YOU in time for you to make it for YOUR Thanksgiving? I couldn’t share it after the fact because then it was too late. So I just didn’t share at all. That stops now. This year my family and I will enjoy our holiday favorites a time or two before the holidays so that I can share them with you.

On that note, this is truly the best pumpkin pie ever. I got the original recipe from The Fannie Farmer Baking Book (best baking book ever… you have got to hunt it down on Amazon) and over time, have adapted to more to our tastes; i.e., a bit more spice, using cream and so on. But basically, it’s the same recipe from the book. This crust is wonderful. It’s not like cornbread so don’t worry about that. It just has a bit more texture and a touch of crunch from the cornmeal and the rustic flavor of it goes so well with a pie like pumpkin. But feel free to sub your favorite pie crust recipe or even a store bought one. Since this pie uses dark brown sugar and extra spices, it IS darker when cooked than the typical color. So don’t think you overcooked it when it comes out a dark orangeish brown instead of the “normal” light orange color. It’s still fine. πŸ™‚

Decadent Extra Creamy Pumpkin Pie With A Cornmeal Crust

  • Crust- (Can sub your favorite crust)
  • 1 cup all purpose flour
  • 1/2 cup yellow cornmeal (NOT cornmeal mix)
  • 1/4 teaspoon salt
  • 1 tablespoon sugar
  • 1/2 cup solid shortening, chilled
  • 3 to 6 tablespoons water (I usually make this in late Autumn and use about 3 tablespoons, but it being Summer, I used closer to the 6 this time)
  • Pumpkin Filling-
  • 2 cups pumpkin puree (NOT pre-made pie filling)
  • 3 eggs
  • 1 egg yolk (adds extra richness but is optional)
  • 1 1/2 cups heavy cream
  • 3/4 cup dark brown sugar
  • 1/2 teaspoon salt
  • 1 tablespoon cinnamon
  • 1 1/2 teaspoons ground ginger
  • 3/4 teaspoon nutmeg (do freshly grated if you can. It’s so much better.)
  • 1/2 teaspoon ground cloves (be careful with the cloves and don’t go overboard- they can be very strong and bitter if you use too much)
  • 1/2 teaspoon ground allspice
  • 1 teaspoon vanilla extract
  1. Crust-
  2. Preheat oven to 425 degrees.
  3. Combine the cornmeal, flour, sugar and salt in a large bowl. Using a pastry blender,  cut the cold shortening into the flour mixture until it resembles fine crumbs. Add the water, about 2 tablespoons at a time. Mix thoroughly. When enough water has been added, you should have a cohesive mixture that you can form into a ball, which, when pressed, doesn’t crumble at all. it will however, be a soft dough.
  4. On a lightly floured board or counter, roll the dough out to be 2 inches wider than the pie pan you are using is when inverted. This dough tears easily but it also patches easily. the easiest way to get it into the pan is the old method of easing it off of the counter with a spatula, then wrapping it around the rolling pin and laying it in the pie pan.
  5. After laying the dough in the pan, gently press it into the sides of the pan. Don’t stretch or pull at the dough because that can cause it to shrink up as it bakes. Crimp your top edges and prick the crust all over with a fork.
  6. Bake at 425 for 10 minutes or until it is just beginning to brown. Set aside.
  7. For the filling-
  8. In a large bowl, beat the pumpkin puree, eggs and the egg yolk.
  9. Add the cream and sugar, then beat in the spices and vanilla. Taste a bit on your finger to make sure it has enough spice for you. If not, add a bit more.
  10. Beat until the mixture is smooth with no pumpkin or sugar lumps.
  11. Pour into the prepared pie crust.
  12. Bake at 425 for 10 minutes, then turn the heat down to 300. Bake for about 40 minutes, until the filling is almost set. A sharp knife inserted off center should come out almost clean, with just a few moist crumbs on it and the center of the pie should still be slightly jiggly. It will set up as it cools.
  13. Chill to finish setting. It can then be served either at room temp or chilled. Serve with whipped cream, creme fraiche or ice cream. Enjoy! We’ve always loved this pie. I hope you do too. πŸ™‚

Copyright Notice: From Cupcakes To Caviar images and original content are copyright protected. Please do not publish these materials anywhere without prior permission.


Herbed Onion, Shallot & Cheese Bread

Herbed Onion, Shallot & Cheese Bread

Herbed Onion, Shallot & Cheese Bread

I love baking. I betcha never knew that, did you? I run a quiet little blog full of main dish recipes, vegan yummies (is it just me or the phrase “vegan yummies” a total contradiction in terms? hehe) and no baking whatsoever. or something like that. But really… I do love to bake. I don’t bake so that I have something to post on the blog. I blog because I love to bake. There is something about combining a bunch of ingredients, tossing them into a pan and creating something homey and comforting that appeals to the nurturer in me. And I love to share the recipes. And watch you all get fat with me. And buy stock in “fat girl pants” companies.

I especially love baking this time of year. Doesn’t most everyone? that whole colder weather, cozy house, yummy smells thing is great incentive. It’s also great incentive to buy a treadmill and a gym membership, but we won’t go there. Please see above about that stock option idea. πŸ˜€

My house smells amazing right now. I swear, one of the best smells ever is practically ANYTHING made with either cheese or onions. So combine cheese and onions with shallots, more cheese, Herbes De Provence, more cheese and make it all into a loaf of quick bread, and Janet is one happy camper. In all reality, I’d probably be a  miserable camper unless said camp had a jacuzzi tub, king sized bed, room (campfire) service and the campfire was a large fireplace overlooking either the mountains or the ocean. Ahhh, daydreams. They make life worth living, huh?

If you like savory quick breads and need something fairly quick to serve with dinner (or lunch or breakfast or a midnight snack) give this a try. Beyond the fact that I promise that your house will smell divine, this tastes so good. the top is slightly crispy form the cheeses, then you get the soft tender inside with more cheese and the flavor of the shallots, onions and garlic. This is great by itself. I can also see it going well with a bowl of soup or stew as the weather gets cooler. Shovel a boatload of butter on there (use two boatloads… I won’t tell) and eat half the loaf. I won’t tell if you do that either. I’ll just be counting my money from the fat girl pants stock.

Herbed Onion, Shallot & Cheese Bread

  • 2 1/4 cups flour
  • 4 and a half teaspoons baking powder
  • 1 teaspoon salt
  • 3 tablespoons unsalted butter, cold
  • 1 cup sharp cheddar cheese, divided
  • 3/4 cup fresh grated Parmesan cheese, divided
  • 2/3 cup diced onion
  • 2 shallots, diced
  • 2 cloves garlic, minced
  • 1/2 cup chopped green onions
  • 1 tablespoon unsalted butter
  • 1 egg
  • 1 egg yolk
  • 3 tablespoons vegetable oil
  • 1/2 cup milk
  • Preheat oven to 375 degrees. Grease and flour (or use a cooking spray) a 9 inch loaf pan.

1)- In a large bowl, combine the flour, baking powder and salt. Using a pastry blender, cut in the 3 tablespoons unsalted butter until fine crumbs form. Add in 3/4 cup of the cheddar cheese and 1/2 cup of the Parmesan cheese and the green onions. Stir well to combine.

2)-I n a small pot, melt the one tablespoon butter. Saute the onions (just the regular onion, not the green onion), shallots and garlic over medium heat, stirring frequently, until soft and tender. Remove from heat and let cool for five minutes.

3)- When cool, add the milk to the onion mix. Stir well, then add the egg, egg yolk and vegetable oil. Stir.

4)- Pour the onion mixture into the center of the bowl of flour. Using a wooden spoon (not a mixer) mix just until thoroughly combined and there are no dry spots left. This is a thick almost biscuit like dough so don’t expect it to be pourable.

5)- Dump the dough into the prepared loaf pan and pat down, smoothing the top.

6)- Sprinkle with the reserved cheese.

7)- Bake at 375 degrees for about 30 minutes or until the top is golden brown and a skewer inserted into the middle comes out clean. Let cool in the pan for 2 minutes, then turn out onto a wire rack to finish cooling.

Copyright Notice: From Cupcakes To Caviar images and original content are copyright protected. Please do not publish these materials anywhere without prior permission.

Easy Chicken Parmesan Pasta Bake

Easy Chicken Parmesan Pasta Bake

Easy Chicken Parmesan Pasta Bake


I mentioned in the last post that my husbands requested birthday cake every year is a German chocolate one. Well, his requested birthday dinner is Chicken Parmesan. Every.Single.Year. Did I mention that he asks for it every single year? He is a creature of habit, my husband is. Though I really have no room to talk. I tend to do the whole creature of habit thing myself though not with birthday cakes and birthday dinner. One- I usually have to make those myself so for dinner you’d darn well better believe it is going to be steak. Dessert… ehhh, who knows. I buy a cake more for the kids since cake doesn’t really excite me much. and two- if given the opportunity, I’ll ask for dinner out every time. Give up the chance to have someone else doing the cooking and cleaning? Not on your life!

But back to that whole chicken Parmesan thing. I am pretty sure he would alternate between that, my chicken curry, my lasagna or spaghetti and my chili or meatloaf every day with no problem. But beyond the fact that chicken Parm is a pain in the tush to make (you try making enough to feed not only a grown man but 2 teen boys, yourself and a 4 year old who loves “sketti”), it’s just not a favorite of mine so it’s a definite labor of love to make it. But… I also absolutely adore my husband so I wanted to make him something that at the very least mimics the idea of full blown chicken Parmesan. I think this casserole does a good job. To make it even better, it uses those evil convenience products and that makes this a fairly quick fix for a weeknight dinner.  You COULD use homemade pasta sauce and more power to you for it. You could also make fresh chicken and again more power to you, but I wanted something quick, easy and tasty. This worked in a delicious way. It’s hearty, filling, creamy, cheesy and comfort food to the max. You get bites of tender chicken mixed in with pasta as well as the creamy tomatoey (yes that is now a word cause I say so) sauce and ooey gooey cheese. Unless you’re feeding a lot of people, this will easily stretch to the next days lunch meal too. Light and low fat? Ummmm… no. But really? You came to THIS blog looking for low fat and low cal? *giggles hysterically*

You know the drill…

Easy Chicken Parmesan Pasta Bake

  • 1 rotisserie chicken, skin removed and meat cut into bite sized pieces
  • 1 14 to 16 ounce box Penne pasta (or ziti or whatever you prefer), cooked according to package directions and drained
  • 1 23 ounce jar pasta sauce (those jars are slowly getting smaller & smaller for the same price!)
  • 1 15 ounce jar Alfredo sauce
  • 1/3 cup grated Parmesan cheese
  • 1/4 cup fresh chopped Basil
  • 1/4 cup fresh chopped Parsley (can sub 1 1/2 tablespoons Italian Seasoning for this if you don’t have fresh)
  • 24 ounces freshly grated Mozzarella cheese
  1. Preheat oven to 350 degrees and spray a  3 quart baking dish with cooking spray.
  2. After draining your pasta, pour the jar of pasta sauce and the jar of Alfredo sauce into the empty pot. Stir to combine., Add in the Parmesan cheese, chicken, basil and parsley. Stir to combine.
  3. Fold in the drained pasta then 16 ounces of the Mozzarella cheese.
  4. Spoon the pasta mixture into the prepared dish. Bake at 350 degrees for 20 minutes, then top with the remaining 8 ounces of Mozzarella cheese and continue baking for about 15 minutes or until the cheese is melted and lightly browned and the casserole is hot and bubbly.

Copyright Notice: From Cupcakes To Caviar images and original content are copyright protected. Please do not publish these materials anywhere without prior permission.


Browned Butter German Chocolate Chip Cookies

Browned Butter German Chocolate Chip Cookies

Browned Butter German Chocolate Chip Cookies

I have a major personality flaw. Well, I have more than one but we won’t get into the others today. The one I’m talking about right now is my inability to let things alone. I am that person who when being sarcastic, always has to say that one last sentence that gets people wanting to look for cement shoes for me. I’m that person that when a joke goes flat, will be standing there saying “no, no, let me explain it to you! It’s funny! Really, it is!”. I’m also that person who, once I’ve made a recipe, then has to make it about 463 times more in different variations just because I love to play around with recipes and put my own stamp on it. I guess that’s one reason I’m a food blogger, huh?. Sometimes it works, but sometimes it’s a case of I should have left well enough alone.

Today it was a definite case of “it works”. Oh…my…gosh…did it work. Now, contrary to what one would think, I’m not a huge cookie person. I prefer my sweets to be floating in a puddle of cream and maybe even have fruit in them. I know, I know, I just shocked a bunch of you. I LOVE sweets, don’t get me wrong but creaminess (aka fat lol) and fruit put together tend to do it for me more than cookies. But there are times I like something a little homey, a little old fashioned, a little…well…cookieish.  So yesterday, on my Facebook Page, I mentioned that I was making These cookies. Well, I never got to them yesterday and this is a good thing because overnight, I got the inspiration to try to make them a bit different. My husband, who is my favorite person ever, was my inspiration. He LOVES German Chocolate Cake and I make it (or buy it) for him every year on his birthday. So I decided to make these Browned Butter cookies in a way that mimics the flavors in his favorite cake. And since I love the chocolate/coconut flavor combo myself, I am kind of in love with these cookies myself. The dough alone was fantastic lol. I kept snagging bits of it from the bowl. The nutty taste of the browned butter, the chocolate, the crispy toasted coconut, the caramel… oh my *drools*

You know the drill…

Browned Butter German Chocolate Chip Cookies

    • 1 cup (2 sticks) unsalted butter, browned to a golden brown color & cooled
    • 1 cup packed dark brown sugar
    • 1/3 cup sugar
    • 1 egg
    • 1 egg yolk
    • 2 tablespoons cream
    • 1 tablespoon vanilla extract
    • 1 teaspoon coconut flavoring
    • 2 1/4 cups all purpose flour
    • 1 teaspoon baking soda
    • 1/2 teaspoon salt
    • 1 12 ounce bag semi sweet chocolate chips or chunks (I actually used more like 3 cups because I had a partial bag opened that I wanted to use up so extra wouldn’t go amiss πŸ™‚ )
    • 1 1/4 cup sweetened coconut, toasted, 1/4 cup set aside
    • 25 Kraft Caramels,
    • 1/4 cup heavy cream or half & half
  1. To brown the butter, in a medium saucepan, over medium heat melt the butter. Let cook,stirring frequently, until it turns a golden brown color. This can take anywhere from five to ten minutes. It will sputter and spit a lot at first then that will stop. Do NOT walk away from this as it can go from yellowish butter to burnt garbage very quickly.
  2. Pour the browned butter into a large bowl and let cool.
  3. When cool, pour both kinds of sugar into the bowl with the butter. Beat until well mixed.
  4. Add in the egg and egg yolk, then pour in the vanilla, coconut flavoring and the cream. Beat on low speed until well mixed.
  5. In a small bowl, combine the flour, baking soda and salt.
  6. Pour the dry ingredients into the wet and at slow speed (unless you want to be covered in flying flour), mix until you have a cohesive cookie dough.
  7. Fold in the chocolate chips and one cup of the toasted coconut.
  8. Heat oven to 350 degrees. Line a cookie sheet with parchment paper or a silicone mat.. Spray the cookie sheet with baking spray before lining it if using the parchment paper.
  9. Scoop the cookies up and place about 2 inches apart on the lined cookie sheet.
  10. Bake at 350 until golden brown on the edges, about 10 to 12 minutes.
  11. Let cool for a minute on the sheet then transfer over to a wire rack to finish cooling.
  12. When the cookies are cool, make the caramel drizzle.  Unwrap your caramels and put them into a bowl. A cereal sized bowl is sufficient. Pour the cream over the top. Then microwave at 70% power for 30 second intervals until the caramel is melted and bubbly. Stir well to mix. Be careful… there is nothing as fun as scraping out a bowl of hardened burnt caramel because you didn’t watch carefully. Please don’t ask how I know this.
  13. Drizzle each cookie with some of the caramel and while it’s still gooey, sprinkle some of the reserved toasted coconut over each one.

Copyright Notice: From Cupcakes To Caviar images and original content are copyright protected. Please do not publish these materials anywhere without prior permission.


Country Fried Chicken

Country Fried Chicken

Country Fried Chicken

My mom made the worlds best fried chicken. Or at least she did to me when I was a kid. I wonder sometimes if I would like as well the foods I enjoyed when I was a kid since my tastes are oh so sophisticated now *snorts and laughs*. But seriously, as our tastes mature and we try more, the things we loved as kids just don’t seem appealing anymore. In some cases, that’s a good thing. As much as I joke about Twinkies and Cheetos, I wouldn’t want a steady diet of them but when I was a kid, I could have happily eaten them for every meal. In other cases, maybe it’s not such a good thing. Like I said, I loved my mothers fried chicken. But now, as a middle aged mom, I make it my way and it’s what my family and I are used to. Would I like mothers now with it’s simple coating of flour, salt and pepper? I don’t know and that strikes me as kind of sad. She also made really good lasagna but I make that differently too. I remember once asking her, after I was married and made it myself, why hers always tasted like it had boiled eggs in it. She replied simply, “because it does.” I thought then and still wonder where she found a recipe for lasagna that used boiled eggs in the filling. And while I wouldn’t make it that way myself, I remember loving it when she made it. Maybe I didn’t know any better… maybe it was because it was a rare treat, maybe it was just because it was made by her.

This chicken is years in the making. For years, my coating was too heavy, too greasy, too hard. FINALLY though, I learned what I was doing wrong. Basically, I was trying too hard. I was trying to make fried chicken into something fancy when it’s not. It’s simple country food, homey and comforting. It’s fattening, it’s bad for you and it’s oh so good. Fried chicken can frighten so many people but if you don’t fall into the ‘trying to hard” trap, it’s easy as can be. Just watch your oil temp (buy an instant read thermometer if you don’t have one) and don’t overcoat. Contrary to what one would think, extra coating won’t make it crispier. It just makes the coating hard and tough.

You know the drill…

Country Fried Chicken

  • 5 lbs chicken pieces (we like boneless skinless thighs and breasts and occasionally wings if I can find them on sale)
  • 2 cups flour
  • 2 tablespoons Janes Krazy Mized Up Salt (can be found in most grocery stores. I prefer this one because it uses larger salt pieces thus isn’t as “salty” tasting as other seasoned salts)
  • 1 1/2 teaspoons garlic powder
  • 1 1/2 teaspoons onion powder
  • 1 tablespoon poultry seasoning
  • 1 1/2 tablespoons paprika
  • 2 teaspoons black pepper
  • 2 cups buttermilk
  • 2 eggs
  • 2 to 5 tablespoons of franks Hot Sauce (optional and amount will vary depending on what level of heat you like)
  • vegetable oil for frying
  • 1 cup butter flavor Crisco (optional, but it gives a nice flavor)
  1. In a large bowl, combine the flour, herbs, spices and salt. Stir well.
  2. In another bowl, combine the buttermilk, eggs and hot sauce. Beat until well combined.
  3. In a large pan or dutch oven (I use my 8 quart dutch oven and it works great. You can get a deep level of oil but with no worry of bubbling over and less splattering.), pour vegetable oil to a level of about 2 inches. Add in the Crisco if using (or another cup of oil) and over medium heat, heat oil to 340 degrees.
  4. While oil heats, take each piece of chicken and coat in this order- dredge first in the flour, then in the egg mixture, carefully shaking off excess liquid, then dredge again in the flour. Set each piece on a rack that is set over a piece of waxed paper for easier cleanup.
  5. When oil is hot, put chicken into pan carefully, starting with dark meat pieces like thighs and drumsticks. Turn the heat up to medium high for about 2 minutes, just long enough to bring the oil back up to temp, because adding the chicken can lower the temp drastically, causing the chicken to soak up too much oil. Don’t crowd your pan. Let the dark meat pieces cook for about 5 minutes, then if you have room in the pan, add a piece or two of the white meat.
  6. Cook the chicken, turning two or three times during cooking, until it is golden brown and an instant read thermometer inserted into a piece of chicken (NOT touching a bone if it’s not boneless chicken) reads at a temp of approximately 180 degrees. Remember that white meat cooks quicker than dark and that just because a thinner piece is done, that doesn’t mean a thick piece like a large breast will be. Make sure you check thicker pieces inner temps too.
  7. Drain on a paper towel covered plate and serve piping hot…or warm…or room temp…or cold. I mean, really… it’s fried chicken!!

Copyright Notice: From Cupcakes To Caviar images and original content are copyright protected. Please do not publish these materials anywhere without prior permission.