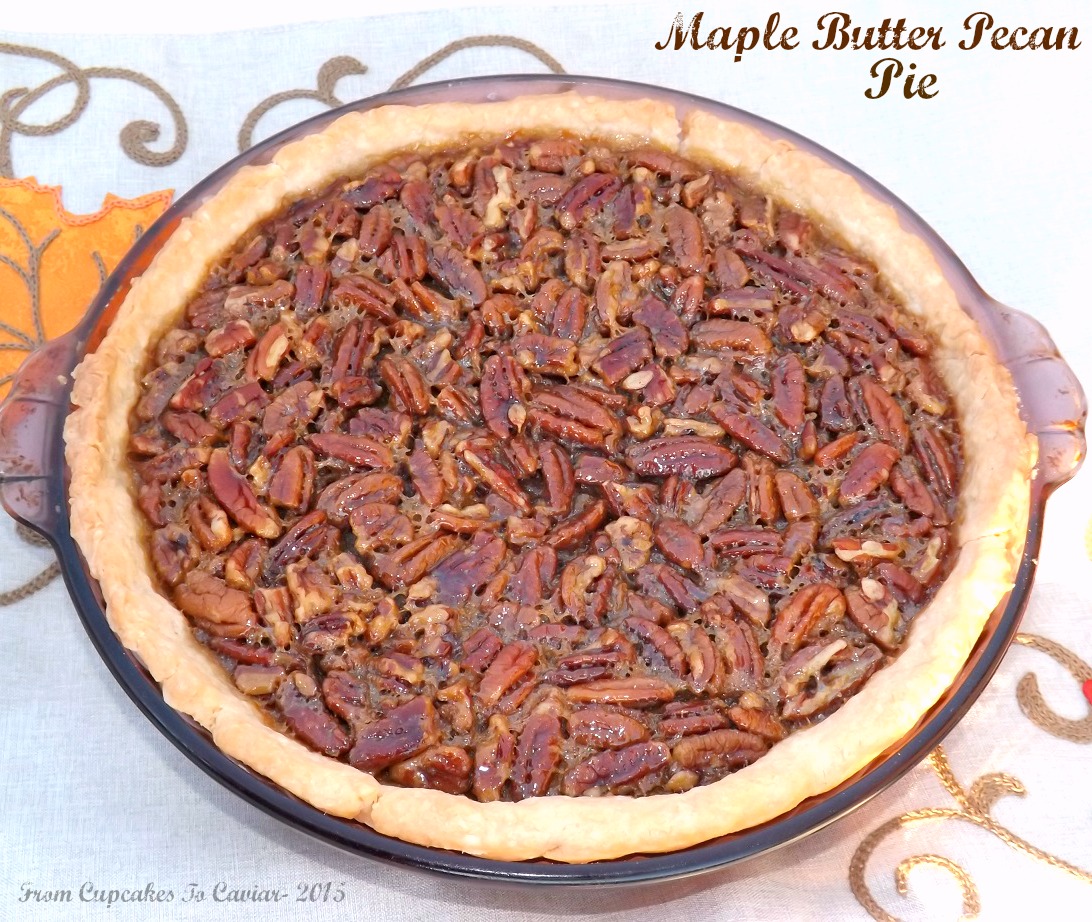
Maple Butter Pecan Pie

I’m totally ready to get started with Thanksgiving and Christmas recipes. Hopefully, you’re totally ready to get those recipes, cause it’s probably the vast majority of what I’ll be posting for a while. 😀
I sometimes think to myself that I wouldn’t be as enamored of the holiday season if it fell in Summer. I mean… “let’s go grill out some chicken for Thanksgiving dinner” or “how about we make some nice cold ice cream to serve on Christmas”?? Those just don’t have the same ring to them, even though I’m well aware that it’s only on this half of the world that is deep into Autumn and Winter when Thanksgiving and Christmas hit. But I’m one of those people who gets sad if it isn’t bitter cold on both days. I want cozy, homey, preferably snowy. Plus, cooking a large meal in the oven and making the house a sauna when it’s not cold out kinda sucks.
I already have two pecan pies up here on the blog. But one can never have too many pecan pies, am I right? I rather like pecan pie, obviously. My husband isn’t fond of it. Yet I let him stay around anyway. Go figure.
I wanted to change up this years pecan recipe for the blog. So when I saw this in an old cooking magazine I have, I had to give it a try. I absolutely love real maple anything and I knew from the ingredients in this that it would be good. It came with it’s own pie crust recipe, but I forgot to get some photos of it, so I’ll post that separately next time I use it. Meanwhile, just use your own favorite 9 inch pie crust; even a store bought one is fine if you swing that way.
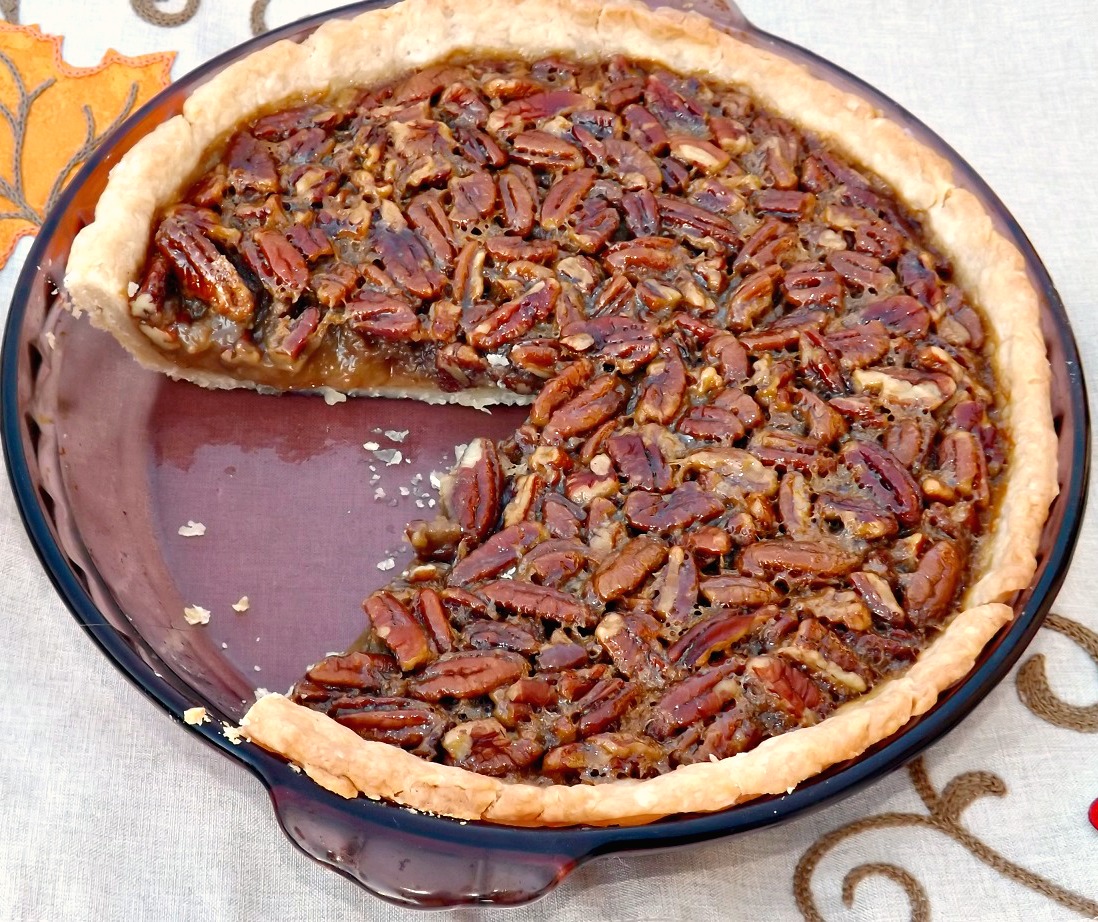
This was a delicious pie. Nice glazed looking pecans on top (the recipe called for pecan halves, but I prefer chopped. You do you.), a filling that wasn’t overly goopy nor overly sweet, but has a subtle maple edge to it. It IS pecan pie however; don’t go into this not expecting very sweet 🙂 I love to serve my own piece of pie simply; just the pie, gently warmed, with a small puddle of heavy cream poured over it. Serve this with strong tea or coffee or a glass of milk for the kiddos.
You know the drill… <3
Maple Butter Pecan Pie
- 9 inch pie crust
- 1 to 1 1/2 cups toasted pecan halves (I used more like just 1 cup because I prefer a higher ratio of filling to pecans)
- 1 cup packed brown sugar
- 1/2 cup pure maple syrup
- 1/2 cup light corn syrup
- 1/2 teaspoon salt
- 4 eggs, lightly beaten (have them standing by in a large measuring cup)
- 1 1/2 tablespoons vanilla extract
- 4 tablespoons unsalted butter, melted
- Preheat oven to 400. Line a 9 inch pie pan with the pie crust; crimp as desired. Gently cover the crust with foil, making sure to press it snugly onto the sides. Dump about a cup or so of either dry beans or uncooked rice onto the foil (you can let these cool afterward and save them in a ziploc bag to use the same way again); spread evenly. Bake the crust for about 15 minutes; until it is set, but not browned at all. Remove from oven, take the foil off and turn the oven down to 325 degrees.
- In a medium pot, combine the brown sugar, maple syrup, corn syrup and salt. Cooking, stirring frequently, just until warmed and the sugar has melted.
- Slowly drizzle some of the warmed sugar mixture into the eggs, whisking constantly. You want to temper the yolks, but not scramble them by adding hot liquid to it too quickly. Do it nice and slow. When you have about half the sugar mix incorporated into the eggs, whisk the eggs into the pot containing the rest of the sugar mix. Stir in the butter and vanilla extract.
- Sprinkle the pecans over the bottom of the crust. Carefully pour the sugar/egg mixture on top of the pecans.
- Bake the pie at 325 for 35 to 45 minutes, until the filling is puffed (it will settle back down as it cools) and just off center looks set. It’s ok if there is still some jiggle right in the middle. That will firm as it cools.
Copyright Notice: From Cupcakes To Caviar images and original content are copyright protected. Please do not publish these materials anywhere without prior permission.
Maple Butter Pecan Pie