Chocolate, Cherry & Pistachio Scones

Chocolate, Cherry & Pistachio Scones

Chocolate, Cherry & Pistachio Scones


I’ve mentioned a couple of hundred times by now that I’m not one of those people who does things by the seasons. Nope, I’m that weirdo at the grocery store with no coat and flip flops when it’s 20 degrees out. I’m the reason you’re smelling bbq and woodsmoke in January and suddenly craving grilled chicken. I’m the one making heart cookies in August. While at the same time making a nice comforting warming beef stew or chili. I’m that person posting Pumpkin bread in May and having everyone who comes here (all two of you hehe) wonder what the heck I’m on and why I’m so bass ackward.

Yes. I’m weird. This however is why you like me, right?

*crickets*

From what I’ve seen, most people tend to seem to bake scones during the Winter, many times even around the holidays. This may have something to do with everyone being far wiser than I and not turning on their ovens in the middle of a heat wave. I have never claimed wiseness though so it’s all good. I claim only insanity, a warped sense of humor and an unhealthy love for Cheetos and almost any sort of Gummy candy (right now my current addiction is These Brachs Juicy Berries Gummies. Oh my gosh, I love them and talk about lack of wisdom… it’s unwise for a bag of them to be near me or I’ll eat every.single.one.

But… today wasn’t about gummy candy (tonight when I watch Glee however, all bets are off). Today was about scones. This recipe was originally an Ina Garten one but I found it long ago on the now defunct blog “Gingerbread Bagels”. I don’t know the blog closed of where Lindsey, the owner, disappeared to, but I still think of her and hope she’s ok. Originally, this was just dark chocolate and dried cranberries but we all know I’m genetically incapable of doing a recipe the way it was written. So now I have left my mark on this one and love how I changed it 🙂

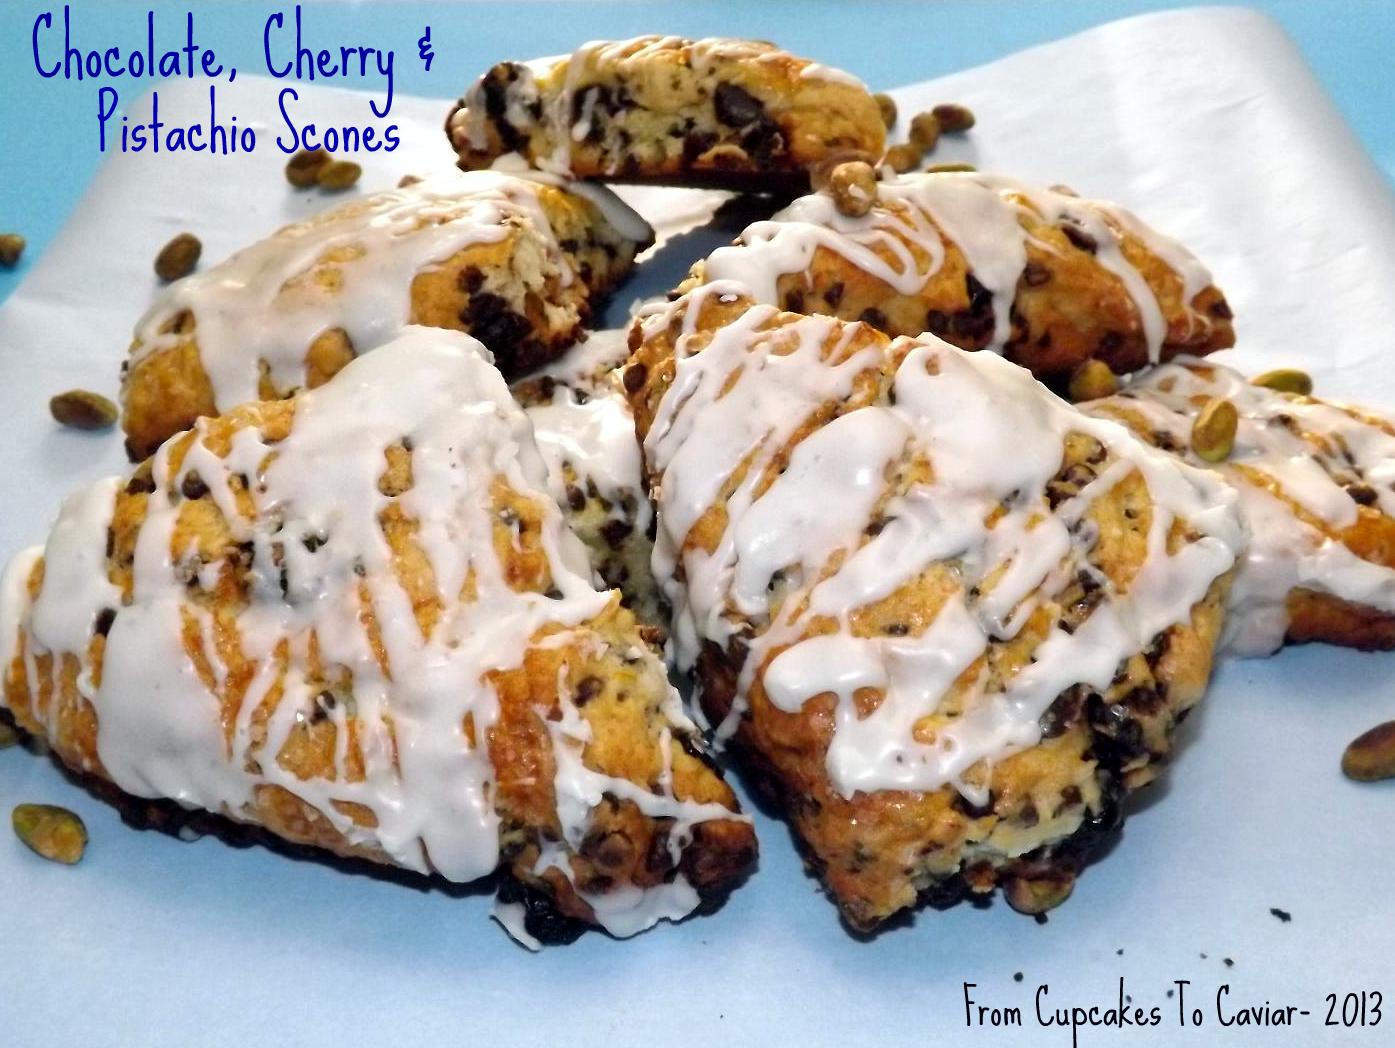
These scones are probably my favorite scones ever. They are flaky and tender… a little bit crispy on the outside and tender on the inside. The chocolate and cherries go so well together and the orange zest and almond extract add a lovely flavor to these. Add in the yummy pistachios and the bit of crunch they add and it’s scone Heaven.

You know the drill. Get to baking!

Chocolate, Cherry & Pistachio Scones

  • 1 1/2 cups mini chocolate chips
  • 1 5 ounce bag dried cherries
  • 1/2 cup chopped salted pistachios
  • 2 cups flour
  • 1/3 cup sugar
  • 1 tablespoon baking powder
  • 1 teaspoon salt
  • 2 teaspoons orange zest
  • 1 1/2 sticks COLD unsalted butter, diced
  • 1/2 cup COLD heavy cream
  • 2 large eggs
  • 1 tablespoon vanilla extract
  • 1 teaspoon almond extract
  • Glaze-
  • 1/2 cup powdered sugar
  • 1/2 teaspoon vanilla extract
  • 2 to 3 tablespoons heavy cream (may need more or less to make glaze drizzling consistency)
  1. Preheat oven to 375. Line a buttered baking sheet with parchment paper and then butter the paper.
  2. Combine the flour, baking powder, salt and orange zest in the bowl of a stand mixer. Add in the cold butter and mix on low speed with the paddle attachment until the flour has only small lumps the size of peas left in it. (Alternately, do the same with a hand mixer or pastry blender)
  3. Whisk together the 2 eggs, 1/2 cup cream, vanilla extract and almond extract. Pour slowly into the flour mixture and continue mixing at low speed until dough comes together in a sticky ball from the side of the bowl.
  4.  Dump onto a lightly floured board. Pat down into a circle of about 3/4 of an inch thick. Cut into 8 wedges with a lightly floured knife or pizza cutter.
  5. Lay close together but not touching on the baking sheet. They will rise and touch as they bake and you’ll have nice soft sides where they do, crispy ones where they didn’t.
  6. Bake at 375 for about 17 minutes or until they are nicely browned and firm on top. Don’t over bake or you’ll lose that great texture!
  7. When done, let cool for about minute in the pan, then carefully transfer over to a wire rack to finish cooling.
  8. For glaze, simply whisk together all the glaze ingredients in a small bowl. Drizzle over the cooled scones.

Print Friendly and PDF

Chocolate Chip Butterscotch Cookie Cake (With An Adult Twist)

Chocolate Chip Butterscotch Cookie Cake

Chocolate Chip Butterscotch Cookie Cake

I’ve mentioned before that I’m not much of a drinker. I like my wine a time or two a week and I like some sweet liquors every once in a while; things like Baileys, Amaretto (it’s wonderful in hot tea) and Butterscotch Schnapps. Yep… they actually make a schnapps with that flavor.  And add Pinnacle Vodka in there sometimes too. I’m not normally a vodka drinker but the ones they make are actually creamy tasting and if you’ve read my blog for more than five minutes, you know creamy tasting and I are BFF’s from way back. 😀

When I was a kid, I loved those hard yellow butterscotch discs. Still do actually, though my teeth (or lack thereof hehe) can’t handle them anymore. So, years back, when I saw the schnapps with that flavor, I had to try it. And lo and behold, it tastes exactly like one of those candies. The problem is that I DON’T drink enough (laughs cause I’m whining that I don’t drink heavily. Go figure.) so a bottle lasts me approximately as long as it takes to go from birth to puberty. So I like to think of ways to use the stuff up that doesn’t involve me and a headache from syrupy booze.

Today, I was looking through my copy of Dam Good Sweets and I noticed a page I tagged. It was for Chocolate Chip Cookie cake. That alone sounded good and I was going to make it but then boozy inspiration entered my head (that sounds like I was sloshed when I thought of it lol. Y’all know what I meant right?) so I played around with the recipe. Not much… just enough to make it say “Janet Made Me!!” How, you ask? Simple. I added butterscotch chips as well as the chocolate and I added a slug of butterscotch schnapps to the batter. I also omitted the almond extract they called for and used dark brown sugar instead of light.

This worked out nicely. You can definitely taste the butterscotch flavor in the dough. Combined with the two different flavors of chips that are all melty and ooey gooey and the soft chewy cookie with crispity (yes, that too is now a word) edges, this all becomes one decadent treat. I had originally thought about sending it in to my husbands work with him, but no way is that happening now that I’ve tasted it hehe.

Now go bake a cookie!

Chocolate Chip Butterscotch Cookie Cake

  • 2 cups semi sweet chocolate chips
  • 1 1/2 cups butterscotch chips
  • 1/2 cup heavy cream
  • 9 1/2 tablespoons unsalted butter, room temp
  • 1 cup flour
  • 1 1/2 teaspoons baking powder
  • 1/4 teaspoon salt
  • 1 cup brown sugar
  • 1 teaspoon vanilla extract
  • 2 tablespoons butterscotch schnapps (you could sub 1/4 teaspoon of butterscotch candy flavoring if you wanted to)
  • 1 egg
  1. Make your ganache- this will be the glaze later. Put 2/3 of a cup of the chocolate chips in a bowl. Microwave the cream until boiling, then pour over the chocolate chips in the bowl. Let sit for about a minute then stir well to melt the chocolate and make a smooth mixture. Cover and set aside. You can make this hours before hand if you want. Just leave out because it will harden in the fridge.
  2. Preheat oven to 350 degrees. Line a buttered 9 inch cake pan with a round of parchment paper (easiest way is to trace the outline of the with pencil on parchment then cut it out) then butter or spray the paper.
  3. Whisk the flour, salt and baking powder in a small bowl. Set aside
  4. In a large bowl, combine the butter, brown sugar, vanilla and schnapps. Mix with a hand mixer until well combined and fluffy. Scrape down the bowl, then add the egg.
  5. After the egg is well combined, stir in the flour mixture.. Stir just until well combined, then add the rest of the chocolate chips and the butterscotch chips
  6. Bake at 350 for about 25 minutes or until the top is golden brown and puffy and the edges look set. The middle will still look and feel somewhat soft..
  7. Let cool in the pan on a wire rack for about an hour. Run a butter knife around the edges of the pan. Carefully lay a plate over the top of the pan and invert the cookie, then do that again onto another plate to get it back right side up.
  8. Spoon your cooled ganache into a sandwich bag. Snip off the corner and pipe the ganache onto the top of the cookie. Eat the leftover ganache hehe.
  9. Serve this to hungry kids who will love you (the alcohol has cooked off). Or just do the usual… hide in the closet with it and don’t share. I’m cool with that too.

Print Friendly and PDF

Lemon Icebox Pie With Honeyed Whipped Cream

Lemon Icebox Pie With Honeyed WHipped Cream 2-001

I know, I know, I just did a citrus pie. What can I say? I’m in a tangy frame of mind. Spring and Summer makes me want sweet tart desserts. Ok, so Fall and Winter make me want sweet tart desserts. So does Christmas. And Groundhog Day. And Thursdays. And…well, you get the point.

I’m not one of those weirdos who says that I would always choose lemon over chocolate, but I do love me a good lemony dessert. I come by that honestly if the love for it can be genetic. One of the only desserts I can recall my mother making was lemon meringue pie. She made an awesome one too.  Plus, my dad loved lemon meringue pie. Hmmm, wonder if there is a connection there. maybe my mom learned because my dad liked it? Or maybe my dad loved it because my mom made it? Who knows? I don’t have many memories of the two of them together so I guess it will remain a mystery.

My father would have loved this pie. It’s not lemon meringue but it has all the thing in it he (and I) loved; lemon, creaminess, whipped cream… ok, so my dad would have loved it because it had sugar lol. I’ve said it before- he was a diabetic with an insatiable sweet tooth.

I originally saw this recipe on The Galley Gourmet. Her blog is one of my absolute favorites and one I aspire to be like though I doubt it will ever happen with my lack of photography skills hehe. When I checked out the cookbook she mentioned in her post, I immediately went to Amazon to check it out and ten minutes later, I was 10 bucks poorer. But it’s definitely worth it. The book (Dam Good Sweet) has quite a few tempting recipes in it that I’ll be trying. Being me however, i had to change it up a little. Mind you, it was very very little. All I did was add some vanilla to it because I adore the combo of lemon and vanilla and I made a honeyed whipped cream for the top of it because who can resist the classic pairing of honey and lemon. I was tickled with the results of that idea. The honey whipped cream goes so well with the lemon flavor. I also didn’t freeze it, just chilled it because I’m not big on frozen pies. Anddddd, I used a premade graham cracker crust but I will post the recipe for the crust in the book. Feel free to do it either way. It worked just fine in the premade if you’re feeling as lazy as I was. So go see if you have any sweetened condensed milk and go buy the prettiest lemons you can find. This pie is delicious!

Note- this takes a lot of egg yolks so plan on making some egg white omelets for dinner that night or some meringue cookies the next day. Just store the whites in a covered container. They will last about 3 days.

Lemon Icebox Pie With Honeyed Whipped Cream

  • crust-
  • Premade graham cracker crust OR
  • 14 whole graham crackers
  • 1/4 cup sugar
  • 6 tablespoons butter, melted
  • Filling-
  • 2 cans sweetened condensed milk
  • 1 1/4 cups strained lemon juice (will take about 5 to 6 lemons)
  • 8 egg yolks
  • zest from 2 lemons
  • Honeyed whipped cream-
  • 2 cups heavy cream
  • 1/4 to 1/3 cup honey (depends on how sweet you want it. I prefer it only mildly sweet because the pie is pretty sweet on it’s own)
  1. To make the crust-
  2. Preheat oven to 350 degrees. Break the graham crackers up into small pieces and place in the bowl of a food processor with the sugar and pulse until they are fine crumbs.
  3. Pour in the melted butter and pulse a few times, until the mixture holds together if squeezed.
  4. Transfer the mixture to a 9 inch springform pan and press onto the bottom and about an inch up the sides of the pan. Set aside.
  5. Whisk the condensed milk with the lemon juice. In another bowl, whisk the lemon zest with the egg yolks for about a minute or so. Pour the lemon juice mixture into the egg mixture and mix well.
  6. Place the pan on a rimmed baking sheet and pour the mixture into the crust. Place into the oven and bake for about 25 minutes or until the center is jiggly, rather like a soft set custard. Remove from the oven and let cool for an hour on a wire rack.  Loosely cover with plastic wrap and either chill or freeze for at least six hours.
  7. When ready to serve, make your cream. In a medium bowl, combine the heavy cream and the honey. Start with the 1/4 cup honey if you’re not sure how sweet you want it. You can taste midway through beating and see if you want more. Beat until soft peaks form. Either cover the pie with the cream or serve on the side. Or just take the whole bowl in a closet and eat it. I won’t judge.
Lemon Icebox Pie With Honeyed Whipped Cream

Lemon Icebox Pie With Honeyed Whipped Cream


Print Friendly and PDF

Key Lime Chess Pie

Key Lime Chess Pie 1

I’ve always had a thing for food culture and food history. One of my prize possessions is the full set of Time Life Foods Of The World cookbooks. The firs time I read one of them was when I lived in Germany and I became immediately hooked. The books are a bit dated now (they were printed in the late 60’s through early 70’s but that is actually part of their charm. But they are a wonderful combination of a cookbook, a travelogue and personal anecdotes from each author. When the internet became a larger part of everyday life, I looked for the books on Ebay and found them. By the time I managed to piece together one set, I had extras and now have almost 2 full sets of the books. I have yet to decide which one of my kids get the books when I die hehe.

One of the things I love about food history is how the things we eat has changed so much and it’s fun to compare. back in the day, people routinely ate things like offal and marrow. I remember my mother, a depression baby, sucking the marrow out of bones and how it grossed me out because I was form a different time period than she. And how many of you have ever had a tomato aspic or jellied beef? Or a Marlborough Pie or Shoofly Pie? Heck, I know many people from the generations younger than myself who have never even had jello or a jello salad. That was such a common place dessert or side dish years back but my theory is that the younger crowd today has far more choices when it comes to sweets so things like jello have fallen out of favor.

One of the things that always sounded interesting to me was Chess Pie. The addition of cornmeal to what would otherwise be a typical custard pie seemed unusual enough to be yummy. But the “normal” chess pie sounded overly sweet, even to me lol. So when I saw a recipe for Key Lime Chess Pie in The Southern Foodie, I knew I wanted to try it. I mean, y’all know me. Turn down something made with lime? Not to mention custardy, aka creamy? yeah right… and I hated Twinkies too.

This turned out pretty good. I was leery at first about the amount of butter used in the crust. I worried it would be greasy. But it seems to have worked, making the crust almost cookie like though a bit less butter would be ideal in my opinion. The filling is nice and tart from the lime but not too tart. The only issue I have is that the directions weren’t very clear on pie pan size. I used a regular 9 inch pan and ended with 1) a very thick crust and 2) too much filling for the pan. So I will say here and repeat in the recipe. Either use a 10 inch deep dish pie pan (hard to find I know), make this in say, a 13×9 inch glass pan or plan on putting some of it into ramekins as I did today.

Key Lime Chess Pie

  • Crust-
  • 1 1/4 cups graham cracker crumbs
  • 1/3 cup plus 1 tablespoon flour
  • 1/3 cup plus 1 tablespoon powdered sugar
  • 11 teaspoons unsalted butter, melted (the recipe called for 12.5 tablespoons but I think a tad less would be ideal with no chance of excessive greasiness. Make your own call there.)
  • Filling-
  • 8 eggs (yes, 8)
  • 4 cups sugar
  • 1/2 cup milk or cream
  • 1/2 cup Key Lime juice (you can find it bottled with the regular lemon and lime juices at the store)
  • 2 tablespoons flour
  • 2 tablespoons cornmeal
  • juice (and zest; my addition there) of one lime
  • 6 tablespoons unsalted butter, melted
  1. To make the crust, preheat oven to 350 degrees then combine all the crust ingredients and pat into the bottom of a deep dish large pie pan or a 9 inch pan and a couple of ramekins.
  2. Place the pan in the 350 degree oven and bake for 7 minutes, then set aside to cool.
  3. For the filling, In a large bowl, combine the eggs, sugar, milk (or cream) and key lime juice. Whisk until well combined.
  4. Add the flour, cornmeal, lime juice and zest and butter. Stir to combine.
  5. Pour into the pie shell and bake at 350 until the top is golden brown and the only the very center of the pie is jiggly. The edges and halfway through should look and feel set not liquidy.

Print Friendly and PDF

White Chocolate Coconut Mojito Cookies

White Chocolate Coconut Mojito Cookies

I’m not a huge imbiber when it comes to hard alcohol. I joke about it on my facebook page and yes, I do like my wine and every once in a while something harder. But generally speaking, I’m pretty darn boring that way. I did all my drinking in my wild younger days (someday I’ll tell the story of waking up in the backseat of a car, unclothed, with no memory of how I got there. I was…interesting when in my late teens and early 20’s). But even then I tended to drink wine. When I drank the hard stuff, I ended up..well, in situations. Learn from me, grasshoppers.

So I’ve never had a mojito. But the IDEA of them has always intrigued me since I absolutely LOVE lime and enjoy mint too. So the thought of them together sounded yummy. But it meant buying rum and the only time I buy rum is when I buy an airline sized bottle around Christmas to soak my fruitcake in.

So I saw a recipe a few days ago for a Mojito Scone. That sounded interesting but I know I do a lot of that type of baked goods in here and hadn’t done any cookies for a while <insert Cookie Monster voice here saying “COOOOOOKIEEEESSSS!”>. So I thought. Then I thunk some more. Then I answered the door cause the fire department was there saying they had multiple reports of the smell of burning coming from my house.

So I stopped thinking. And that’s when it came to me. These cookies. Mojito flavored. As well as tasting of some toasted coconut just because I love any excuse to throw toasted coconut into things.

These turned out both good and not to my taste, all at once. Will I make them again? Yes, but next time I will double the lime zest, add some lime oil, cut the mint extract in half (it was a bit overpowering for me) and add some coconut extract as well. Then, I think they would be absolutely perfect. But if you prefer the flavor of mint to be more prominent, make them exactly as I will type them out here. Otherwise, try them the way I just suggested up above. that will make the lime and coconut flavors more noticeable. But for an experiment, I was really pleased with these. They are nice and chewy, the toasted coconut was a great addition and were pleasantly buttery. I WILL be making these again 🙂

White Chocolate Coconut Mojito Cookies

  • 1 cup unsalted butter, room temp
  • 1 1/2 cups brown sugar, packed
  • 1 cup sugar
  • 2 eggs
  • 2 teaspoons vanilla extract
  • 1 teaspoon rum extract
  • 1 teaspoon mint extract (cut in half if you want mint flavor lighter)
  • zest and juice from one small lime (remember, double the zest and add some lime oil if you prefer the lime to dominate over the mint)
  • 1 cup shredded sweetened coconut, toasted in a 350 degree oven until light brown (also, about 1/2 teaspoon coconut extract if you want a heavier coconut flavor)
  • 3 cups flour
  • 1/2 teaspoon baking soda
  • 1/2 teaspoon salt
  • 1 11 ounce bag of white chocolate pieces
  1. In a large bowl, beat together the butter and the sugars.
  2. Add the eggs, the extracts and the lime juice and zest. Beat until well blended.
  3. In a small bowl, mix the flour, baking soda and salt. Add to the butter mixture. Mix just until blended. Stir in the white chocolate pieces and the toasted coconut.
  4. Cover bowl with plastic wrap and chill for about an hour.
  5. Preheat oven to 350 degrees. Grease and/or line cookie sheets with parchment paper.
  6. Spoon or scoop rounded spoonfuls of the dough onto the prepared cookie sheets. Bake at 350 for about 10 minutes. They should be just barely browned on the edges of the cookies.
  7. Let cool on pan for a minute, then transfer to a wire rack to finish cooling.


Print Friendly and PDF

Extra Rich Cinnamon Rolls With Cream Cheese Icing

Extra Rich Cinnamon Rolls-001

Surprise, surprise… a recipe from me with the words extra rich in the title. Never expected that huh? Not with the dearth of fattening recipes here. What makes these extra rich? Mashed potatoes in the dough. Get back here! Sheesh. Ever had potato bread? Same idea, different result. I didn’t make a batch of garlic mashed and shove the extra into cinnamon rolls *gags a little*. Mashed potatoes (plain, NOTHING added; just the taters) are very common in yeast bread. They add a richness to the dough but with no potato flavor. They also make the dough more tender and help it to rise better. matter of fact, when you make mashed potatoes, it’s a good habit to save some of the cooking water if you make yeast risen doughs often. You can sub it for part or all of the liquid (part is better if the original recipe calls for milk) and you will see an amazing difference in the finished product.

These cinnamon rolls were supposed to have pecans in the filling, but if you follow my facebook page at all, you may have seen my update about the two pans of burned pecans. Sigh. talk about idiocy. I put one in to toast then had a major “ooo, shiny thing!” moment and forgot about them. Slapped myself around for a bit then put in another pan. Words With Friends on facebook may or may not have had something to do with the other pan burning. Needless to say, after about 12 dollars worth of pecans torched, I was not trying again. So the rolls have raisins in half the batch. Feel free to sub pecans (I will put the amounts for either one in the recipe). Just stay away from word games when toasting them. Also, this makes a HUGE batch of rolls. I got 2 13×9 pans with 12 each and 6 more in a 8×8 pan. In my household which currently consists of myself, hubby, two teen boys, three boys 6 and under and a pregnant woman, they will get eaten. But in “normal” homes, you may want to cut this in half. Or make your neighbors happy.

This originally came from The Pastry Queen Cookbook. Adapted some for a stand mixer and ingredients changed a LITTLE but not much.

Extra Rich Cinnamon Rolls

  • 2 medium russet potatoes
  • 4 packets dry yeast
  • 3/4 cup plus 1 teaspoon sugar
  • 1 cup unsalted butter, melted
  • 3 large eggs
  • 2 teaspoons salt
  • 9 cups flour (I TOLD you this was big batch) (I actually used more like ten cups; it will depend on the moisture of your potatoes)
  • Filling-
  • 4 cups pecans, toasted for about 8 minutes at 350 degrees then coarsely chopped or 3 cups good quality raisins (not dried shriveled rocks)
  • 4 cups firmly packed brown sugar (I used dark brown)
  • 4 tablespoons cinnamon (no, that’s not a typo… look at the amount of ingredients and this makes sense)
  • 1 teaspoon nutmeg
  • zest from one large orange (optional)
  • 1 cup unsalted butter, melted
  • Icing-
  • 1 8 ounce package cream cheese, room temp
  • 1/4 cup heavy cream
  • 3 to 4 cups powdered sugar
  • 1 teaspoon vanilla extract
  • 1/4 teaspoon orange extract (optional)
  1. To make the rolls- fill a large pot with water and set on high to boil. Peel and chop the potatoes and add to the pot. Cook until the potatoes are tender. Reserve three cups of the cooking water, then drain off the rest. Mash the potatoes and set aside. Let the potato water cool until it is between 110 and 115 degrees.
  2. In a medium bowl,  combine the cooled potato water, yeast and the one teaspoon of sugar. Stir until the yeast is dissolved. Let sit until foamy, about five minutes.
  3. In a large bowl, whisk together the potatoes, 3/4 cup sugar, 1 cup melted butter, eggs, salt and yeast mixture.
  4. Pour mixture into the bowl of a stand mixer. Turn mixer onto low and add the flour, in 3 cup increments. If the dough still seems wet (you want slightly sticky but not obviously moist) add more flour, a 1/4 cup at a time. Don’t go over 10 cups. Again, it’s ok if the dough is somewhat sticky. If you make it too dry, the rolls will also be dry. Sticky dough equals tender moist rolls in the end.
  5. Place the dough in a large greased bowl, making sure to oil the top of the dough some and then cover with a clean towel. Place in a warm place to rise and let rise until doubled in bulk, about an hour.
  6. Meanwhile, mix together the brown sugar, cinnamon, nutmeg and orange zest (if using) in a large bowl. Prepare 2 13×9 inch pans by lining with foil then greasing the foil. Heat oven to 375 degrees.
  7. When risen, punch down dough then divide it  in half. On a floured board or counter, roll half into a 1/4 inch thick rectangle. Brush with half the butter,  sprinkle with half the brown sugar mixture and half the raisins or pecans. Carefully roll the dough up from one long end. Roll as tightly as you can.
  8. Using a sharp serrated knife, cut each roll of dough into 12 to 15 pieces. This will depend on whether or not your roll ended up bigger than 1/4 inch and looks like it is about the length of an adult python. Place 12 in each 13×9 inch pan. If you get more than 12 from each roll,  foil and grease a 8×8 inch pan and put the remainder in the 8×8 pan. Allow to rise until puffy but not quite doubled, about 45 minutes
  9. Bake at 375 degrees for about 25 minutes or until a nice light golden brown.
  10. Let cool in pan set on wire rack.
  11. For icing, combine icing ingredients in a medium bowl. Beat until smooth and creamy. Spread on slightly warm rolls. But first, eat about half of it straight off of a spoon then blame me when your husband asks why there is so little icing for the rolls.


Print Friendly and PDF


Hummingbird Bundt Cake

Hummingbird Bundt Cake-001

Hummingbird Bundt cake- No hummingbirds were harmed in the making of this cake 😀

I’m one of those people whose mind never shuts down. I don’t say this in the tone of “I’m so damn smart, my mind is always working”. On the contrary. I said it never shuts down. Work on the other hand is a totally foreign concept to my brain. If my brain were a person, it would be sitting on the couch in a holey wife beater, holding a beer, chips and the TV remote, burping and watching something like “Nude Alligator Hunters” while it said to my body “make me a sammich, bit**!”. My mind needs therapy.

Point is, my mind annoys me. It will be 3am and the rest of the world is sleeping (ok, the rest in my time zone…who aren’t working 3rd shift…and aren’t insomniac…or watching “Nude Alligator Hunters”. Crap, ok, while SOME other people are sleeping) and my mind is creating story lines that I will forget by morning and never write. Or it will be wondering if the cats are warm enough…or why Bates on Downton Abbey let his estranged wife blackmail him. Or why things have the names they have.

Case in point- this cake. Really? Hummingbird Cake? There is not a Hummingbird in it… not even a stray feather. I had seen the original recipe for the layer cake and I know it’s a fairly old recipe, stemming from at least the Civil War era. Maybe they put Hummingbirds in it then? 😛 As I was saying; I’ve seen the recipe (maybe I should say “the receipt” since this is an old cake) for the layer cake and while it intrigued me, I was always hesitant to make it because it just sounded too sweet, too rich. WAIT!!! Don’t leave! Yes, that was really me that just said the words “too sweet” and “too rich”.  because…well… it did. A fairly rich cake layered with an ultra sweet and rich frosting. Just…too much. So when I saw this recipe for a bundt cake version with the frosting as just a glaze on top, I HAD to try it. The combo of banana and pineapple along with a cream cheese glaze was too much to resist. And oh boy, is it hard to resist. Moist and tender with the tropical flavors blending so well. Then the cream cheese glaze. Really… can you ever go wrong with cream cheese glaze? Plus it goes together quickly. No beating for 90 minutes and alternate adding of ingredients.

I still think I should have put a Hummingbird in it though. But the birds weren’t falling for my sign that said “Free Bird Seed Here… Enter Box Here—>” My son on the other hand… we still need to figure out how to get the box off of his head.

This came from “Southern Living Comfort Foods”

Hummingbird Bundt Cake

  • Cake-
  • 1 1/2 cups pecans, toasted
  • 3 cups flour
  • 2 cups sugar
  • 1 teaspoon baking soda
  • 1 teaspoon cinnamon (I used 2)
  • 1/4 teaspoon salt
  • 3 eggs, lightly beaten
  • 1 1/4 cups mashed bananas (about 4 large)
  • 1 8 ounce can crushed pineapple, undrained
  • 3/4 cup vegetable or canola oil
  • 1 1/2 teaspoons vanilla extract
  • Glaze-
  • 4 ounces cream cheese, room temp
  • 2 cups sifted powdered sugar
  • 1 teaspoon vanilla extract
  • 1 to 2 teaspoons milk
  1. Preheat oven to 350 degrees. Grease and flour a 14 cup bundt pan. Sprinkle 1 cup of the pecans on the bottom of the pan, reserving the last 1/2 cup for sprinkling on the glaze.
  2. Stir together flour, sugar, baking soda, salt and cinnamon in a large bowl.
  3. Stir in the eggs, oil, bananas, pineapple and vanilla. Stir just until the dry ingredients are moistened.
  4. Bake at 350 degrees for an hour to an hour and ten minutes or until golden brown and a wooden skewer inserted in center comes out clean.
  5. Let cool in pan on wire rack for 15 minutes, then turn out onto rack to finish cooling for about 2 hours.
  6. For glaze- beat cream cheese until light, then add powdered sugar and beat on LOW speed (unless you like being covered in sugar dust) until well mixed. Add in the milk, a teaspoon at a time, only adding the second one of you need to make it thin enough to pour.
  7. Pour glaze over the top of the cake. Sprinkle with reserved pecans.

Print Friendly and PDF

Caramel Apple Snack Cake

Caramel Apple Snack Cake-001

…Or dessert cake, or breakfast cake, or eat this when the kids aren’t looking cake, or late night snack cake or..well, you get the idea. I mean it has apples in it so it can be for ANY meal, right? So what if the apples are really a can of pie filling and they are surrounded by ooey gooey bits of caramel!

I know I’ve mentioned before that I have never been one to cook by the seasons. If I want Pumpkin Bread in July, I’m having pumpkin bread. If I want to grill out in January, I grill out. Hey, I never claimed sanity. So when I decided to make something appley  (what? Appley is a word… honest it is!) for my husband because he loves apple desserts, I didn’t give a darn that according to blogger standards, the time for apple desserts is in the Autumn. I’m a rebel! A rebel I say!!! Or something like that.

Right away,  I knew what I wanted to do. I have a recipe from Food.com that I use often for Chocolate Covered Cherry bars  that my husband loves. So I played around with it and changed it to apple. I then added a healthy disgustingly large dose of caramel and a bag of cinnamon chips. I have to admit, this is really good. Not fancy by any means but so darn yummy! It’s moist, filled with apples and caramel and cinnamon chips. The edges are slightly crispy and sticky from the caramel and you never get the same bite twice. this one has apples, this one caramel, this one both and so on. This is a great family dessert and one I know I’ll be making again…probably tomorrow 😀

Caramel Apple Snack Cake

  • 3/4 cups butter, room temp
  • 2 eggs
  • 1/2 cup sugar
  • 1/4 cup brown sugar
  • 2 teaspoons vanilla extract
  • 2 cups flour
  • 1 teaspoon baking soda
  • 1 can apple pie filling
  • 1 bag cinnamon chips
  • 1 bag caramels, cut into quarters
  1. Preheat oven to 350 degrees. Grease and then line a 13×9 inch pan with parchment paper. Grease the parchment paper well.
  2. In a large bowl, combine the butter, sugars, vanilla and eggs. beat well
  3. Combine the flour & baking soda in a small bowl. Combine with the butter mixture.
  4. Fold in the apple pie filling, cinnamon chips and caramel pieces.
  5. Spoon into the prepared pan. Bake at 350 for about 35 to 40 minutes or until top is nicely golden brown and a wooden skewer inserted in the middle comes out clean.
  6. This is good warm, served with ice cream or room temp..or cold..or frozen stiff..or boiling hot..or…or..or..


Print Friendly and PDF

Homey? Decadent? Homey? Decadent?

Maple Buttermilk Pudding Cake

Maple Buttermilk Pudding Cake


Usually those two words don’t go together. You have your decadent foods, which can be tasty and other times can be what some restaurants consider tasty but is actuality just snobby and the only thing decadent is the price. There are the truly decadent foods however that deserve the title and the love they get. Think Creme Brulee, Lobster and drawn butter, a thick porterhouse steak (ribeye in my case… would be on the menu for my last meal along with roasted brussel sprouts and seasoned potato wedges) All of those qualify as decadent in their way.

Then you have your homey comfort foods; the casseroles made with cream of emu soup that your mother made, the mac and cheese made with 14 pounds of velveeta and not a drop of real cheese in sight, the pot roast that your family had every Sunday,  the fried chicken that gramma made that you still can’t seem to duplicate no matter how many times you try. All oh so bad for you, half the time made with more sodium and fat than you need in a week, but sooo tasty, so comforting and simply reeking of hominess.

So I’m not sure what to call the dessert I made today. The same dessert btw, that I ate an entire serving of after photographing and that has made me now have absolutely no interest in eating dinner. Ummm…oops? Moving on though… I’m not sure what heading this one qualifies for. It’s a pudding cake, which is the very definition of a homey dessert. Yet it uses a butt ton of real maple syrup, which is decadent both in taste and price. And the flavor is both homey and comforting at the same time that it is rich and decadent.

I’m so confused!!! My taste buds don’t know what to think!!

So I’m just gonna give you the recipe and let you decide.  But be warned. This is one awesome dessert. I know, I know, all us bloggers say that. But this really is. I told my husband that this is now going on my list of favorite desserts. It is very rich… I mean, the bottom of this is literally just maple syrup and butter. And pretty? No; not so much. But there is something downright decadent AND homey about it and that’s not a mix you come across often with foods. The edges get all cripsy with caramelized syrup and the bottom is almost like a pancake drenched in syrup while the top is a light cake. I will be making this again…and again…and again.

This recipe originally came from Food and Wine. I barely changed it but did make a couple of very small alterations.

Maple Buttermilk Pudding Cake

  • 1 1/3 cups maple syrup (the real stuff, not Mrs. Butterworths and preferably Grade B as it’s darker and more mapley <yes, mapley is now a word; I said so.> )
  • 1/2 cup plus 3 tablespoons unsalted butter, room temp
  • 1 cup all purpose flour
  • 2 teaspoons baking powder
  • 1/2 teaspoon salt
  • 1/4 teaspoon nutmeg
  • 1/2 teaspoon cinnamon
  • 1 egg
  • 1 egg yolk
  • 1/3 cup buttermilk
  • 2 teaspoons vanilla extract
  • 2/3 cup sugar
  1. Preheat the oven to 350 degrees. Lightly butter and 8×8 pan then line it with parchment paper, then butter again.
  2. In a medium saucepan, boil the syrup until it is reduced down to about a  cup. And no, you can’t just start with a cup of syrup and skip the reducing. You get a more condensed flavor plus, when making pudding cakes, the textural differences are helped by having a hot layer mixed with a cold layer. When reduced, whisk in the 3 tablespoons butter and pour the mixture into the bottom of the prepared pan.
  3. In a small bowl, whisk together the flour, baking powder, salt, cinnamon and nutmeg.
  4. In ANOTHER (I know, I know but it’s worth the dishwashing later) bowl, whisk together the egg, egg yolk, buttermilk and vanilla.
  5. In another bowl (shush… just go get a bowl) beat the 1/2 cup butter with the sugar at medium speed until light and fluffy.
  6. At low speed, beat in the dry ingredients, alternating with the liquid in two batches.
  7. Dollop spoonfuls of the batter over the syrup. bake the pudding for about 35 minutes or until the top is golden brown with syrup all bubbly at the sides and a wooden skewer inserted in the middle comes out clean. Let stand for a few minutes before serving then scoop portions into a bowl and serve with a puddle of heavy cream or some creme fraiche.


Print Friendly and PDF

Too Much Chocolate? You’re Kidding, Right?

Fudge truffle Pie With Mascarpone Cream

Fudge truffle Pie With Mascarpone Cream

Is there such a thing as too much chocolate? My husband has joked (ok, half joked) that it’s different for a man, that women are hormonally wired to want chocolate more than males do. I’m not sure that’s true, no matter how many jokes/pins/whatever there are combining women, PMS and chocolate. But I think of it this way. If HE thinks that women have this strange NEED for chocolate, who am I to argue? With that mindset,a ll he does is roll his eyes as I grab the Reeses Cup package from the check out lane or smiles when I talk about how he just must, absolutely must, get me some Fanny May chocolates. I mean… I NEED them, right?  Why fight that line of thought? Heh.

This recipe however, come perilously close to too much. When you make it (and you must make it. If you’re female, tell anyone who asks that my husband, who is a medical professional, says that you need this pie. If you’re male, say you’re making it for your wife or sister or mother. Then eat it all yourself.

This pie is like a truffle in a crust. It’s rich, thick, smooth, supremely chocolatey and any other adjectives one can think of that mean “OMG, hand over this pie now and no one will get hurt!”. The mascarpone cream I added to it just adds to the decadence. Yet at the same time it cuts the richness a bit making it easier to fit in 4 or 5 more bites of pie. See? I’m always thinking of your needs here. I’m a pal that way.

No matter how much you love chocolate though, I suggest small slices. This pie can easily serve 12 people. Not to mention, I would guesstimate that a small slice of this has about 12,000 calories. Add some of the Mascarpone Cream and you’ve upped it to about 15,000 calories, give or take a thousand 😀

Fudge Truffle Pie With Mascarpone Cream Topping

  • 6 eggs
  • 1 1/2 cups sugar
  • 1/3 cup cornstarch
  • 1 3/4 cup heavy cream
  • 2 cups whole (or 2%) milk
  • 5 ounces unsweetened chocolate, chopped
  • 1 tablespoon butter
  • 4 teaspoons good quality vanilla extract
  • 1 large premade graham cracker crust (feel free to use a deep dish pastry crust, but plan on leftover filling, which you can then eat warm with a spoon; not a bad predicament to be in)
  • Mascarpone Cream-
  • 8 ounces mascarpone
  • 1 cup heavy cream
  • 1/4 cup sour cream
  • 1 teaspoon vanilla extract
  • 1/3 cup powdered sugar
  1.  Separate your eggs, putting the whites into a sealable container in the fridge. Save them for meringue cookies or a couple of egg white omelets. After eating this pie, you’ll want to watch your calories for a bit anyway hehe.
  2. Place the yolks in a small bowl or measuring cup. Beat lightly then set aside.
  3. For the filling, in a large nonstick pot, combine the sugar and the cornstarch. Gradually whisk in the cream and milk, then stir in the chocolate.
  4. Cook over medium heat, stirring constantly. Continue to cook until it is thick and bubbly. At first it will look like the chocolate just isn’t melting into it but keep going; it all comes together. Just don’t stop stirring or it will stick and burn and burned pudding smells and tastes disgusting and it makes baby kittens whimper..
  5. When it thickens, reduce the heat and cook for a couple of minutes more.
  6. Gradually stir about a cup of the filling mixture into the egg yolks, stirring the whole time you’re combining them. You have to temper your yolks. If you just dump them into the hot mixture, you’ll have chocolate filling with scrambled eggs mixed in. Yum??
  7. Stir the egg yolk mixture into the chocolate mixture. Bring to a gentle boil and cook for another 2 minutes, again stirring constantly.
  8. Take off the heat. Stir in the butter and vanilla extract.
  9. Pour the filling into the crust. Cover with plastic wrap and refrigerate for about 4 hours.
  10. About ten minutes (or up to a day; no more though) before you’re ready to serve, make your topping.
  11. In a medium bowl, whip the mascarpone until light. Pour in the powdered sugar and vanilla and beat until fluffy and combined. Fold in the sour cream with a rubber spatula. Add in the heavy cream and beat at low speed until the mixture is light, fluffy and looks like a soft custard. If not using right away, eat a spoonful or six then put in a covered bowl in the fridge.
  12. When ready to serve, cut the pie (this slices quite nicely. It’s a firm filling) into small slices and serve either with a dollop of topping on each slice or with the topping in a bowl so everyone can put on how much they’d like.


Print Friendly and PDF