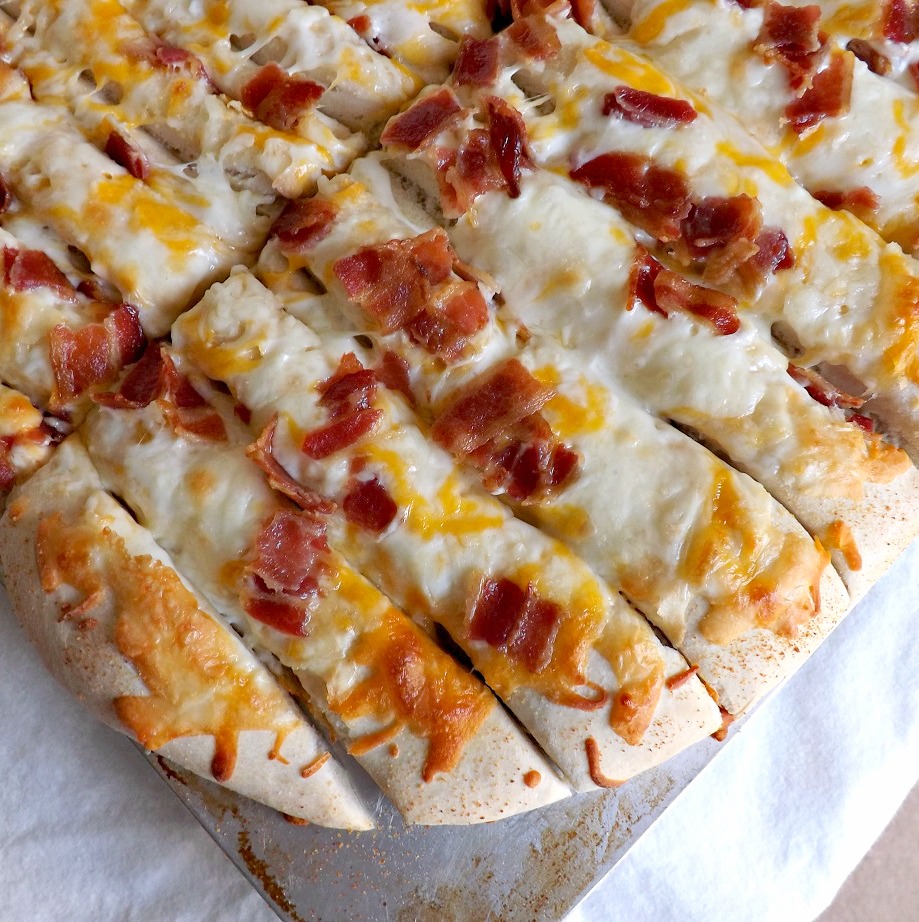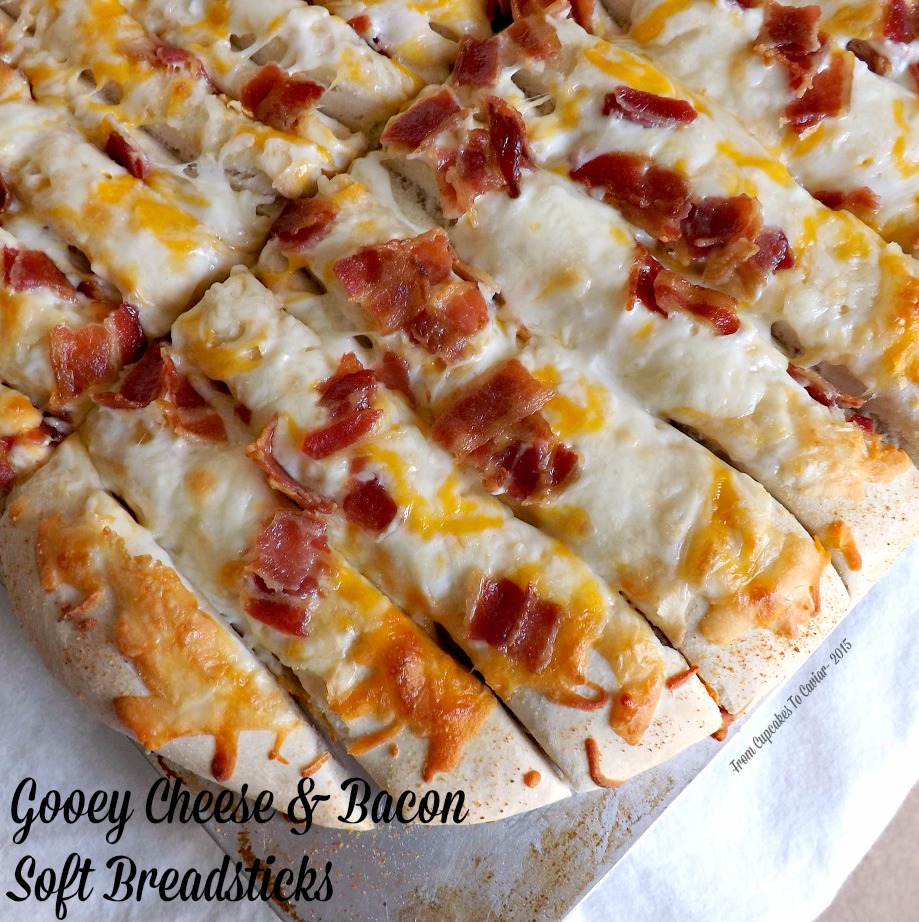
Gooey Cheese & Bacon Soft Breadsticks

I think if it were left up to the guys in my house, every day would be a day devoted to seeing how many carbs and how much cheese they could stuff into their bodies, veggies be damned. I on the other hand would happily live on veggies and meat, with dessert afterward of course. I love cheese, but I’ve said before I prefer my carbs in sweet form usually. Thus why this blog is overwhelmingly sweets and not non-sweets.
The rare times we can manage to go out for dinner, they love places that have pizza, with Gatti-Town being a favorite…unlimited pizza, pasta, breadsticks and then games. What more does any male need, right? I am pretty sure that when the cooks see them go up for their 14th plate of cheesy carbs, they groan and wish they worked somewhere else. I’m never worth the price of the buffet myself. I usually manage two slices of pizza and a salad and that’s about it.
Right now, it’s a rough patch financially, so I wanted to give the guys a treat I knew they’d love that we can’t afford to get out. What better way than one of their favorite buffet foods, made fresh at home?
Gooey Cheese & Bacon Soft Breadsticks
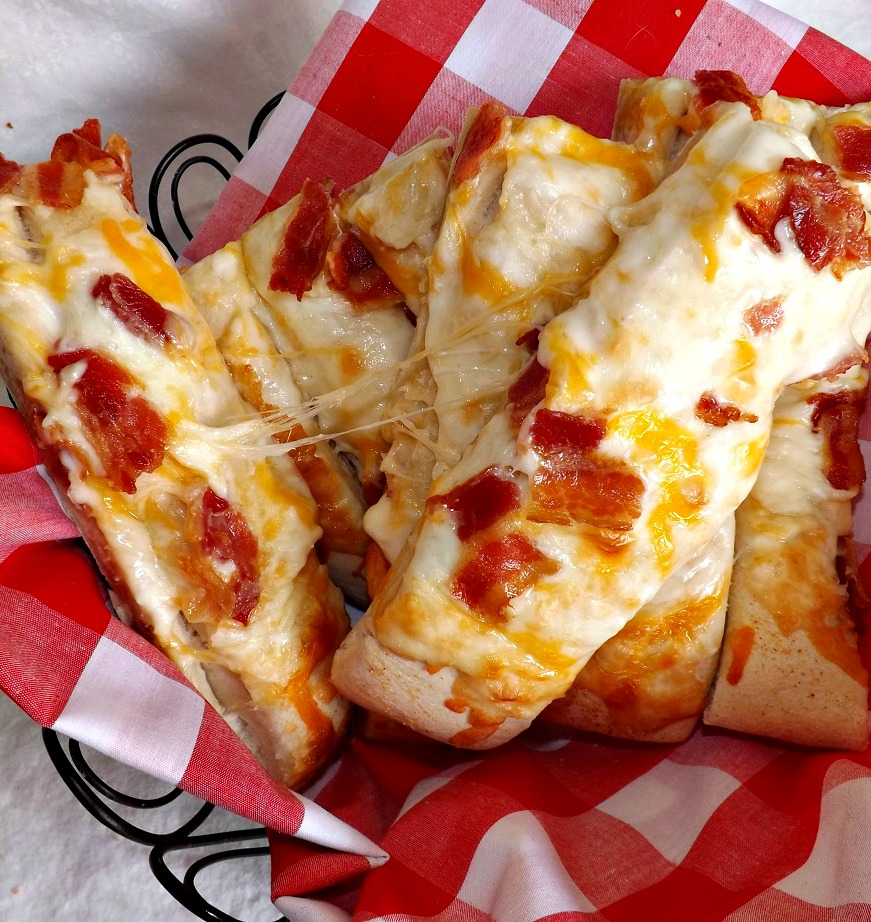
I think they were happy with these. I mean, really… cheese…bacon. Bacon is one of Gods gifts to mankind 😀 I managed to eat one and it was quite yummy. I hid one for myself for later too, hehe. They inhaled the rest of them for an early dinner. Not traditional, not even particularly nutritious, but my guys enjoyed the treat.
These are extremely easy to make. it’s a SIMPLE yeast dough you can do in a stand mixer (or even by hand if you want). Then you roll it out into a rough rectangle, cut it, let it rise, sprinkle with the goodies, then bake and eat the cheesy, carby goodness. Nuthin’ to it. You can add a bit of thinly sliced red onion to this or a bit of green pepper… just use your imagination and put what makes you happy.
You know the drill….
Mrs. Cupcake… who feels the need for a fresh salad now
Gooey Cheese & Bacon Soft Breadsticks
- 1 package dry yeast
- 1/4 cup warm water (about 112 to 117 degrees)
- 4 to 4 1/2 cups flour
- 1 1/4 cups water
- 2 tablespoons unsalted butter, room temp
- 1 1/2 tablespoons sugar
- 1 tablespoon salt
- 1 teaspoon garlic powder
- 1 teaspoon onion powder
- 1 teaspoon salt
- olive oil (or just use some of the bacon drippings)
- 8 ounces bacon, cooked to chewy crispness and crumbled
- 8 ounces Mozzarella cheese, shredded
- 8 ounces mild cheddar, shredded
- Sprinkle the yeast over the 1/4 cup warm water in a bowl; stir to mix then let it sit for about five minutes. The mixture should start to get foamy.
- Place 4 cups of the flour, the butter, sugar, salt and 1 1/4 cups water in the bowl of a stand mixer (again, you can mix by hand. It will take longer, but it’s definitely doable). Pour the yeast mix in and beat on low speed, with the dough hook, for about five minutes, until the dough comes together in a slightly sticky ball. If it is too sticky to work with, add in another 1/4 cup of flour, then mix again until the dough comes together in a ball.
- Grease a large baking sheet or cookie sheet. Dump the dough out onto a lightly floured board or counter and give it a few quick kneads just to bring it together well. Roll it out into a more or less rectangular size (it doesn’t have to be perfect- you’ll just be laying it out on a baking sheet) of about 15 x 11. Carefully roll it up halfway over the rolling pin or your hand and transfer it to the baking sheet. Stretch out any wrinkles you may have made in it during the transfer.
- Use a pizza cutter or sharp knife to score the dough into long strips, then again down the middle to cut the strips in half. Don’t separate them, just leave it like that. Let rise in a warm place until puffy and almost doubled, about 45 minutes. Preheat your oven to 375 degrees while it rises.
- Brush dough lightly with either olive oil or bacon drippings. Sprinkle with the garlic powder, onion powder and salt. Sprinkle the cheese on top of that, then the bacon.
- Bake at 375 degrees until the edges are golden brown and the cheese is browned and bubbly, about 25 minutes.
- Let rest for about 5 minutes, then use a pizza cutter or sharp knife to cut the breadsticks through the score lines you made earlier.
- Serve to hungry males with pizza sauce. Take in the accolades and cheese scented kisses.
Copyright Notice: From Cupcakes To Caviar images and original content are copyright protected. Please do not publish these materials anywhere without prior permission.