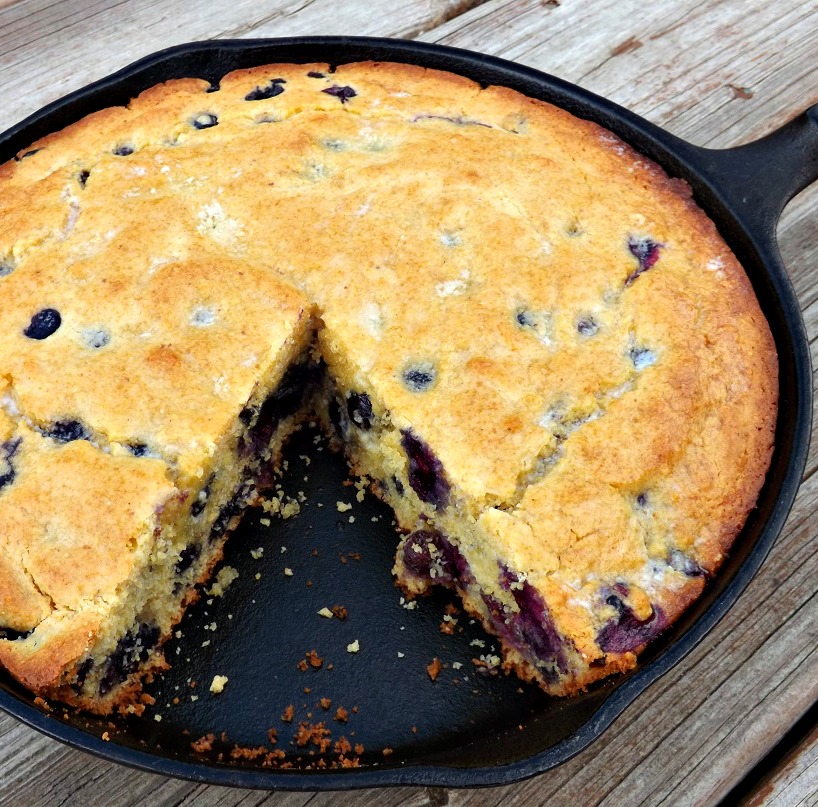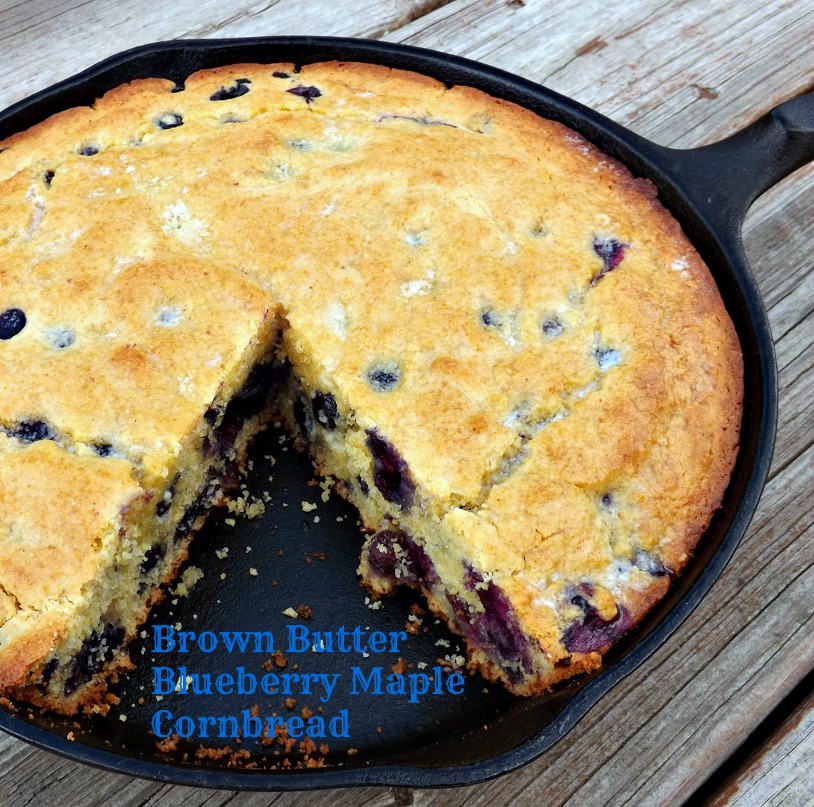
Brown Butter Blueberry Maple Cornbread

As much as I love making yeast breads and other good stuff that are yeast raised like sticky buns , my first love will probably always be cornbread .There is just something so homey about a good wedge of cornbread, be it plain or doctored up, as this version is. You can eat it by itself; and contrary to popular belief, you really should be able to eat it plain, without soaking it in something to relieve dryness. If it’s that dry, you did something wrong when baking it.
On the yeast bread front, I’ve put my sourdough starter out to come to room temp somewhere in the vicinity of 43 times in the last month. Then, I get involved in other things, put it away and say I’ll get to it the next day. If starters could be sentient, mine would have the worlds largest inferiority complex. “What? She doesn’t want me again? Was it something I did… said? Do I smell funny? Wait… I’m supposed to smell funny.”
With this bread, I took the recipe I have up in here for honey cornbread and played with it. I traded the plain butter for browned butter because you can never go wrong with brown butter, used maple sugar in place of the regular and added in a pint of blueberries. This one is perfect for breakfast. Just serve it with yogurt and a cup of coffee (or tea in my case) and you’re good to go. It’s actually almost cake like enough to be a good fit for dessert too, if you’re the nontraditional sort, as I am. One of my favorite desserts is a piece of cornbread with butter and maple syrup. Try it sometime. 🙂
You know the drill…
Brown Butter Blueberry Maple Cornbread
- 1 cup flour
- 1 cup cornmeal (NOT cornbread mix)
- 1 tablespoon baking powder
- 1/2 teaspoon salt
- 1/4 cup maple sugar (if you don’t have maple sugar, sub 1/4 cup regular sugar and add in 1/2 teaspoon maple flavoring when you add the eggs)
- 1/2 cup heavy cream
- 1/2 cup whole or 2% milk
- 1/4 cup unsalted butter
- 1/4 cup honey, warmed if needed to make it pourable
- 2 eggs
- 1 pint fresh blueberries
- Preheat the oven to 400. Butter a 9 inch cast iron pan or a 9 inch square baking pan.
- Then, brown your butter- place the butter in a small pot. Melt it over medium high heat, swirling it frequently. Let it keep cooking until it turns a nice golden brown, then immediately pour it into a measuring cup or bowl to cool a bit while you work on the rest of the recipe.
- In a large bowl, whisk to combine the flour, cornmeal, baking powder and salt.
- In another bowl, combine the maple sugar, cream, milk, honey and browned butter. Whisk well. Add in the eggs (and maple flavoring if that’s what you’re using) and whisk well.
- Pour the wet ingredients into the dry ingredients and use a rubber spatula to stir just until barely combined. gently fold in the blueberries then pour the batter into the prepared pan.
- Bake at 400 until the top is golden brown and a wooden skewer inserted in the center comes out clean, about 20Â to 25 minutes.
- Best served warm with plenty of butter and maple syrup. But that may be a bit of bias on my part. 😀
Copyright Notice: From Cupcakes To Caviar images and original content are copyright protected. Please do not publish these materials anywhere without prior permission.