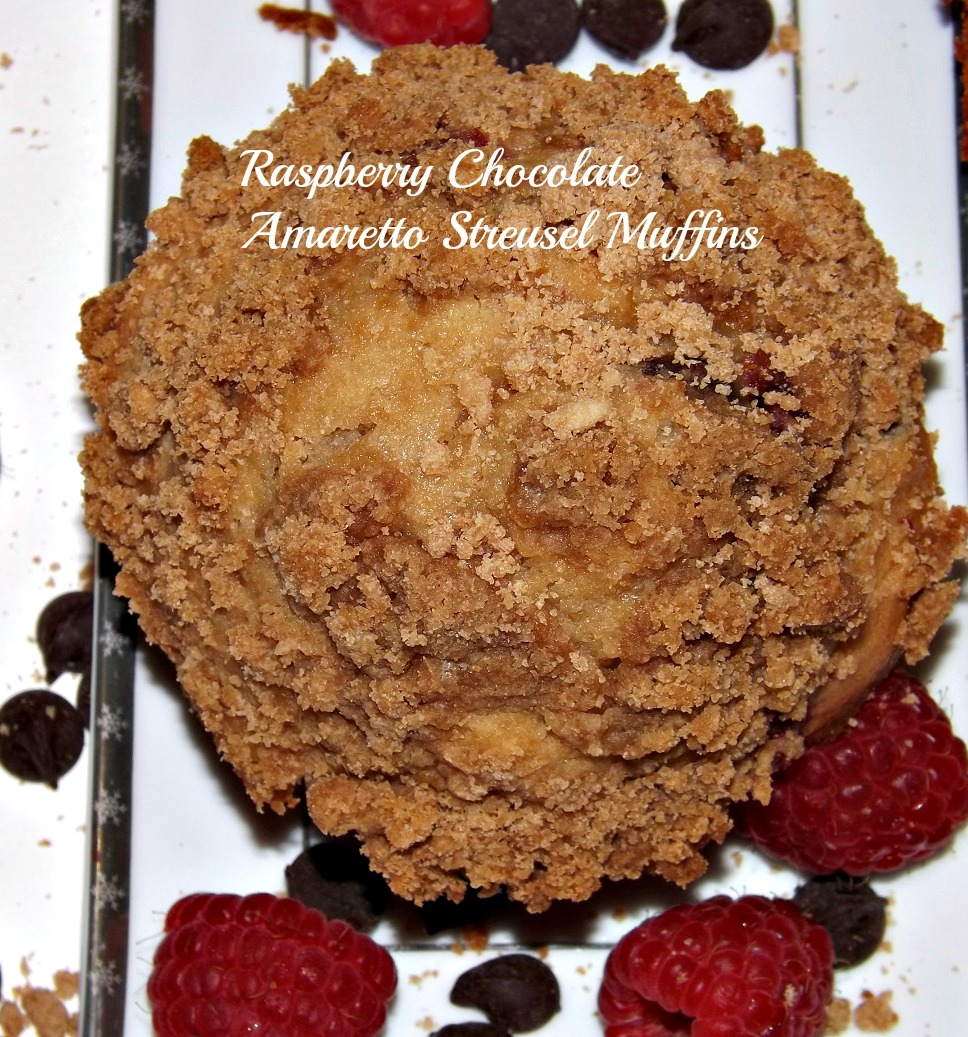
Raspberry Chocolate Amaretto Streusel Muffins

Mannnn, I’ve mentioned before that I hate wordy recipe titles. I prefer straight to the point and concise. But sometimes, you just need to make sure the title lets people know about all the yummy goodness in the food.
It’s funny that I am the same way with recipe titles as I am with life in general. I’ve always told my husband not to assume I fit the stereotypes of how women are “supposed” to act. If I ask you, “do I look fat in these pants?”, and I do, tell me I do. I can’t stand it when some women use phrases like that as a trap for a guy and when he answers honestly, they go on a rampage. Don’t ask the question if you don’t want a straightforward, honest answer! Point being (yes, somewhere in there there was a point) that I like people to be just as straightforward as I like my recipe titles. 😛
And no, I have absolutely no idea where that all came from. Chalk it up to being incredibly tired and as I wrote it, there seemed to be some vague connection lol. Now? Not so much. But it’s there, so…
These muffins are quite yummy if I do say so myself. I had found some fresh raspberries at the grocery store for, get this, 50 cents a pint! I was in shock but not so dumbstruck that I didn’t go ahead and grab six pints. My original thought was to make preserves, but lately, I’ve been unbelievably tired for some odd reason and the thought of making preserves just kind of died out. So I went to muffins. Nice, easy to throw together muffins lol. And I’m glad I did. The original recipe for the raspberry and chocolate part of these came from Sallys Baking Addiction which is a blog I love. But I wanted to do them a bit differently. Imagine that…me…changing a recipe. Whoda thunk it?
I have always loved the combo of chocolate and raspberry and the combo of chocolate and almond. Knowing that almond also goes with raspberry made this an easy decision as to what to do. Add in some streusel and these are wonderful dessert muffins, though you can of course still eat them for breakfast. Because…muffins! There is no actual Amaretto in these. I used almond flavoring but didn’t want the title to make it seem that there were nuts in here, so amaretto sufficed as a description. These are soft and tender, fairly high rising with a lovely almond flavor amidst bites of raspberry and chocolate. The original recipe called for an oven temp of 425 for the first five minutes, but I did it at 400 instead; hot enough to yield a quick rise, but not so hot as to burn the outside if ones oven runs hot, as many do (cause ovens are finicky pains in the…) Also, since I used more raspberries and more chocolate than Sally’s, I got more muffins. She got six jumbo. I got six jumbo and five regular sized.
You know the drill… 🙂
Raspberry Chocolate Amaretto Streusel Muffins
- 3 cups flour
- 4 teaspoons baking powder
- 1/2 teaspoon salt
- 2 eggs, room temp
- 3/4 cup sugar
- 1/4 cup dark brown sugar
- 1 cup milk, room temp
- 1/2 cup neutral oil (I used vegetable)
- 2 teaspoons vanilla extract
- 1 tablespoon almond extract
- 1 12 ounce bag semi sweet chocolate chips
- 2 dry pints fresh raspberries (about 2 cups)
- Streusel-
- 1 cup flour
- 1/2 cup dark brown sugar
- 1/2 cup unsalted butter, chilled
- Preheat the oven to 400 degrees. Spray 6 large and 5 regular muffin cups with no stick spray.
- Make your streusel and set aside- in a medium bowl, combine the streusel ingredients. Cut the butter in using a pastry blender. You can also slice it thin and work it in using your fingers. You want small chunks, about the size of a pea.
- In a large bowl, combine the dry ingredients (flour, baking powder, salt). Scoop out about 3 tablespoons of the flour mixture and toss it with the chocolate chips in a small bowl. This helps prevent them from sinking to the bottom of the muffins. Set aside.
- In a medium bowl, whisk together the eggs, sugar and brown sugar. Add in the oil, milk and extracts. Dump the wet ingredients into the bowl of dry ingredients and gently stir just until combined. It’s ok, good actually, if there are some small lumps. Over beaten muffin batter makes for tough muffins.
- Fold in the chocolate chips, then carefully fold in the raspberries, trying your best to break them as little as possible.
- Divide the mixture evenly among the prepared cups, filling each to the top. Sprinkle with streusel topping, gently pressing it down onto the muffins. If you have streusel left over, just put it in a ziploc bag and freeze it. It’s wonderful to have on hand when you need some. Place in the oven on the middle rack.
- Bake at 400 for five minutes, then, without taking the pans out of the oven, reduce the heat to 350. Bake for about 25 minutes for the large muffins, 18 or so for the small ones, or until a skewer inserted in the middle comes out clean. let cool in the pan for three minutes, then carefully remove to a rack to finish cooling. These are even more delicious spread with some raspberry jam!
Copyright Notice: From Cupcakes To Caviar images and original content are copyright protected. Please do not publish these materials anywhere without prior permission.
)