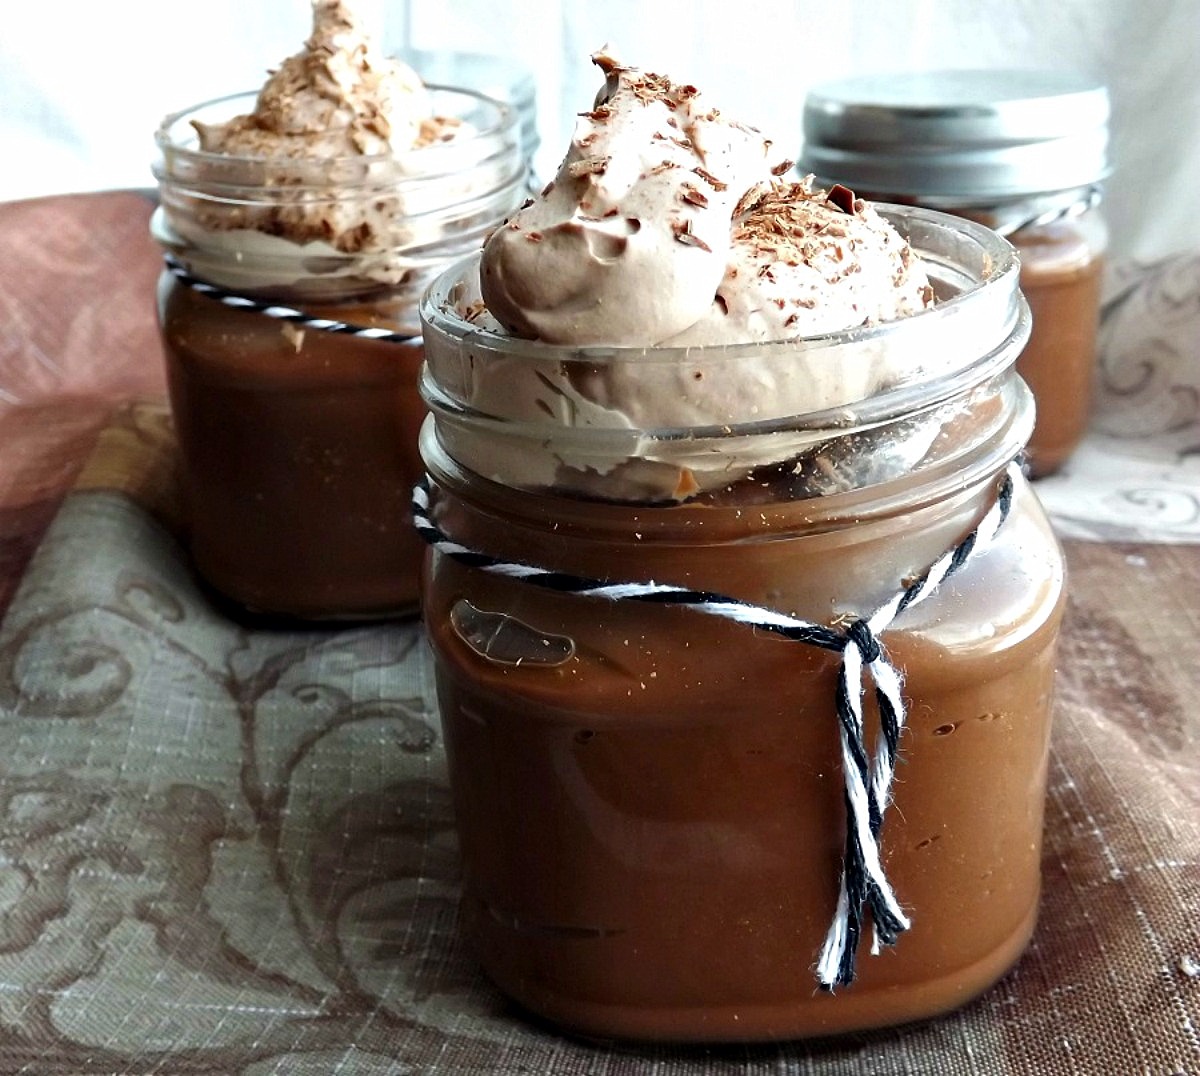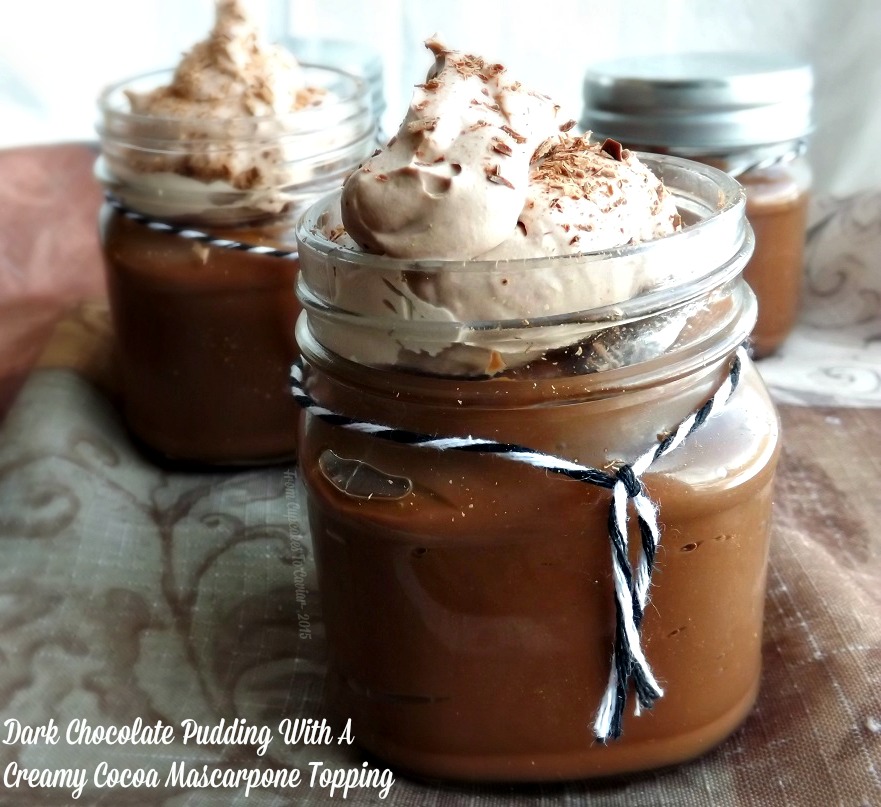
Dark Chocolate Pudding With A Creamy Cocoa Mascarpone Topping

Oh….my….gosh. I never thought I’d be one to say this, but I’m ready for Winter to be over. Normally, I love Winter. I have said before that I love the coziness, the enforced couch potato-ness because you can’t go outside. But, right now, here… in Kentucky, we have an expected low of -14 for tomorrow with a high, a HIGH, of 6. Hello? God? This is Kentucky. I just wanted to throw that out there in case You’d forgotten. Thank you.
The last few days we’ve had all of our outside cats penned up in the garage to keep them safe from the cold. The garage now smells like the elephant cage at the zoo… after it hasn’t been cleaned for three months. FYI… it is impossible to keep a garage clean with five male cats locked up in it *shudders* We have ONE cat we haven’t been able to catch and I have been worrying myself silly over her. She was dumped here at some point (people just love to dump their unwanted animals in the country) and is almost completely feral now. She comes out to get food and water and pals around with one of my male cats (who is in the garage) but won’t come near us, so I couldn’t get her into the garage. So what have I been doing? Shoveling fourteen times a day to make paths to the porch for her, setting out food and water bowls in strategic places, changing the water bowls every time they freeze (like once an hour) and fretting myself into a nervous breakdown over her safety.
Lately I have been all about the creamy foods. I know, I know… I can hear some of you out there saying, “how is this different from every other day for you, Janet?”. But it is. Yes, I absolutely love my creamy foods, I completely admit that little fact. 😀 But recently, I’ve been craving things like rice pudding, meats with creamy sauces, and puddings like this one. I like to tell myself that it’s an attempt by my prehistoric brain cells to add a layer of fat to my body to keep warm. The problem being that if I add another layer of fat, I’ll have to turn sideways to get my hips through the doorways.
This pudding is oh so good. Very chocolatey, but not overly sweet, being as it’s a dark chocolate flavor. It definitely hits that “I need something creamy and chocolate” spot. And the topping I made? Oh, my. There was some left over after I topped the puddings and I may or may not have stood over the sink eating the rest of it plain. It’s creamy, yet surprisingly light and not too sweet or too over the top cocoa flavored at all; the perfect foil for this pudding This is originally from The Food Network, with the topping being mine and the addition of the Kahlua being mine.
You know the drill…
Mrs. Cupcake; who is sick of shoveling snow.
Dark Chocolate Pudding With A Creamy Cocoa Mascarpone Topping
- 1 cup sugar
- 4 tablespoons cornstarch
- 1/3 cup plus 1 tablespoon unsweetened cocoa
- pinch salt
- 2 cups milk
- 1 cup heavy cream
- 4 egg yolks, lightly beaten
- 1 teaspoon vanilla extract
- 2 tablespoons Kahlua Liqueur
- 4 ounces (1/2 cup) semi sweet chocolate, chopped
- Topping-
- 4 ounces Mascarpone, room temp
- 3/4 cup heavy cream
- 3 tablespoons sugar
- 1 1/2 tablespoons unsweetened cocoa powder
- In a large bowl, sift together the sugar, cornstarch, cocoa and salt. I just shake it through a fine mesh strainer. Add in 1/2 cup of the milk and whisk it, forming a thick paste. Whisk the beaten egg yolks into the mixture.
- In a heavy bottomed saucepot, combine the remaining milk and the cream. Bring them to just barely a boil, then take off the heat. Slowly pour about half a cup of the hot milk over the cocoa mixture to temper the egg yolks. Then slowly whisk in the rest of the milk/cream.
- Â Pour the pudding back into the pot you used for the milk. Whisk in the vanilla and the Kahlua. Cook over not quite medium heat, stirring constantly (a wooden spoon or silicone spatula works best), making sure to get to the edges of the pan. When the mixture starts to thicken up, about 5 minutes or so, remove from the heat. You want this to almost, but not quite, come to a boil. Drop the chopped chocolate into the hot pudding, stirring until it melts.
- Now you have a choice. If you’re not worried about a few little lumps (I wasn’t) you can go ahead and divide this among your serving dishes now. If you want it lump free (truthfully, if you made sure to stir well while cooking, you really shouldn’t have any), you can pour this through a mesh strainer into a bowl and then put it into serving dishes. Do whichever makes you happy. This makes 4 8 ounce servings, 8 4 ounce servings, 16 2 ounce servings, 32…. sorry. I’ll stop now.
- Cover each dish of pudding with plastic wrap to prevent a skin forming and refrigerate for at least 3 hours.
- When ready to serve, make your topping. In a medium bowl, combine the mascarpone, cocoa and sugar. Whisk to combine well. Pour in the cream and whisk gently (so you don’t wear cream) until combined. Then, whisk more vigorously until it thickens up to firm peaks, about 4 minutes.
- Serve the pudding topped with the mascarpone cream and some shaved or grated chocolate.
Copyright Notice: From Cupcakes To Caviar images and original content are copyright protected. Please do not publish these materials anywhere without prior permission.