Streusel Topped Chocolate Chip Banana Bread

Streusel Topped Chocolate Chip Banana Bread 3

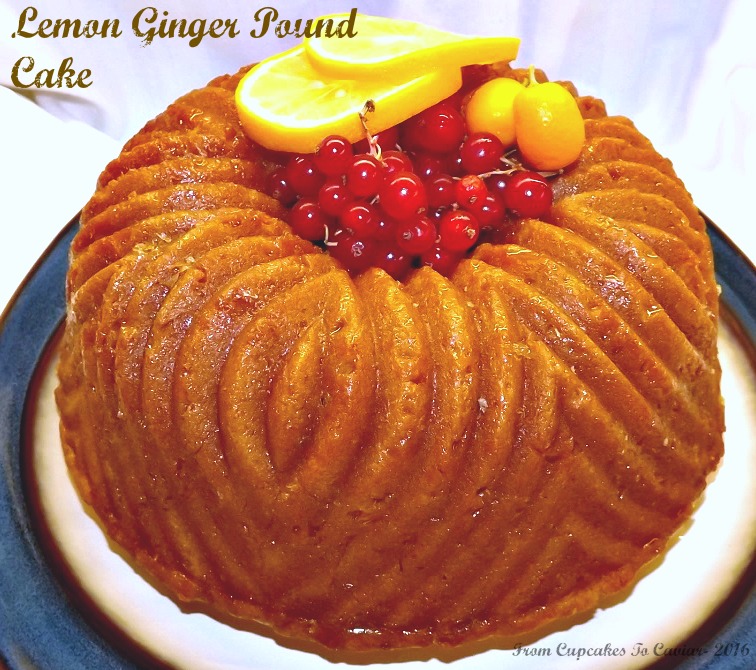
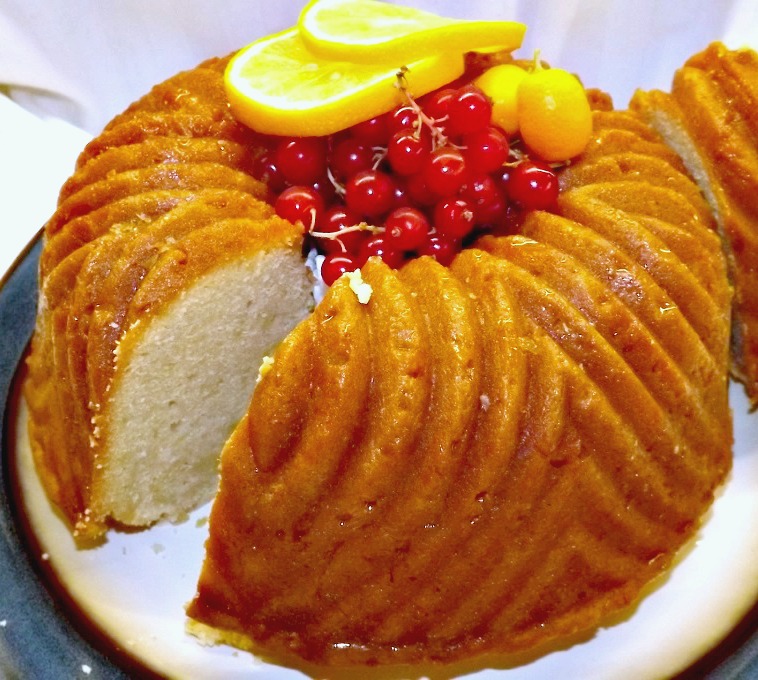
I would apologize for having been gone so long, but you’ve all heard it before. I’ve become like that straying spouse that says for the 12th time, “I promise; it won’t happen again! Trust me!” and then they step out on you again 😛 I do what I can post wise lately and I know that those of you who have been around for pretty much my full five years (Yes! We passed the five year mark early this month. D’you believe it!?) love me anyway.

Are you all as totally sick as me of all the political crap on facebook anymore? I love my friends, but I swear, I can’t scroll half an inch there without being bombarded with “Democrats are evil; no, Republicans are evil!” posts. It is enough to make one want to go live on a deserted island in the south pacific with only a banana tree for food and a macaw for company.  Wait; I wanted to do that anyway. I mean, really, think about it. Bananas are a perfectly good food to live off of (though if I wanted protein, I imagine my buddy the macaw would start looking tasty hehe) and you can’t beat a nice sunny tropical island. Just send me with a few crates of books and a way to play music and it’s all good.

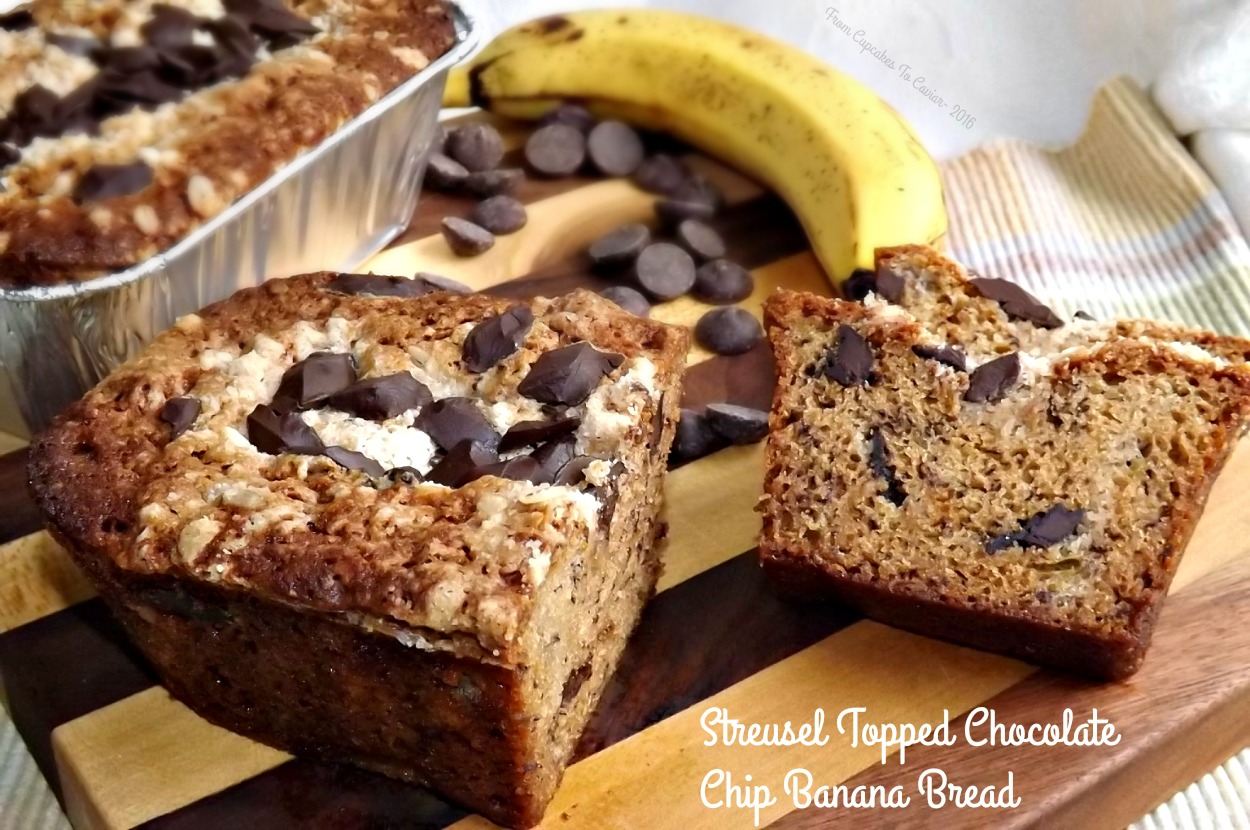
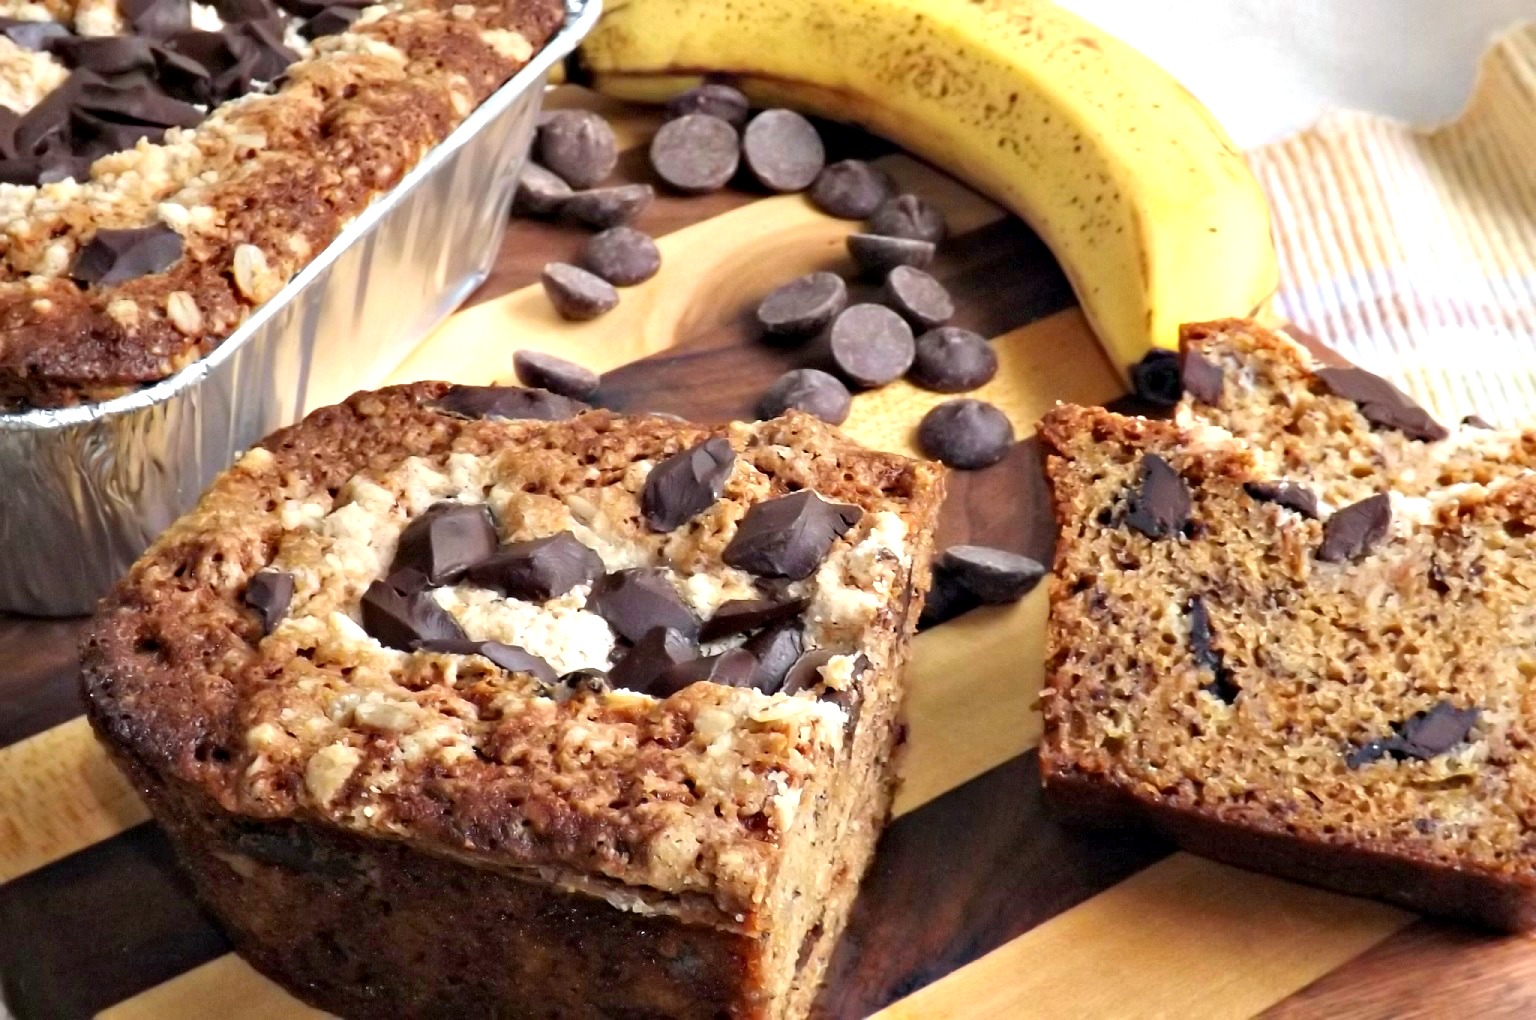
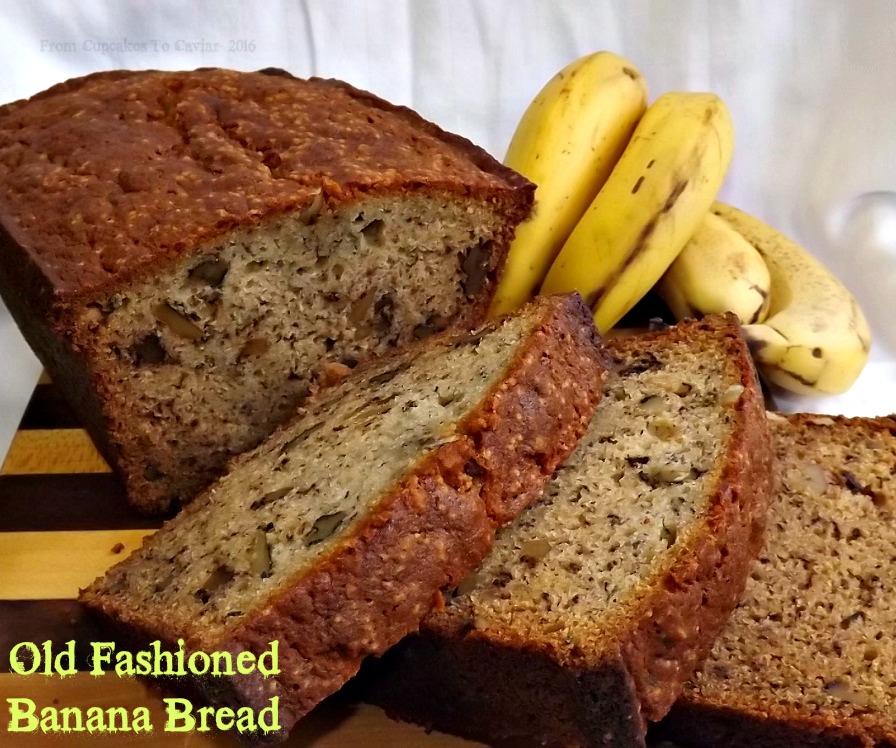
This wasn’t originally going to be a post, but it was too tasty to keep to myself. It’s nothing earth shaking. I was making my original banana bread and I noticed that I had a partial bag of chocolate chips I needed to use up. Then, when I glanced in the freezer for something else, I saw my stored bag of streusel. The two brain cells I have left decided to use both of these things in the bread. I have to say, it’s really quite good. I added a layer of streusel to the middle of each loaf along with a small handful of chocolate chips, then topped each loaf with more of the same. Simple, yet delicious. I sent some in with Joshie for his teacher today and she texted me saying it was fantastic. I soooo love when people enjoy what I’ve made. 🙂

This is a perfect after school snack, great with coffee for a quick and somewhat decadent breakfast (but it has bananas! It must be good for you, right?!), a nice late night treat; just an all around nice baked good to have around. And, as as in the case for most quick breads, this is easy to throw together and get in the oven.

You know the drill…. 🙂

Streusel Topped Chocolate Chip Banana Bread

  • 2 1/2 cups flour
  • 1 teaspoon salt
  • 2 teaspoons baking soda
  • 1 cup solid shortening
  • 1 3/4 cups sugar
  • 2 cups of mashed bananas (this is about 5 to 6 medium bananas)
  • 1 tablespoon vanilla extract
  • 1 teaspoon banana flavoring
  • 1 teaspoon butter flavoring (optional, but it adds a nice flavor)
  • 4 eggs
  • 1 cup coarsely chopped toasted walnuts or pecans (toast in a single layer in a 350 oven until they are a light golden brown)
  • 1 cup semi sweet or dark chocolate chips or chunks
  • Streusel-
  • 1/2 cup sugar
  • 5 tablespoons flour
  • 1 1/2 teaspoons cinnamon
  • 1/4 cup unsalted butter, cold
  • 1/4 cup chopped toasted walnuts or pecans (optional; with me, nuts in streusel depends on my mood)
  1. Preheat your oven to 350. Grease 6 mini disposable foil loaf pans and set aside. Alternately, you can do this in a 9 inch loaf pan, but you’ll have extra that you’ll need to make muffins with.
  2. In a small bowl, whisk together the flour, salt and baking soda.
  3. In a large bowl, on low speed, cream together the shortening and the sugar until well combined. Add in the mashed bananas, vanilla, banana and butter flavorings and eggs. Beat well.
  4. Dump in the flour mixture and using a large spoon or rubber spatula, combine JUST until mixed. It’s fine if there are a few lumps or white streaks. I have said before and will say again, you do NOT want to over beat quick breads and/or muffins. You end up with tough rubbery final products doing that. Resist that urge.
  5. Fold in the toasted walnuts. Again; don’t over mix.
  6. Fill each mini loaf pan about half full. Sprinkle with about 2 heaping tablespoons of the streusel and then about a tablespoon of the chocolate chips. Divide the rest of the batter evenly over each loaf, carefully smoothing the top to get it over the streusel. Top each loaf with another 2 tablespoons of streusel and some chocolate chips. If you have streusel left over, it freezes wonderfully.
  7. Bake at 350 for 35 to 45 minutes minutes or until a wooden skewer inserted in the middle comes out clean  If this starts to brown too much, just lay a piece of foil over the top as it bakes.
  8. Let it sit in the pan for ten minutes, then gently squeeze the bottom of the pan to loosen the loaf and turn it out carefully to a rack to finish cooling.

Copyright Notice: From Cupcakes To Caviar images and original content are copyright protected. Please do not publish these materials anywhere without prior permission.

Streusel Topped Chocolate Chip Banana Bread 5


My favorite Brown Butter Chocolate Chip Cookies & A Hamilton Beach Giveaway!

Browned Butter Chocolate Chip & Toffee Cookies

Browned Butter Chocolate Chip & Toffee Cookies

It’s time for me to get to enjoy being a Hamilton Beach Ambassador one more time! I always love when I get the chance to share my thoughts on one of their products with you, and I especially love getting to give away whatever that product is to one of you! So, what do we have to talk about today? The most recent thing the lovely people at Hamilton Beach sent to me is their Easy Reach 4 Slice Toaster Oven .

4 Slice Easy Reachâ„¢ Toaster Oven with Roll-Top Door

4 Slice Easy Reachâ„¢ Toaster Oven with Roll-Top Door

This toaster oven is so darn cute! Yes, I just called a toaster oven cute. But really, it is.31334 Other women will understand it, while men will just shake their heads and assume I’m insane; rather like my husband does when I say that those teeny tiny mini sized bottles of ketchup are cute. Inside, this oven is only a wee bit smaller seeming than the typical toaster oven. What makes it seems tinier is it’s lack of bulk. You have a glass door on the front that rolls up rather than opens downward. This has a pro and a con. It makes it easier to get into the oven without worrying about the door getting in your way as you pull things out. BUT… and this is again something most women will “get”; it also means that you can’t set any sort of knick knacks or decorations on top of this oven. On my old one, I kept the cup that held all the keys, my ceramic cow named Herman (don’t ask) and a knick knack that once belonged to my mother in law. With this one, I can’t do that due to the roll top door.
But it makes up for it in other ways. The Hamilton Beach 4 Slice goes from 200 degrees all the way up to 450 degrees. Beyond toasting, you have the already mentioned bake function, plus a broil one. I can see THAT one working great for melting the cheese on top of something or crisping up a food; making burgers.

Did I mention that the door was removable? Can we say “easy cleanup”?! Unlike ones where you end up with a door so splattered and icky that you can’t see through it, with this one, after each use, just take the door off, wash it up, dry it and put it back on. No mess! 31334-04 This comes with a removable rack that can be used in two different positions and a crumb tray that isn’t attached inside, so you can pull it out easily and clean it off.
My old toaster oven? I was afraid to actually COOK anything in it. I used it for toast and frozen pizzas and that was about it. But I knew if I was going to be able to accurately review this for you, I needed to branch out a little. I thought about homemade pizza, then realized that was still hedging my bets; pizza is pizza when it comes to baking. So I finally decided to make one of my family’s favorite cookies; my Brown Butter Chocolate Chip & Toffee Cookies. This cookie isn’t cheap to make generally, so I was counting on this oven to do it correctly and not end up burning the tops or the bottoms like other ones have done. So I took a deep breath and dived in.
IT WORKED!! The cookies came out looking just like they should, though they seemed to finish baking about a minute and a half quicker. Obviously, you can’t fit a full sized tray of cookies in there, but the oven comes with a tray and that tray fits four cookies just fine. If made smaller, you could fit six, but I like generously sized cookies 😀 My sons got a hold of the cookies (I only got ONE cookie! Darn kids!) before I got a photo (I had only made a half batch) so the photo I am using here is my old one, but trust me, there was no difference in the cookies.
As for the cookies themselves, if you haven’t tried these before, now’s your chance! These cookies are awesome, if I do say so myself, hehe. They are ooey gooey, with a slight nutty flavor from the browned butter, but no actual pesky nuts. They have that wonderful soft middle with the crispy edge. You could make a half batch like I did and have enough for the here and now, or make the full batch of dough, freeze half in cookie sized balls, then bake in the toaster oven anytime you get a craving. You can bake straight from frozen; just add a couple of minutes time on.

                         Browned Butter Chocolate Chip & Toffee Cookies

  • 1 cup (2 sticks) unsalted butter, browned to a golden brown color & cooled
  • 1 cup packed dark brown sugar
  • 1/3 cup sugar
  • 1 egg
  • 1 egg yolk
  • 2 tablespoons cream
  • 1 tablespoon vanilla extract
  • 2 1/4 cups all purpose flour
  • 1 teaspoon baking soda
  • 1/2 teaspoon salt
  • 1 12 ounce bag semi sweet chocolate chips
  • 1 bag Heath Bar toffee chips (or 4 Heath bars, crushed)


  1. To brown the butter, in a medium saucepan, over medium heat, melt the butter. Let cook,stirring frequently, until it turns a golden brown color. This can take anywhere from five to ten minutes. It will sputter, spit and foam a lot at first then that will stop. Do NOT walk away from this as it can go from yellowish butter to burnt garbage very quickly.
  2. Pour the browned butter into a large bowl, leaving behind all the solid bits at the bottom of the pot (though if you get some in there it’s no big deal. Don’t worry about it.). Let cool.
  3. When cool, pour both kinds of sugar into the bowl with the butter. Beat until well mixed.
  4. Add in the egg and egg yolk, then pour in the vanilla and the cream. Beat on low speed until well mixed.
  5. In a small bowl, combine the flour, baking soda and salt.
  6. Pour the dry ingredients into the wet and at slow speed (unless you want to be covered in flying flour), mix until you have a cohesive cookie dough.
  7. Fold in the chocolate chips and the toffee bits.
  8. Now you can chill for about an hour if you want. The original recipe says to but I didn’t bother and they were fine.
  9. Heat oven to 350 degrees. Line a cookie sheet with parchment paper or a silicone mat. If you don’t have a silicone mat, please go buy one. They aren’t cheap but oh my, they’re worth it. Trust me on this. The first time you use it, you’ll totally understand. Spray the cookie sheet with baking spray.
  10. Scoop the cookies up and place about 2 inches apart on the lined cookie sheet.
  11. Bake at 350 until golden brown on the edges, about 10 to 12 minutes. Do NOT over bake or they will lose that delicious softness and gooeyness (yes, that is now a word). They should be firm on top if you press one lightly but not hard.
  12. Let cool for a minute on the sheet then transfer over to a wire rack to finish cooling.

Copyright Notice: From Cupcakes To Caviar images and original content are copyright protected. Please do not publish these materials anywhere without prior permission.

Now for the fun part; the giveaway! Enter below for your chance (chances) to win one of these Hamilton Beach 4 Slice Toaster Ovens for yourself!

[promosimple id=”95f8″]

Disclosure-The lovely people at Hamilton Beach provided me with a 4 Slice Easy Reach Toaster Oven With Roll Top Door to review, but all opinions are 100% my own and completely honest.

Caramel, Toasted Coconut & Pecan Blondies

Caramel, Toasted Coconut & Pecan Blondies

Caramel, Toasted Coconut & Pecan Blondies

The first graders in Joshies school have their Easter egg hunt tomorrow. He wants me to come be one of the volunteer moms who hides eggs and acts all gleeful to be in a crowd of moms I don’t know. *Sobs* The child is young. He hasn’t yet learned that his mother is a total introvert, with social anxiety issues to boot. While I COULD go do this, and use it as a handy excuse to have a drink later, I think I prefer to go to the Easter egg hunt, cheer him on from the back of the mass of people and then quietly slink off to wait for school to end and Spring break to start. Though Spring break brings with it its own reasons to have a bottle of booze handy.

I already have his first Spring break snackie all ready with these blondies (Did ya see that smooth segue there? Huh, huh, huh?). Generally speaking, I prefer chocolaty brownie type bars, but every once in a while I get a wild hair and want to play with something else.  One of my favorite brownie recipes are these caramel pecan brownies. They are so easy and what you get from that easiness is an outstanding brownie; chewy, chocolaty and gooey. In other words, right up my alley. But the idea had been flitting around in my head to see what else I could do with the basic recipe. I know some people like their chocolate a little more muted and these should please those people immensely. But you know what? The rest of you will love them too. I know I do. These are simple as can be since they use cake mix (yes, cake mix. Quit rolling your eyes; they’ll stick that way.) and bagged caramels. I’ve learned in my many years of life (many, many years) that things don’t always have to be fancy to be delicious. These turned out really well. They are almost candylike in their texture; chewy, but not hard to chew, gooey, with just enough chocolate in them. Plus, the toasted coconut and pecans add a nice crunch and flavor to them. Cut these in fairly small bars. They are pretty rich.

You know the drill… 🙂

Caramel, Toasted Coconut & Pecan Blondies

  • 1 box yellow cake mix
  • 1/3 cup evaporated milk (you can sub half and half it you prefer)
  • 1/2 cup unsalted butter, melted and slightly cooled
  • 1 teaspoon vanilla extract
  • 1/2 teaspoon almond extract
  • 1 cup coarsely chopped pecans, toasted
  • 1 cup toasted coconut (350 oven, single layer in a baking dish for about ten minutes; stir once during toasting)
  • 21 ounces (give or take) caramel candy (I used Kraft; it takes about a bag and a half), unwrapped (I assume you know to unwrap them, but I have to be careful here 😛 )
  • 1/2 cup evaporated milk or half and half (yes, this is supposed to be in here twice)
  • 1 cup chocolate chips
  1. Preheat oven to 350. Line a 13×9 baking pan with foil; lightly grease the foil.
  2. In a medium bowl, combine the cake mix, 1/3 cup evaporated milk, melted butter and extracts. Use a spoon to mix just until combined. It’s ok if there are still some lumps in the batter.
  3. Use your hands (lightly grease or flour them; it helps) to spread/press about half the batter into the prepared pan. It may take a touch more than half; that’s fine. Bake at 350 for five minutes.
  4. While it’s baking, in a medium bowl, combine the caramels and the 1/2 cup evaporated milk. Microwave on high for 1 minute; stir. Then continue to microwave in 30 second increments, stirring after each one, until the caramels are melted. It’s again ok if there are small lumps and it’s not perfectly smooth. You just want a more or less smooth caramel mixture, but a few lumps won’t hurt.
  5. Pour half the caramel sauce on top of the partially baked crust. be careful spreading it since the crust isn’t cooked all the way and will tear if you’re not gentle. Top this with the toasted coconut, pecans and half the chocolate chips. Then pour the rest of the caramel sauce over the top.
  6. Mix the other half of the chocolate chips with the remaining batter, then spoon dollops of the batter over the top of the caramel. it’s not going to cover it all; that’s cool. Just try to evenly space the dollops over the top.
  7. Put the pan bake in the 350 oven for about 20 minutes, or until the top it browned and the caramel is bubbly.
  8. Let cool in the pan at LEAST a couple of hours (overnight in a cool place is best), then use the foil to lift the blondies out onto a cutting board. If they start to sag in the middle, they aren’t cool enough yet.. Peel off the foil, then cut the blondies into serving size pieces.

Copyright Notice: From Cupcakes To Caviar images and original content are copyright protected. Please do not publish these materials anywhere without prior permission.


Revamped Morning Glory Muffins

Revamped Morning Glory Muffins

Revamped Morning Glory Muffins

It’s no secret that I don’t like carrots. I whine about it every time I post a recipe that uses carrots in it, I make mention of it on my personal page in facebook every time my husbands dares to want carrots with dinner, I moan when my youngest child eats carrots dipped in ketchup (don’t ask). Carrots are just…icky. They’re fibrous and hard to chew and don’t have a ton of flavor unless they are roasted (which is one of the few ways I willingly eat them). Did I mention that I think they’re icky.

Except when they aren’t.

These muffins are a definite case of they aren’t yucky. I mean, I know a bunch of you have already heard of Morning Glory Muffins. They’re pretty much a breakfast standard, and can be found in a bunch of home style cookbooks. But let’s keep one thing in mind, please.

This is me. I don’t do ANYTHING normally. That includes making these muffins. I wanted to ramp up the flavor a bit, add a bit more to make these interesting enough that even the kids wouldn’t scoff over having a muffin full of fruits and vegetables. I think I succeeded. These have all the nutrition of the original muffins, but with a blast of flavor that comes from a small amount of dark chocolate, some dried apricots and a fair amount of orange zest, along with some other minor changes I made. These aren’t the prettiest of muffins, since you have a boatload of fruits and veggies with just enough batter to bind them together, but darn, they taste good. I scarfed one down hot from the oven and it was heavenly. Moist, tender, with crunch from the toasted nuts and coconut as well as the carrots and the varied flavors of everything else in there, all finished with gooey chocolate.

You know the drill…. 🙂

Revamped Morning Glory Muffins

  • 2 cups flour
  • 1 1/3 cup sugar
  • 2 teaspoons baking soda
  • 1/2 teaspoon salt
  • 1 teaspoon cinnamon
  • 2 cups grated carrots
  • 1 1/2 tablespoons orange zest
  • 1/2 cup raisins (make sure you use good ones, not dried shriveled ones)
  • 1/2 cup shredded sweetened coconut, toasted*
  • 1/2 cup chopped pecans, toasted*
  • 1/2 cup chopped dried apricots
  • 1/2 cup chopped dark chocolate (or dark chocolate chips)
  • 1 8 ounce can crushed pineapple, drained
  • 1 tablespoon vanilla extract
  • 3 eggs, lightly beaten
  • 1 cup vegetable oil
  1. Preheat oven to 350 degrees and line two 12 cup muffin tins with liners. Alternately, grease them well.
  2. In a large bowl, whisk together the flour, baking soda, salt and cinnamon. Add in the carrots and orange zest and stir to combine.
  3. Dump in the raisins, coconut, pecans, apricots and dark chocolate. Stir well.
  4. Make a well in the center and dump in the oil, eggs, vanilla and crushed pineapple. Stir just until combined. Don’t overbeat or you’ll end up with tough muffins full of holes.
  5. Fill each muffin cup 2/3’s full of the batter. Bake at 350 degrees about 20 to 25 minutes, until the muffins are a golden brown color. Let rest in the tin for a bout 2 minutes, then use a butter knife or spoon to get them out to a cooling rack to finish cooling.
  6. These are a great breakfast and/or an after school snack you can feel ok giving the kiddos. Drizzle with some honey and butter for a real treat!
  7. * To toast the coconut and nuts, simply place in a single layer in a baking pan in a 350 oven and let cook for about 10 minutes, or until lightly browned. Watch carefully; both nuts and coconut can go from nicely browned to burnt very quickly.

Chocolaty Orange Mocha Snack Cake

Chocolaty Orange Mocha Snack Cake 2

Chocolaty Orange Mocha Snack Cake

Russ, my husband, has a thing for the combo of chocolate and orange. I have to admit that it’s a favorite of mine also. But then again, I’m an equal opportunity fruit/chocolate fan. Blend it with raspberry, cherry, apricots, whatever and I’ll be there banging on your door, plate in hand.

Every year at Christmas time, I get Russ one of those chocolate oranges. You know the kind; wrapped in foil, you’re supposed to strike it against a hard surface to separate the segments, etc, etc. I SAY I get it for Russ and it HAS become a tradition. But the truth is that while he loves the flavor combo, he isn’t much on candy. He prefers it in that flavor of Milano cookie (me too!) So what happens to his chocolate orange over time? Yep; you guessed it. *sheepish look* Well, I can’t just let it go to waste, now can I?! It’s rather like how every year when my brother, sister and I were kids, we would get our mom a big heart shaped box of Fanny May chocolates for Valentines Day, using her money of course. Of course, by the time our poor mother, suffering from some late night chocolate craving, got to the box that she stored in the fridge, she would usually find two or three pieces of the worst flavors left in there, surrounded by a plethora of wrappers. And those three would usually have their bottoms bitten off by yours truly.

Oops.

So, in honor of my husbands favorite flavor (honest; I haven’t eaten any yet *coughcough*), I made a loaf cake that mingles the two, but with the added bonus (totally thought of myself and my favorite coffee drink here) of making the chocolate part mocha flavored. I tried marbling it for looks, but for some odd reason, I’ve never had a lot of luck with marbling (bad butter knife skills? 😛 ) so it looks more layers, but I rather like it that way.

This isn’t in your face with either flavor; the chocolaty mocha part has a subtle flavor with a touch of orange itself from the orange oil I added and the orange part is also subtle. If you want more in your face from the flavors, add about an extra 1/2 teaspoon of orange oil to the orange part and you could probably get away with adding about 1/2 cup of mini chocolate chips and a touch more coffee powder to the chocolate part.  This is a nice simple, old fashioned loaf cake, perfect for an after school snack for the kiddos if they like a more sophisticated flavor, perfect with your morning cup of coffee or for a light dessert.

You know the drill… 🙂

By the way, I really adore all of you! <3

Chocolaty Orange Mocha Snack Cake

  • 1 cup unsalted butter, room temp
  • 1 cup sugar
  • 1 tablespoon vanilla extract
  • 3 eggs
  • 1 3/4 cups flour
  • 3/4 teaspoon baking powder
  • 3/4 teaspoon baking soda
  • 1/2 teaspoon salt
  • 1 cup sour cream (can sub a nice thick Greek yogurt if it makes you happy)
  • 2 tablespoons orange zest (or the amount that you can get from one medium orange)
  • 3/4 teaspoon orange oil, divided (you can sub orange extract, but the oil is infinitely better)
  • 2 1/2 ounces unsweetened chocolate, melted
  • 1 1/2 teaspoons instant coffee powder ( baked goods such as this are a good reason to keep a small jar of instant coffee around- it lasts forever)
  • Glaze and garnish-
  • 1/3 cup orange juice
  • 2 tablespoons sugar
  • orange zest or strips
  • chocolate shavings (I used a bitter sweet bar with almonds because it was all I had, but I actually liked the way the shaved almonds added a bit of texture and crunch to the top)
  1. Preheat oven to 350 and either grease and flour a 9 inch loaf pan or spray well with one of the flour/oil combo baking sprays. In a small bowl, whisk together the flour, baking powder, baking soda and salt.
  2. In a medium bowl, beat the butter, sugar and vanilla extract together until light and fluffy. Add eggs, one at a time, beating well after each addition. After the last egg is added, continue beating at medium speed for a minute or two.
  3.  Add in the flour mixture and just barely mix it in. Add in the sour cream. This is a thick batter, so no, you didn’t do anything wrong.
  4. Move half of the batter to another medium bowl. To that half, add in 1/2 teaspoon of the orange oil and the orange zest. Mix just until combined.
  5. To the remaining batter, add the melted chocolate, the last 1/4 teaspoon of orange oil and the coffee powder. Mix just until combined.
  6. Spoon half of the orange batter into the prepared loaf pan. Spoon half of the chocolate batter on top of that. Repeat those layers once. Use a butter knife to dig down in there and swirl the batter together, then smooth the top. Hopefully, your mad swirling skills are better than mine 😀 Smooth the top of the batter.
  7. Bake at 350 until a skewer inserted in the middle comes out clean, 60 to 70 minutes. Cover the top loosely with foil if it starts to get too brown at the edges before it is fully baked.
  8. Let cool in the pan set on a rack set over a rimmed baking pan for about ten minutes, then carefully invert it out onto your hand, then back onto the rack to finish cooling.
  9. During the ten minutes it is in the pan, make your glaze which is easy peasy. Just combine the 1/3 cup orange juice and 2 tablespoons sugar and bring to a boil. Boil for about a minute; just long enough to dissolve the sugar.
  10. Brush the glaze over the hot cake.
  11. When the cake is completely cool, garnish with shaved chocolate and orange zest.

Copyright Notice: From Cupcakes To Caviar images and original content are copyright protected. Please do not publish these materials anywhere without prior permission.

Chocolaty Orange Mocha Snack Cake

Chocolaty Orange Mocha Snack Cake

RumChata Tres Leches Cake With A Creamy Cinnamon Mascarpone Topping

RumChata Tres Leches Cake With A Creamy Cinnamon Mascarpone Topping 2

*Stands up at the front of the room and clears my throat* Hi there. My name is Janet and I’m a slacker. I mean, how else can I explain away an absence of almost a month? Sure, I could give you a line (truthful though it may be) about being under the weather in recent weeks. I could say that life has been busy, which it has. No one with a seven year old, other kids, a spouse and a household to care for can deny that one. But none of that is good enough. Had I really TRIED, I could have found the time and energy to post here. You ladies and gentlemen deserve nothing less than my all. In my defense, I made something (a chocolate/peanut butter bundt cake) about a week ago that I was going to post, but it turned out so badly even the kids didn’t like it. So no go. I won’t post less than delicious foods.
But I’m back. You can now be frightened. :-p
It’s been an interesting few weeks. Lots of snow, missed school days due to said snow because we live in the south, lots of cussing when the fire goes out in the house and we start to freeze to death (I died four time during the last month, but then my husband remade the fire and revived me. 😀 My toes, however, are still frozen.) and many moments of “The Momma” (that would be me) verging on insanity when no one could go outside and I got no alone time.
So what am I back with on this snowy Valentines Day? Well, anyone who likes sweet foods has heard of Tres Leches Cake, correct? It is a sponge cake that is soaked in three different types of milk. Theories abound as to where it originated, but generally, it is seen as a treat stemming from South and Central America. While I like the typical one just fine, I wanted to play with the soaking liquid a bit, so I used Rumchata in place of some of the milk.
About a year ago, I discovered the liqueur called RumChata. It’s a creamy liqueur based on Horchata, the delicious rice and milk beverage (the origins of horchata are also disputed, so I am so NOT going to get into where it came from) that is enjoyed in Mexico and has become a trendy drink in the states now, too. While we all know I tend to balk at trendiness, I bought an airplane sized bottle of the RumChata on a whim one day and absolutely loved it. I describe it as alcoholic liquid rice pudding. That is truly what it tastes like.
This cake is pretty darn easy. It’s a sponge cake, so yes, you have to separate your eggs and whips up the whites, but I have complete faith in your egg beating abilities. :-p Then all you do is whisk together the milks for the top, poke some holes in the cake and pour. Top it with the easily mixed together topping and voila, a delicious, somewhat boozy dessert (obviously just for the adults). This is the perfect treat to bring along to a book club, a dinner for adults (bring some cookies for the kids), and cut in half, makes enough for you and your sweetie with some left over. The original tres leches cake recipe that I adapted comes from Bon Appetit.
You know the drill… 🙂

RumChata Tres Leches Cake With A Creamy Cinnamon Mascarpone Topping

  • 1/8 teaspoon cinnamon
  • 1/2 teaspoon vanilla
  • 2 tablespoons sugar
  • 2 tablespoons Rumchata
  • 1/2 cup heavy cream
  • 4 ounces mascarpone cheese, softened
  • Mascarpone topping-
  • 1/4 teaspoon cinnamon
  • 1 cup sweetened condensed milk
  • 1 cup heavy cream
  • 1/2 cup whole milk
  • 1/2 cup RumChata
  • Soaking liquid-
  • 1/2 cup RumChata
  • 1 tablespoon vanilla extract
  • 3 egg yolks (save the rest for something like creme brulee)
  • 1 1/2 cups sugar
  • 6 egg whites
  • 1/4 teaspoon cinnamon
  • 1/4 teaspoon salt
  • 1 tablespoon baking powder
  • 1 1/2 cups flour
  1. Preheat oven to 350 degrees. Grease and flour a 13×9 inch pan, preferably glass.
  2. In a small bowl, whisk together the flour, baking powder, salt and cinnamon
  3. In a large, scrupulously clean bowl, beat the egg whites at medium to high speed (I tend to start out lower and speed it up as they get firmer) until firm peaks form, about 6 minutes or so.
  4. Gradually add in the sugar, beating well. Then add in the egg yolks, one at a time, beating well after each addition..Mix in the vanilla extract.
  5. Add the flour mixture, alternating it with the 1/2 cup RumChata, starting and ending with the flour (flour, Rumchata, flour, Rumchata, flour).
  6. Pour the batter into the prepared pan and smooth the top.
  7. Bake at 350 for 25 minutes, then turn the heat down to 325 and continue baking until the cake is golden brown and the center springs back if gently pressed.
  8. Let it cool in the pan for ten minutes, then invert it onto a rack that has been placed over a rimmed cookie or baking sheet.
  9. Whisk together the milk ingredients. Poke holes all over the cake using a skewer and pour about half of the liquid slowly over the top of the cake. Let that soak in for ten minutes.Invert the cake over a large platter and drizzle the rest of the milks over the top of the cake.
  10. For the topping, simply beat together those ingredients until creamy. Dust the cake with powdered sugar, slice and serve with a dollop of the creamy topping.

Copyright Notice: From Cupcakes To Caviar images and original content are copyright protected. Please do not publish these materials anywhere without prior permission.

RumChata Tres Leches Cake With A Creamy Cinnamon Mascarpone Topping


Lemon Ginger Pound Cake (Janet’s Cold Remedy)

Lemon Ginger Pound Cake

Lemon Ginger Pound Cake


Ugh. It’s definitely sickness season. The time of year when everyone is cooped up in small areas together, merrily spreading their germs with their fellow man. Share and share alike, ehh? I’m one of those people who absolutely HATES taking pills. I don’t react well to them half the time and anyway, I tend to believe that, for the most part, nature has provided a lot of cures (or at least treatments) in the plants and trees around us. So if I can get away with it, I resort to more natural treatments for minor ailments like colds, sniffles, etc.

One of the things I love is using a good amount of grated ginger in black or herbal teas. It’s got enough of a kick to it scent wise to help clear up a stuffy nose and the heat of the tea is both soothing and somewhat medicinal. If you add in lemon and honey, it’s darn tasty too. So it occurred to me that it would be cool to use the same flavors in a pound cake. This won’t do anything to make your cold better, but it tastes good, hehe. Lemon pound cake tends to be in most bakers repertoire (this one is based on the one from Luscious Lemon Desserts, though I drastically changed the oven temp; her extremely low baking temp has you end up with a lemon flavored brick, and changed some other things too) so it didn’t take much to just extend the idea to include the ginger. I didn’t do the honey because it just felt like it would be getting too busy. But you could easily sub out honey for the sugar in the glaze and make a honey lemon glaze.

I loved the flavor of this. It could use a bit more ginger though, so I’m going to write the recipe as if it had the extra ginger in it. Don’t think, “omg, that sounds like a lot!” It’s going into a good amount of cake batter and when I made it, I used a full tablespoon and it just wasn’t “there” enough.

You know the drill… 🙂

Lemon Ginger Pound Cake

  • 3 1/4 cups flour, sifted
  • 1/2 teaspoon baking powder
  • 1/2 teaspoon salt
  • 1 1/2 cups unsalted butter, room temp
  • 2  cups sugar, divided
  • 6 eggs, room temp
  • 3/4 cup milk combined with
  • 1/4 cup lemon juice
  • 2 tablespoons lemon zest
  • 1 teaspoon lemon oil (You can sub lemon extract if you must, but trust me when I say that lemon oil is always your better bet- I use Boyajian )
  • 2 teaspoons vanilla extract
  • 2 tablespoons squeezeable ginger paste (found in tubes in the produce section of the grocery store)
  • Lemon syrup-
  • 1/3 cup lemon juice
  • 1/4 cup sugar
  • 1 teaspoon lemon zest
  1. Preheat the oven to 335 and liberally grease and flour a 10 cup bundt style pan.
  2. In a medium bowl, whisk together the sifted flour, baking powder, and salt.
  3. In another, larger bowl, cream together the butter and sugar until light and fluffy. Add in the eggs, one at a time, beating until just combined. Add in the lemon zest, ginger and flavorings and beat until combined.
  4. Starting with the flour mixture, alternately add it then the milk mixture to the batter (flour, milk, flour, milk, flour), beating well after each addition.
  5. Pour the batter into the prepared pan. Bake at 335 for 65 to 80 minutes or until a wooden skewer inserted in the middle comes out clean. The color should be a nice golden brown. If it starts to brown too much, just lightly cover the top with a sheet of foil.
  6. When done, let it cool in the pan on a rack for 15 minutes. Meanwhile, make the syrup for the top, which is easy peasy. Just combine the syrup ingredients in a small pot and bring to a boil, stirring to dissolve the sugar.
  7. Carefully turn the cake out onto the rack (set the rack above a cookie sheet to catch drips) and brush the hot syrup over the still hot cake, letting it soak in each time before adding more. Let the cake cool to room temp and then enjoy!

Copyright Notice: From Cupcakes To Caviar images and original content are copyright protected. Please do not publish these materials anywhere without prior permission.

Lemon Ginger Pound Cake

Lemon Ginger Pound Cake


Old Fashioned Banana Bread & Hamilton Beach Freebies (maybe for YOU!?)

Old Fashioned Banana Bread

Old Fashioned Banana Bread

Yes, yes I am still alive. As Mark Twain is said to have remarked, “Rumors of my death have been highly exaggerated”. Mind you, even as ancient as I am, I wasn’t around back then, so I don’t know that he actually uttered those words. But if one goes by the claims of the internet, he, Abraham Lincoln, Samuel L Jackson and Morgan Freeman are the only people who ever said anything worth quoting, other than a few random quotes attributed to Thomas Jefferson or Patrick Henry.
But I digress. Imagine that. I am here to bring you food!! Plus a giveaway. You all know I have had the much envied position of being a Hamilton Beach Ambassador for a couple of years now. As one, I get the opportunity to review their products from time to time and then offer those same products to you, my faithful (and slightly offbeat and rather warped) readers.
Today, I am bringing you two of the most iconic small appliances from Hamilton Beach– their 6 Speed Hand Mixer and their pretty darn awesome Stand Mixer. Let me tell you my thoughts on both now- First, the 6 Speed Hand Mixer-

Hamilton Beach Hand Mixer

Hamilton Beach Hand Mixer

I love this bad boy. This is the type of mixer one reaches for when doing the typical cooking/baking that requires a mixer. it is sturdy, easy to use ( I love the hand grip. It fits comfortably in my hand) and this one comes with some cool attachments,Hamilton Beach Attachments including a milkshake mixer (think of it rather like an immersion blender). I also love the storage area underneath. it’s a nice, convenient and NEAT (I have a thing for anything that leads to less drawer clutter) way to keep the attachments nearby. This mixer works well for everyday thing and has a “burst” button that gives you some extra power when you need it. it’s pretty much the perfect everyday mixer.
Now on to the Hamilton Beach Stand Mixer

Hamilton Beach Stand Mixer

Hamilton Beach Stand Mixer

. This one is a bit more powerful than the hand mixer and has the convenience of the bowl and hands off usage. It doesn’t have the horsepower, so to speak, to do heavy doughs easily, so no, this isn’t one to try to make 4 loaves of whole wheat bread in. But for regular baking and mixing, this is a workhorse. It worked fine for me when I made chocolate chip cookie dough in it and we all know that that dough can be rather dense. The only thing I DIDN’T like though I know I may be in the minority with this, were the stability suction cups on the bottom to hold it still when mixing. They are a great idea, but if one tries to move the mixer from one spot to another, the way it sticks to the counter makes it pull up forcefully and can make the contents of the bowl go everywhere. Don’t ask me how I know this, please. Ahem. This one comes with a standard flat beater hook, a dough hook and a whisk attachment.Stand Mixer AttachmentsYou want to win these. Trust me. You do. Both together are close to a $150.00 value and with the attachments, are sooooo helpful in the kitchen! I made my famous (hey, it is… in my household! 😛 ) Old fashioned Banana Bread using the hand mixer and it worked wonderfully. Oh, you want the recipe, you say? Well, ok, if I MUST *gives you an evil glare and gets on to the recipe* 😛 <3

Old Fashioned Banana Bread

  • 2 1/2 cups flour
  • 1 teaspoon salt
  • 2 teaspoons baking soda
  • 1 cup solid shortening
  • 1 1/2 cups sugar
  • 2 cups of mashed bananas (this is about 5 to 6 medium bananas)
  • 1 tablespoon vanilla extract
  • 1 teaspoon banana flavoring
  • 1 teaspoon butter flavoring (optional, but it adds a nice flavor)
  • 4 eggs
  • 1 cup coarsely chopped toasted walnuts (toast in a single layer in a 350 oven until they are a light golden brown)
  1. Preheat your oven to 350. Grease a 10 inch loaf pan (if you don’t have a 10 inch pan, make this in a 9 inch, and pour about 2/3 of a cup of batter into a mini loaf pan, a couple of muffin cups or a ramekin and bake it in there or you’ll end up with overflow everywhere) and set aside.
  2. In a small bowl, whisk together the flour, salt and baking soda.
  3. In a large bowl, on low speed, cream together the shortening and the sugar until well combined. Add in the mashed bananas, vanilla, banana and butter flavorings and eggs. Beat well.
  4. Dump in the flour mixture and on the lowest speed, combine JUST until mixed. it’s fine if there are a few lumps or white streaks. I have said before and will say again, you do NOT want to over beat quick breads and/or muffins. You end up with tough rubbery final products doing that. Resist that urge.
  5. Fold in the toasted walnuts. Again; don’t over mix.
  6. Pour the batter into the prepared pan/pans.  Bake at 350 for 55 to 75 minutes (yes, that’s a large gap. I’ve had it done by both both times. I have no idea why other than my oven is stupid 😛 ) or until a wooden skewer inserted in the middle comes out clean. If this starts to brown too much, just lay a piece of foil over the top as it bakes.
  7. Let it sit in the pan for ten minutes, then gently invert it over your hands and transfer it to a rack to finish cooling.

In the interest of full disclosure, Hamilton Beach provided me with both mixers for review and my personal use. But all opinions in here are 100% my own.

Now! On to the giveaway!!! Use the PromoSimple entry form below to enter to win both of those cool mixers!

[promosimple id=”8e42″]

Elegant & Easy Lemon Almond Cake

Elegant & Easy Lemon Almond Cake

Elegant & Easy Lemon Almond Cake


Twas the week before Thanksgiving and all over the internet, were recipes for pumpkin and pecan and chocolate and all sorts of heavy desserts….

Yes, I’m well aware that that didn’t rhyme at all and didn’t even have a decent rhythm to it, but by the time I typed out “Twas the week before Thanksgiving”, my brain had died out. I tend to take thinking minute by minute, obviously.

Seriously though, I figured I would give all of you a recipe for something a little lighter, something citrusy and not bogged down with 5000 calories. Mind you, if you’re anything like me, it just means one MORE dessert to eat during the holidays, not one DIFFERENT dessert. There is no way I can turn down my pecan pie or pumpkin pie or berry pie. So, I join the throngs of Americans who spend the later hours of Thanksgiving sleeping under a table somewhere, fork in hand, whipped cream smears on my chin and a happy smile on my face.

This cake is so easy to throw together and it really is such a nice change from the heavier things this time of year. The cake itself is moist, with a mild taste of both almond and lemon, along with the gentle crunch of sliced almonds on top. I got the original recipe from the cookbook “Luscious Lemon Desserts”. I changed it in that it didn’t have the almonds on it, I used lemon oil rather than lemon extract, which I don’t care for as it adds a bitter flavor to foods in my opinion, I added more vanilla as well as almond extract in the cake andddddd added a couple tablespoons of actual lemon juice to give it a very mild tartness. All in all, this was delicious and something I can see making year round.

You know the drill…. 🙂

Elegant & Easy Lemon Almond Cake

  • 1 cup flour
  • 1 teaspoon baking powder
  • 1/4 teaspoon salt
  • 1/4 cup milk
  • 2 tablespoons lemon juice
  • 2 to 3 tablespoons lemon zest
  • 1 teaspoon lemon oil (if you absolutely have to sub lemon extract, use 1 1/2 teaspoons)
  • 2 teaspoons vanilla extract
  • 1 teaspoon almond extract
  • 1/3 cup sugar
  • 1/3 cup almond paste, room temp
  • 1/4 cup (half stick) unsalted butter, room temp
  • 2 eggs
  • 1/2 cup thin sliced almonds
  1. Preheat your oven to 350 degrees. Line a greased 8 inch cake pan with parchment paper, then grease and flour the paper (or use a flour/oil combination baking spray). Sprinkle the sliced almonds evenly over the bottom of the pan.
  2. In a small bowl, whisk together the flour, baking powder and salt.
  3. In another small bowl or measuring cup, whisk together the milk, lemon juice, lemon oil, and extracts
  4. In a large bowl, beat together the room temp almond paste and the butter. If it doesn’t beat well at first, do what I did- get a potato masher and mush the dickens out of it. It worked great. 😀 Beat in the sugar until fluffy.
  5. Once the sugar, butter and almond paste are nicely blended, beat in the eggs, one at a time, until well blended.
  6. Alternate adding in the flour mix and the milk mixture, starting and ending with the flour (flour, milk, flour, milk, flour), beating just until well mixed each time.
  7. Spoon the batter carefully over the almonds in the pan, then spread it evenly.
  8. Bake at 350 degrees until golden brown and a wooden skewer inserted in the middle comes out clean, about 35 minutes. Let the cake cool in the pan, on a rack for fifteen minutes, then carefully turn it out onto a plate to finish cooling.
  9. When cool, sprinkle the top generously with powdered sugar and cut into wedges to serve.

Copyright Notice: From Cupcakes To Caviar images and original content are copyright protected. Please do not publish these materials anywhere without prior permission.

Elegant & Easy Lemon Almond Cake

Elegant & Easy Lemon Almond Cake


Maple Butter Pecan Pie

Maple Butter Pecan Pie

Maple Butter Pecan Pie


I’m totally ready to get started with Thanksgiving and Christmas recipes. Hopefully, you’re totally ready to get those recipes, cause it’s probably the vast majority of what I’ll be posting for a while. 😀

I sometimes think to myself that I wouldn’t be as enamored of the holiday season if it fell in Summer. I mean… “let’s go grill out some chicken for Thanksgiving dinner” or “how about we make some nice cold ice cream to serve on Christmas”?? Those just don’t have the same ring to them, even though I’m well aware that it’s only on this half of the world that is deep into Autumn and Winter when Thanksgiving and Christmas hit. But I’m one of those people who gets sad if it isn’t bitter cold on both days. I want cozy, homey, preferably snowy. Plus, cooking a large meal in the oven and making the house a sauna when it’s not cold out kinda sucks.

I already have two pecan pies up here on the blog. But one can never have too many pecan pies, am I right? I rather like pecan pie, obviously. My husband isn’t fond of it. Yet I let him stay around anyway. Go figure.

I wanted to change up this years pecan recipe for the blog. So when I saw this in an old cooking magazine I have, I had to give it a try. I absolutely love real maple anything and I knew from the ingredients in this that it would be good. It came with it’s own pie crust recipe, but I forgot to get some photos of it, so I’ll post that separately next time I use it. Meanwhile, just use your own favorite 9 inch pie crust; even a store bought one is fine if you swing that way.

This was a delicious pie. Nice glazed looking pecans on top (the recipe called for pecan halves, but I prefer chopped. You do you.), a filling that wasn’t overly goopy nor overly sweet, but has a subtle maple edge to it. It IS pecan pie however; don’t go into this not expecting very sweet 🙂 I love to serve my own piece of pie simply; just the pie, gently warmed, with a small puddle of heavy cream poured over it. Serve this with strong tea or coffee or a glass of milk for the kiddos.

You know the drill… <3

Maple Butter Pecan Pie

  • 9 inch pie crust
  • 1 to 1 1/2 cups toasted pecan halves (I used more like just 1 cup because I prefer a higher ratio of filling to pecans)
  • 1 cup packed brown sugar
  • 1/2 cup pure maple syrup
  • 1/2 cup light corn syrup
  • 1/2 teaspoon salt
  • 4 eggs, lightly beaten (have them standing by in a large measuring cup)
  • 1 1/2 tablespoons vanilla extract
  • 4 tablespoons unsalted butter, melted
  1. Preheat oven to 400. Line a 9 inch pie pan with the pie crust; crimp as desired. Gently cover the crust with foil, making sure to press it snugly onto the sides. Dump about a cup or so of either dry beans or uncooked rice onto the foil (you can let these cool afterward and save them in a ziploc bag to use the same way again); spread evenly. Bake the crust for about 15 minutes; until it is set, but not browned at all. Remove from oven, take the foil off and turn the oven down to 325 degrees.
  2. In a medium pot, combine the brown sugar, maple syrup, corn syrup and salt. Cooking, stirring frequently, just until warmed and the sugar has melted.
  3. Slowly drizzle some of the warmed sugar mixture into the eggs, whisking constantly. You want to temper the yolks, but not scramble them by adding hot liquid to it too quickly. Do it nice and slow. When you have about half the sugar mix incorporated into the eggs, whisk the eggs into the pot containing the rest of the sugar mix. Stir in the butter and vanilla extract.
  4. Sprinkle the pecans over the bottom of the crust. Carefully pour the sugar/egg mixture on top of the pecans.
  5. Bake the pie at 325 for 35 to 45 minutes, until the filling is puffed (it will settle back down as it cools) and just off center looks set. It’s ok if there is still some jiggle right in the middle. That will firm as it cools.

Copyright Notice: From Cupcakes To Caviar images and original content are copyright protected. Please do not publish these materials anywhere without prior permission.

Maple Butter Pecan Pie

Maple Butter Pecan Pie