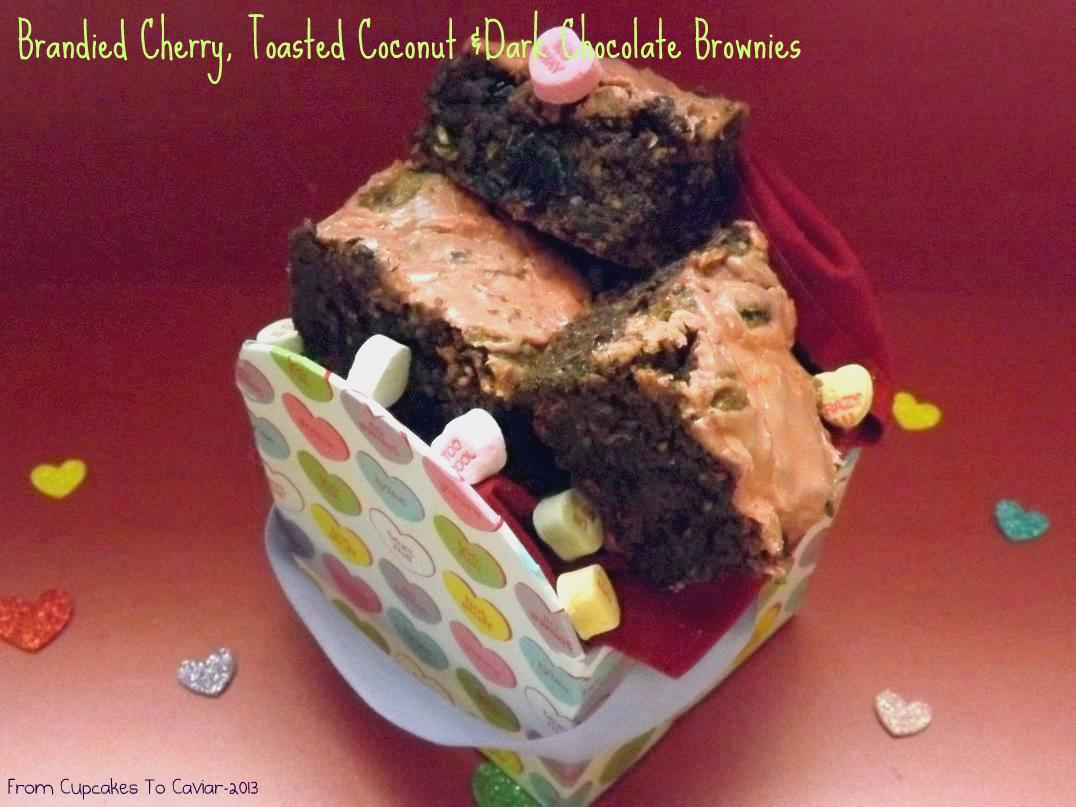
Brandied Cherry, Toasted Coconut & Dark Chocolate Brownies

I’m not a big Valentines Day person. Don’t get me wrong… I enjoy any holiday where you can go to the store and see an aisle set up just for special candy. What’s not to like? But otherwise? Not so much. I think it’s a day where a lot of men (and women somewhat) feel pressured to “be romantic”, “make this a day she’ll never forget”, “buy this, spend more, get diamonds, MAKE HER LOVE YOU!!!!”. And then what happens? You go out, you wait in an outrageously long line for an hour to get a dinner that was haphazardly prepared and served because 99% of restaurant staff absolutely hates working on Valentines Day. Trust me.. they do. By the end of the evening, you’re tired, you’re frustrated and you’re feeling anything but loving towards ANYONE. You get flowers and candy from a man who felt like crap cause he forgot what day it was (“Hello… February 14th, dude… that day meant for lovers world wide to suck up to atone for their sins the other 364 days of the year. Now go buy some dying roses at the grocery store!” hehe) and three days later you have dead flowers and an increasing waistline.
Yeah, yeah, I know. “Cynical much, Janet?” And honestly, it’s not that really. I am a sappy fool. I just don’t want to be EXPECTED to be sappy. Nor do I expect my husband to be sappy because someone, somewhere decided that it was a good day for it. Nope; ain’t happ’nin. So how am I sappy? How is my husband sappy?
I make his coffee at night so all he has to do in the morning when he’s half asleep is press a button. I make baked goods that I know he likes, even if I don’t like them. I give him my last chicken McNugget even though I’m still hungry. I kiss him when he has morning breath. I cuddle at night when sometimes what I really want to do is roll over and read a book, I watch Holmes on Homes when I’d prefer to watch an old episode of Roseanne.
Him? He makes me tea every single morning. Tonight, he is making me grilled cheese and tomato soup because my mouth still hurts from dental surgery. He doesn’t gripe at me when I spend too much at Trader Joes. He rubs my back when it hurts and doesn’t expect it to be anything but a back rub. He gets up with our son (his stepson really; mine biologically) at 6:30 every school day so that I can sleep because I don’t sleep well. He supports, financially and otherwise, my two teen boys even though it’s not his job. he loves my kids as his own to the point that he is not bitching about my daughter and her kids moving back in for 6 months while her husband is in Boot Camp. He was there to hold my hand and help me walk down the stairs when I had my stroke and he still does that when I’m having a bad day physically.
These are my Valentines Day Gifts. I get them every day of the year. I don’t need the calendar and some cheap flowers bought on the fly to know that he loves me. He doesn’t need me in a slinky nighty with a rose between my teeth (though I’m sure he wouldn’t argue) willing to try every position in the Kama Sutra for him to know I love him. We do our damndest to prove it to each other each and every day, in small ways and in big. We talk out our problems, we hold hands in public, we make love when we’d rather sleep, we sleep when we’d rather make love. We share, we love, we STAY… even when it’s not easy. Not just on February 14th.
This recipe makes a large 13×9 pan. Feel free to cut it in half and do it in an 8×8 pan if you’d like. Also, unless you make the glaze alcohol free, this is NOT kid friendly.
Brandied Cherry & Toasted Coconut Dark Chocolate Brownies
- 6 ounces dried tart cherries
- 1/4 cup brandy (can sub 1/4 cup juice and 1/2 teaspoon brandy flavoring)
- 1 1/2 cups dried coconut flakes (sweetened or not; your choice. I used unsweetened)
- 5 ounces unsweetened chocolate
- 2 stick (1 cup) unsalted butter, room temp
- 2 cups brown sugar
- 3 eggs
- 2 teaspoons vanilla extract
- 1/2 teaspoon coconut extract
- 2 teaspoons dry instant coffee (optional- helps deepen the chocolate flavor but don’t run out and buy it if you’ll never use it again)
- 3 cups flour
- 1 teaspoon baking soda
- 1/2 teaspoon salt
- 2 cups chopped good quality dark chocolate (I used a Trader Joes Dark Chocolate bar, chopped)
- GLAZE-
- Reserved brandy from the cherries
- 1 cup powdered sugar
- Preheat oven to 350 degrees. Oil and then line a 13×9 inch baking pan with parchment paper. Spray the parchment paper with cooking spray Sprinkle your coconut in another baking pan and toast at 350 until lightly browned. Don’t forget it in the oven and make charcoal. Don’t ask me why I advise this….ahem.
- Meanwhile, put your brandy and cherries in a shallow bowl. Stir to mix and then let sit while you make the brownies.
- Melt the unsweetened chocolate in a small bowl in the microwave, using 45 second increments and watching carefully. Set aside.
- Cream the butter and sugar together in a large bowl. Add the eggs and beat until light and fluffy. Add the extracts, coffee is using and again mix well.
- Beat in the melted chocolate.
- In a large bowl, mix your flour, salt, baking soda and coconut. Drain your cherries, reserving he liquid to use in the glaze.
- Pour your wet ingredients into your dry ingredients. Mix just until combined then fold in the chocolate and drained cherries.
- Spread mixture into the prepared pan.
- Bake at 350 until a skewer or toothpick inserted in center comes out almost clean, with maybe a few moist crumbs on it.
- Let cool in pan on rack until cool. For glaze- mix powdered sugar with the reserved brandy (that has now been wonderfully flavored with cherries). If desired, add a bit of red gel food coloring to make this pink…pink is always good. Drizzle glaze over cooled brownies 😀 Lift brownies out by the parchment paper then cut into SMALL pieces. Trust me; these are rich.

(Mine and my husbands song)