Sweet And Sour Pork

Sweet And Sour Pork-001

When I was young, my mom was a waitress. Heck, when I grew up, my mom was still a waitress. She was the typical divorced woman of her generation. She was undereducated yet street smart from years of living on the south side of Chicago. That in itself was rather a feat considering she was a child of the depression who grew up in very rural Alabama. She never had a “good” job but always managed to keep us fed. It may have been mayo sandwiches or ketchup sandwiches at times, but we ate. The restaurant she worked at for over 20 years was fairly popular and well known in the Chicago area. It was named the Tropical Hut and was known for it’s Polynesian food, which was a big thing back in the 60’s as people were expanding their foodie taste buds beyond burgers and baked potatoes. Thing is, other than a duck dish they had that I loved (we of course went there for every family event. Why do people do that anyway? Work someplace and then go back then when NOT working? :-P) the main food I recall from there was their club sandwich. Mom would bring it home cold at night to eat but half the time it ended up going to one or the other of us kids. I loved them.

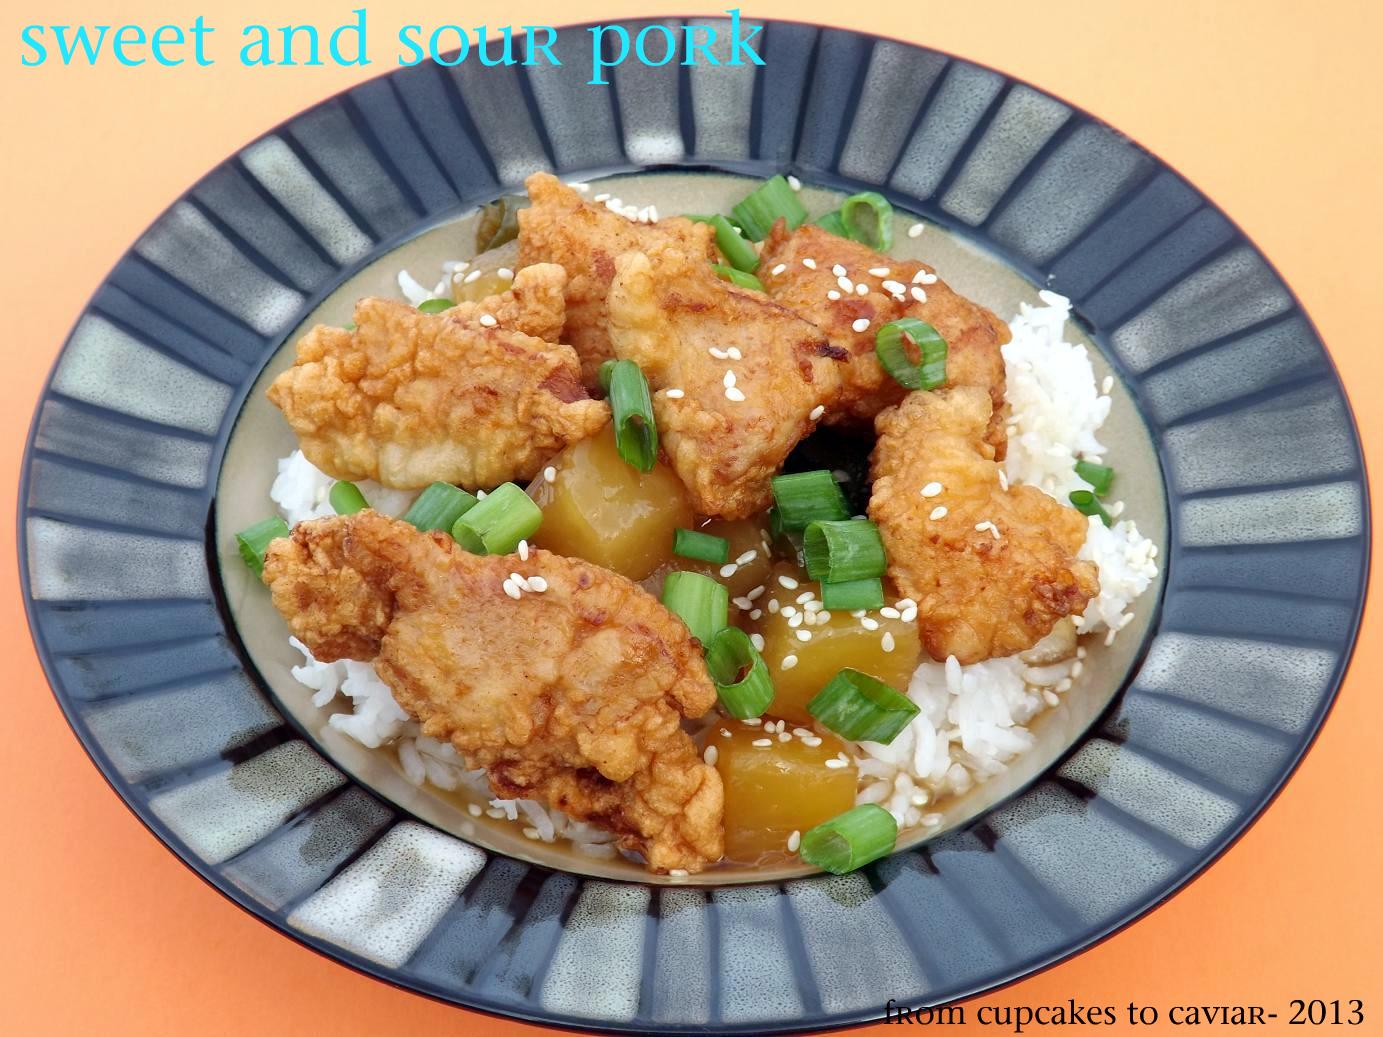
Point being, when I was young, my main experience with food from other cultures was a club sandwich from a Polynesian restaurant in the Midwest. Go figure. While my taste buds have grown a bit more sophisticated as I’ve aged, I have to confess that I still love all the Americanized versions of Asian foods, from which some of the Polynesian foods can branch off. One that I love that you will never find on the menu of any authentic Chinese restaurant is Sweet & Sour Pork. Deep fried pork thrown together with an overly sweet yet tangy sauce with pineapple in it, then put on rice. Sounds rather gross, ehh? But in reality, it’s soooooo darn yummy. I mean, the words deep fried should tip you off right away. I’ve said before; you could probably deep fry a shoe and it would taste good.

This is the version I’ve been making for years. Authentic? Nope. Just mine. Though like I said, what is authentic with this dish ANYWAY? Back when I first started making it, I honestly didn’t even know there WAS such a thing as sweet and sour pork lol. I just took the sauce recipe from some meatballs I loved, chopped up some pork, battered it, fried it and thought it seemed Asian enough to deserve rice as the base. Isn’t it amazing what we come up with, thinking we are so original only to find out later (or sooner now that you can google a recipe in 3 seconds) that many others have been making it for years?

This is a good version, mine though it may be. Nothing weird, nothing unusual, fairly standard as it goes. But I wanted to post it for those who may be thinking that this is a hard dish to make. It’s not. If you can fry food and combine sauce ingredients, you can make Sweet And Sour Pork.

Sweet And Sour Pork

  • Batter-
  • 2 eggs 1 egg yolk
  • 3/4 cup cornstarch
  • 3/4 cup flour
  • 1/4 teaspoon baking powder
  • 1 cup milk
  • 2 teaspoons soy sauce
  • 3 pounds boneless pork loin, cubed into about 1 inch pieces
  • about 4 cups canola or vegetable oil, heated to 355 degrees
  • Sauce-
  • 1 20 ounce can pineapple chunks in juice, undrained
  • 1 8 ounce can pineapple chunks in juice, undrained
  • 1 cup brown sugar
  • 2 tablespoons cornstarch dissolved in 3 tablespoons water
  • 2 tablespoons soy sauce
  • 2/3 cup vinegar
  • 2/3 cup chopped green pepper
  • 2/3 cup chopped onion
  • 1/2 teaspoon red pepper flakes (optional)
  • 3 cups cooked rice (I like this served with Jasmine or Basmati but use your favorite)
  1. Start your sauce first- In a large pot, combine the pineapple with it’s juice, brown sugar, vinegar, soy sauce and cornstarch mixture. Bring to a boil, then cover, reduce the heat to low and simmer for about 15 minutes, stirring frequently.
  2. Add the green pepper and onions and simmer covered for another five minutes. Set aside and keep warm
  3. Start your oil heating while you prepare the batter, which is easy peasy.
  4. Combine the dry ingredients in a medium bowl. Whisk in the eggs, egg yolk, milk and soy sauce.
  5. While your oil heats (large pot), take about half the pork cubes and put them into the batter. Stir around to get them well coated.
  6. When the oil has reached 355 degrees, carefully toss in (make sure your hands are fairly close to the oil… tossing from far up because it seems safer actually isn’t. It will just make the oil splatter all over you.) pieces of the pork. Do about 12 pieces at a time. You don’t want to overcrowd or the oil temp drops and you end up with greasy pork.
  7. Cook for about 4 minutes or until a nice dark golden brown. You’ll probably have to stir them around to get both sides browned.
  8. Using a wide slotted spoon or even better, a metal skimmer, lift out your pork and lay in a paper towel lined bowl.
  9. Keep cooking until it’s all done then you can either toss it with the sauce or, as I prefer to do, serve all the components separately so everyone can fix it the way they like it. Like here, my daughter loves a lot of sauce, I prefer less.
  10. Garnish with sliced green onions and serve with soy sauce

Print Friendly and PDF

Creamy Coconut Flan

Creamy Coconut Flan

No long winded story and bad jokes tonight. I’m sleepy and on a massive sugar crash from this flan. 😛
Ok, maybe a short story based on the whole sugar high/crash idea.

I remember when my brother, sister and I were kids. Every year we would get our mother a large heart shaped box of Fanny May candy for Valentines day. We used her money to buy it of course and I am fairly sure that any change went for things like Lemonheads and ice cream. Well, each and every year, mom would put the opened box into the fridge. She wasn’t a huge sweets eater (obviously I get my love of them from my sweets binging diabetic father hehe) so would put it there with, I’m sure, the idea that when she wanted a piece (ONE piece) she could get one (again… ONE piece. Who does that!?). Well, every.single.year. mom would invariably come to us with a heart shaped box asking what had happened. Why? Because what she held was a practically empty box bearing only one or two pieces of candy that had a bite out of the side, those pieces being the ones none of us kids liked.

Mom always said she hoped I had kids just like me. I did. I now have a “stash” of candy and junk food in my closet that the kids are supposed to stay out of. HA! yeah, right. The ones living at home go in it all the time and the ones who come and visit head straight to the stash, coming out bearing junk food galore and innocent expressions.

On a side note, taking a drink of Pepsi Throwback after eating a huge serving of flan isn’t advisable. It has absolutely no flavor according to my “sweeted out” taste buds plus I think my pancreas just cried a little, then died.

This is one yummy flan btw. Sweet (oh my, is it sweet), quite coconutty, with that mouth feel texture that everyone loves (man, that sounds vaguely obscene. but then I’m tired and everything is making me titter). The caramel sauce on the top is the perfect topping. I used to make flan just for the topping. I swear I did. I’m weird. This is intensely coconutty so if you’re so so about coconut flavor this may be one you need to pass by.

Creamy Coconut Flan

  • 1 cup sugar
  • 4 eggs
  • 3 egg yolks
  • 1 can sweetened condensed milk
  • 1 can cream of coconut (found with the drink mixers- do NOT sub coconut milk)
  • 1 cup heavy cream
  • 1 tablespoon vanilla extract
  • 1/4 cup coconut vodka
  • Toasted coconut for garnish (optional)
  1. Preheat the oven to 325 degrees.
  2. Pour your sugar into a small saucepot. Heat it over medium high heat until it is melted and a nice golden brown color. Don’t walk away once it starts melting. It doesn’t take long to go from melting to scorched and wasted.
  3. Pour the sugar onto the bottom of 8 one cup ramekins, swirling to coat the bottom of the ramekins with the melted sugar.
  4. Whisk the eggs and egg yolks in a large bowl until foamy. Add in the condensed milk, cream of coconut, cream, vanilla extract and vodka. Whisk until well combined. Strain through a fine mesh strainer into another bowl (preferably one with a pour spout) or large measuring cup.
  5. Pour the flan mixture evenly into the prepared ramekins. Set the ramekins into two deep baking dishes. Set into the oven then carefully add hot water to each pan to go about halfway up the sides of the ramekins. be careful not to slosh any INTO them though.
  6. Bake at 325 degrees until the center is almost set, about 30 to 40 minutes.
  7. Carefully remove from the pan (I used tongs) and set on a wire rack for about an hour, then transfer to the fridge to chill for at least an hour.
  8. Carefully slide a butter knife all around the edges of each flan and invert onto a plate. If it doesn’t come out,  place the ramekin into hot water for a minute or so to loosen it up, then try again. Garnish with the toasted coconut if using.

Print Friendly and PDF

Chocolate Chip Double Berry Scones

Chocolate Chip Double Berry Scones 2-001

I can hear the outcry now… “MORE scones, lady!!!??? What the heck?? Can you do anything but scones or citrus pies or risotto!?”

Yes. yes, I can. But I wasn’t thinking the other day when I, on my Facebook page asked everyone which they would prefer- these scones or a quick bread I am trying. They chose the scones. Sooooo, being a woman of my word, I made them. Because honesty is just how I roll. Well, when I trip on our land, downhill quickly is also how I roll but I won’t blog about that. Though photos would probably be hilarious.

Moving on- been interesting in our household lately. My (very pregnant) daughter and her boys are with us through mid August while her husband goes through Basic Training and AIT (the on the job training for whatever you will be doing part of the military) so having 2 extra little ones (they are 3 and 6) has been chaotic to say the least. But I love knowing that when they move, they will, for a time at least, until it fades, have some memories of living with gramma and grampa. My daughter is due in a few weeks so I’ll have time with the baby (girl) for a while too 🙂

Plus, I’ve been having some health issues again. Not gonna go into detail here yet but I’ll cue you all in when things are more settled as to treatment. Until then, I’m just gonna continue to bake fattening things for all of you. Why? Cause I lurves you of course!!! Seriously. You have no idea what it means to me to know that people actually come here to my tiny blog, read my inane words and sometimes actually even make the foods I post.

These scones turned out delicious. I got the base recipe from The Pastry Queen Cookbook (you should have noticed by now that I love this cookbook) but changed it around. I just KNOW you’re surprised at that news. The only problem I had (which is my fault not the books) was shape. After I added the berries, I didn’t want to knead the dough, thus mushing the berries and toughening the dough, so I just reshaped it. BUT… I wasn’t able to get it back into a decent circle. so I tried making it more rectangular and cutting the scones from that. It turned out rather laughable 😛 These taste absolutely amazing… light, tender, flaky with a perfect mix of berries and chocolate and an orange glaze that just complements it all. But the way they look? Kinda wonky lol. But I promise you; you won’t care once you make some and taste them how they look. Also, you may have better luck shaping the dough than I did ANYWAY thus negating the issue. So don’t let looks fool you. Just look at the nicely glazed surface… see the pieces of berry peeking out alongside some chocolate. Then go bake. And I promise… no more scones…. for a few days anyway 😛

Chocolate Chip Double Berry Scones

  • 3 cups flour
  • 1 cup sugar
  • 1 tablespoon baking powder
  • 1/2 teaspoon salt
  • 10 tablespoons unsalted butter, COLD
  • 1 tablespoon vanilla extract
  • 1 1/2 cups heavy cream
  • zest from one large orange (about 1 to 2 tablespoons)
  • 1 cup semi sweet or bittersweet chocolate chips
  • 1/2 cup fresh raspberries
  • 1/2 cup fresh blackberries
  • Glaze-
  • 1 cup powdered sugar
  • 2 teaspoons orange zest
  • 1/3 cup orange juice
  1. Preheat oven to 375 degrees. Line a buttered baking sheet with parchment paper then butter the paper.
  2. In the bowl of a stand mixer fitted with the paddle attachment (as always, you can use these directions with a hand mixer), combine the dry ingredients on low speed, including the orange zest.
  3. Cut the butter into small pieces, then add to the flour. Beat on low speed until the butter is in small pea sized pieces. Then add in 1 cup of the cream and the vanilla and continue beating on low speed. You want the dough to come away from the sides of the bowl in a clean ball of dough, no floury remnants left behind. If it still looks dry, add more cream, about a tablespoon at a time until it forms the dough ball.
  4. Turn out onto a lightly floured board and gently knead the chocolate chips into it. You’re not trying to work the gluten up like in bread dough. That will make the scones tough.
  5. When the chocolate is incorporated, gently pan the dough out into a fairly thin circle or rectangle. Lay the berries down on one side of the dough, then fold the other side down over them. Press gently to seal.
  6. Reshape the dough (circle if you want wedges, rectangle if you want squares or diamonds) and cut into either 10 wedges or if making squares or diamonds (for the diamonds, cut into squares then cut them in half diagonally), cut into 12 pieces. Brush each with some of the leftover cream and sprinkle with sugar.
  7. Bake at 375 for about 15 minutes for wedges or 10 to 12 minutes for squares or diamonds. You want them a nice golden brown on top.
  8. For the glaze- in a small bowl, mix together the glaze ingredients. Whisk well to get rid of lumps.
  9. Pour the glaze out onto a shallow lipped plate.
  10. Dip the top of each scone into the glaze. Let dry for about ten minutes then dip each one again. Let dry a bit before serving though when they are warm and sticky they are awfully hard to resist 😀

Print Friendly and PDF

Chocolate, Cherry & Pistachio Scones

Chocolate, Cherry & Pistachio Scones

Chocolate, Cherry & Pistachio Scones


I’ve mentioned a couple of hundred times by now that I’m not one of those people who does things by the seasons. Nope, I’m that weirdo at the grocery store with no coat and flip flops when it’s 20 degrees out. I’m the reason you’re smelling bbq and woodsmoke in January and suddenly craving grilled chicken. I’m the one making heart cookies in August. While at the same time making a nice comforting warming beef stew or chili. I’m that person posting Pumpkin bread in May and having everyone who comes here (all two of you hehe) wonder what the heck I’m on and why I’m so bass ackward.

Yes. I’m weird. This however is why you like me, right?

*crickets*

From what I’ve seen, most people tend to seem to bake scones during the Winter, many times even around the holidays. This may have something to do with everyone being far wiser than I and not turning on their ovens in the middle of a heat wave. I have never claimed wiseness though so it’s all good. I claim only insanity, a warped sense of humor and an unhealthy love for Cheetos and almost any sort of Gummy candy (right now my current addiction is These Brachs Juicy Berries Gummies. Oh my gosh, I love them and talk about lack of wisdom… it’s unwise for a bag of them to be near me or I’ll eat every.single.one.

But… today wasn’t about gummy candy (tonight when I watch Glee however, all bets are off). Today was about scones. This recipe was originally an Ina Garten one but I found it long ago on the now defunct blog “Gingerbread Bagels”. I don’t know the blog closed of where Lindsey, the owner, disappeared to, but I still think of her and hope she’s ok. Originally, this was just dark chocolate and dried cranberries but we all know I’m genetically incapable of doing a recipe the way it was written. So now I have left my mark on this one and love how I changed it 🙂

These scones are probably my favorite scones ever. They are flaky and tender… a little bit crispy on the outside and tender on the inside. The chocolate and cherries go so well together and the orange zest and almond extract add a lovely flavor to these. Add in the yummy pistachios and the bit of crunch they add and it’s scone Heaven.

You know the drill. Get to baking!

Chocolate, Cherry & Pistachio Scones

  • 1 1/2 cups mini chocolate chips
  • 1 5 ounce bag dried cherries
  • 1/2 cup chopped salted pistachios
  • 2 cups flour
  • 1/3 cup sugar
  • 1 tablespoon baking powder
  • 1 teaspoon salt
  • 2 teaspoons orange zest
  • 1 1/2 sticks COLD unsalted butter, diced
  • 1/2 cup COLD heavy cream
  • 2 large eggs
  • 1 tablespoon vanilla extract
  • 1 teaspoon almond extract
  • Glaze-
  • 1/2 cup powdered sugar
  • 1/2 teaspoon vanilla extract
  • 2 to 3 tablespoons heavy cream (may need more or less to make glaze drizzling consistency)
  1. Preheat oven to 375. Line a buttered baking sheet with parchment paper and then butter the paper.
  2. Combine the flour, baking powder, salt and orange zest in the bowl of a stand mixer. Add in the cold butter and mix on low speed with the paddle attachment until the flour has only small lumps the size of peas left in it. (Alternately, do the same with a hand mixer or pastry blender)
  3. Whisk together the 2 eggs, 1/2 cup cream, vanilla extract and almond extract. Pour slowly into the flour mixture and continue mixing at low speed until dough comes together in a sticky ball from the side of the bowl.
  4.  Dump onto a lightly floured board. Pat down into a circle of about 3/4 of an inch thick. Cut into 8 wedges with a lightly floured knife or pizza cutter.
  5. Lay close together but not touching on the baking sheet. They will rise and touch as they bake and you’ll have nice soft sides where they do, crispy ones where they didn’t.
  6. Bake at 375 for about 17 minutes or until they are nicely browned and firm on top. Don’t over bake or you’ll lose that great texture!
  7. When done, let cool for about minute in the pan, then carefully transfer over to a wire rack to finish cooling.
  8. For glaze, simply whisk together all the glaze ingredients in a small bowl. Drizzle over the cooled scones.

Print Friendly and PDF

Three Cheese, Seafood And Asparagus Risotto

Three Cheese, Seafood & Asparagus Risotto

Three Cheese, Seafood & Asparagus Risotto

No, I am NOT in a rut darn it :-P. So what if I have done two citrus pies and now two risottos as my last four posts? I LIKE them, I cook them, I inhale them (well not really inhale… my lungs might not appreciate that) then I tell you about them. We all go through food phases and lately anything citrus and different risottos have been my weaknesses.

I splurged for this dish. We are so NOT that family that can afford to get seafood anytime we want, as much as I may wish we could.  Things like going out to seafood restaurants or buying shrimp or even fish are rare treats here. Add in that my husband doesn’t even LIKE seafood and I get it rarely. But Russ is out of town helping take care of his dad after surgery (I miss my darlin man!!!! *sobs*) and my oldest son and his family are here visiting so this seemed like a perfect chance to splurge and use seafood. So I bought some crab and shrimp and got cooking. I have to say, I am in love with this risotto. It’s rich and creamy (and we all know that those are my downfalls) with a wonderful seafood flavor (use less crab if you want the shrimp to shine) along with a burst of lemon and cheese flavors. This is a perfect family treat as well as a dish that would be great for a special occasion. So as I always say… get to cooking! This makes a lot so feel free to cut the amounts in half is serving just a few people.

Three Cheese, Seafood & Asparagus Risotto

  • 1 lb uncooked large shrimp
  • 2 tablespoons butter
  • 1 tablespoon olive oil
  • 1 lb asparagus, tough ends chopped off & the rest cut into about 1 inch pieces
  • 3 tablespoons unsalted butter
  • 1 tablespoon olive oil
  • 1 12 ounce bag arborio rice
  • 1 large onion, chopped (about 1 1/2 cups)
  • 2 tablespoons chopped garlic
  • 4 to 5 cups chicken broth, brought to a simmer and kept hot
  • 1/2 cup heavy cream, heated then mixed with the chicken broth
  • 1/3 cup dry white wine (don’t use something you wouldn’t drink)
  • 4 ounces mascarpone cheese
  • 1/4 cup crumbled bleu cheese
  • 1/2 cup fresh grated Parmesan (plus more for on top)
  • 1 tablespoon dried dill weed
  • zest and juice of one lemon (no more than 1/4 cup juice however)
  • 8 ounces fresh crabmeat
  • 4 tablespoons unsalted butter
  1. First things first- get the shrimp ready. In a medium saucepan, combine the 2 tablespoons butter and 1 tablespoon olive oil. Melt over medium high heat. Add in the shrimp and saute for about 1 1/2 minutes on each side. You don’t want these completely cooked because they will finish cooking when they get mixed into the risotto. When they are done, put into a bowl and set aside (and clean your pan and put it away because I’m anal that way).
  2. Now the asparagus- Take the pieces, put into a microwave safe bowl with 3 tablespoons water, cover with plastic wrap and microwave at full power for 4 minutes. Drain then set aside.
  3. In a large saucepot, melt  the 3 tablespoons butter and 1 tablespoon olive oil. Add in the chopped onion, garlic and rice. Saute, stirring frequently, until the rice has become translucent and the onions and garlic are softened and limp, about 5 minutes.
  4. Add in the wine and continue cooking, stirring constantly until the wine is absorbed.
  5. Stir in about 1 cup of the chicken broth. Continue cooking, stirring constantly, until all the broth is absorbed.
  6. Continue to add broth as needed, 1/2 cup at a time, stirring constantly, until the rice is al dente and looks creamy (and utterly delicious)
  7. Stir in the 3 cheeses. Continue stirring until they are melted and thoroughly incorporated into the rice.
  8. Stir in the dill weed, lemon zest and juice.  Stir in the 4 tablespoons butter and stir until melted and combined.Then fold in the shrimp, crabmeat and asparagus, being careful not to break up the asparagus.
  9. Put into a serving dish, sprinkle with more Parmesan and serve. Get ready for some big time kudos here 🙂

Print Friendly and PDF

Chocolate Chip Butterscotch Cookie Cake (With An Adult Twist)

Chocolate Chip Butterscotch Cookie Cake

Chocolate Chip Butterscotch Cookie Cake

I’ve mentioned before that I’m not much of a drinker. I like my wine a time or two a week and I like some sweet liquors every once in a while; things like Baileys, Amaretto (it’s wonderful in hot tea) and Butterscotch Schnapps. Yep… they actually make a schnapps with that flavor.  And add Pinnacle Vodka in there sometimes too. I’m not normally a vodka drinker but the ones they make are actually creamy tasting and if you’ve read my blog for more than five minutes, you know creamy tasting and I are BFF’s from way back. 😀

When I was a kid, I loved those hard yellow butterscotch discs. Still do actually, though my teeth (or lack thereof hehe) can’t handle them anymore. So, years back, when I saw the schnapps with that flavor, I had to try it. And lo and behold, it tastes exactly like one of those candies. The problem is that I DON’T drink enough (laughs cause I’m whining that I don’t drink heavily. Go figure.) so a bottle lasts me approximately as long as it takes to go from birth to puberty. So I like to think of ways to use the stuff up that doesn’t involve me and a headache from syrupy booze.

Today, I was looking through my copy of Dam Good Sweets and I noticed a page I tagged. It was for Chocolate Chip Cookie cake. That alone sounded good and I was going to make it but then boozy inspiration entered my head (that sounds like I was sloshed when I thought of it lol. Y’all know what I meant right?) so I played around with the recipe. Not much… just enough to make it say “Janet Made Me!!” How, you ask? Simple. I added butterscotch chips as well as the chocolate and I added a slug of butterscotch schnapps to the batter. I also omitted the almond extract they called for and used dark brown sugar instead of light.

This worked out nicely. You can definitely taste the butterscotch flavor in the dough. Combined with the two different flavors of chips that are all melty and ooey gooey and the soft chewy cookie with crispity (yes, that too is now a word) edges, this all becomes one decadent treat. I had originally thought about sending it in to my husbands work with him, but no way is that happening now that I’ve tasted it hehe.

Now go bake a cookie!

Chocolate Chip Butterscotch Cookie Cake

  • 2 cups semi sweet chocolate chips
  • 1 1/2 cups butterscotch chips
  • 1/2 cup heavy cream
  • 9 1/2 tablespoons unsalted butter, room temp
  • 1 cup flour
  • 1 1/2 teaspoons baking powder
  • 1/4 teaspoon salt
  • 1 cup brown sugar
  • 1 teaspoon vanilla extract
  • 2 tablespoons butterscotch schnapps (you could sub 1/4 teaspoon of butterscotch candy flavoring if you wanted to)
  • 1 egg
  1. Make your ganache- this will be the glaze later. Put 2/3 of a cup of the chocolate chips in a bowl. Microwave the cream until boiling, then pour over the chocolate chips in the bowl. Let sit for about a minute then stir well to melt the chocolate and make a smooth mixture. Cover and set aside. You can make this hours before hand if you want. Just leave out because it will harden in the fridge.
  2. Preheat oven to 350 degrees. Line a buttered 9 inch cake pan with a round of parchment paper (easiest way is to trace the outline of the with pencil on parchment then cut it out) then butter or spray the paper.
  3. Whisk the flour, salt and baking powder in a small bowl. Set aside
  4. In a large bowl, combine the butter, brown sugar, vanilla and schnapps. Mix with a hand mixer until well combined and fluffy. Scrape down the bowl, then add the egg.
  5. After the egg is well combined, stir in the flour mixture.. Stir just until well combined, then add the rest of the chocolate chips and the butterscotch chips
  6. Bake at 350 for about 25 minutes or until the top is golden brown and puffy and the edges look set. The middle will still look and feel somewhat soft..
  7. Let cool in the pan on a wire rack for about an hour. Run a butter knife around the edges of the pan. Carefully lay a plate over the top of the pan and invert the cookie, then do that again onto another plate to get it back right side up.
  8. Spoon your cooled ganache into a sandwich bag. Snip off the corner and pipe the ganache onto the top of the cookie. Eat the leftover ganache hehe.
  9. Serve this to hungry kids who will love you (the alcohol has cooked off). Or just do the usual… hide in the closet with it and don’t share. I’m cool with that too.

Print Friendly and PDF

Lemon Icebox Pie With Honeyed Whipped Cream

Lemon Icebox Pie With Honeyed WHipped Cream 2-001

I know, I know, I just did a citrus pie. What can I say? I’m in a tangy frame of mind. Spring and Summer makes me want sweet tart desserts. Ok, so Fall and Winter make me want sweet tart desserts. So does Christmas. And Groundhog Day. And Thursdays. And…well, you get the point.

I’m not one of those weirdos who says that I would always choose lemon over chocolate, but I do love me a good lemony dessert. I come by that honestly if the love for it can be genetic. One of the only desserts I can recall my mother making was lemon meringue pie. She made an awesome one too.  Plus, my dad loved lemon meringue pie. Hmmm, wonder if there is a connection there. maybe my mom learned because my dad liked it? Or maybe my dad loved it because my mom made it? Who knows? I don’t have many memories of the two of them together so I guess it will remain a mystery.

My father would have loved this pie. It’s not lemon meringue but it has all the thing in it he (and I) loved; lemon, creaminess, whipped cream… ok, so my dad would have loved it because it had sugar lol. I’ve said it before- he was a diabetic with an insatiable sweet tooth.

I originally saw this recipe on The Galley Gourmet. Her blog is one of my absolute favorites and one I aspire to be like though I doubt it will ever happen with my lack of photography skills hehe. When I checked out the cookbook she mentioned in her post, I immediately went to Amazon to check it out and ten minutes later, I was 10 bucks poorer. But it’s definitely worth it. The book (Dam Good Sweet) has quite a few tempting recipes in it that I’ll be trying. Being me however, i had to change it up a little. Mind you, it was very very little. All I did was add some vanilla to it because I adore the combo of lemon and vanilla and I made a honeyed whipped cream for the top of it because who can resist the classic pairing of honey and lemon. I was tickled with the results of that idea. The honey whipped cream goes so well with the lemon flavor. I also didn’t freeze it, just chilled it because I’m not big on frozen pies. Anddddd, I used a premade graham cracker crust but I will post the recipe for the crust in the book. Feel free to do it either way. It worked just fine in the premade if you’re feeling as lazy as I was. So go see if you have any sweetened condensed milk and go buy the prettiest lemons you can find. This pie is delicious!

Note- this takes a lot of egg yolks so plan on making some egg white omelets for dinner that night or some meringue cookies the next day. Just store the whites in a covered container. They will last about 3 days.

Lemon Icebox Pie With Honeyed Whipped Cream

  • crust-
  • Premade graham cracker crust OR
  • 14 whole graham crackers
  • 1/4 cup sugar
  • 6 tablespoons butter, melted
  • Filling-
  • 2 cans sweetened condensed milk
  • 1 1/4 cups strained lemon juice (will take about 5 to 6 lemons)
  • 8 egg yolks
  • zest from 2 lemons
  • Honeyed whipped cream-
  • 2 cups heavy cream
  • 1/4 to 1/3 cup honey (depends on how sweet you want it. I prefer it only mildly sweet because the pie is pretty sweet on it’s own)
  1. To make the crust-
  2. Preheat oven to 350 degrees. Break the graham crackers up into small pieces and place in the bowl of a food processor with the sugar and pulse until they are fine crumbs.
  3. Pour in the melted butter and pulse a few times, until the mixture holds together if squeezed.
  4. Transfer the mixture to a 9 inch springform pan and press onto the bottom and about an inch up the sides of the pan. Set aside.
  5. Whisk the condensed milk with the lemon juice. In another bowl, whisk the lemon zest with the egg yolks for about a minute or so. Pour the lemon juice mixture into the egg mixture and mix well.
  6. Place the pan on a rimmed baking sheet and pour the mixture into the crust. Place into the oven and bake for about 25 minutes or until the center is jiggly, rather like a soft set custard. Remove from the oven and let cool for an hour on a wire rack.  Loosely cover with plastic wrap and either chill or freeze for at least six hours.
  7. When ready to serve, make your cream. In a medium bowl, combine the heavy cream and the honey. Start with the 1/4 cup honey if you’re not sure how sweet you want it. You can taste midway through beating and see if you want more. Beat until soft peaks form. Either cover the pie with the cream or serve on the side. Or just take the whole bowl in a closet and eat it. I won’t judge.
Lemon Icebox Pie With Honeyed Whipped Cream

Lemon Icebox Pie With Honeyed Whipped Cream


Print Friendly and PDF

Key Lime Chess Pie

Key Lime Chess Pie 1

I’ve always had a thing for food culture and food history. One of my prize possessions is the full set of Time Life Foods Of The World cookbooks. The firs time I read one of them was when I lived in Germany and I became immediately hooked. The books are a bit dated now (they were printed in the late 60’s through early 70’s but that is actually part of their charm. But they are a wonderful combination of a cookbook, a travelogue and personal anecdotes from each author. When the internet became a larger part of everyday life, I looked for the books on Ebay and found them. By the time I managed to piece together one set, I had extras and now have almost 2 full sets of the books. I have yet to decide which one of my kids get the books when I die hehe.

One of the things I love about food history is how the things we eat has changed so much and it’s fun to compare. back in the day, people routinely ate things like offal and marrow. I remember my mother, a depression baby, sucking the marrow out of bones and how it grossed me out because I was form a different time period than she. And how many of you have ever had a tomato aspic or jellied beef? Or a Marlborough Pie or Shoofly Pie? Heck, I know many people from the generations younger than myself who have never even had jello or a jello salad. That was such a common place dessert or side dish years back but my theory is that the younger crowd today has far more choices when it comes to sweets so things like jello have fallen out of favor.

One of the things that always sounded interesting to me was Chess Pie. The addition of cornmeal to what would otherwise be a typical custard pie seemed unusual enough to be yummy. But the “normal” chess pie sounded overly sweet, even to me lol. So when I saw a recipe for Key Lime Chess Pie in The Southern Foodie, I knew I wanted to try it. I mean, y’all know me. Turn down something made with lime? Not to mention custardy, aka creamy? yeah right… and I hated Twinkies too.

This turned out pretty good. I was leery at first about the amount of butter used in the crust. I worried it would be greasy. But it seems to have worked, making the crust almost cookie like though a bit less butter would be ideal in my opinion. The filling is nice and tart from the lime but not too tart. The only issue I have is that the directions weren’t very clear on pie pan size. I used a regular 9 inch pan and ended with 1) a very thick crust and 2) too much filling for the pan. So I will say here and repeat in the recipe. Either use a 10 inch deep dish pie pan (hard to find I know), make this in say, a 13×9 inch glass pan or plan on putting some of it into ramekins as I did today.

Key Lime Chess Pie

  • Crust-
  • 1 1/4 cups graham cracker crumbs
  • 1/3 cup plus 1 tablespoon flour
  • 1/3 cup plus 1 tablespoon powdered sugar
  • 11 teaspoons unsalted butter, melted (the recipe called for 12.5 tablespoons but I think a tad less would be ideal with no chance of excessive greasiness. Make your own call there.)
  • Filling-
  • 8 eggs (yes, 8)
  • 4 cups sugar
  • 1/2 cup milk or cream
  • 1/2 cup Key Lime juice (you can find it bottled with the regular lemon and lime juices at the store)
  • 2 tablespoons flour
  • 2 tablespoons cornmeal
  • juice (and zest; my addition there) of one lime
  • 6 tablespoons unsalted butter, melted
  1. To make the crust, preheat oven to 350 degrees then combine all the crust ingredients and pat into the bottom of a deep dish large pie pan or a 9 inch pan and a couple of ramekins.
  2. Place the pan in the 350 degree oven and bake for 7 minutes, then set aside to cool.
  3. For the filling, In a large bowl, combine the eggs, sugar, milk (or cream) and key lime juice. Whisk until well combined.
  4. Add the flour, cornmeal, lime juice and zest and butter. Stir to combine.
  5. Pour into the pie shell and bake at 350 until the top is golden brown and the only the very center of the pie is jiggly. The edges and halfway through should look and feel set not liquidy.

Print Friendly and PDF

Caramelized Onion, Bacon & Mascarpone Risotto

Caramelized Onion, Bacon & Mascarpone Risotto

Caramelized Onion, Bacon & Mascarpone Risotto


Rice is one of my best friends. If this were 150 years ago, I would have been the wife of a rice planter in say, South Carolina. We would of course, be stone broke because I would eat all of our profits. Ok, so maybe not, but I remember reading once that it was common back in the day on the plantations for rice to be served with every meal, including breakfast. It was just a difference in HOW it was served.

I am pretty sure risotto was not on the menu back then though. It is, for Americans at least, a fairly recent dish. But I am willing to bet that if you could go back in time (wouldn’t that be a blast btw? I vacillate constantly over what time period I would go to first. Yes, that is how my mind works and these are the things that keep me awake at night.) and offer risotto to rice planters, they would love you. They would also realize what could be done with their crop, increase prices substantially and rice would now be right up there price wise with foie gras, caviar and Dom Perignon champagne… all things that do NOT fit into my budget, meaning that I would never be able to afford rice, would go through life depressed and probably would have been committed at a young age.

On that note, in case it wasn’t obvious, I made risotto tonight. But not plain old boring risotto. Me?? Make something normally??? Surely you jest? Nope. I put bacon, caramelized onions, mascarpone cheese and a butt ton of other assorted Italian cheeses in there. Creamy? definitely. Meaty? Check. Needing anything else with it to make it a meal. Oh heck no. This WAS the meal… and the dessert… and dinner for tomorrow. It makes a lot. I’d say that I’ll make less next time, but I’d be lying. I’m looking forward to leftovers.

Caramelized Onion, Bacon & Mascarpone Risotto

  • 1/2 pound bacon (preferably low sodium), cooked crisp and crumbled, then set aside (make extra because you KNOW you’ll pick at it)
  • 1/4 cup olive oil
  • 3 onions, cut in half lengthwise then thinly sliced into half moons
  • 5 to 6 cups of good quality chicken broth, heated to close to boiling (keep warm by either reheating in the microwave or keeping it simmering in a pot on the stove)
  • 3 garlic cloves, minced
  • 1/2 cup fresh grated Parmesan cheese (plus more to smother the finished rice in)
  • 4 ounces mascarpone cheese
  • 4 to 8 ounces shredded Italian cheeses (Kraft makes it, plus most groceries have a store brand)
  1. In a large saucepot, over low heat, saute the onions in 3 tablespoons of the olive oil, stirring constantly for the first three or 4 minutes. Cover the pan, keep the heat at low and cook the onions, stirring frequently, until the onions are golden brown and tender, about 20 to 30 minutes. Put the onions in a bowl and clean the pot.
  2. In the same pot, put the rest of the olive oil. Add in the garlic and over medium heat, cook for about 3 minutes. Add the rice and cook, stirring constantly for about 3 to 4 minutes. You want the rice to have a nice coating of garlicky oil on it.
  3. Pour about 1 1/2 cups of the hot broth into the rice. You want it to just barely cover the rice. Make sure you have a drink and something to do next to you, because you’re not leaving the stove for a while now 😛 .
  4. Stirring constantly, continue to cook the rice until practically all of the broth is absorbed. Add in another 1/ 1/2 cups and do it all over again. Then do it one last time. The rice is done when it is tender and creamy.
  5. Take the pan off the heat and add in all the cheeses. Stir well to melt them, then add in the bacon and the caramelized onions.
  6. Place the rice in a large serving bowl to serve family style or individual bowls to make sure that no one eats your portion. Sprinkle each serving with a healthy portion of grated Parmesan.

Print Friendly and PDF

White Chocolate Coconut Mojito Cookies

White Chocolate Coconut Mojito Cookies

I’m not a huge imbiber when it comes to hard alcohol. I joke about it on my facebook page and yes, I do like my wine and every once in a while something harder. But generally speaking, I’m pretty darn boring that way. I did all my drinking in my wild younger days (someday I’ll tell the story of waking up in the backseat of a car, unclothed, with no memory of how I got there. I was…interesting when in my late teens and early 20’s). But even then I tended to drink wine. When I drank the hard stuff, I ended up..well, in situations. Learn from me, grasshoppers.

So I’ve never had a mojito. But the IDEA of them has always intrigued me since I absolutely LOVE lime and enjoy mint too. So the thought of them together sounded yummy. But it meant buying rum and the only time I buy rum is when I buy an airline sized bottle around Christmas to soak my fruitcake in.

So I saw a recipe a few days ago for a Mojito Scone. That sounded interesting but I know I do a lot of that type of baked goods in here and hadn’t done any cookies for a while <insert Cookie Monster voice here saying “COOOOOOKIEEEESSSS!”>. So I thought. Then I thunk some more. Then I answered the door cause the fire department was there saying they had multiple reports of the smell of burning coming from my house.

So I stopped thinking. And that’s when it came to me. These cookies. Mojito flavored. As well as tasting of some toasted coconut just because I love any excuse to throw toasted coconut into things.

These turned out both good and not to my taste, all at once. Will I make them again? Yes, but next time I will double the lime zest, add some lime oil, cut the mint extract in half (it was a bit overpowering for me) and add some coconut extract as well. Then, I think they would be absolutely perfect. But if you prefer the flavor of mint to be more prominent, make them exactly as I will type them out here. Otherwise, try them the way I just suggested up above. that will make the lime and coconut flavors more noticeable. But for an experiment, I was really pleased with these. They are nice and chewy, the toasted coconut was a great addition and were pleasantly buttery. I WILL be making these again 🙂

White Chocolate Coconut Mojito Cookies

  • 1 cup unsalted butter, room temp
  • 1 1/2 cups brown sugar, packed
  • 1 cup sugar
  • 2 eggs
  • 2 teaspoons vanilla extract
  • 1 teaspoon rum extract
  • 1 teaspoon mint extract (cut in half if you want mint flavor lighter)
  • zest and juice from one small lime (remember, double the zest and add some lime oil if you prefer the lime to dominate over the mint)
  • 1 cup shredded sweetened coconut, toasted in a 350 degree oven until light brown (also, about 1/2 teaspoon coconut extract if you want a heavier coconut flavor)
  • 3 cups flour
  • 1/2 teaspoon baking soda
  • 1/2 teaspoon salt
  • 1 11 ounce bag of white chocolate pieces
  1. In a large bowl, beat together the butter and the sugars.
  2. Add the eggs, the extracts and the lime juice and zest. Beat until well blended.
  3. In a small bowl, mix the flour, baking soda and salt. Add to the butter mixture. Mix just until blended. Stir in the white chocolate pieces and the toasted coconut.
  4. Cover bowl with plastic wrap and chill for about an hour.
  5. Preheat oven to 350 degrees. Grease and/or line cookie sheets with parchment paper.
  6. Spoon or scoop rounded spoonfuls of the dough onto the prepared cookie sheets. Bake at 350 for about 10 minutes. They should be just barely browned on the edges of the cookies.
  7. Let cool on pan for a minute, then transfer to a wire rack to finish cooling.


Print Friendly and PDF