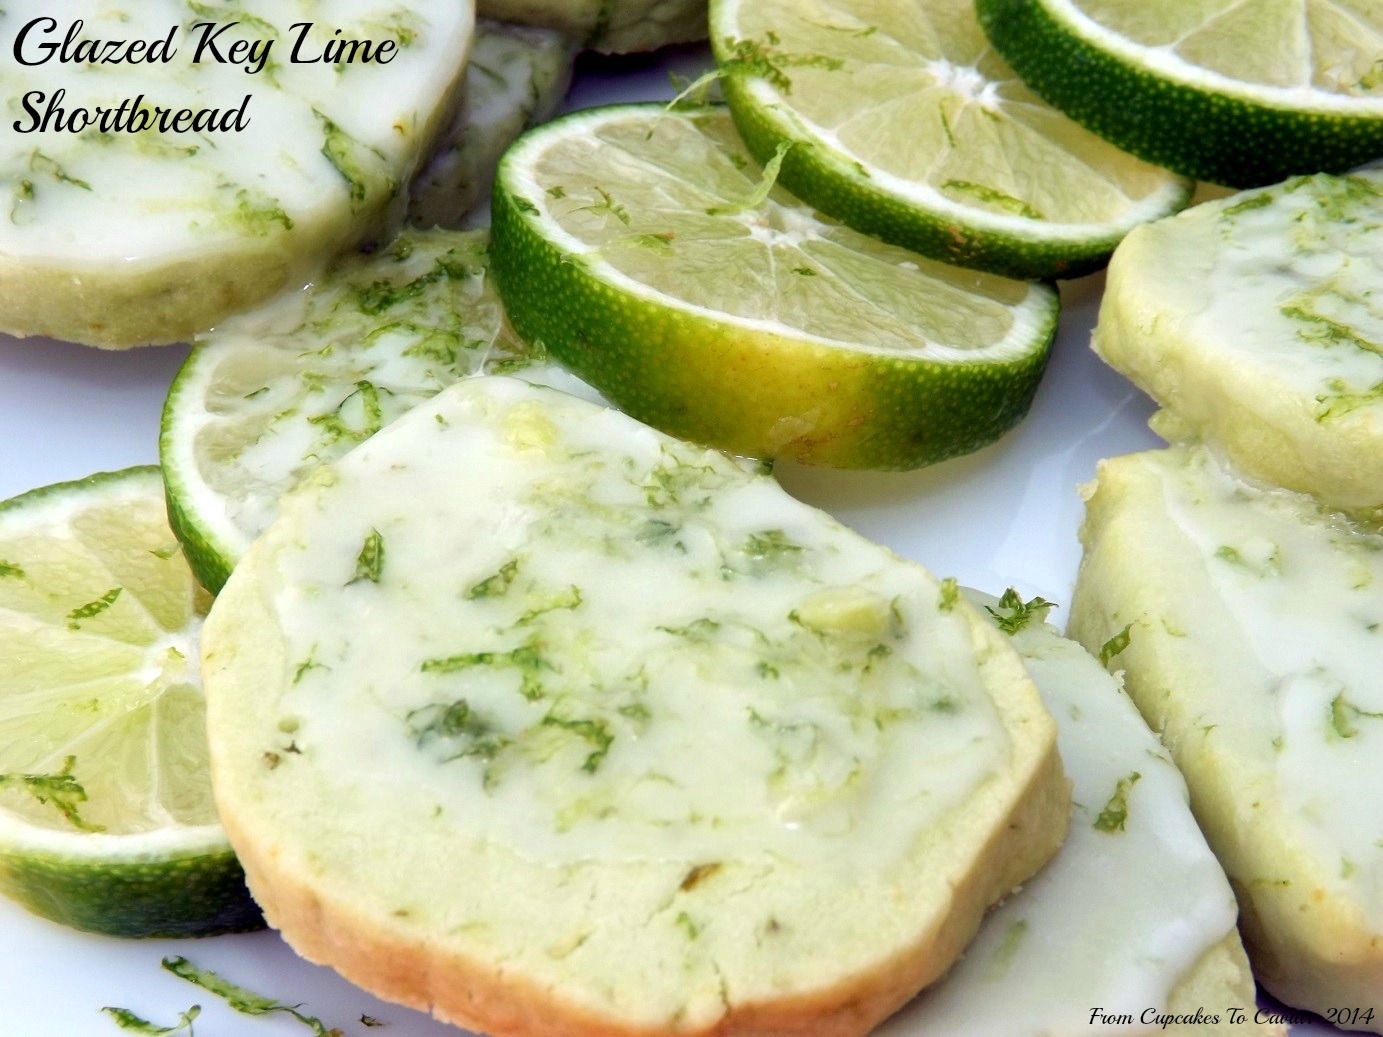
Glazed Key Lime Shortbread

You ever have one of those days when you feel like you’ve run around like a crazy woman (or man as the case may be) all day, but haven’t accomplished anything of importance? That was my day today. I made homemade bread, made dinner, made cookies, did housework, etc etc, but somehow, I just don’t feel like I got anything done. All the floors still need waxed, I need to go weed outside, I need to vacuum, there’s more laundry, I did NOT write a New York Times bestselling novel nor did I manage to effect world peace by my mere presence or find a cure for paper cuts. So, see? Wasted day.
I may have no choice but to console myself about my laziness by being lazy and sitting down with 14 of these cookies and a cup of tea and watching all five of the Rocky Movies on Netflix. Want to come join me? If you get here in sayyyyyy, the next ten minutes, there may even be a cookie left.
I had seen this cookie (more or less) on the Land O Lakes web site. The idea intrigued me because I love shortbread. I mean, what’s not to love about shortbread? It uses lots of butter. What else did I need to know? I mean…butter! But so many of the reviews talked about it being dry and crumbly. Now, by its very nature, shortbread tends to be crumbly. It has very few ingredients and doesn’t really include anything that could be considered a binder or “cookie glue” as I think I’ll call it 😀
So I changed the recipe. I know, right! Whoda thunk it of me!? In all honesty, one reason I change recipes is because in the blogging world, it’s considered uncool to use anothers recipe without substantial changes. But mostly, I change things, as I’ve said many times, because I am genetically incapable of leaving a recipe alone. It’s a sickness! A sickness, I tell you!
What I did was to add an egg yolk to make a more manageable cookie that didn’t crumble if you looked at it funny and I also added a packet of Duncan Hines Key Lime Frosting Creations to up the zing factor of the lime flavor. It worked! These are yummy cookies, if I do say so myself. They are still very delicate, so you can’t like throw one at someone you’re wanting to give one to, or all they will receive is a handful of tasty crumbs, but handle them with common sense care and you’ll be fine. These are great for after school snacking (which is coming up far quicker than most of us parents want to admit!), great with some tea or coffee, late night noshing. Ok, fine, it’s good no matter what. It has a nice bright lime flavor with a melt in your mouth texture. I can see myself in the future using this same recipe with other packet flavors, so be on the lookout for some, especially near Christmas!
You know the drill… 🙂
Glazed Key Lime Shortbread
- 1 1/2 cups flour
- 1/2 cup cornstarch
- 1/2 cup powdered sugar
- 1 packet Duncan Hines Key Lime Frosting Creations (can be done without this, but it makes the flavor pop)
- 1 cup unsalted butter, room temp
- 1 egg yolk
- 1 1/2 tablespoons Key Lime juice
- 1 tablespoon Key Lime zest (I have a confession; I used regular limes)
- GLAZE-
- 1 1/4 cups powdered sugar
- 2 teaspoons lime zest
- 2 to 3 tablespoons lime juice (amount varies by how thin you want the glaze)
- In a medium bowl, whisk to combine the flour, cornstarch, powdered sugar and the frosting packet.
- In another bowl, beat together the butter, egg yolk, lime juice and lime zest. Add in the flour mixture and beat on low speed to combine. This is a fairly soft dough, so don’t add more flour when you see that.
- Divide the dough in half, shape each half into a log (carefully or it will start to melt all over your hands) and wrap in plastic wrap or foil. Refrigerate until firm, about 2 hours.
- Preheat your oven to 350 degrees and line your cookie sheet with either parchment paper or a silicone mat.
- Slice each log into 10 to 12 slices. Lay about an inch apart on the cookie sheets. Bake at 350 for about 12 to 14 minutes or until the cookies look set and are a nice light brown around the edges. You don’t want to overcook shortbread. That’s one of the things that will make it too crumbly.
- Let them cool for about 2 minutes on the sheet, then CAREFULLY transfer them to a rack to finish cooling.
- When they are cool, whisk together the glaze ingredients. You can then either carefully spoon it and spread it on top of each cookie or dip the tops of them in the glaze. Spooning tends to work better because if you dip, the lime zest gets left in the bowl for the most part and doesn’t adhere to the cookies.
Copyright Notice: From Cupcakes To Caviar images and original content are copyright protected. Please do not publish these materials anywhere without prior permission.