Ultra Creamy Hot Fudge Sauce

Ultra Creamy Hot Fudge Sauce

Ultra Creamy Hot Fudge Sauce

Back when I was a kid, when dinosaurs roamed the Earth and mankind had a population of about 12, I loved hot fudge sundaes. I remember that, when my father would come to stay with us (my mom had surgery once and he stayed with us, which I loved) or we with him, which I did quite often as I grew, being the daddys girl that I was, he would make us these huge bowls of ice cream (my God, I just wrote the worlds longest run on sentence). And when I say huge, I mean huge. The man had no boundaries when it came to sweets, a trait he kept throughout his life. He would put about 43 scoops of ice cream in a large industrial size vat, then he would cover that with either Hersheys syrup or hot fudge, then add whippped cream, sprinkles and about 309 cookies surrounding it. Needless to say, my brother, sister and I ate every bowl and then licked the vat clean. He usually had to call for the firemen to help us back out of the vat, but it was worth it.

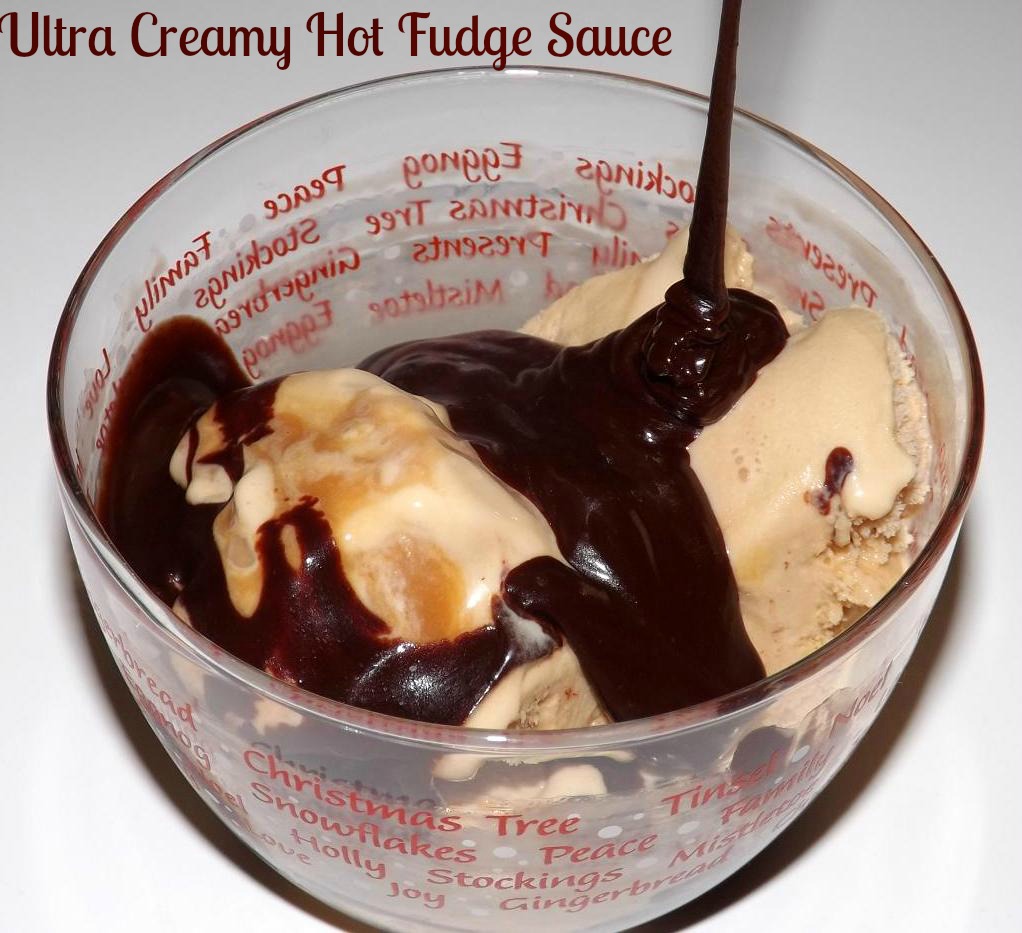
As time went on, I turned my back on my beloved hot fudge for other flavors (*sobs and begs hot fudge to forgive me*) like butterscotch. Now, I still love butterscotch and I will admit to it being my flavor of choice when it comes to ice cream toppings, but I still also have a weakness for a good hot fudge sauce. There are some decent ones you can find at the stores but that’s the key word…. decent. You have not tasted hot fudge untiul you have had homemade hot fudge dripping it’s warm, decadent creamy self (man, is it getting hot in here or is it just me? *fans my face*) down a vat bowl of ice cream. There is just no comparison. This sauce is has a glossy sheen when warm and drips wonderfully over ice cream… or pudding… or a pot roast**… or a marshmallow. But cold, it has definite uses too. Like say, a spoon. You, hot fudge and a spoon. Enough said.

This oringally came from Taste Of Home and is barely adapted; just the brandy and the cooking time.

You know the drill…

Ultra Creamy Hot Fudge Sauce

  • 1 cup heavy cream
  • 3/4 cup unsalted butter, room temp
  • 1 1/3 cups packed light brown sugar
  • 1/4 cup sugar
  • 1/8 teaspoon salt
  • 1 cup unsweetened cocoa powder
  • 1/2 cup plus 2 tablespoons light corn syrup
  • 2 ounces unsweetened chocolate, chopped
  • 1 tablespoon vanilla extract
  • 1 tablespoon brandy (doesn’t add an alcohol taste; just adds depth to the flavor but consider it optional)
  1. In a heavy bottomed saucepot, combine the cream and the butter. Stir over low heat until the butter is melted. Add the brown and white sugars and the salt. Stir and cook over low heat until the sugar is completely dissolved.
  2. Whisk in the cocoa powder and the corn syrup. Cook over low heatr, stirring constantly, until the cocoa is dissolved and blended.
  3. Add in the chopped chocolate. Cook and stir for about 3 minutes, until the chocolate is completely melted. Continue to cook over low heat, simmering this for about 5 minutes (more if you want a very thick sauce but keep in mind that this will thicken as it stands plus even more so in the fridge). Remove frm the heat and add in the vanilla and the brandy if you’;re using it. Let cool, then pour into glass jars. Store in the fridge. (disposable plastic containers work too. Just make sure the sauce is cool first)
  4. This is a wonderful Chrismas gift, put into pretty jars and tied with a holiday ribbon and maybe gifted with some ice cream bowls.

Copyright Notice: From Cupcakes To Caviar images and original content are copyright protected. Please do not publish these materials anywhere without prior permission.


Pumpkin Spice Cake With A Creamy Mascarpone Swirl

Pumpkin Spice Cake With A Creamy Mascarpone Swirl

Pumpkin Spice Cake With A Creamy Mascarpone Swirl


Back when she was little, my daughter Rachel didn’t like pumpkin pie. For a minute or two each year, I would contemplate sending her to an orphanage a la Oliver Twist style, until she got so hungry that even my pie looked good. Honestly, I think I always just wanted someone to hold a bowl out to me and say (in a cockney accent) “May I have some more, sir?” Though no, I have no idea why they would be calling me sir. I have rather prominent boobs. Hard to mistake me for a guy. But I digress.

Now, she goes back and forth. One year she hates pumpkin pie and then another she’ll like it. Go figure. I think we all know a pumpkin pie hating weirdo though. I’m looking at YOU, Kim, you pepsi swigging pumpkin hater.  So what can you do? Especially since it’s so hard to find an orphanage. Make something ELSE pumpkin flavored and refuse to let them have any stuffing, turkey or cranberry sauce until they eat something pumpkin. WHAT!? It seems reasonable enough to me.

Thursday we will be bringing meals over to the volunteer firefighters who have to work and one of the things I’m bringing is one of these cakes. The recipe makes two and who better to share with than the gentlmen who will come save my home from burning if I drink a bit too much Cabernet while I cook? 😛

This came from the Saveur web site. They are pretty much my favorite cooking magazine and this cake is one of the reasons why. This is moist, not overly sweet, thus perfect after a heavy meal, has a touch of crunch from crispy edges and the pepitas on top. I changed it just a bit. The original called for just plain mascarpone and I know my family well enough to know that unsweetened dollops of a creamy cheese wouldn’t work. I’m glad I changed it. The cake really is NOT that sweet so the mascarpone flavored with a touch of sugar and vanilla was a nice counterpoint to the cake itself. I also added more spice (and deleted the cardamom because I didn’t have any nor the cash to buy any) than they called for and I’m again glad I did. It could use maybe even a bit more than what I added.

You know the drill….

Pumpkin Spice Cake With A Creamy Mascarpone Swirl

  •  3 cups flour
  • 1 teaspoon baking soda
  • 2 teaspoons cinnamon
  • 1 teaspoon cloves
  • 1 1/2 teaspoons ground ginger
  • 1 1/2 teaspoons grated nutmeg
  • 1 teaspoon salt
  • 4 eggs
  • 2 teaspoons vanilla extract
  • 2 cups sugar
  • 1 16 ounce can pumpkin puree (NOT pie filling)
  • zest of one orange (I used 1/2 teaspoon of orange oil)
  • 1 1/4 cups canola oil (I used vegetable and it was fine. I don’t like canola oil)
  • 8 ounces mascarpone cheese, room temp
  • 1/4 cup sugar
  • 1 teaspoon vanilla extract
  • 1 1/2 tablespoons heavy cream or half and half
  • 1/4 cup pepitas
  1. Heat oven to 350. Grease and flour two 8 inch cake pans. I used 9 inch pans and this was still fine; made a nice thick cake.
  2. On a small bowl, combine the mascarpone, 1/4 cup of sugar, 1 1/2 teaspoons cream and 1 teaspoon vanilla extract. Mix well and set aside
  3. In a medium bowl, whisk together the flour, salt, baking soda and spices.
  4. In a large bowl, combine the pumpkin, eggs, sugar, oil, orange zest and canola oil. Mix well.
  5. Add the flour mixture to the pumpkin mixture. Beat well until thoroughly combined. Divide the batter between the two pans.
  6. Dollop the mascarpone mix evenly over the two pans. Use a butter knife to swirl it into the batter lightly. Sprinkle the pepitas evenly over the two cakes.
  7. Bake at 350 for about 35 to 40 minutes or untila wooden toothpick inserted into the middle comes out clean. Let cool in pan for about ten minutes, then turn out of pan to finish cooling.

Copyright Notice: From Cupcakes To Caviar images and original content are copyright protected. Please do not publish these materials anywhere without prior permission


Old Fashioned Fruitcake

Old Fashioned Fruitcake

Old Fashioned Fruitcake


A couple of weeks ago, I asked on the blogs facebook page if the readers liked or hated fruitcake. I was fully expecting a lot of “ewwww, I HATE fruitcake!”. But to my surprise, the vast majority of the responses were people saying they either loved it or had at least learned to appreciate it. Yep… fruitcake. Candied peels, unnaturally dyed cherries and pineapple, the whole kit and kaboodle.  I was totally tickled since I have always loved fruitcake.

About ten years or so ago, I started making my own. I got the recipe from The New Doubleday Cookbook, one I used to have, but have since lost *sobs* (excellent cookbook btw… if you can find it, get it). Luckily, a few years ago, I was able to find the exact recipe on an about.com site. Yay! This is a typical fruitcake recipe, similar to what one would get at a higher end grocery or through mail order. But even though the fruits are expensive, this is still cheaper than buying one prebaked, plus you know the ingredients going in and the biggest plus, it tastes ten times fresher. ANDDDDDD, you soak this bad boy in a rum or brandy soaked cheesecloth (you can sub apple juice) to up the drunken goodness lol.

This isn’t at all difficult. But you DO need to get this made now for it to be ready for Christmas eating. It is a two day process to make it then it ripens in the soaked cloth for 3 weeks. Could you eat it immediately? I suppose so, but trust me, it tastes far better as it ages. Also, the original recipe calls for making this in a ten inch tube pan. I use two loaf pans; one large, one 8 inch. It works perfectly and that way I have one cake I can soak in rum and one I soak in juice to be kid friendly. Otherwise, I have changed this recipe very little. I add a bit more dried fruit, more vanilla and almond extract, less nuts, no currants and that’s about it. Ok, so maybe I’ve changed it more than I realized lol. Regardless, I’m going to write this as I make it.

You know the drill…. 🙂

Old Fashioned Fruitcake

  • Fruit Mixture-
  • 1 1/2 lbs fruitcake mix (found this time of year in any grocery store, usually near or in the produce section)
  • 8 ounce container candied lemon or orange peels (your preference)
  • 8 ounces raisins
  • 8 ounces golden raisins (can use a full lb of one or the other if you prefer)
  • 8 ounce container candied cherries
  • 8 ounces finely chopped pecans or walnuts, toasted
  • zest of 2 large lemons (about 2 tablespoons)
  • 1/4 cup lemon juice
  • 1/2 cup orange marmalade
  • 1/4 cup brandy, rum or orange juice
  • 2 teaspoons vanilla extract
  • 1 teaspoon almond extract
  • Cake-
  • 2 cups flour
  • 1 teaspoon cinnamon
  • 3/4 teaspoon nutmeg
  • 1/4 teaspoon cloves
  • 1/4 teaspoon allspice
  • 1 teaspoon baking powder
  • 1/2 teaspoon salt
  • 1 cup unsalted butter, room temp
  • 1 cup sugar
  • 6 eggs
  • Cheesecloth for wrapping
  • Rum, Brandy or Apple Juice for soaking
  1. Place all the fruit mixture ingredients in a large bowl. Stir well to mix. Cover the bowl and let it sit overnight at room temp.
  2. The next day, preheat oven to 250 degrees and grease and flour the bottom of either a 10 inch tube pan or two loaf pans.  Put a large shallow baking pan filled with boiling water on the bottom rack of your oven.
  3. In a medium bowl, combine the flour, cinnamon, nutmeg, cloves, allspice, baking powder and salt. Stir to combine.
  4. In a large bowl, cream together the butter and sugar. Add the eggs, one at a time, beating well after each addition.
  5. Pour the dry ingredients into the bowl of wet ones. Beat just enough to thoroughly blend. Now, carefull spoon the fruit mixture into the bowl of batter. Stir well to combine and make sure all the fruit is covered well in batter.
  6. Pours into the prepared pan or pans. Bake at 250 degrees for approximately 4 1/2 hours, until the cake has shrunk slightly from the sides of the pan and/or until a skewer inserted in the middle comes out with only a few moist crumbs on it. MOIST, not liquidy.
  7. Cool in the pan on a rack for one hour. Loosen the edges with a butter knife then carefully turn out onto the rack to finish cooling. When completely cooled, wrap the cake(s) in a rum, brandy or juice soaked cheesecloth, then wrap tightly in foil. Let ripen for at least 3 weeks. This can be aged even longer. Just make sure to redampen the cheesecloth every three weeks. Just remember, the more you soak this, the more alcohol is getting into it, so don’t eat and drive! 😛

Copyright Notice: From Cupcakes To Caviar images and original content are copyright protected. Please do not publish these materials anywhere without prior permission


Deep Dish Pecan Pie

Deep Dish Pecan Pie

Deep Dish Pecan Pie

I love the whole idea of Thanksgiving. Beyond the obvious loving the meal part (I am a turkey fiend), there is something about the knowledge that on a day when I am sitting down with my family to our Thanksgiving meal, so are millions of other Americans here and abroad. I get a mental image of so many other families saying grace before they eat as they join hands. I think of them laughing as they enjoy the meal, many, just going by odds, laughing over the same lame jokes (oh my gosh, mom burned the pies AGAIN!) at the exact same time. I smile when I think of the kids all over America asking for the 10th time “can we have dessert now?” when all the adults want to do is sit back and catch up with each other over a cup of coffee and a glass of wine. It all gives me chills… the nationwide brotherhood so to speak, the idea that when it comes down to it, we are all one people. I feel the same way at Christmas when I think of so many opening their present early morning as they try not to yawn over the hour (though yes, I know not everyone celebrates Christmas) and on July 4th. So many things join us together as a nation, as a large extended family and Thanksgiving is one of those times.

One of the things I look forward to every year is Pecan Pie. As much as I love it, I can’t seem to bring myself to make it at any other time than Thanksgiving. It just feels wrong. But, so that some of you having a horde of family and/or friends over this Thanksgiving can have a good recipe, I made an exception this year. The things I do for you *she says as she shoves a spoonful of pie into her mouth*. This is a BIG pie. It will easily serve about 12 to 16 people unless you make the slices huge. It’s also not quite as tooth achingly rich as the pecan pie I posted last year. For me, it is a toss up which I prefer. This one is sturdy enough to hold a slice in your hands but it lacks the goopiness of the other. This one isn’t as sweet, but then again, this is ME here… I have no problem with sweet hehe. So what will I do? I’ll make both here. Then I have my sweet gooey pie and my husband has one that’s not as rich, cause he’s a wimp. Either way though, this is fantastic with some lightly whipped cream or as I like it, just with some warm cream poured around it.

You know the drill… 🙂

Deep Dish Pecan Pie

  • Crust-
  • 3 1/2 cups all purpose flour
  • 1 teaspoon salt
  • 2 tablespoons sugar
  • 1 cup plus 2 tablespoons solid shortening, such as Crisco, chilled in freezer and sliced thin
  • 2/3 cup ice water (you may not use it all)
  • Filling-
  • 3/4 cup dark brown sugar
  • 3/4 cup granulated sugar
  • 1 cup white (clear) corn syrup
  • 1 1/4 cups dark corn syrup
  • 6 eggs, beaten well
  • 1/3 cup unsalted butter, melted
  • 1 3/4 cup coarsely chopped pecans
  • 1 tablespoon vanilla extract
  1. For crust- In a large bowl, combine the flour, salt and sugar. Stir to combine. Dump in the shortening and using a pastry blender, quickly cut the shortening into the flour  until you have a crumbly mixture. You want there to still be some lumps in here, so don’t make it too fine.
  2. Add your ice water, one tablespoon at a time, mixing with a fork after each, until a small piece of the dough holds together in a ball when gently squeezed. When the dough is ready, wrap it in foil and refrigerate for at least 30 minutes, but up to 2 days if you’re making the dough ahead of time.
  3. While the dough chills, make your filling. In a medium saucepot, combine the sugars and corn syrups. Bring to a boil over medium high heat and let boil for three minutes.  Set aside to cool slightly.
  4. When cooled down, slowly drizzle two cups of the sugar mix into the eggs, whisking all the time. This will temper your eggs and prevent them from scrambling when added to the sugar mix,. When you have whisked in all two cups, then pour the eggs into the saucepot with the sugar mix, again whisking the whole time. Then add in the vanilla and the pecans. Set aside.
  5. Make your crust- Preheat the oven to 350 degrees and get out a 13×9 inch baking pan. Flour your working area well. Get the chilled crust, lay down on the work area and press it rather flat with your hands. Then roll out into a rectangle (you may have to help it keep the correct shape by periodically reshaping it as you roll) about 3 inches larger than the pan all around.
  6. Use a spatula to gently pry the dough off of the board or counter and roll it around the rolling pan to transport it to the pan. Gently drape it into the pan and press down into the bottom and edges of the pan. Crimp the top edges as desired.
  7. Pour the filling into the pie shell. Bake at 350 for 15 minutes, then turn the oven down to 325 to finish. Remove form the oven when you can insert a butter knife halfway between the edge and the center of the pie and it comes out clean, about 60 to 75 minutes. The pie will finish cooking form it’s own residual heat. Let this cool completely before you try to slice it or you will end up with a liquidy mess. If you want warm slices, simply reheat them in the microwave for about 10 seconds per slice.

Copyright Notice: From Cupcakes To Caviar images and original content are copyright protected. Please do not publish these materials anywhere without prior permission.


Fleur De Sel Caramels (Salted Caramels)

Fleur De Sel Caramels

Fleur De Sel Caramels

The fancy name sounds so purty, but it’s just salted caramels. I was about to say “just plain old salted caramels”, but that would have been an insult to these rich creamy pieces of goodness. There’s nothing plain about these. There’s also nothing difficult. Back when I first made my Homemade Caramel Sauce, I was one of those people that assumed that something that tasted so decadent had to be hard to make. Nope; flat out easy. Now don’t get me wrong. You walk away from this during the caramelizing of the sugar, you will end up with every smoke detector in a ten mile radius going off, an embarrassing fire department visit, a ruined pan that no amount of soaking will save and worst of all…. NO CARAMEL! And while this isn’t hard, it is not a put the pot on the stove during ANY step and go sit and watch The Real Housewives Of The Amazon Rainforest sort of thing to cook. You need to stick close by.

Is it worth it? You tell me. Your choice is this- go spend 5 bucks at Trader Joes for a container of caramels that, while good, gives you about 20 caramels for the price and STILL isn’t as good as homemade. Or you could go buy a bag of Kraft or Brachs caramels that are cheap but..well, you can tell they are cheap. Very little flavor, the mouth feel isn’t the same and you get what you pay for. OR… you can spend about 6 bucks and get a 9 inch pan of gloriously burnt sugar tasting, creamy rich “OMG, if I eat any more of these, I’m gonna weigh 500 pounds but they are so damn good!” caramels. So you choose. 😀

Also, if you prefer just regular caramels, just omit the salt in the caramel and on top. Regular caramels at your service. Fat girl pants optional.

P.S.- If you don’t have Fleur De Sel, you can use any coarse grained salt. Just don’t use table salt.

You know the drill….

Fleur De Sel Caramels (Salted Caramels)

  • 2 cups sugar
  • 2/3 cup light corn syrup
  • 1/2 cup water
  • 2 cups heavy cream, warmed
  • 1/2 cup unsalted butter, room temp, cut into 4 pieces
  • 1 1/2 teaspoon vanilla extract
  • 1/2 teaspoon fleur de sel

Make sure you have all your ingredients at hand. Have the cream measured and nearby and to save time, just grind your salt right into the cream as well as pour the vanilla in it and make sure your butter is unwrapped and at the ready. Then set it all aside right by the stove. Line a 9 inch square pan with foil (preferably the non stick kind.). Butter the foil, bottom and sides. Set aside near the stove.

  1. Get a nice deep heavy bottomed saucepot. At least a 4 quart one. Combine the sugar, water and corn syrup in the pot. Bring to a boil over medium high heat. Swirl the pan a couple of times while cooking but do NOT stir it. If you stir caramel as it’s cooking, you stand a good chance of ending up with grainy, gritty caramel.
  2. Boil until the mixture has turned a nice dark golden brown color. Do NOT leave the stove during this step. When it is the right color, immediately move it to a cool burner. Pour in the cream mixture all at once and carefully drop in the butter. This is going to sputter like crazy so be prepared. Just pour and then give it a minute to settle down some.
  3. Set it back on the stove over medium high heat. Don’t stir. Just swirl the pot a few times carefully to combine the mixture. You can, very carefully, if you have to, use a wooden spoon and gently stir in the middle of the mixture, making sure to not touch the sides or bottom of the pan. But just the one time to get things combined.
  4. Keep the mixture over medium high heat and cook to 245 degrees. Use a candy thermometer or good instant read thermometer to get an accurate reading. This will take about ten minutes.
  5. When it gets to 245 degrees, take off the heat and immediately pour into the prepared pan without scraping the bottom of the pot. If there’s any left in the bottom, just let it cool and consider it the cooks treat. 🙂
  6. Allow this to sit overnight or until firm. You can refrigerate it and it will get firmer much quicker but it also makes it a bit more difficult to cut, though not hard if you have a good knife. Cut into about 48 pieces, using a sharp knife.
  7. Sprinkle more fleur de sel on top of each piece and either wrap in plastic wrap or put in mini candy cups. These are perfect for Christmas gift giving!

Copyright Notice: From Cupcakes To Caviar images and original content are copyright protected. Please do not publish these materials anywhere without prior permission.


Amaretto Chocolate Mousse Cake With Mascarpone Cream & A Mixed Berry Sauce

Amaretto Chocolate Mousse Cake

Amaretto Chocolate Mousse Cake


Whoaaaaa mannnnnn, that’s a long title. But I wanted to fit all the goodness in there so I broke my own rule about trying to avoid long titles.

This is also known as a flourless chocolate cake but that has such “omg, I can’t do that” connotations that I fiddled with the name some. Hey, I change recipes themselves, why not names too? :-p This is one of those desserts that, when people taste it, they are convinced that you 1) are a gourmet cook and 2) spent days making it. In reality however, this isn’t difficult at all. The most labor intensive part is making the berry sauce and you could used jarred ice cream topping if you wanted to or just serve the berries whole. I would of course, cry if you did, so just don’t tell me if you forgo  the berry step. I don’t like crying. It makes my nose stuffy and I look like Rudolph the Red Nosed Reindeer after a 3 day booze binge.

Back in the day, I would never attempted something like this because for some reason, I have to agree with the general assessment, it just LOOKS and tastes like it must be complicated. So if I can get over being a chicken, so can any of you out there afraid to try it. This isn’t even as complex as unbaked chocolate mousse because there is no egg separating, no whipping a ton of cream to fold in, yada yada yada. You melt some good chocolate and butter, beat the crap out of some whole eggs, fold them together and bake. Voila! Cake. And the topping I made as well as the sauce are also easy. You’ve got this. Honest.

This cake is dense, rich, and almost fudge like when chilled. The texture changes at room temp and I personally prefer the silkiness it has when cold. But try it both ways and see how YOU prefer it. It’s outstanding either way.

Use good quality chocolate in this, not say, Wal Mart brand. The flavor here is pure chocolate and you get what you pay for in this.

You know the drill… 🙂

Amaretto Chocolate Mousse Cake

  • 6 refrigerator cold large eggs
  • 12 ounces good quality semi sweet chocolate, coarsely chopped
  • 4 ounces good quality unsweetened chocolate, coarsely chopped
  • 1 cup unsalted butter
  • 1/4 cup Amaretto
  • 1 teaspoon almond extract
  • 2 teaspoons vanilla extract
  • Mascarpone Cream-
  • 8 ounces Mascarpone cheese, room temp
  • 1/2 cup sour cream
  • 1 teaspoon vanilla extract
  • 1/2 teaspoon almond extract
  • 1/2 cup powdered sugar
  • Berry Sauce-
  • 16 ounce bag frozen mixed berries, thawed and drained
  • 1/2 cup sugar
  1. Preheat oven to 325 degrees. Wrap a 9 inch springform pan in two layers of heavy duty foil. Line the bottom of the pan with parchment paper and grease the sides of the pan well. Set the pan inside a large baking dish.
  2. In a small heavy bottomed pot, over low heat, melt together the butter and chocolate. Stir constantly until you have a smooth lump free mixture. Pour in the Amaretto and extracts and mix well. Set aside off the heat to cool for five to ten minutes. Start some water boiling for the water bath. Not, not for you. You can bathe later. For the cake.
  3. Meanwhile, in a large bowl (make sure this is scrupulously clean with no greasy feel at all) beat all 6 eggs at high speed. Beat for a full five to ten minutes until you have  nicely aerated, foamy, doubled in volume  eggs.
  4. Stir about one third of the eggs into the chocolate mixture. Be gentle, don’t stir like you’re trying to cause it pain. Now gently fold in half the remaining eggs. Make sure there are no streaks of white showing. Then fold in the remaining eggs.
  5. Pour the chocolate/egg mixture into the prepared pan. Place pan in the 325 degree oven. Pour boiling water around the pan, careful not to splash any into it, until the water is about halfway up the sides of the springform pan.
  6. Bake at 325 for 20 minutes. Take pan out of the water bath and set on a rack to cool completely, then chill overnight
  7. For the Mascarpone cream- In a small mixing bowl, beat together the mascarpone and the sour cream until smooth. Add in the powdered sugar and extracts. beat well. Chill. See how easy that was?
  8. For the berry sauce- make sure the berries are well drained, then pulse three or four times in a food processor with the sugar. Use the back of a large spoon to press the berries through a fine mesh strainer into a bowl, effectively getting rid of the seeds and pulp, leaving you with a nice smooth sauce.
  9. To serve- about half an hour before serving, carefully remove the side of the springform pan. Invert, then peel off the parchment. Invert back onto your serving plate.
  10. Use an offset spatula to spread the cream over the top of the cake. Alternately, you can just serve it on the side.
  11. Cut thin slices of the cake with a very sharp knife and serve with the berry sauce.

Copyright Notice: From Cupcakes To Caviar images and original content are copyright protected. Please do not publish these materials anywhere without prior permission.


Pumpkin Cheesecake Streusel Bars

Pumpkin Cheesecake Streusel bars2

I remember Thanksgiving when I was a kid. I’ve mentioned before that my mom was not much of a cook. In her defense, as I’ve said, she was a single mom who worked ungodly hours and even had she been home, it just wasn’t her passion. Thanksgivings that I remember were fairly rushed because her long term b/f worked as a train engineer and we always had Thanksgiving dinner at like 2pm so he could get to work. Always pissed off my brother, sister and myself. I think that, being the children of divorce, we wanted that whole Norman Rockwell ideal on holidays and that just doesn’t happen in real life. I remember a fairly dry turkey, stuffing that was actually pretty good, mashed taters, the ubiquitous sweet potatoes covered in marshmallows which I still love, (on a side note, I remember the year my brother wanted something different and made sweet potatoes with oj in them and no marshmallows. No one ate them lol. Sorry, Steve.), plus two store bought pies- pumpkin and pecan.

Nowadays, even before I blogged, I go a bit more all out. Holidays give me an excuse to make all those seasonal things that I’ve had tabbed in cookbooks and magazines for like 37 years. The end result is enough food to feed 478 people which was great when I had a ton of people at home, not so much now, especially this year when there will be only 5 of us here. But will that stop me? No. I’ll still make far too much and be grateful we are able to do so. That will include a pumpkin pie or two, a pecan pie and quite possibly this cheesecake.

One of the holiday-ish recipes I have had tabbed forever was this recipe. I found it in a 2006 issue of Bon Appetit, their 50th anniversary issue which was pretty awesome as magazines go.

Now, if you try this, like I told my husband, remember, this is a cheesecake, not a typical pumpkin pie. So it’s tangier and the texture is different. But trust me, this is NOT a bad thing. The crust and the topping are one and the same, just used differently. Both are crunchy, sweet enough to be a good foil to the filling and topping and just plain yummy. The filling is creamy, spicy, slightly tangy and nice and pumpkiny.  I doubled the recipe (because it used only a partial can of pumpkin and I HATE that) and added a good bit more in the way of spices as well as some vanilla plus the crust/crumbs didn’t have any spice at ALL which bored me so I added some there too. If you like pumpkin pie, if you like cheesecake, if you like “normal” pumpkin cheesecake, you need to try this one. It’s pretty yummy and I’m glad I doubled the recipe though I’m sure my thighs and hips aren’t so happy with me. For the record, I’m posting this in the quantities they used, If you want to double it as I did, it’s easy enough to do 🙂

You know the drill…

This looks like it has a lot of steps and ingredients, but really, it all comes together quickly since the bulk of the ingredients are just the spices.

Pumpkin Cheesecake Streusel Bars

  • Crust/crumb topping-
  • 1 cup flour
  • 1/4 cup dark brown sugar
  • 1 1/2 teaspoons cinnamon
  • 1/2 teaspoon ground ginger
  • 1/2 teaspoon nutmeg
  • 1/2 teaspoon salt
  • 1/2 cup cold unsalted butter
  • 1 cup chopped pecans
  • 3/4 cup old fashioned oatmeal
  • Filling-
  • 1 8 ounce package cream cheese, room temp
  • 3/4 cup pumpkin puree
  • 1/2 cup sugar
  • 1 egg
  • 1 1/2 teaspoons vanilla extract
  • 1 tablespoon cinnamon
  • 1 1/2 teaspoons ground ginger
  • 3/4 teaspoon nutmeg
  • 1/2 teaspoon ground cloves
  • 1/2 teaspoon allspice
  • Topping-
  • 1 cup sour cream
  • 3 tablespoons sugar
  • 1/2 teaspoon vanilla extract
  1. Preheat oven to 350 degrees.  Butter a 9 inch square pan (or use something like Bakers Joy which is what I did) and set aside. Have ready a 9×13 inch rimmed baking sheet.
  2. To make the crust/crumbs, combine the flour, salt, brown sugar and spices. Using a pastry cutter, cut in the cold butter until it resembles small crumbs. Stir in the pecans and oats.
  3. Press 3 1/2 cups of the mixture firmly into the bottom of the 9 inch pan to form the crust. Spread the rest of the mixture onto the 13×9 inch pan. Put both in the preheated oven.
  4. Bake the sheet pan for about 15 minutes or until golden brown, stirring once or twice during baking. When it’s done, break it up into smaller bits and set aside. For the crust, bake for about 30 minutes, until golden brown and firm.
  5. For filling- Using a hand mixer, combine all the filling ingredients. Beat until smooth. Pour onto the hot crust and return to the oven.
  6. Bake at 350 for about 20 minutes, until it is set, looks dry at the center and is beginning to puff up around the edges.
  7. While it bakes, make the topping. Simply combine all the ingredients in a small bowl and mix well.
  8. When cheesecake is done, remove from the oven and spread the topping over it. Return to the oven for five minutes. Take out and set onto a rack to cool completely, about 2 hours. When it is totally cool, take the reserved broken up crumbs and sprinkle evenly over the cheesecake. Press down lightly to make them adhere. Chill the cheesecake until cold. To serve, use a sharp knife dipped in hot water to make clean cuts.

Copyright Notice: From Cupcakes To Caviar images and original content are copyright protected. Please do not publish these materials anywhere without prior permission.


Coconut Chocolate Fudge Truffle Cookies


Coconut Chocolate Fudge Truffle Cookies

Coconut Chocolate Fudge Truffle Cookies


I think we’ve all learned by now that I like the combination of chocolate and coconut. I don’t think I realized it myself until I started this blog. But now, when I look back through the blog and see the recipes for different treats with that flavor combo, like Mounds Bar Brownies or Chocolate Bundt Cake With A Creamy Coconut Filling orrrrrr Browned Butter German Chocolate Chip Cookies or 😛 Samoa Wanna Be Cookies, it makes me realize that umm, yeah, I guess I use that combo a lot. But my family hasn’t killed me yet and they are actually some of my more popular postshere so it seems I’m not the only one who likes it. That of course means I feel perfectly safe posting yet another hehe.

These cookies, like practically everything else I make, started out somewhat different. The original recipe comes from The Gourmet Cookbook I actually wasn’t that thrilled with that  cookbook. I only found two recipes in the book that interested me enough to try them and their Truffle Cookies was one of them. On a side note however, if you can get a hold of a copy of Gourmet Today  grab a copy. I personally found about 25 recipes in there that I tabbed, which for me, was enough to make it worth buying from Amazon. Just got it in the mail today actually and I’m looking forward to making some recipes from it.

But, as I was saying, the recipe was somewhat different when I saw it in the book. I didn’t make a ton of changes to it but enough to make the flavor profile of it quite a bit different. The original was just a plain chocolate truffle cookie and while there’s nothing wrong with that lol, I am, as we know, incapable of keeping a recipe the same. So I went to that favorite of mine… chocolate coconut. I love Almond Joy candy bars so I also threw in some sliced toasted almonds. I’ve mentioned before that while I like coconut, I won’t use it unless it is toasted. I just don’t like the texture of it untoasted. But if you don’t mind it, feel free to omit the toasting of the coconut and almonds. But I highly suggest doing it. It adds a nutty crunchiness to the cookies. If you want to try the cookies the way the book wrote it, just omit the coconut and almonds altogether as well as the coconut extract.

You know the drill…

Coconut Chocolate Fudge Truffle Cookies

  • 4 ounces unsweetened chocolate, chopped
  • 6 tablespoons unsalted butter, sliced thin
  • 1 12 ounce package semi sweet chocolate chips, divided
  • 1/2 cup flour
  • 2 tablespoons unsweetened cocoa powder
  • 1 cup coconut
  • 1/2 cup sliced almonds
  • 1/4 teaspoon baking powder
  • 1/2 teaspoon salt
  • 1 cup sugar
  • 2 teaspoons vanilla extract
  • 1 teaspoon coconut flavoring
  • 3 eggs
  1. Preheat oven to 350 degrees. In a small baking dish, combine the coconut and the almonds. Toast at 350, stirring once during cooking, until both are light golden brown. Don’t overcook. Nothing worse than the smell of scorched coconut. Don’t ask me how I know this *whistles innocently* Go ahead and shut off the oven after that because the dough has to chill.
  2. Melt together the unsweetened chocolate, butter and one cup of the chocolate chips in a small heavy bottomed saucepan, stirring occasionally. Set aside to cool.
  3. In a small mixing bowl, combine the flour, baking powder, salt, cocoa powder and the coconut almond mixture.
  4. Beat together the sugar, extracts and eggs. Pour in the melted chocolate mixture and beat until well blended, then add the flour mixture and mix until well combined. Stir in the remaining chocolate chips.
  5. Chill the dough in the fridge in a covered bowl for about two hours or until firm.
  6. Preheat oven to 350. Using your lightly dampened hands, roll the dough into small (about 1 inch) balls and place 2 inches apart on ungreased baking sheets.
  7. Bake at 350 until puffy and set, about 11 minutes. They will still be soft in the center
  8. Cool on the baking sheet for ten minutes, then remove to a rack to finish cooling.
  9. Hide from the family and eat them all yourself because you love them and want to save them from overeating.

Copyright Notice: From Cupcakes To Caviar images and original content are copyright protected. Please do not publish these materials anywhere without prior permission.


Maple Pumpkin Bread With Maple Glazed Pepitas

Maple Pumpkin Bread With Maple Glazed Pepitas

Maple Pumpkin Bread With Maple Glazed Pepitas

Up until recently, Starbucks and I were very good friends. We had sleepovers, braided each others hair, talked about boys and cried together over all the other mean coffee places. Then one day, I cheated on my friendship with Starbucks. I found a NEW bff. It’s name was The Daily Grind. I played there one day on a whim and well, I’m ashamed to say, that after that, I never gave Starbucks coffee a second thought. Though every once in a while, I go back there for nostalgia’s sake. But Starbucks can’t make Milky Way Lattes; The Daily Grind can.

There’s one problem with this new relationship however. My new bff coffee place doesn’t sell baked goods. Oh, they have some wrapped stuff that was mass produced in somewhere like Taiwan, the best place ever to get fancy pastries :-p  But they don’t have the pumpkin bread you can get at Starbucks.  I can’t go to Starbucks anymore though. They all look at me funny, like I’m wearing a big red letter A on my chest. It’s just too awkward, too painful remembering the good times *sobs a little and takes a sip of my Milky Way Latte to calm down*

So what did I do? I made my own. Yes, you heard that right, Starbucks!!! I don’t need your  high priced pumpkin bread anymore! I have no reason to come crawling back to you groveling for forgiveness just so that I can sneak a piece of pumpkin bread. Buahahaaaaaaa!!! Guess what else? My pumpkin bread? It’s better than yours. Yep. Better. It’s moist and spicy and pumpkiny (yes, that too is now a word. I swear, the world needs ME to revise the dictionary. Language would be so much more interesting.) with a hint of maple in the bread. It’s also not as overly sweet as your bread and MINE is covered in sweet/salty maple glazed pepitas. Take THAT, Starbucks!

Sorry. I’m calm now. You all know how those break up moments can be, right?

You know the drill….

Maple Pumpkin Bread With Maple Glazed Pepitas

  • 3 cups flour
  • 2 teaspoons baking soda
  • 1 teaspoon baking powder
  • 1 teaspoon salt
  • 4 teaspoons cinnamon
  • 1 1/2 teaspoons ground ginger
  • 3/4 teaspoon ground cloves
  • 3/4 teaspoon ground allspice
  • 3/4 teaspoon ground nutmeg
  • 7 eggs
  • 4 tablespoons molasses
  • 1 tablespoon vanilla extract
  • 1 1/4 teaspoons maple flavoring
  • 1 3/4 cups sugar
  • 2/3 cup dark brown sugar
  • 1 16 ounce can pumpkin (NOT pumpkin pie filling)
  • 1 3/4 cup vegetable oil
  • 1/2 cup dry roasted Pepita’s
  • 3 tablespoons pure maple syrup
  1. Preheat your oven to 350 degrees. Grease and flour two 9 inch loaf pans (or use a product such as Bakers Joy and spray them)
  2. In a large bowl, combine the flour, baking powder, baking soda, salt, regular sugar and spices.
  3. In another large bowl, at low speed with a hand mixer, combine the eggs, molasses, brown sugar, vanilla extract and maple flavoring. Mix well. Pour in the vegetable oil and the can of pumpkin in and mix well.
  4. Pour the dry ingredients into the bowl of wet ones and mix at low speed just until well combined. It’s fine if there are some small lumps left.
  5. Divide the batter evenly between the two loaf pans.
  6. In a small bowl, toss the pepitas with the maple syrup. Sprinkle evenly between the two pans of batter.
  7. Bake at 350 degrees until a wooden skewer inserted in the center of the bread comes out clean, with at most a few loose crumbs on it.
  8. Cool in the pans set on a rack for five minutes.
  9. Loosen the breads from the pans by running a butter knife around the edges then turn the loaves out onto the rack to finish cooling.

Copyright Notice: From Cupcakes To Caviar images and original content are copyright protected. Please do not publish these materials anywhere without prior permission.


Oatmeal Raisinet Cookies

Oatmeal Raisinet Cookies

I feel sorry for my husband at times. Why? He’s type 2 diabetic but man, does he love his sweets. Though he would deny that to his death bed. He also loves his savory snacks mind you but when I bake, he is all over it. There was a time I would buy him sugar free treats from the store, but he has come to realize that he prefers a few of the ‘real thing” as opposed to more of the artificial ones. He gets jealous as can be of me (in a loving way of course lol) because, even though I’m overweight (perils of food blogging) I have great blood sugar readings. If anything, I run too low. He also hates me for my low blood pressure too hehe. I am one weird fat woman physically. :-p

One of the things he loves is cookies. Non sweet lover or not (yeah, right. You know better, darlin’), he can eat his weight in cookies. Especially if it’s chocolate chip or oatmeal raisin. So I have had to make sure I have good recipes for both to keep the man supplied. The things we do for love, huh? *Bats eyes in my husbands direction and attempts to look flirtatious* But hey, the man willingly makes me cups of tea whenever I ask and sometimes, I don’t even have to ask. PLUS, he is the one who gets our 16 year old up for school in the mornings. He’s pretty awesome.

Ok, I’m done gushing now lol.

These are some pretty good oatmeal cookies. The original recipe came from food.com and I have just barely adapted it. One thing I do is just make half the recipe because the full recipe makes an ungodly amount of cookies, which is fine for say, Christmas goodie trays but not for everyday unless I’m serving cookies for dinner. The half recipe makes about 5 dozen smallish cookies. I also added the raisinets as the original just called for chocolate chips as we love raisins in oatmeal cookies here, plus I added more vanilla, some cinnamon and a little less sugar because they were far too sweet as written. Ok, so maybe I adapted it a bit more than I thought lol. When cooking these, watch them carefully. With a 375 temp, they can get overdone quickly. If you want chewier cookies, go for the lower cooking time. If you prefer crispier, go for the higher cook time. Either way though…

You know the drill. 🙂

  • 1 cup unsalted butter, room temp
  • 3/4 cup sugar
  • 1 cup dark brown sugar
  • 2 eggs, room temp
  • 2 teaspoons vanilla extract
  • 2 cups flour
  • 2 1/2 cups oatmeal, divided in half
  • 1/2 teaspoon salt
  • 1 teaspoon baking powder
  • 1 teaspoon baking soda
  • 18 ounces raisinets (one bag and 2 individual sized boxes equals this amount)
  1. Preheat oven to 375 degrees. Lightly grease cookie sheets (I do two at a time) with cooking spray. Set aside.
  2. In the bowl of a stand mixer (you can do this with a heavy wooden spoon or hand mixer but it’s a fairly thick dough so it will be harder to stir) cream together the butter and sugars.
  3. Scrape down the sides of the bowl if needed, then add in the eggs and vanilla. beat well on low speed.
  4. In a food processor or blender, pulverize 1 1/4 cups of the oatmeal. In a large bowl, combine it with all the other dry ingredients, including the rest of the oatmeal. Don’t add the raisinets yet. Stir well to combine.
  5. Pour the dry ingredients into the wet ones, about 1/3 at a time, and mix well.
  6. Scrape down the bowl again, take the bowl off the base and stir in the raisinets.
  7. Use a small scoop to make cookies on the prepared sheets.
  8. Bake at 375 for 8 to 10 minutes. Let sit on sheet for one minute, then transfer to a wire rack to finish cooling.


Copyright Notice: From Cupcakes To Caviar images and original content are copyright protected. Please do not publish these materials anywhere without prior permission.