Double Chocolate Berry Meringue Trifle


Double Chocolate Berry Meringue Trifle-001

You know that saying, when life gives you lemons, make lemonade.”? Well, life was spitting lemon juice at me every time I tried to make this dessert lol. My original idea was to make mini meringue shells and fill them with the cheesecake mixture and berries. But after three tries to make mini meringue shells and failing each time (meringue too runny, cooked meringues not cooked enough yada yada yada) I then went to just two large meringue shells, figuring I could make something like This amazing dessert. But then I undercooked THOSE a touch and when I went to get them off of the baking sheet, they crumbled. Very tasty crumbles, but crumbles nonetheless. So there went the idea of a two layered pavlova sort of dessert. So what did I do? I made lemonade. No, no, not really. Chocolate meringue lemonade? EWWW. I know I can be a bit out there at times, but not THAT much. Proverbial lemonade, people.

So what is the proverbial lemonade? A trifle. As I stood there ready to either cry or beat on a wall because this would be the third mess up (and I have made meringues many many times before. I have NO idea what my issue was this time.) for this idea. But as I stood trying not to sob, the thought popped into my head… make it into a trifle. So…ummmm… I did. Every once in a while I listen to that voice. Usually it gets me in trouble, like that whole incident with Wal Mart and wearing the underwear on my head or the time I…well, never mind.

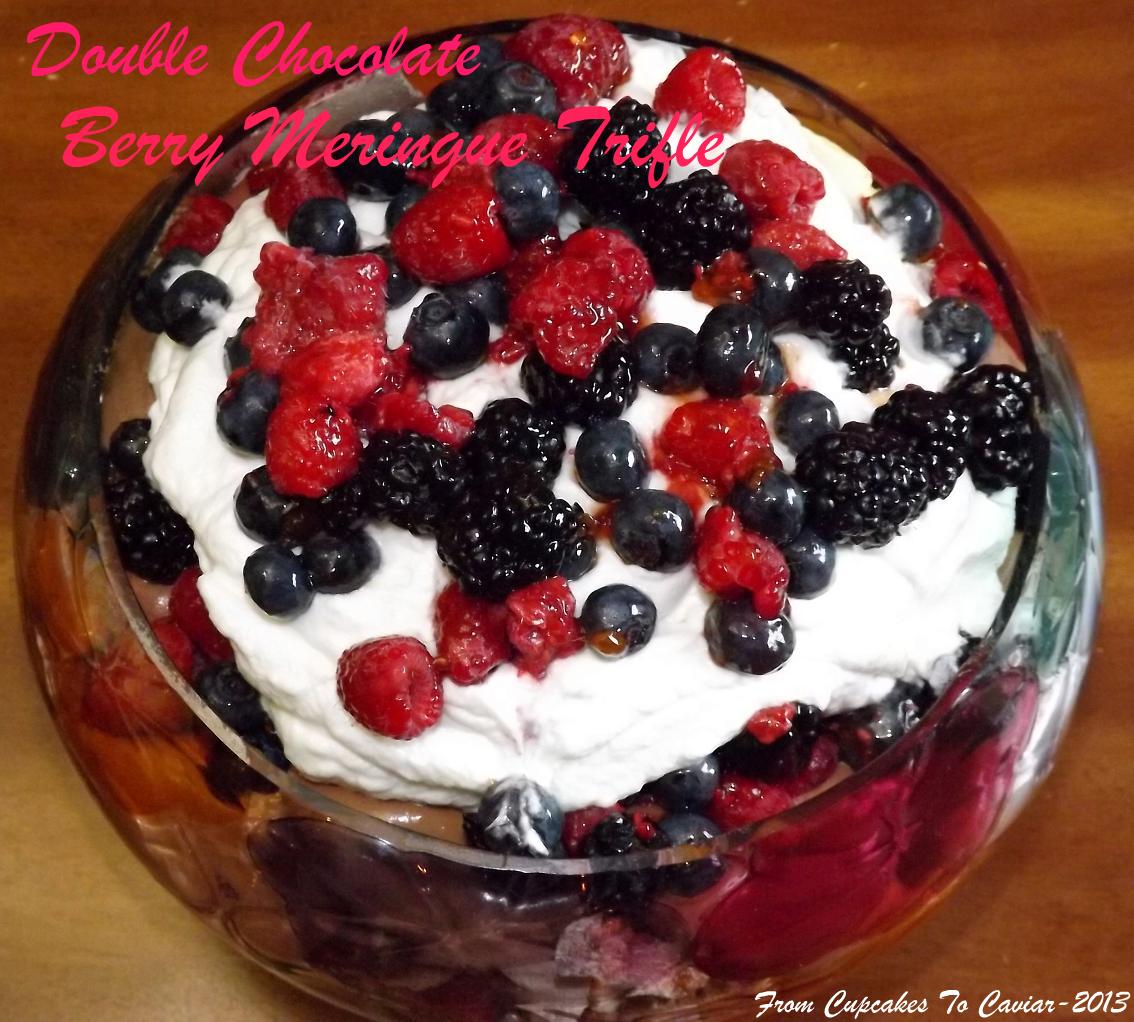
I have to admit; the trifle idea is a pretty good one. Is it as pretty as having all of this as elegant little meringue shells would have been? No. Do I care? No. I’m more of a rustic type of a gal anyway. More importantly though- will YOU or those you’re feeding care? Oh, hell no. This is creamy from the cheesecake filling, chewy/crisp form the meringue, tart/sweet form the berries and then creamy again from the whipped cream. All in all, while I hate the eggs I wasted getting to this point, I’m quite pleased with the end result. This makes a lot so is perfect for that Summer cookout while berries are in season or great for a large family dinner.

As usual… you know the drill. Get to cookin’.

Double Chocolate Berry Meringue Trifle

  • Meringue-
  • 8 egg whites
  • 1 teaspoon cream of tartar
  • 1 1/3 cups sugar
  • 1/4 cup unsweetened cocoa powder, sifted to remove lumps
  • 1/2 teaspoon vanilla extract
  • Cheesecake filling-
  • 8 ounce container mascarpone cheese, room temp
  • 8 ounce package cream cheese, room temp
  • 2 egg yolks (optional- they add richness but aren’t necessary if the idea of raw eggs skeeves you out)
  • 1 cup sugar
  • 1/4 cup unsweetened cocoa powder, sifted to remove lumps
  • 1 1/2 teaspoons vanilla extract
  • 1/4 cup heavy cream
  • Berries-
  • 5 cups mixed berries or berries of choice (I used a mix of blackberries, raspberries and blueberries) rinsed and patted dry
  • 1/4 cup apricot preserves, melted and cooled slightly (I like using preserves in many desserts instead os sugar because you get some sweetness but it’s not overpowering plus the berries tend to release less juice using jam or preserves so no liquidy mess)
  • Whipped Cream-
  • 1 1/2 cups heavy cream, cold
  • 3/4 cup sugar
  • 1 teaspoon vanilla extract
  1. Make your meringue- Preheat oven to 225 degrees and line 2 large baking sheets with parchment paper or a silicone liner.
  2. In the bowl of a stand mixer with the whisk attachment on it, add your egg whites, vanilla and cream of tarter. Beat on medium speed until foamy. Turn speed up to high, gradually add your sugar and beat until stiff peaks form. Don’t panic if it seems to be taking forever. Some days when I make meringue, it gets to peak quickly. Other times, it may take like 5 minutes. It all depends on the temp of the kitchen, the humidity, the temp of the eggs, etc.
  3. When you have stiff peaks, take the bowl off of the stand and gently fold in your cocoa powder. Don’t mix vigorously or you’ll deflate your whites. When mixed, spread half of the mixture into a circle on each prepared pan.
  4. Cook at 225 for about one hour or until the meringue is cooked throughout (don’t be afraid to stick a knife in there and check; you’ll just be crumbling these up anyway so pretty isn’t imperative. ) and lightly browned. Turn oven off and let meringues sit in the oven for about another hour or until completely cool.
  5. Meanwhile, make your filling- In a large bowl, combine the mascarpone and cream cheese. Beat at medium speed until light and creamy. Add in the sugar (and egg yolks if using) and beat well. Add in the cream and vanilla extract and beat well, until mixture is smooth and creamy. On low speed, beat in the cocoa powder.  If you did NOT use the egg yolks, you may need to add a tablespoon or two more of cream to get this to a more spoonable consistency. Cover and put in the fridge until ready to put together the dessert.
  6. Make your berries-  in a medium bowl (shush… bowls aren’t that hard to wash πŸ˜› ), combine the berries and the preserves. Gently fold together trying not to mush up the berries. Take about a cup of berries and set aside for the top of the dessert.
  7. Make your whipped cream- In a large bowl, combine the cream, sugar and vanilla. Beat until stiff peaks form. Set aside or refrigerate if not using right away.
  8. To put together- Crumble up one of the cooled meringues at the bottom of a large serving or trifle bowl. On top of that, layer half of the chilled chocolate mixture. On top of that, spread half of the berries. Repeat layering, then top with the whipped cream. Top the cream with the reserves berries. Cover and chill if not serving this immediately and store leftovers in the fridge.

Peanut Butter & Jelly Chocolate Whoopie Pies

Peanut Butter & Jelly Chocolate Whoopie Pies

Peanut Butter & Jelly Chocolate Whoopie Pies


I have mentioned more than once that generally speaking, I don’t care for peanut butter. never have, never will. Strangely, while five of my six kids like peanut butter, one of my sons has never liked it either. That is so weird to me! You don’t think of food liking as being in any way genetic, but with six kids, I have learned that they really do seem to be in some cases. That same son hated bananas for many years. His father, whom he hadn’t lived with since an extremely young age, also hated bananas. Go figure.

But every once in a while, I get a strange (strange because well… I don’t LIKE pb so it’s akin to a rabid vegetarian suddenly craving steak tartare) craving for something peanut buttery. Usually I just have a peanut butter sandwich and that’s that; I’m done for 6 months or so. But today I was working on a blog post anyway. It was supposed to be chocolate whoopie pies with chocolate filling (I hear some of you sobbing out there because I changed it lol) but the peanut butter and jelly sandwich craving hit (twice a year, like clockwork πŸ˜› ) and my 4 watt mental light bulb went off and I thought to myself “self ( I call myself self when I’m not calling myself somewhat obscene names), why not make a peanut butter filling for these instead?! The you can use that bag of mini reeses cups you bought and never ate!” Then I had another flash of brilliance and decided to add some raspberry jam in them pies. Raspberry goes well in PB&J sandwiches and it definitely goes well with chocolate so… voila, Peanut Butter & Jelly Chocolate Whoopie Pies were born. Well, born in my household anyway. I’m sure that at some point they were born somewhere else already lol.

I then congratulated myself for being a genius, made myself a cup of tea and had some chocolate as a reward for being so brilliant and got started. The end result is pretty yummy if I do say so myself. Mind you, my whoopie pies aren’t flat and tiny like most. Why you ask? Because I’m lazy. It was much easier to put the cookie batter in my muffin top pan than to spoon out each individual cookie and make sure it was shaped nicely. The benefits of this is that you also get these cool crispy edges as well as some HUGE arse whoopie pies hehe. But I will write the directions as written in the cookbook (aptly called “Whoopie Pies” by Sarah Billingsly). Just know that you CAN do these in a muffin top pan too. You’ll just get less but bigger pies and they will be thicker.

You know the drill… get to cookin’!

Peanut Butter & Jelly Chocolate Whoopie Pies

  • Whoopie Pie-
  • 1 2/3 cup flour
  • 2/3 cup unsweetened cocoa powder
  • 1 1/2 teaspoons baking soda
  • 1/2 teaspoon salt
  • 4 tablespoons butter, room temp
  • 4 tablespoon shortening, room temp
  • 1 cup dark brown sugar, firmly packed
  • 1 egg
  • 1 teaspoon vanilla extract
  • 1 1/4 cup milk
  • Peanut Butter Filling-
  • 3/4 cup peanut butter (I used crunchy)
  • 6 tablespoons unsalted butter, room temp
  • 3/4 cup powdered sugar
  • about 1/3 cup raspberry jam (or whatever flavor you prefer)
  • 1 2.5 ounce bag mini Reeses Peanut Butter Cups (find at the check out lanes in the grocery store), each cup cut in half
  1. Preheat the oven to 375. Line 2 baking sheets with parchment paper.
  2. Sift together the flour, cocoa powder, baking soda and salt onto a large piece of waxed paper.
  3. In the bowl of a stand mixer (can use a hand mixer if you need to),  beat the butter, brown sugar and shortening on low speed until combined. Scrape down the sides of the bowl, increase the speed to medium and beat for about 2 minutes until smooth and creamy.
  4. Add the egg and vanilla extract and beat on low speed just until combined. Turn off and scrape down the bowl again. Add half of the flour mixture and half of the milk and beat on low until combined. Add the remainder of the flour and milk and again, beat on low until just combined.
  5. Spoon batter, about a tablespoon at a time, onto the prepared baking sheets. Bake for about 10 minutes at 375 degrees or until the cookies spring back when touched gently. Let them cool on the pan for about 5 minutes, then remove to a rack to cool completely.
  6. Make your filling- In a medium bowl, combine the peanut butter and butter. Beat at medium speed until smooth & creamy. Add in the powdered sugar and beat on low until combined, then turn the mixer up to medium and continue beating until it is creamy and fluffy looking.
  7. Fold in the chopped reeses cups.
  8. Spread a good sized dollop of the peanut butter filling on the flat side of half of the cooled cookies. Top with another good sized dollop of jam. Top each cookie with another of the unfilled cookies, flat side inwards. Magically, your cookies are no longer just cookies, but are now Whoopie Pies. Enjoy!! πŸ™‚

Copyright Notice: From Cupcakes To Caviar images and original content are copyright protected. Please do not publish these materials anywhere without prior permission.

Mascarpone Lemon Cheesecake & Berry Parfaits

Mascarpone lemon Cheesecake & berry Parfaits

Mascarpone lemon Cheesecake & Berry Parfaits


Wow, that recipe name was a mouthful. But I wanted to get the gist of it across. I could have just said cheesecake parfaits but beyond the fact that that sounds completely boring, it doesn’t talk about the mascarpone and we all know that mascarpone creates a totally different cheesecake and mouth feel (hehehehe… I said mouth feel…{insert Beavis and Butthead voice here } yes, I am really 12 years old ) than plain cream cheese so it needed mentioning. And of course you see the berries but you can’t SEE the lemon so I had to mention it too lol.

Other bloggers know how difficult it can be to come up with a name for something you’ve made if it doesn’t already have one. I have seen some that are so ridiculously long that it turns me off of even wanting to make the dish. Fictitious example- “Lamb Burgers With a Garlic Emu testicle Aioli, Caramelized And Bruleed Llama Toenails And  Sauteed Red peppers Served On A Tapioca Flour Spelt Bun On A Bed Of Spicy Arugala”. If you read recipes, you KNOW what I’m talking about there. Then on the other extreme you have ones that give you no idea of what it is. You’ll see a photo that obviously has a handful of different components but all it will say is “Llama Rice”. But…but…but…WAIT!!! I see what looks like pine nuts there and sparrow wings and dried fruit and and and isn’t that a brioche it’s resting in???

Thus why I tried to be somewhat concise here. Because Mascarpone No Bake Lemon Cheesecake With a Graham Cracker Crumble, Lemon Curd And Berries made me cringe as a title. And Lemon Cheesecake doesn’t do this justice.

I was quite proud of this when I tried the final dessert. I had already tried a bit 75 spoonsful of each separate part and they were all fantastic. I could and possibly do eat lemon curd as my dessert just off the spoon. I may have made a double batch for this dessert just so that I would have a lot of leftovers hehe. The cheesecake filling was simple yet tasted rich and creamy. The graham cracker crumble was a wonderful sweet textural counterpoint to the creaminess of the dessert. And the berries?? Well, they’re berries… in season…with raspberry jam. What else can I say? πŸ˜€

This comes together easily but it is a little time consuming as you are layering it all. It also makes enough for 12 servings so either make this for a large gathering (think cookout, pot luck or picnic) or cut it in half. Whatever you do, enjoy and… git to cookin’.

Mascarpone Lemon Cheesecake & Berry Parfaits

  • Cheesecake-
  • 1 8 ounce package cream cheese, room temp
  • 1 8 ounce package mascarpone cheese, room temp
  • 1 14 ounce can sweetened condensed milk
  • 1/4 cup fresh lemon juice
  • zest of one lemon
  • 1 teaspoon vanilla extract
  • Lemon Curd-
  • My recipe for lemon curd is here
  • Graham Cracker Crumble
  • 1 1/4 cups graham cracker crumbs
  • 1/4 cup sugar
  • 1/2 cup unsalted butter, melted
  • Berries-
  • 3 pints mixed berries (I used raspberries and blueberries)
  • 3 tablespoons raspberry jam (GOOD QUALITY)
  • 1 teaspoon orange zest


    1. Make your lemon curd first so that it can chill. When made, cover bowl and refrigerate for about 2 hours.
    2. Make the cheesecake which couldn’t be easier as this is no bake. In a medium bowl, combine the cream cheese and mascarpone cheese. Beat at medium high speed with a hand mixer until smooth and creamy. Pour in the condensed milk and beat until mixture is again smooth and creamy
    3. Add in the lemon juice, lemon zest and vanilla. Beat at low speed just until combined. Pour mixture into a tupperware-ish bowl and refrigerate for about 2 hours.
    4. Make your berries- In a medium bowl, combine the berries (make sure to pick off all the pesky leftover stems). Add in the jam (melt it a little and cool it if it is a very thick jam. You don’t want to have to stir so hard to mix that you crush all the berries) and stir to combine. Again, refrigerate for about 2 hours to give the flavors time to meld.
    5. Make your graham cracker crumble- Preheat oven to 350 degrees and line baking sheet with foil.
    6. In a small bowl, combine the graham cracker crumbs and sugar.
    7. Mix in the melted butter into the crumbs and stir well until is is all combined.
    8. Pour crumbs onto baking pan and bake at 350 for ten minutes or until the crumbs look dry and lightly toasted, stirring once halfway through cooking. Remove from oven and set aside to cool.
    9. When the other ingredients have chilled, get out 12 4 ounce glasses (4 ounce canning jars work well if you don’t have a lot of glasses and they come in handy with the current trend towards desserts in jars plus it makes them portable if taking them out of the house)
    10. Layer the ingredients in whatever order strikes your fancy. I did it with cheesecake filling, crumbs, lemon curd, berries and then repeated one time.
    11. Chill parfaits until serving time.

Copyright Notice: From Cupcakes To Caviar images and original content are copyright protected. Please do not publish these materials anywhere without prior permission.


Berries & Cream Chocolate Eclairs

Berries & Cream Chocolate Eclairs

Berries & Cream Chocolate Eclairs


I like to lie to myself sometimes. I lie and tell myself that yes, I really Do look good with a muffin top in my jeans and I am the only one around who can totally rock that style. Then I sob hysterically and smack myself around for lying.

I lie and tell myself that I will be just fine with only 3 hours of sleep because I stayed up late watching reruns of Cold Case (gosh, I love that show). Then I look in the mirror the next morning and wonder who had to have rubbed purplish black makeup all under my eyes while I slept and why my wrinkles suddenly look deeper. Then I sob hysterically and smack myself around for lying.

I lie and tell myself that rereading The Proud Breed by Celeste DeBlasis for the 15th time counts as deep reading because she has well researched information on the history of the state of California in it amidst all the love scenes and dramatic romance. Then I get sad when I realize how few functioning brain cells I have left because I continue to read books like that. Then I sob hysterically and smack myself around for lying.

I lie and say that eating Brachs Fruity Gummis for dinner is perfectly all right because I am 48 years old and am allowed to make decisions like that. Then I wake up the next morning and try to stuff myself into a pair of jeans that has magically grown too small. Then I sob hysterically and smack myself around for lying. And the cycle begins all over again.

I also lie when I eat desserts like this and tell myself that because it tastes so light, it MUST be low calorie and quite possibly as good for me as say, a lean chicken breast and a green salad. I lie and ignore the eggs, the cream, the chocolate, the more cream etc etc etc. Then I sob hysterically…and well, you get the point.

I lie a lot. But only to myself. Well, maybe also to my kids when I say that I ate all the chocolate when I know it’s just well hidden.

But sometimes lies are totally worth it. And if lying lets me eat one or eight of these eclairs, I’m all for a life lived lying. The pastry cream alone is worth a lie or two…or three…or fifty. Add in the puffy pasty outside and the thick sour cream chocolate icing and you’ll be willing to lie too. But I take no responsibility for your morals when it comes to chocolate. It’s all on you.

You will probably end up with leftover pastry cream and frosting. I promise… you won’t mind. Take it and layer it in parfait glasses and make somebody happy. It’s an easy way to let little kids enjoy this dessert without the mess of them trying to eat an eclair.

You know the drill. Get to cookin’.

Berries & Cream Chocolate Eclairs

  • Choux pastry-
  • 1/2 cup unsalted butter
  • 1 cup water
  • 1/4 teaspoon salt
  • 1 cup flour
  • 4 eggs
  • Pastry Cream-
  • 1 cup sugar
  • 1/4 cup flour
  • 1/4 teaspoon salt
  • 1 1/2 cups milk
  • 6 egg yolks, lightly beaten
  • 2 teaspoons vanilla extract
  • 1 1/2 cups heavy cream
  • 2 cups mixed berries (I used blueberries and blackberries. Use your favorite)
  • Chocolate Sour Cream Icing-
  • 1 cup milk chocolate chips
  • 1 cup semisweet chocolate chips
  • 3/4 cup sour cream
  1. Make your pastry cream-
  2. In a medium (preferably non-stick) saucepan, combine the flour, salt and sugar. Stir in the milk until you have a smooth mixture. Cook over medium heat until it comes to a boil and thickens. Boil for one minute, stirring constantly.
  3. Beat a small amount of the hot milk mixture into the egg yolks to temper them, stirring it constantly. Then slowly pour the hot yolk mixture into the pot of the hot milk, stirring constantly.
  4. Cook over medium low heat until mixture again thickens up and coats the back of the spoon. Don’t let it come to a boil; it could separate.
  5. Remove from heat and stir in the vanilla extract. Put into a bowl and cover with plastic wrap and refrigerate until well chilled. Meanwhile, make your eclairs.
  6. For the eclairs-
  7. Preheat oven to 375 degrees and grease a large baking sheet.
  8. In the same medium saucepan from earlier (washed of course) heat the butter, salt and water over medium high heat until it comes to a boil. Pour in the flour all at once. Stir vigorously until mixture comes together and leaves the side of the pan in a ball.
  9. Add in the eggs, one by one, stirring well after each one, until smooth.
  10. Let the mixture cool slightly, then drop large spoonsful of it into the prepared pan, shaping into a roughly rounded rectangular shape.
  11. Bake at 375 for about 25 minutes or until the eclairs look lightly browned and dry. Take them out and cut a small slit in the side of each, then put them back into the oven and cook until golden brown, about 10 minutes. The cut helps the inside dry out.
  12. Take out and cool on the pan for about 15 minutes. Then cut them in half and carefully pull out the doughy insides of each one.
  13. Get your pastry cream out to finish preparing it. In a medium bowl, whip the heavy cream until it forms fairly stiff peaks. Stir about a quarter cup of it into the pastry cream to lighten it up, then fold in the rest of the cream until no white streaks remain.
  14. For the icing, melt your chocolate chips in the microwave in a microwave safe bowl in 30 second increments at 60% power until you can stir it freely and it is totally melted. Stir in the sour cream. If it thickens up too much to spread after the cold sour cream hits it, microwave it again, 15 seconds at a time, at 60% power, until it is smooth and glossy.
  15. To put the eclairs together-
  16. Fold the berries into the prepared pastry cream. Spoon about 1/3 of a cup of the pastry cream (more or less as desired but know if you use more, you will NOT be able to pick these bad boys up without a mess lol)  into the bottom half of each eclair then put the top half on top of that. Then spread each eclair with a good dollop of frosting.
  17. If not serving immediately, these need to be refrigerated but I strongly suggest NOT doing final prep on them until just about ready to serve as the eclairs will get soggy otherwise.

Copyright Notice: From Cupcakes To Caviar images and original content are copyright protected. Please do not publish these materials anywhere without prior permission.

Mounds Bars Brownies With A Creamy Coconut Buttercream


Mounds Bar Brownies With Coconut Buttercream

Mounds Bar Brownies With Coconut Buttercream


Respiratory illnesses suck. Just sayin’. I am one of those people who doesn’t get a mere cold. Oh nooooooo… my body is as ornery as my personality. I get the sniffles and we know to have 911 on standby for when I start coughing up bits and pieces of a lung or twelve. Thus why I have been gone almost 2 weeks. It takes time to piece back together a lung. And I’ve never been good at puzzles. I tried yesterday and I am pretty sure that my lung is NOT supposed to be on the bottom of my foot. But that’s ok. It tickled. I kinda liked it.

It’s been a LONGGGGGG 2 weeks. This may have effected more than lungs and sinuses. Oh hell, who am I kidding. I’m acting no weirder than normal.

Seriously though, sorry I was gone so long. I’m more or less on the mend now. Still coughing like crazy and still need meds to breathe at night but good otherwise. Definitely ready to get back to work.

And I started out way over the line on the decadence side. Gee. imagine that huh? Me? Making naughty foods instead of quinoa salads?

These brownies are yummy. Yummy may be an understatement. They kind of cross the line over into “OMG, I am gonna need to work out for 3 hours if I eat one of these!” territory. The brownie part of these is barely adapted from Ina Gartens Outrageous brownie recipe. I simply more or less cut it in half (changed it a touch but like I said, barely). Then I shoved some fun size Mounds bars and semisweet chocolate chips into the batter before baking. THEN to add insult to injury, I topped it off with a creamy coconut buttercream. But wait! Order right now and pay just ONE shipping and handling!

Sorry. I was having an infomercial moment. As I was saying… then, I covered it all with a rich thick chocolate ganache. Then (how many times can I say then for one recipe?) I coated THAT with some crunchy toasted coconut. So what do we have here? Thick, chewy, chocolatey, mounds bars, buttercream, ganache, more coconut. I think I may have broken some laws somewhere with this one.

You know the drill. Get to cookin’.

                                      Mounds Bar Brownies With A Creamy Coconut Buttercream

  • Brownies-
  • 1 cup (2 sticks) unsalted butter, room temp
  • 3 ounces unsweetened chocolate, chopped
  • 8 ounces semisweet chocolate
  • 12 ounce bag semisweet chocolate chips
  • 4 large eggs
  • 1 egg yolk
  • 1 tablespoon vanilla extract
  • 1/2 teaspoon coconut extract
  • 1 cup plus 2 tablespoons sugar
  • 2/3 cup flour
  • 1 1/2 teaspoons baking powder
  • 1/2 teaspoon salt
  • 12 fun size Mounds Bars
  • Buttercream-
  • 4 cups powdered sugar
  • 1/2 cup unsalted butter, room temp
  • 1/2 cup cream of coconut (found with the mixers in the drink aisle)
  • 2 teaspoons coconut extract
  • 2 to 5 tablespoons heavy cream (more or less as needed to get desired thickness of buttercream)
  • Ganache-
  • 1 1/2 cups semisweet chocolate chips
  • 1cup heavy cream
  • 1/2 to 3/4 cup toasted coconut for garnish
  1. Preheat oven to 350. Butter a 13 x 9 inch baking pan. Line with parchment paper then butter the paper.
  2. In a large glass (or other microwave safe) bowl, place the unsweetened chocolate, the butter and the 8 ounces semisweet chocolate. Microwave on 70% power for 2 minutes. Stir well, then microwave on 70% power for 30 second increments, stirring after each one, until all the chocolate is melted. Stir for about two minutes to help cool then set aside.
  3. In a large bowl,  stir together the eggs and egg yolk, the vanilla and the sugar. Stir the warm chocolate mixture into the egg mixture then allow it to cool to room temp.
  4. In a medium bowl, mix together the flour, the baking powder and the salt. Add to the chocolate mixture and stir well (no beating, just stirring). Stir in the 12 ounces of chocolate chips.
  5. Pour the batter into the prepared pan. Lay the 12 Mounds bars in 4 rows of 3 down the length of the pan, pressing them down slightly into the batter.
  6. Bake at 350 for about 35 to 45 minutes or until a wooden skewer inserted in the middle (make sure to not hit a Mounds bar) comes out barely clean, with just a few moist crumbs on it. Don’t overbake! Nothing worse than a dry crumbly brownie.
  7. Let cool thoroughly in pan on a wire rack before frosting. Also nothing worse than watching your frosting melt into a puddle on a too warm baked good.
  8. Meanwhile, make your buttercream.
  9. In a a large bowl (you’re welcome btw for all the dirty dishes. Don’t mention it.) combine the butter, cream of coconut and coconut extract. Beat well until mixture is smooth. Stir in the 4 cups of powdered sugar. I’d advise actually stirring at first to incorporate some of it before turning on the beater unless you are aiming to powder the kitchen. When you have it mixed in well, turn the beater on high and beat well for about 5 minutes. You’re trying to get a nice thick creamy mixture. Add the heavy cream in, one tablespoon at a time, until you get a good spreading consistency.
  10. When the brownies are completely cool, spoon on the buttercream and spread to the edges of the brownies. Chill while you make and cool the ganache.
  11. Ganache-
  12. Put the 1 1/2 cups chocolate chips in a small glass bowl.
  13. Microwave the 1 cup cream just to the simmering point. Don’t boil. Pour all of the cream over the chocolate. Let sit for 3 minutes or so. Stir well. The heat from the cream should have been enough to totally melt the chocolate. Stir until thoroughly combined then let sit until the ganache has cooled completely and thickened up. Pour in a steady stream down the middle of the buttercream. Spread to the edges of the brownies. Sprinkle with toasted coconut.
  14. Chill brownies in fridge for at least 3 hours to give the buttercream and ganache time to set.
  15. Using a sharp knife dipped in hot water and wiped dry, cut the brownies into desired size squares. These are extremely rich. I suggest small squares. Also, they are best if you let them sit for a while after cutting. They get fairly hard when cold. Though I know some people who like that, if you want them softer, let them sit.


Copyright Notice: From Cupcakes To Caviar images and original content are copyright protected. Please do not publish these materials anywhere without prior permission.

Maple Creme Brulee For Two

Maple Creme Brulee

There are some things in life that can only be called dangerous and dangerous with good reason. Bungee jumping? Dangerous. I understand that whole adrenaline rush idea but jumping off of a 300 mile high surface into mid air connected to only a piece of frayed yarn (yeah yeah I may be exaggerating just a bit here but not much) isn’t my idea of a woohoo good time. Though I admit to a strange hankering to sky dive, which is the exact same thing, only from a moving plane this time. holding a plastic grocery bag over your hand and hoping it expands enough to keep you from becoming part of the scenery.

Race car driving? Dangerous. Again; I can see the appeal. Hell, I see people in my own town driving like bad versions of Mario Andretti and I’ve been known to have a lead foot at times when I am sure I am *ahem* not being watched she says tactfully.  But getting into a large chunk of metal with an engine that is about 2 inches in front of you and hoping that you can drive well enough to where said engine doesn’t end up in your lap whilst only being protected by a helmet and a body suit that is NOT made of titanium or something good like that? Yeah. Dangerous.

For me personally? Having a full bag of gummy candy near me? Dangerous. A pint of Haagen Dazs Sea Salt Caramel Gelato sitting in front of me? Dangerous. It will soon be empty and I will be smacking myself upside the head for being a glutton at the same time that I’m sticking my face down in the carton sucking up the last drips. Creme Brulee? Dangerous. Any flavor whatsoever. But this one was particularly so with my love of all things maple. Thank God that it only makes 2 servings. Because if it made more, I would have eaten more than the one I had. Creme Brulee is, contrary to what many think, an extremely easy dessert to make. It tastes like it took you all day but in reality if you can hold a whisk in your hand and separate eggs, you’re good to go. Just don’t eat this thinking it is low calorie. It’s more like enough calorie to keep you alive for say, a week. So as I always say… git to cookin’.

Maple Creme Brulee (For Two)

  • 3 egg yolks
  • 1 cup heavy cream
  • 1/3 cup maple syrup (the real thing, not Mrs. Butterworth)
  • 1/4 teaspoon maple flavoring (can be found with the vanilla extract in stores)
  • 1/8 teaspoon salt (USE the salt… it brings out flavor)
  • 2 to 3 tablespoons of either maple sugar or demarara sugar
  1. Preheat the oven to 300 degrees. Place 2 8 ounce ramekins or custard cups into an 8 or 9 inch square pan.
  2. In a large measuring cup (makes it easier to pour later), whisk together all the ingredients except the maple sugar. That will be your crackly topping later. Pour the liquid evenly between the two ramekins.
  3. Place the pan with the ramekins into the 300 degree oven then carefully pour very hot water into the pan to where it goes about halfway up the sides of the ramekins.
  4. Bake at 300 for about 45 minutes or until the top has only a slight jiggle in the very middle when you gently shake it.
  5. Take the ramekins out of the hot water so they don’t keep cooking and set them aside to cool to room temp, then place in the fridge until serving time.
  6. When ready to serve, sprinkle half the sugar onto each creme brulee and either use a kitchen torch or the broiler to caramelize the sugar. if doing it under the broiler, make sure your ramekins are broiler safe. Not all of them are.


Berry Mascarpone Cheesecake Bars

Mascarpone Berry Cheesecake Bars-001

I have decided to build an ark. Yep. An ark. Because I am pretty sure it is never ever going to stop raining here in my part of Kentucky. Usually here in mid May, we are hovering around the 80’s and already worrying about drought. This year however, it has rained almost every day for almost 2 weeks and the temp, while pleasant, is most certainly not hovering near the 80’s. Right now it’s 62.

But!!! Being me, I will not be filling my ark with two of every animal. Nope. Noah already did that and I don’t want to be a copycat. There will be animals of course. I’ll have monkeys. I like monkeys. And cats. And platypus for comic uses. But no elephants unless one of you wants to offer poop scooping services. And you’d darn well better believe I’m leaving mosquitoes behind. And centipedes. Those things ick me out. They have got to be the most prehistoric bug ever. If some director wanted to make a killer horror movie, he/she would only need to have a few scenes with centipedes crawling over the tied up heroine. *shivers*

So what will my ark be filled with? Duhhhh man, this is ME. What do YOU think? CANDY!! Twelve (why stop at two) of every kind of chocolate, lemonheads and of course my current craze, fruity gummi candy. I may also throw some cheetos on the ark just cause.

But, if you’re one of those weirdos who wants their fruit with no preservatives and actually *gasps* REAL, try these cheesecake bars. I based them off of the ubiquitous blackberry pie bars that you can find everywhere online, including right here on my blog . The pie bars originally came from The Pastry Queen cookbook. These cheesecake bars are based on that recipe. They use the same crust but the filling is changed up. These are quite yummy. The crust is sweet and buttery and the filling is creamy, tangy and sweet all at the same time. Plus- they have crumbs on top. Butter, fruit, mascarpone and crumbs. Need I say more? They couldn’t be any easier to make so you know the drill… get to cookin’!

Berry Mascarpone Cheesecake Bars

  • Crust and crumbs-
  • 3 cups flour
  • 1 1/2 cups sugar
  • 1/4 teaspoon salt
  • 1 1/2 cups unsalted butter, cold
  • Filling-
  • 4 eggs
  • 2 cups sugar
  • 1/2 cup sour cream
  • 8 ounces mascarpone cheese, room temp
  • 8 ounces cream cheese, room temp
  • 3/4 cup flour
  • 1/2 teaspoon almond extract
  •  1 1/2 teaspoons vanilla extract
  • 1 16 ounce bag frozen raspberries, thawed and drained well
  • 1 16 ounce bag frozen blackberries, thawed and drained well
  • Fresh berries to scatter on top (optional)
  1. Preheat oven to 350 degrees. Butter a 13×9 inch pan then line it with parchment paper and butter the paper.
  2. Combine the 3 cups flour, 1 1/2 cups sugar and the salt in a large bowl. Using a pastry blender, cut in the cold butter until the mixture resembles fine crumbs. Set aside 2 cups of the mixture. Press the rest into the bottom of the prepared pan.
  3. Bake crust at 350 degrees for about 15 minutes or until it is golden brown. Let rest while you prepare the filling.
  4. In a large bowl, using a hand mixer, together the mascarpone, cream cheese and sour cream. Add the sugar and beat just until well combined. Add the eggs, vanilla extract and almond extract and beat well. Mix in the flour. Gently fold in the drained berries.
  5. Spoon the mixture over the prepared crust. Sprinkle evenly with the crumbs that you held back earlier.
  6. Bake at 350 degrees about 55 minutes. You want the top to be firm but still to have a little jiggle in the center third of the bars, just like with any other cheesecake. The crumbly top will be a nice light golden brown. This will firm up as it cools so don’t overcook it.
  7. Let this cool for at LEAST an hour or so before cutting, but it’s preferable to cover it and let chill overnight. Use a sharp serrated knife that you’ve heated under hot water if you want to get clean cuts.

Chocolate Bundt Cake With A Creamy Coconut Filling

Chocolate Bundt Cake With A Creamy Coconut Filling

Chocolate Bundt Cake With A Creamy Coconut Filling


Ya know, for a woman who once claimed to not like coconut, I have noticed that my tune has changed and I have quite a few coconut recipes in here now. I’ve always thought that that aspect of human physiology was interesting. We can hate or love something for years and then all of a sudden, we do a 360 on how we feel about it. Other than Mounds Bars or Almond Joy bars, just 2 years ago you’d be hard pressed to find me saying anything nice about coconut. Coconut flavor I was fine on as well as coconut milk (I could happily drink it with a straw πŸ˜› ) but actual coconut? No way.

What about you? Anything that you have changed your mind on in either direction as you’ve aged? Food wise that is.

All that said, obviously the recipe for today contains coconut. What? You were expecting goose liver perchance? Some Morels? Not sure either of them would have gone as well with this cake. And believe me, coconut goes well in this. the first two “taste testers” I served this to took a bite and then their faces went into that “omg, this is good” look that all food bloggers love to see πŸ˜€

This is a very moist cake, which makes it a good keeper if you make sure it stays covered. The coconut filling is very reminiscent of a Mounds bar but with a bit of an almond flavor to it (if you’re not a fan of almond extract, feel free to omit it.)  Then there is the chocolate ganache glaze. Really? Do I need to describe it? Chocolate ganache. Enough said. Go… shoo… bake. Thank me later.

Chocolate Bundt Cake With A Creamy Coconut Filling

  • Filling-
  • 2 cups (one small bag) shredded sweetened coconut flakes
  • 1/2 cup plus 2 tablespoons sweetened condensed milk
  • 1/4 teaspoon vanilla extract
  • 1/8 teaspoon almond extract
  • Cake-
  • 3 cups flour
  • 3/4 cup sifted (yes, sifted; cocoa always has those little lumps it leaves behind otherwise) unsweetened cocoa powder (not hot chocolate mix)
  • 1 teaspoon baking powder
  • 1/2 teaspoon baking soda
  • 1/2 teaspoon salt
  • 2 cups unsalted butter, room temp
  • 1 1/4 cups sugar
  • 1 cup firmly packed light brown sugar
  • 1 tablespoon vanilla extract
  • 1/2 teaspoon coconut flavoring
  • 5 eggs, room temp
  • 2 cups sour cream (NOT low fat)
  • Glaze-
  • 5 ounces semisweet chocolate, chopped
  • 1/2 cup heavy cream
  • Garnish-
  • 1/2 cup toasted coconut
  1. Combine all your filling ingredients in a small bowl and set aside.
  2. For the cake- Preheat oven to 350 degrees and grease and flour a 12 cup bundt pan. If, like me, you only have a 10 cup pan, also grease 5 king sized muffin cups because if you try to fit all this batter into a 10 cup pan, you WILL have it overflow all over your oven. Been there, done that, learned my lesson.
  3. Whisk together your dry ingredients in a medium bowl.
  4. In a large bowl, beat the butter at high speed until creamy. Add the sugars and continue to beat until light and fluffy, about three minutes. Beat in the vanilla extract and coconut flavoring. Add the eggs, one at a time, beating well after each addition.
  5. Beginning and ending with the flour mixture, add it in three batches, alternating with the sour cream.
  6. Spoon a little less than half of the batter into the prepared bundt pan. (If using a ten cup pan, FIRST fill the 5 prepared muffin pans about 2/3 full THEN go to the bundt pan, using about half of the remaining batter. Don’t use the coconut filling in the cupcakes; just think of them as extras to hoard for yourself :-p )
  7. Carefully spoon the coconut filling over the batter in the pan. Make sure it is in the middle of the pan, not touching either side or it will stick and make the cake difficult to remove.
  8. Spoon the rest of the batter carefully over the top of the filling, smoothing it down where needed.
  9. Bake at 350 for about an hour and ten minutes for the 12 cup pan, about 50 minutes for a ten cup (about 20 minutes for the cupcakes) or until a wooden skewer inserted in the cake (make sure to get the cake not the filling) comes out with just a few moist crumbs on it.
  10. Set on a wire rack and allow to cool until just barely warm then turn the cake out onto the rack to finish cooling completely before glazing.
  11. For the glaze- heat your cream just to boiling in the microwave. Pour over the chopped chocolate in a bowl and let sit for about 3 minutes, Stir to combine. Let it sit for a bit to thicken up somewhat. Spoon over the cooled cake. Garnish with the toasted coconut.
  12. If you have any glaze and/or coconut left (which you will) just dump the coconut into the ganache, stir well then put it into the fridge until it firms up. You can then scoop it out and form it into small truffles. Or just spoon it out and eat it in front of the TV watching bad reality show reruns. I won’t tell.

Print Friendly and PDF


Creamy Coconut Flan

Creamy Coconut Flan

No long winded story and bad jokes tonight. I’m sleepy and on a massive sugar crash from this flan. πŸ˜›
Ok, maybe a short story based on the whole sugar high/crash idea.

I remember when my brother, sister and I were kids. Every year we would get our mother a large heart shaped box of Fanny May candy for Valentines day. We used her money to buy it of course and I am fairly sure that any change went for things like Lemonheads and ice cream. Well, each and every year, mom would put the opened box into the fridge. She wasn’t a huge sweets eater (obviously I get my love of them from my sweets binging diabetic father hehe) so would put it there with, I’m sure, the idea that when she wanted a piece (ONE piece) she could get one (again… ONE piece. Who does that!?). Well, every.single.year. mom would invariably come to us with a heart shaped box asking what had happened. Why? Because what she held was a practically empty box bearing only one or two pieces of candy that had a bite out of the side, those pieces being the ones none of us kids liked.

Mom always said she hoped I had kids just like me. I did. I now have a “stash” of candy and junk food in my closet that the kids are supposed to stay out of. HA! yeah, right. The ones living at home go in it all the time and the ones who come and visit head straight to the stash, coming out bearing junk food galore and innocent expressions.

On a side note, taking a drink of Pepsi Throwback after eating a huge serving of flan isn’t advisable. It has absolutely no flavor according to my “sweeted out” taste buds plus I think my pancreas just cried a little, then died.

This is one yummy flan btw. Sweet (oh my, is it sweet), quite coconutty, with that mouth feel texture that everyone loves (man, that sounds vaguely obscene. but then I’m tired and everything is making me titter). The caramel sauce on the top is the perfect topping. I used to make flan just for the topping. I swear I did. I’m weird. This is intensely coconutty so if you’re so so about coconut flavor this may be one you need to pass by.

Creamy Coconut Flan

  • 1 cup sugar
  • 4 eggs
  • 3 egg yolks
  • 1 can sweetened condensed milk
  • 1 can cream of coconut (found with the drink mixers- do NOT sub coconut milk)
  • 1 cup heavy cream
  • 1 tablespoon vanilla extract
  • 1/4 cup coconut vodka
  • Toasted coconut for garnish (optional)
  1. Preheat the oven to 325 degrees.
  2. Pour your sugar into a small saucepot. Heat it over medium high heat until it is melted and a nice golden brown color. Don’t walk away once it starts melting. It doesn’t take long to go from melting to scorched and wasted.
  3. Pour the sugar onto the bottom of 8 one cup ramekins, swirling to coat the bottom of the ramekins with the melted sugar.
  4. Whisk the eggs and egg yolks in a large bowl until foamy. Add in the condensed milk, cream of coconut, cream, vanilla extract and vodka. Whisk until well combined. Strain through a fine mesh strainer into another bowl (preferably one with a pour spout) or large measuring cup.
  5. Pour the flan mixture evenly into the prepared ramekins. Set the ramekins into two deep baking dishes. Set into the oven then carefully add hot water to each pan to go about halfway up the sides of the ramekins. be careful not to slosh any INTO them though.
  6. Bake at 325 degrees until the center is almost set, about 30 to 40 minutes.
  7. Carefully remove from the pan (I used tongs) and set on a wire rack for about an hour, then transfer to the fridge to chill for at least an hour.
  8. Carefully slide a butter knife all around the edges of each flan and invert onto a plate. If it doesn’t come out,  place the ramekin into hot water for a minute or so to loosen it up, then try again. Garnish with the toasted coconut if using.

Print Friendly and PDF

Chocolate Chip Double Berry Scones

Chocolate Chip Double Berry Scones 2-001

I can hear the outcry now… “MORE scones, lady!!!??? What the heck?? Can you do anything but scones or citrus pies or risotto!?”

Yes. yes, I can. But I wasn’t thinking the other day when I, on my Facebook page asked everyone which they would prefer- these scones or a quick bread I am trying. They chose the scones. Sooooo, being a woman of my word, I made them. Because honesty is just how I roll. Well, when I trip on our land, downhill quickly is also how I roll but I won’t blog about that. Though photos would probably be hilarious.

Moving on- been interesting in our household lately. My (very pregnant) daughter and her boys are with us through mid August while her husband goes through Basic Training and AIT (the on the job training for whatever you will be doing part of the military) so having 2 extra little ones (they are 3 and 6) has been chaotic to say the least. But I love knowing that when they move, they will, for a time at least, until it fades, have some memories of living with gramma and grampa. My daughter is due in a few weeks so I’ll have time with the baby (girl) for a while too πŸ™‚

Plus, I’ve been having some health issues again. Not gonna go into detail here yet but I’ll cue you all in when things are more settled as to treatment. Until then, I’m just gonna continue to bake fattening things for all of you. Why? Cause I lurves you of course!!! Seriously. You have no idea what it means to me to know that people actually come here to my tiny blog, read my inane words and sometimes actually even make the foods I post.

These scones turned out delicious. I got the base recipe from The Pastry Queen Cookbook (you should have noticed by now that I love this cookbook) but changed it around. I just KNOW you’re surprised at that news. The only problem I had (which is my fault not the books) was shape. After I added the berries, I didn’t want to knead the dough, thus mushing the berries and toughening the dough, so I just reshaped it. BUT… I wasn’t able to get it back into a decent circle. so I tried making it more rectangular and cutting the scones from that. It turned out rather laughable πŸ˜› These taste absolutely amazing… light, tender, flaky with a perfect mix of berries and chocolate and an orange glaze that just complements it all. But the way they look? Kinda wonky lol. But I promise you; you won’t care once you make some and taste them how they look. Also, you may have better luck shaping the dough than I did ANYWAY thus negating the issue. So don’t let looks fool you. Just look at the nicely glazed surface… see the pieces of berry peeking out alongside some chocolate. Then go bake. And I promise… no more scones…. for a few days anyway πŸ˜›

Chocolate Chip Double Berry Scones

  • 3 cups flour
  • 1 cup sugar
  • 1 tablespoon baking powder
  • 1/2 teaspoon salt
  • 10 tablespoons unsalted butter, COLD
  • 1 tablespoon vanilla extract
  • 1 1/2 cups heavy cream
  • zest from one large orange (about 1 to 2 tablespoons)
  • 1 cup semi sweet or bittersweet chocolate chips
  • 1/2 cup fresh raspberries
  • 1/2 cup fresh blackberries
  • Glaze-
  • 1 cup powdered sugar
  • 2 teaspoons orange zest
  • 1/3 cup orange juice
  1. Preheat oven to 375 degrees. Line a buttered baking sheet with parchment paper then butter the paper.
  2. In the bowl of a stand mixer fitted with the paddle attachment (as always, you can use these directions with a hand mixer), combine the dry ingredients on low speed, including the orange zest.
  3. Cut the butter into small pieces, then add to the flour. Beat on low speed until the butter is in small pea sized pieces. Then add in 1 cup of the cream and the vanilla and continue beating on low speed. You want the dough to come away from the sides of the bowl in a clean ball of dough, no floury remnants left behind. If it still looks dry, add more cream, about a tablespoon at a time until it forms the dough ball.
  4. Turn out onto a lightly floured board and gently knead the chocolate chips into it. You’re not trying to work the gluten up like in bread dough. That will make the scones tough.
  5. When the chocolate is incorporated, gently pan the dough out into a fairly thin circle or rectangle. Lay the berries down on one side of the dough, then fold the other side down over them. Press gently to seal.
  6. Reshape the dough (circle if you want wedges, rectangle if you want squares or diamonds) and cut into either 10 wedges or if making squares or diamonds (for the diamonds, cut into squares then cut them in half diagonally), cut into 12 pieces. Brush each with some of the leftover cream and sprinkle with sugar.
  7. Bake at 375 for about 15 minutes for wedges or 10 to 12 minutes for squares or diamonds. You want them a nice golden brown on top.
  8. For the glaze- in a small bowl, mix together the glaze ingredients. Whisk well to get rid of lumps.
  9. Pour the glaze out onto a shallow lipped plate.
  10. Dip the top of each scone into the glaze. Let dry for about ten minutes then dip each one again. Let dry a bit before serving though when they are warm and sticky they are awfully hard to resist πŸ˜€

Print Friendly and PDF