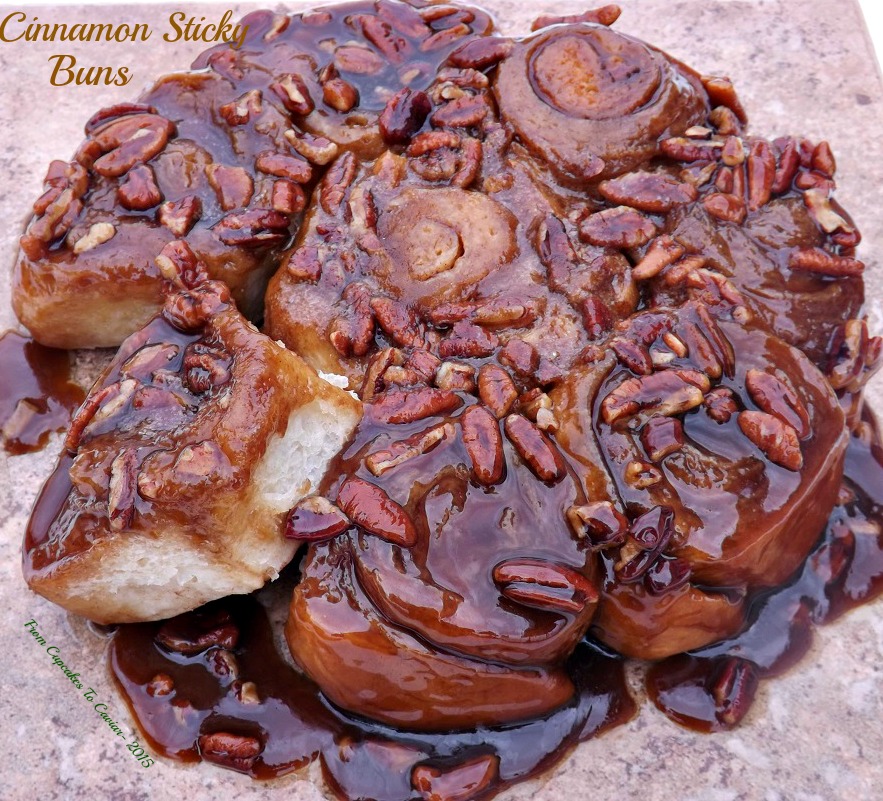
Cinnamon Sticky Buns

I always get confused when I see how nervous some people are about the idea of working with yeast. I mean no disrespect by that. I also get confused by at least 948 other things every day. It’s just that I started making yeast breads and pastries when I was still a fairly novice cook. Now I’ll look at recipes that seem pretty straightforward and they’ll have warnings about “Once you master this, you can move on to harder things like danish pastry and croissants”. Hmmmm… one of the first things I ever made were homemade croissants. I didn’t know that, as a beginner, I wasn’t supposed to be able to make them or that I was supposed to be scared to even try. I could read, therefore I could bake.
Point being, that’s what I want for all of you. If you can read and have any cooking ability at all (I qualify that because if opening a can of Chef Boy-Ar-Dee is beyond your skill level and you only come to blogs to send the recipes to your mom, I make no promises 😛 ), you can make yeast raised baked goods with no problem. They take a little more patience is all and a little more with certain things, like the temps of liquids. Too hot and you can kill the yeast. Too cold and it won’t activate at all. But all you need is an instant read thermometer and you’re good to go. Bake enough and you won’t even need that. You’ll be able to test the temp with your finger and know if it’s right.
I first made these sticky buns in about 1990 or so and have been making them ever since. More or less. It occurred to me the other day that I have never made them for my husband and he and I have been together over seven years. Seven years with no sticky buns!!? What was I thinking?! So it was time. And I am so glad I did. Tender, slightly sweet pastry with a buttery, sweet and cinnamony filling, all smothered in a sticky, teenie tiny bit chewy glaze. These are wonderful fresh out of the oven. These are wonderful room temp. These are just wonderful; period. These are done with a stand mixer and I’ll give directions that way, but you can always, always do yeast doughs by hand.
You know the drill…. 🙂 and no fear is your motto!! Well, that and “I’m going to eat a pan of sticky buns all by myself!”
Cinnamon Sticky Buns
- dough- 2 packages dry yeast
- 1/4 cup warm water (between 110 to 115 degrees)
- 1 cup milk, warmed to about 120 degrees
- 1 1/2 teaspoons vanilla extract
- 1/2 cup sugar
- 2 teaspoons salt
- 1/2 cup unsalted butter, room temp
- 3 eggs, room temp
- 5 to 6 cups flour (it will vary each and every time due to weather, humidity, moisture content of the flour, etc)
- filling-
- 1/2 cup unsalted butter, room temp
- 2 tablespoons cinnamon
- 2/3 cup sugar
- glaze-
- 3/4 cup (1 1/2 sticks) unsalted butter, room temp
- 1 1/2 cups brown sugar (whichever you prefer; I like to use dark)
- 3 tablespoons dark corn syrup (this provides the “sticky” part; don’t omit it. Corn syrup is NOT the same thing as HFCS)
- 3/4 cup lightly toasted chopped pecans
- Sprinkle the 2 packs of yeast over the warm water. Let sit for 3 minutes or so to dissolve. When you go to get it, it should be bubbling and foamy. If not, your yeast may be dead and you should probably use different yeast. Better to do that than waste an entire recipes worth of ingredients.
- Combine the milk, sugar, salt, butter, vanilla extract and eggs in the bowl of a stand mixer fitted with the paddle. Mix on low just long enough to combine. Add in the yeast and 2 1/2 cups of flour. Change over to the dough hook and beat until smooth. Add in 2 1/2 cups more flour. Beat until it is a shaggy mass. It may still be somewhat sticky. Add in another 1/4 cup of flour at a time if needed and beat to incorporate. You want a final dough that is SLIGHTLY tacky, but doesn’t leave dough on your fingers when you press into it. This batch took a full six cups of flour for me. Other times, I’ve used about 5 to 5 1/2 cups.
- Turn your speed up to 2 or 3 and let the dough hook do the kneading work for you. Knead for 6 to 8 minutes; work that gluten! 😛
- Turn dough out into a lightly oiled bowl. Turn to coat both sides, then cover the bowl with a clean towel and set in a warm place to rise. Let the dough rise until it is about doubled in size.
- Meanwhile, make your glaze. Combine all the glaze ingredients and combine until totally mixed and no streaks of butter show. Divide mixture between 2 9 inch cake pans, using your fingers to pat it all the way across the bottoms of the pan. Sprinkle with the toasted pecans. Set aside and start your oven preheating to 350 degrees.
- When the dough has risen, punch it down and turn out onto a lightly floured board or counter. Roll it into about a 24×12 rectangle. Don’t stress if it’s not perfect.
- Break up the 1/2 cup softened butter and scatter it across the dough. Use your fingers to spread it all over the dough, right to the edges. Sprinkle with the 2/3 cup sugar and then the cinnamon.
- Roll the dough tightly from a long end into a cylinder. Trim off the uneven edges (trust me; you’ll have uneven edges) and do what you want with them. You can bake them up in a small pan or I have heard that dogs adore raw dough. Go figure. Cut the dough into 16 pieces with a sharp knife. Lay the slices in the prepared pans, 8 per pan. Let rise again until just about doubled in bulk, about 45 minutes or so.
- Bake at 350 degrees until the tops of the rolls are golden brown and you can see the glaze bubbling around them, about 25 minutes. Let cool in the pan for 5 minutes to set the glaze somewhat, then invert the pan onto a rimmed plate or serving dish.
- These are best warm and fresh, but if you don’t use them all, just wrap them tightly and store on the counter. You can reheat them easily in the microwave. For the record, you can let them rise in the pan, then freeze a pan for another time if two pans is too much. Just wrap the pan tightly with foil and freeze. When you want to bake them, let them sit in the fridge overnight to thaw and bake them as directed above. They may take a bit longer is all.
Copyright Notice: From Cupcakes To Caviar images and original content are copyright protected. Please do not publish these materials anywhere without prior permission.