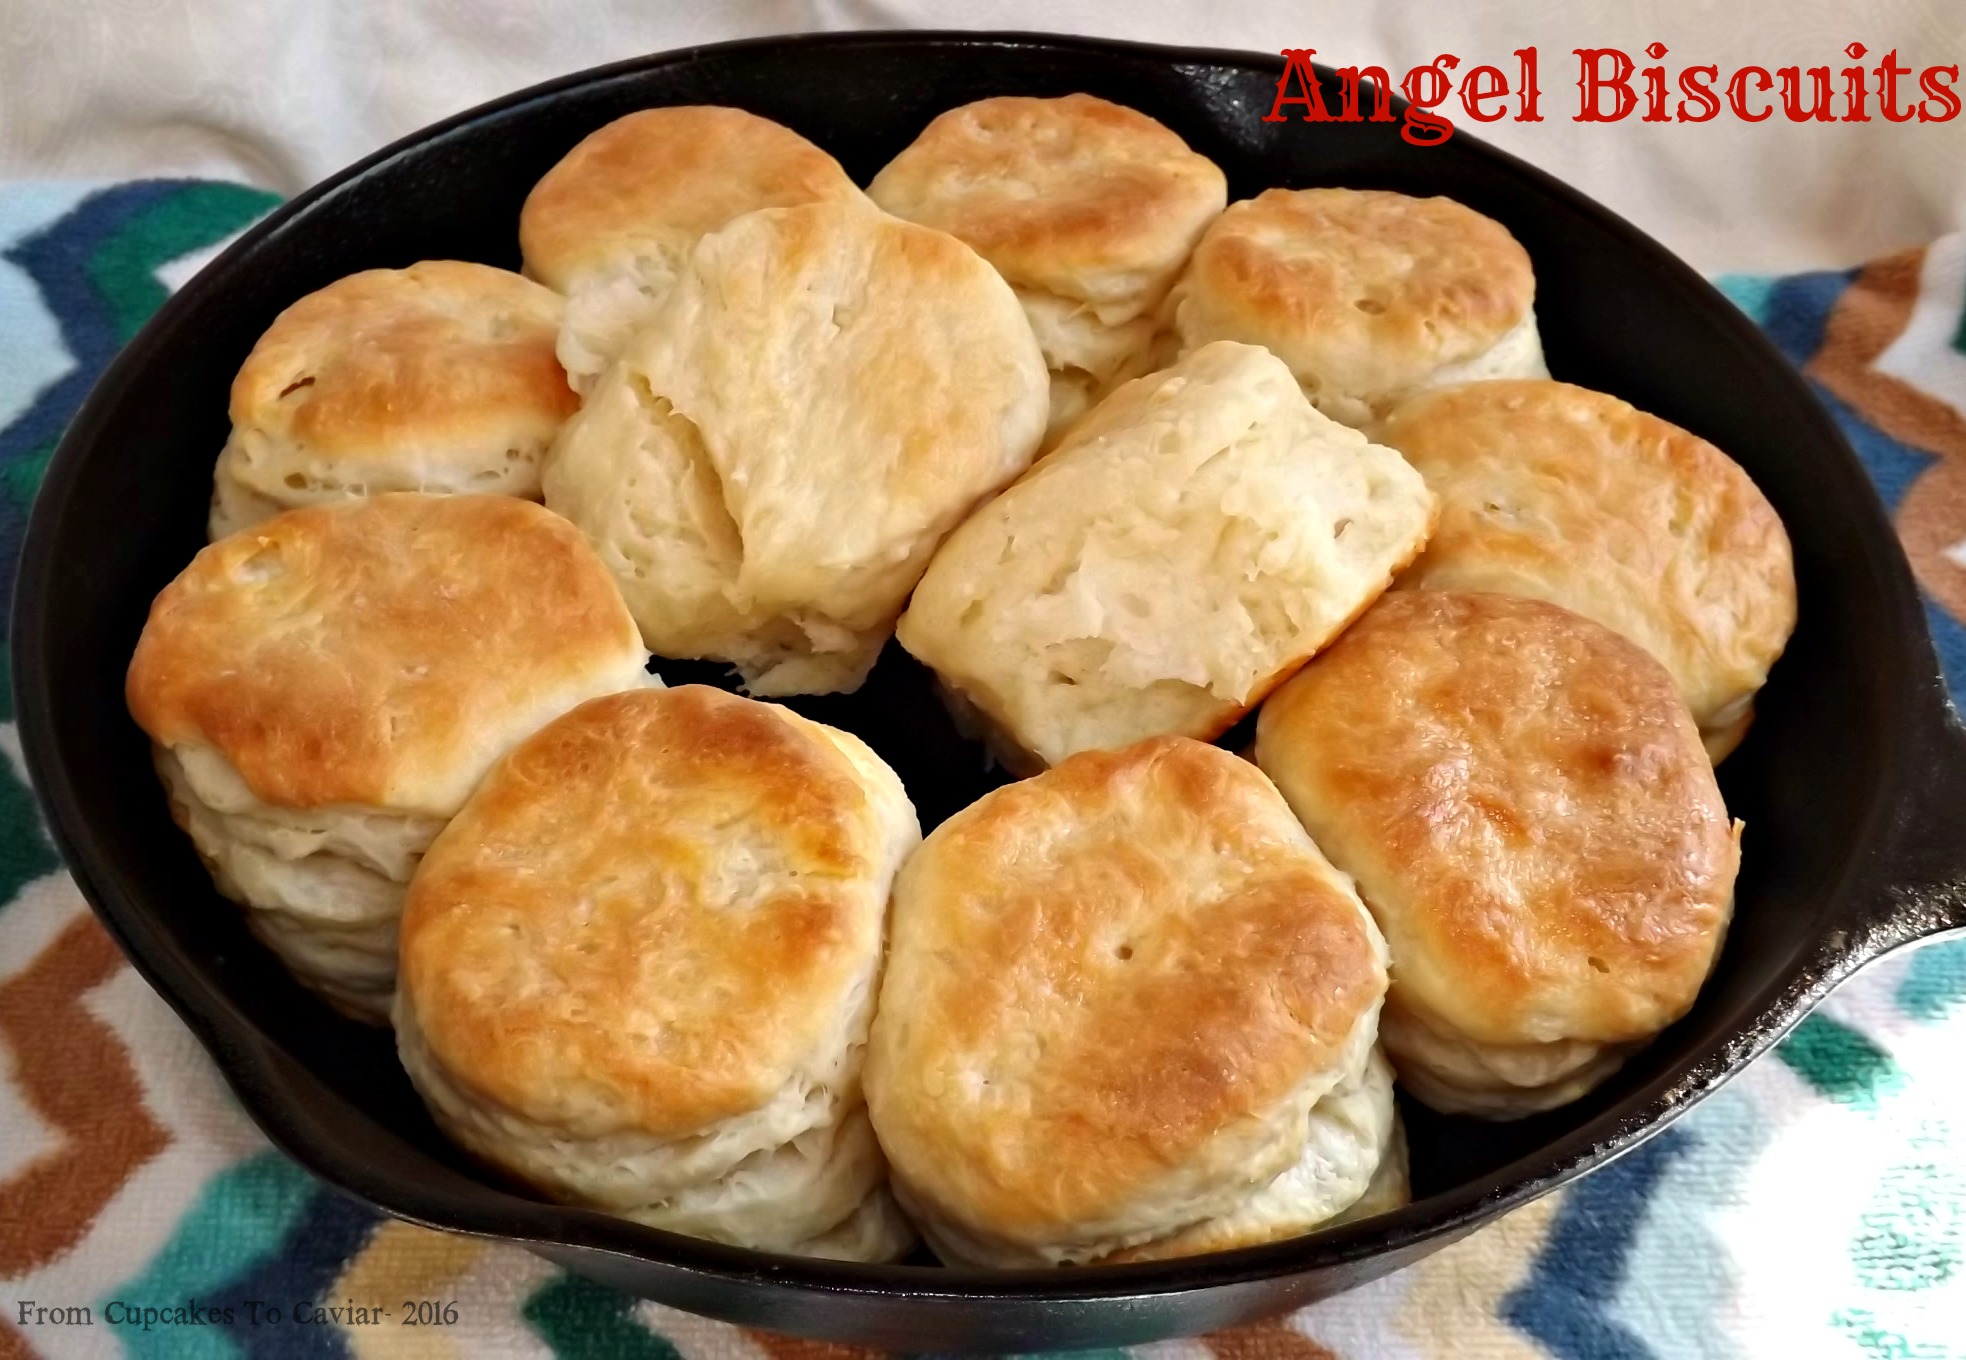
Angel Biscuits

Angel Biscuits

Angel Biscuits

Ever have one of those meals where you are running around like proverbial headless chicken, trying to make a nice dinner, and yet still, you do 456 things incorrectly while cooking? Please tell me you have evenings like that. If nothing else, lie to me. I’m cool with that.

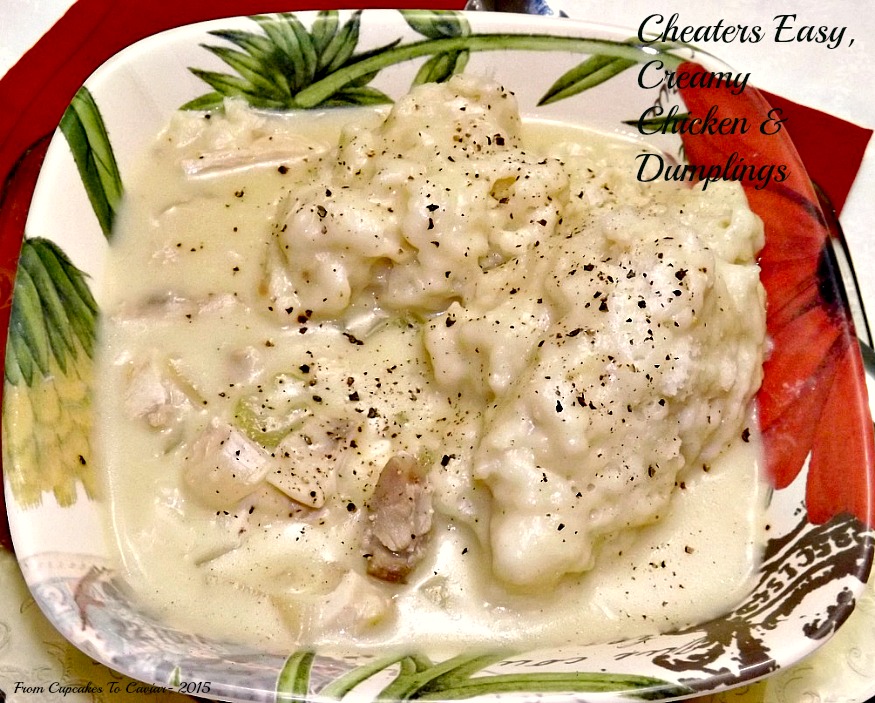
I made fried chicken for dinner tonight. Ultimately, it was fine, but the burner I prefer to use seems to be having hissy fits lately and has no medium temp. It’s either high enough that the food (in this case, the fried chicken) is somewhat burned on the outside and half raw inside or the oil temp is too low and the chicken ends up greasy. Yes, yes, I know, I could just move to another burner, but one, I LIKE the left hand side and two, that seems defeatist. Please don’t ask me why I stick with it and have food come out poorly, because I have no answer for that other than orneriness.

Then, the socket that I plugged the rice cooker into decided to go on the fritz and it wasn’t until the rest of dinner was done that I realized that the rice had never cooked. I had to plug it in elsewhere and try again. So, now we have 3 cups of cooked rice because no one wanted any by the time they finished the rest of dinner.

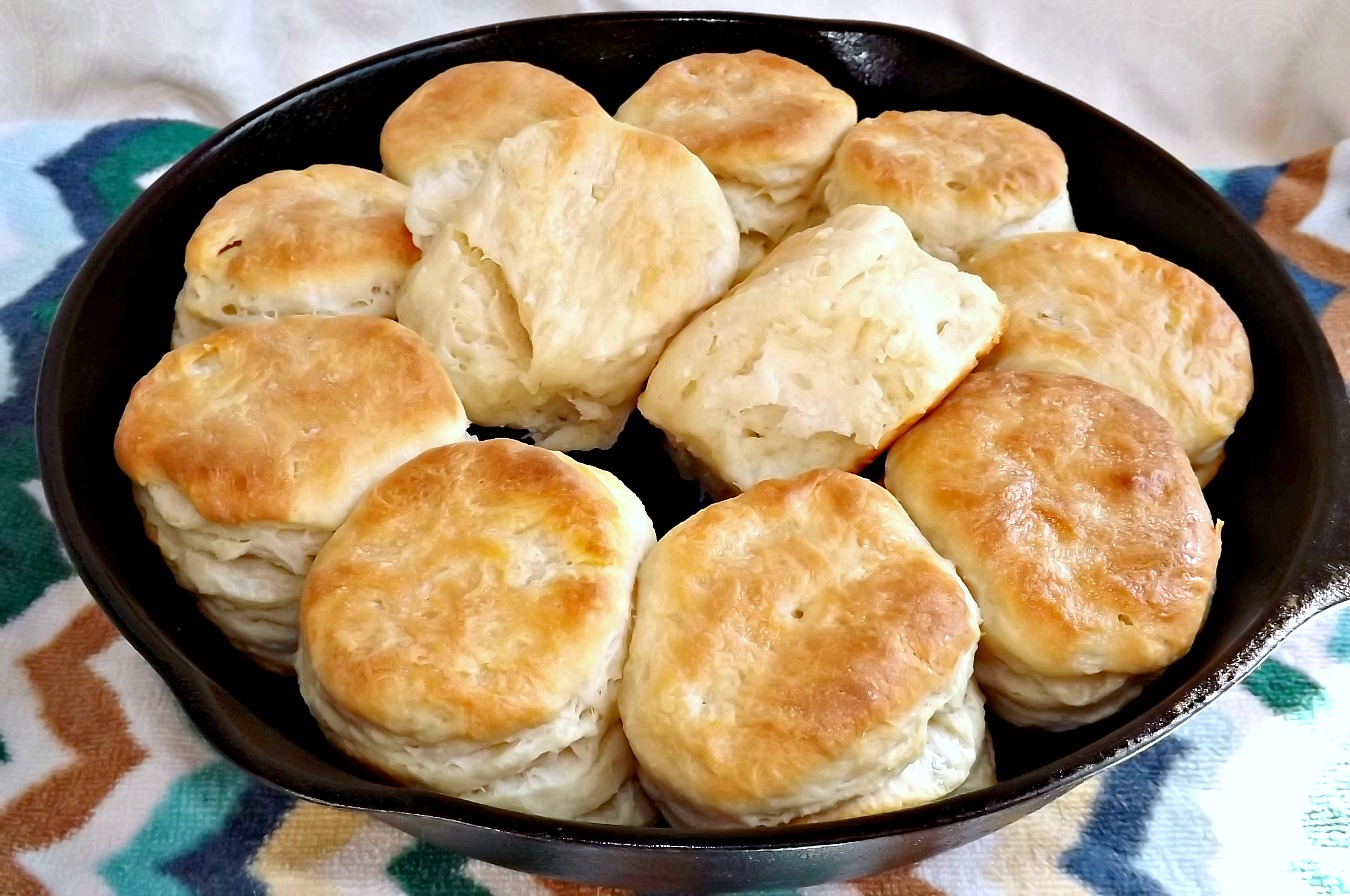
One part that turned out wonderfully was these biscuits. I have a lot of friends who aren’t comfortable using yeast and if you fall into that category yourself, these are the biscuits you want to try. They use both yeast and baking powder, so are virtually foolproof, and are so light and fluffy. These come together so easily; you don’t need a mixer of any kind. A couple hours chilling time, bake, and you have a pan or two of amazingly delicious biscuits. These are fantastic plain, or with butter and jam.

You know the drill…. 🙂

Angel Biscuits

  • 1/2 cup warm water (between 105 and 112 degrees)
  • 1 envelope yeast
  • 1 teaspoon sugar
  • 5 cups flour
  • 3 tablespoons sugar
  • 5 teaspoons baking powder
  • 1 1/2 teaspoons salt (just plain old salt; nothing fancy)
  • 1 teaspoon baking soda
  • 1/2 cup cold shortening, sliced thin
  • 1/2 cup cold unsalted butter, sliced thin
  • 2 cups buttermilk
  • 1/4 cup melted butter
  1. In a small bowl, combine the warm water, yeast and one teaspoon sugar. Stir and let sit for five minutes. it should get foamy and bubbly. If it doesn’t, your yeast is dead; use a different pack.
  2. In a large bowl, whisk together the flour, sugar, baking powder, salt and baking soda.
  3. Use a pastry blender to cut in the cold shortening and butter until the mixture is crumbly with pieces of butter ranging from pea to nickel sized. Pour in the yeast mix and the buttermilk, all at once. then stir until the dough is thoroughly moistened and you can mash it together into a ball.
  4. Cover the bowl with plastic and put it in the fridge for at least 2 hours and up to 24.
  5. When ready to bake, preheat oven to 400 and lightly butter two 10 inch cast iron skillets (or a buttered baking dish). Dump dough out onto a lightly floured board. Pat into a 1 inch thick circle; fold in half; repeat process twice.
  6. Finally, pat or roll the dough into a 3/4 inch thick round. Cut the dough with 2 inch biscuit cutters. You can use smaller or larger cutters, but adjust your cooking time to suit.
  7. Place the biscuits, sides touching, in the prepared pans. Brush with half the melted butter.
  8. Bake at 400 for 15 to 20 minutes, rotating the pans once during baking, until the tops are golden brown. Brush with the rest of the melted butter and serve.

Copyright Notice: From Cupcakes To Caviar images and original content are copyright protected. Please do not publish these materials anywhere without prior permission.

Angel Biscuits

Angel Biscuits

Cheaters Easy, Creamy Chicken & Dumplings

Cheaters Easy, Creamy Chicken & Dumplings

Cheaters Easy, Creamy Chicken & Dumplings


I was never a fan of chicken and dumplings growing up. It was a very heavy dish the way my mom made it. As southerners would say, “Bless her heart… she was a lovely woman, but she might could do something other than cook”.

I’ve said before, my mom made good lasagna considering she was a depression era southern woman. She also made excellent lemon meringue pie. And her fried chicken is something I still haven’t been able to match. But she had her flops too. Say “Garbage Soup” in my or my brothers presence and we’re likely to recoil away and gag. As for her chicken and dumplings, looking back, I can see why it turned out greasy and heavy. Mom just boiled up that chicken until it was tender and then made her Bisquick dumplings right on top, without getting rid of the grease.

While I’d give my right arm to eat her cooking again, I do make most things differently than she did. I used to make chicken and dumplings for the family her way and I could never eat it. So I started cheating. I had some leftover chicken and just started tossing things in a pot with it, then topped it with, yep, Bisquick dumplings. I love those far more than I do the rolled out ones. Over the years, it’s morphed into this dish and I finally can eat chicken and dumplings again. Plus… it’s so darn quick because you use either leftover chicken or a store bought rotisserie one!

You know the drill…

Cheaters Easy & Creamy Chicken & Dumplings

  • 1 rotisserie chicken, skin and bones removed, chopped into bite sized pieces (or about 4 cups of leftover chicken, chopped up)
  • 1 medium onion, chopped (about 1 cup)
  • 2 stalks celery, chopped (about 1/2 cup)
  • 3 tablespoons unsalted butter
  • 2 14 ounce cans chicken broth
  • 2 10.75 ounce cans cream of chicken soup, undiluted
  • 1/2 cup heavy cream or half and half
  • 1 teaspoon poultry seasoning
  • 3 cups biscuit mix (Bisquick)
  • 1 1/4 cups milk
  • Black pepper to taste
  1. In a large pot, saute the chopped onion and celery in the 3 tablespoons butter until they are soft and limp, about 7 minutes. Pour the chicken broth and soup in with the veggies. Whisk to combine.
  2. Add in the chicken and poultry seasoning. Bring to a boil, then simmer over medium heat for ten minutes or so; long enough to heat everything up nicely. Stir in the cream and turn the heat up enough to bring the soup to a boil.
  3. Combine the biscuit mix and milk in a medium bowl. You’ll have a thick pasty sort of mixture. Use a large spoon to drop large balls of dumpling dough onto the hot soup. You should get about 8 to 10 dumplings. Snuggle them all in there right next to each other.
  4. Cover the pot and cook until the dumplings are tender and fluffy and cooked throughout, about 15 to 20 minutes.
  5. Serve with plenty of black pepper and there may be some out there who want to add some salt. I personally find it salty enough without adding extra.

Copyright Notice: From Cupcakes To Caviar images and original content are copyright protected. Please do not publish these materials anywhere without prior permission.


Cracked Pepper & Two Cheese Biscuits

Cracked Pepper & Two Cheese Biscuits

Cracked Pepper & Two Cheese Biscuits


I have a thing for biscuits, scones, quick breads, all of that type of food. They are quick, they are easy and the biscuits are pure southern comfort food. There is nothing like a biscuit, spread with some fresh butter and dripping with honey or jam.

That said though, there are times I like to change it up. Biscuits are fun to play with.  Ok, that came out sounding strange. I now have a mental image of myself and the boys outside batting around a biscuit. Hmmm, back when I was first learning to make them, that actually may have been possible, though if someone got hit with one, it would have been fatal.  Asssssss I was saying before I had an “ooo, shiny thing” moment there,  biscuits are fun to play with. The normal ones are delicious, but they lend themselves to so many variations. I have made them with the addition of bacon, green onions, cheese, dried fruits, you name it, it can probably go in biscuit dough.

This time I wanted to make them a wee bit more sophisticated. Though sophistication falls by the wayside when they are being eaten by three boys whose idea of sophistication is McDonalds and whose table manners resemble a horde of hungry Hyenas attacking an elephant carcass after being on a 4 day juice fast. But hey, *I* actually took the time to savor them and enjoy the step up from plain biscuits.  I used a good amount of cracked pepper in these (enough that when my five year old actually stopped eating long enough to breathe, he said “these are spicy, momma!” I used two slightly more upscale cheese (as opposed to say, American cheese slices 😛 ) and the flavor was wonderful…. cheesy, peppery, with all the flavors of a good biscuit also. This is perfect for a fancier dinner or a family dinner or just to nosh on.

You know the drill…. 🙂

Cracked Pepper & Two Cheese Biscuits

  • 4 cups self rising flour
  • 1 teaspoon baking powder
  • 1/2 teaspoon salt
  • 5 1/3 tablespoons unsalted butter, refrigerator cold and sliced thin
  • 1/2 cup solid shortening, chilled and sliced thin
  • 1 1/2 cups buttermilk (use whole milk buttermilk if you can find it. It makes a far better biscuit and really, low fat milk in a biscuit is a waste of time calorie wise)
  • 2 tablespoons freshly cracked black pepper
  • 4 ounces Fontina Cheese, shredded
  • 4 ounces Havarti Cheese, shredded
  1. Preheat the oven to 425 (400 if your oven runs hot) degrees, Grease a large baking sheet.
  2. In a large bowl, whisk together your flour, baking powder, salt, black pepper and cheeses.
  3. Drop the butter and shortening into the bowl of flour. Use a pastry blender to cut the butter and shortening into the flour until it resembles pea sized crumbs.
  4. Make a well in the center and pour in the buttermilk, all at once, Use a fork to stir and combine the milk with the flour until you have a cohesive dough. Dump the dough onto a lightly floured board or counter top. Pat it down into a flat circle. Fold it into thirds like you’re folding a letter to fit into an envelope. Pat it down again, fold it one more time. Finally, pat it into a rough circle of about 1 inch high.
  5. Cut out as many biscuits as you can get, laying them right next to each other in the baking pan if you want soft sided biscuits or about an inch apart if you want crisp sided biscuits.
  6. Bake at 400 to 425 for about 20 to 24 minutes, until they are firm on top and golden brown. Take off the pan and serve piping hot, preferably with some nice fresh homemade butter. Believe it or not, even with the cheese and the pepper, these are excellent with honey on them too; it adds to the flavor, making a sweet/savory combo.

Copyright Notice: From Cupcakes To Caviar images and original content are copyright protected. Please do not publish these materials anywhere without prior permission.


Ham, Cheddar And Herb Scones

Ham, Cheddar & Herb Scones

I’m feeding my inner Brit today…and my inner Scot… and my inner whatever other ethnicity likes scones. The thing is, in real life, I have not a drop of Brit or Scot in me as far as I know.  Lots of German, some French, a touch or two of Irish (I think it’s the good at bull**** part of me), some Native American and some African American. I am the quintessential mutt.

I like pretending I’m Scottish though. There is little more fun than going into a store and loudly talking in a Scottish accent. People gawk big time. One would think they had never seen a Scot walking around Wal-mart before. Ok, so maybe they haven’t. An Indian accent is fun too since I’m light haired and extremely light skinned and don’t fit the genetic mold of what one would expect from a person speaking with a thick Indian accent.

Most fun however is Russian. My husband is fluent or close to it in a few languages and we have a habit of going shopping and somewhere, ineveitably, he will begin speaking Russian, usually very loudly and usually pretending to be irate over something silly done by Americans.

I, not knowing a lick of Russian, end up as his straight man, using a thick Russian accent to tell him that he is in America now and to speak English and not act like he just came over from the old country. We are American now and he needs to speak the language! Again, the looks are priceless hehehe.

We don’t have very exciting lives.

And I am fairly sure we need to be institutionalized

But before that happens, I want to share this scone recipe (do you say scone rhyming with cones or scones rhyming with cons? I’m a cones person myself) with you. As much as I love sweet scones, savory ones have a larger portion of my heart and my waistline. This one is chock full of cheddar cheese, diced ham, some garlic, some green onions and some dried dill. These smell amazing as they cook and they taste even better than they smell. There is nothing like a fresh, warm scone drowning in butter… unless it’s a fresh warm scone drowning in butter, served with a cup of tea. My idea of Heaven involves both those things. It also involves   ice cream, whipped cream and Morgan Freeman and Ed Harris hand feeding me peeled grapes but that’s another story.

Ham, Cheddar And Herb Scones

  • 3 cups bread flour
  • 1 tablespoon sugar
  • 2 tablespoons baking powder
  • 1/2 teaspoon salt
  • 2 1/2 cups heavy cream
  • 1 cup diced ham
  • 1 cup shredded sharp cheddar cheese plus more for sprinkling on top
  • 1/2 cup sliced green onions
  • 1 tablespoon dried dill weed
  • 1/4 teaspoon garlic powder
  1. Grease the bottom of a nine or ten inch round cake pan. Preheat oven to 350.
  2. Stir together the flour, salt, baking powder, dill weed and garlic powder.
  3. Make a well in the center and pour in the ham, cheddar cheese and green onions. Mix lightly.
  4. Pour in the cream and using a wooden spoon, stir the dough just until evenly moistened and you have no dry flour left in the bottom of the bowl.
  5. Pat the dough down evenly into the prepared cake pan.
  6. Score them almost all the way through into 8 to ten wedges
  7. Bake at 350 degrees until the top is a nice golden brown and a wooden skewer comes out clean. When done, turn the oven off and sprinkle a little bit (or a lot) more cheese on the top of the scones. Put back in the oven just long enough to melt the cheese.
  8. Turn out of pan onto a wire rack and let cool at least ten minutes before cutting. Cut the scones into wedges using the score marks as your guide.
  9. Serve warm with butter. These can be reheated by nuking for about 20 seconds.


Print Friendly and PDF

“Can I Have Another Bigit Momma?”

With six kids, I have heard a lot of mispronounced words in my day. For a woman who tends to be a grammar and vocabulary Nazi (*waits for someone to go through all my posts looking for all the errors…of which I’m sure there will be many hehe), I always found it strangely cute. I guess it comes down to that “when our kids do it, it’s cute even if other people aren’t so amused” sort of thing. I still say that the ability to find our children adorable is what keeps us from being like other species and eating our young. That and baby smell. Is there anything better than the smell of a babies head? Erhmmm… a clean baby. Not a baby that needs a diaper change or has old milk smell 😛

When Jordan and Zach (now 14 and 17) were little, they loved canned ravioli but called them “roly polys”. Hey! I had five kids then… convenience foods kept me sane! For the longest time, I never corrected them when they would ask me to make them a can of roly polys. Then when they hit puberty, I figured it could have long term effects on their social lives if I didn’t tell them the correct pronunciation so I reluctantly told them the correct way to say the word . 😛

Now Joshie, being three, is the one with the way of pronouncing things that makes me giggle.  Yes, I’m easily amused. What can I say? So when I made these biscuits the other night, how could I refuse his cute little face when eh asked me for another “bigit”? Not to mention, getting the boy to eat anything other than apples and raisins is a feat in itself, so I wasn’t going to argue. But seriously, they ARE good bigits.. I mean biscuits. Only I could manage to find a recipe for a simple southern treat that has been sullied by adding demon meat 😀 But really; like they say, everything is better with bacon. Well, except for chocolate. I can’t get behind that trend. *shudders*

These are easy as can be. And with bacon, cheddar cheese and cracked black pepper, they are yummy too! The first time I made these, the cheese on top got a bit too browned  so I suggest adding the cheese to the top when they are almost done. So I have more baking right now so that I have prettier ones to show you. The sacrifices I make for all of you. This came from a BHG magazine and other than adding more bacon and cheese it’s the original recipe. The real recipe called for just a stingy 4 slices of bacon and 1/4 cup of cheese and the cheese was just for on top. What WERE they thinking!? Aren’t that laws against the under use of bacon and cheese? I didn’t change much. Ok, so I added a few green onions… and the extra cheese…and more bacon. Sigh. Let me rephrase. Once upon a time, this began its life in a BHG magazine.

Bacon, Cheddar & Cracked Pepper Biscuits

  • 3 cups all purpose flour
  • 1 tablespoon baking powder
  • 1 tablespoon sugar
  • 1 tablespoon cracked black pepper
  • 3/4 teaspoon cream of tartar
  • 1/2 teaspoon salt
  • 3/4 cup cold butter
  • 1 1/4 cups buttermilk
  • 12 ounces bacon, cooked until crisp and crumbled (hold back two slices for crumbling on top of biscuits)
  • 1 cup shredded cheddar cheese (and about another 1/3 cup for sprinkling on top)
  • 2 green onions, sliced thin
  1. Preheat oven to 450 degrees.
  2. In a large bowl, combine the flour, sugar, salt, baking powder, pepper, cheese, green onions and cream of tartar.
  3. Using a pastry blender, cut in the cold butter until mixture resembles coarse crumbs.
  4. Make a well in the center and pour in the buttermilk all at once.
  5. Stir with a fork just until mixture is thoroughly moistened.
  6. Dump onto a lightly floured board and knead until the dough is barely smooth. This isn’t a yeast dough; don’t over knead it.
  7. Pat it into a circle (doesn’t have to be perfect) of about 1/4 thick. Use a floured biscuit cutter to cut out rounds. Place them on a very lightly greased (cooking spray is fine) baking sheet. almost touching.
  8. Gently reroll scraps and do the same with them.
  9. Bake at 450 for 10 to 14 minutes or until golden brown. If sprinkling cheese and bacon on the tops, wait until they are almost done; sprinkle bacon and cheese on them, then finish cooking. Better yet, cook them, turn off the oven, sprinkle the cheese on them and put them back in and let the residual heat do the melting


Reinventing The Wheel…Or Biscuit

Can you see all the little layers?? Huh huh huh?


We’ve all done it. Or at least if you’ve cooked for any length of time and are more than a casual “I HAVE to cook so I do” sort of foodie you’ve done it. What the heck am I talking about? Food reinvention. Aka the times you want to make something you’ve made before but just want to do it differently. You want something traditional but you want something new. That train of thought has brought us so very many of the foods we all love. Though I doubt Twinkies and Cheetos were somebody’s brain child as to how to reinvent cheese and cake. Mores the pity. 😛

I have been wanting biscuits. I have also been wanting croissants. But biscuits were boring and croissants are a pain in the proverbial tushie. I can make both with no problem. You can’t live in the south and cook without learning to make good buttermilk biscuits or you may as well hide in a hole. And I taught myself to make croissants years back just cause I wanted to prove I could do it. But neither was exciting me yesterday when I was contemplating today’s post. So I figured I’d make Angel Biscuits- those biscuit/yeast roll hybrids. But I wanted to play with them and see if I could get them to be more akin to croissants with out all the trouble and time that croissants take. I have to say; I’m pretty tickled with how they turned out.

Hours before I started the dough, I cut two sticks of butter in half. Then I rolled out each half in between sheets of waxed paper and froze them. After I got the dough finished later, I did the rolling and turning technique (more or less) that you use when making croissants after inserting the sheets of butter in them. After baking, I tried one (I wanted to eat more but controlled myself lol) with some of my home made Apricot Honey Jam. All I can say is… oh my. These turned out fantastic. Are they the prettiest rolls in the world? Nope. But I couldn’t care less nor will you. I promise. These are tender and buttery and the tops and bottoms get a slight crispy almost fried taste and texture due to the butter. You can see the layers in this and they are reminiscent of the flaky biscuits you can make from a can (the ones where you can peel apart the layers) but without the canned taste, thank God and the Pillsbury Dough Boy. So give these a try. They aren’t time consuming at all and taste so darn good!

Croissant Style Buttermilk Biscuits

  • 2 sticks butter (1/2 pound), room temp, cut in half (preferably salted for this recipe contrary to what I usually advise)
  • 1 package (2 1/4 teaspoons) regular yeast
  • 2 tablespoons warm water (105 to 115 degrees)
  • 2 1/2 cups all purpose flour
  • 3 tablespoons sugar
  • 1 1/2 tablespoons baking powder
  • 1/2 teaspoon baking soda
  • 1/2 teaspoon salt
  • 1/2 cup shortening
  • 1 cup buttermilk (you may need a touch more if the dough is dry)
  1. Put one of your pieces of butter onto a large piece of waxed paper. Fold the paper over it and smoosh the butter down. Then roll the butter out flat into a thin sheet. Do this with each of the four pieces. Put into the freezer for at least an hour.

    See? The butter doesn’t have to look pretty. Just nice and thin and flat. 🙂

  2. When the butter has been in for about 50 minutes, preheat your oven to 400 and start your dough.
  3. Mix the yeast with the warm water in a small container. Set aside.
  4. Mix the flour, sugar, baking powder, baking soda and salt in a large bowl. Cut in the shortening with a pastry blender until mixture is the consistency of fine crumbs. Stir in the buttermilk, then the yeast. Mixture should leave sides of bowl and be a cohesive mass. If not, add a little more buttermilk at a time until it does.
  5. Place the dough on a generously floured board. Knead until it comes together smoothly. Gently roll out the dough into a rectangle. It doesn’t need to be perfect.
  6. Place one of the frozen butter sheets on it and fold the dough in half, enclosing the butter. Seal the edges well.  Gently roll back out into a rectangle large enough to insert another sheet of butter.
  7. Do this three more times with each of the other pieces of butter. Make sure your board stays decently floured. Seal the dough well after inserting each sheet of butter using fingers moistened with a bit of buttermilk if necessary. Cover any cracks with a light sprinkling of flour and just continue on as you have been doing. Work quickly so that the butter doesn’t have time to soften up too much. The steam is what helps create the layers and warm butter won’t steam as well. When you have all the butter rolled in, you will end up with a thick fairly heavy piece of dough that looks more or less like this:
  8. Roll out a LITTLE bit. You’re not trying to flatten it out again just make it a touch bigger. Once you have this done, cut the dough into 16 pieces. Bake in a preheated 400 degree oven until golden brown, about 20 minutes. Serve with jam or preserves or chocolate sauce if that makes you happy. But you won’t need butter on these I promise you. 😛