Hello! It’s been a while since I’ve done one of these! But with the holidays coming, there are a lot of things to review! Add in that the weather is getting colder and I don’t know about you, but I start looking for creamier skin products and hair products to fight the Winter dry skin and hair frizz. So lots to review there too.
First off- I’m sure many of you have seen that Gingerbread seems to be the current craze in the Christmas Limited Edition flavors? Well, so had I. I was totally stoked over it since that’s one of my fave holiday flavors. But talk about disappointment! I bought the new Gingerbread M&M’s, the new Gingerbread Twix and the new Gingerbread Oreos. All three…well…sucked. The Gingerbread M&M’s actually had the effect of making both myself and my husband gag when we smelled them. They are reminiscent of sweaty gym socks. And the taste? About what one would imagine those same socks tasting like. The only one who will eat them is my 18 year old and he will eat anything with sugar lol. But even he says they taste “weird”. The other two; twix and Oreos? They didn’t make me gag but neither did they make me want to waste any daily calories on them. The Twix also has an off, chemically smell and the flavor is just boring. Plus the cookie is very dry and crumbly. The Oreos? Just bland and boring and also not worth the money. Save your cash and buy some of the other things I’ll review today!
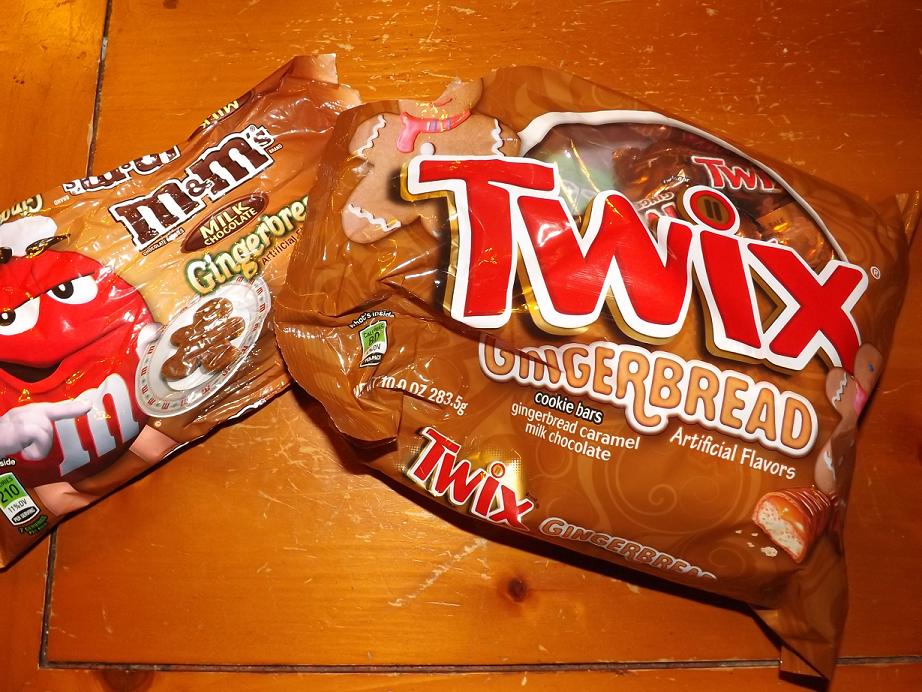
Gingerbread flavored sweets
Next thing isn’t holiday per se but it WOULD make a great stocking stuffer (in this 3 pod trial size) for anyone who has a Keurig. I bought these Archer Farms Vanilla Bean Creme Brulee K-Cups on a whim at Target and wow, they’re yummy! You can smell both the vanilla and the caramelized sugar smell as they brew and you can also taste both flavors, which is hard to find in a flavored coffee. So go grab some if you like the flavor combo.
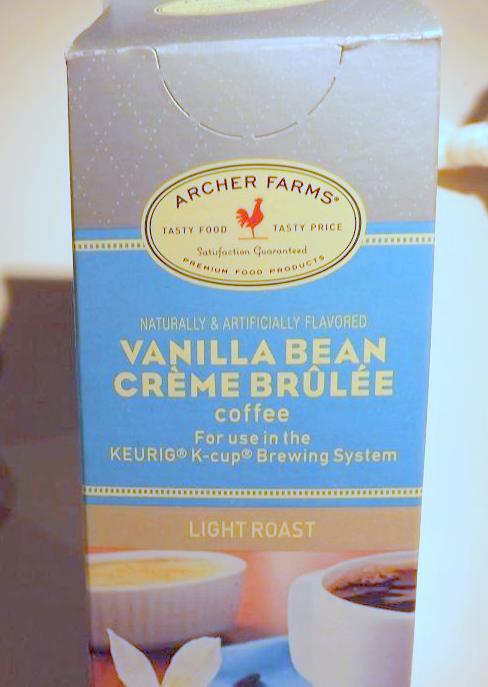
Archer Farms Vanilla Bean Creme Brulee K Cups
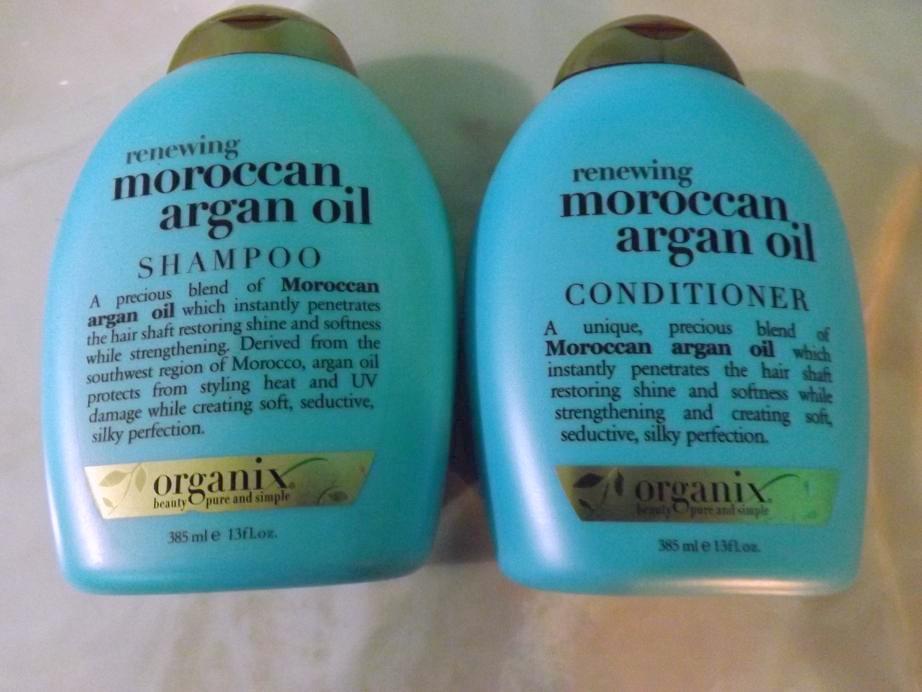
When colder weather hits, my already fine flyaway hair gets dry and frizzy. Yet, when I try to use those extra moisturizing shampoos, I end up with hair that looks like I haven’t washed it in weeks after barely a day. This Moroccan Argan Oil shampoo from Organix doesn’t do that. It leaves my fine hair really soft and I don’t have to hide it by pulling it back into a ponytail after like 10 hours because it looks greasy. Plus, it smells fantastic. It leaves just a subtle scent on my hair but it’s definitely there.
 Last review for this week-
We all know I’m not the worlds most healthful eater. I DO however like dried fruit. Now, no preaching about how the calories are concentrated just as much as the fruit flavor. I know this. I don’t eat buckets of it a day. I saw the Dried Figs at Trader Joes and couldn’t resist them and I’m soooo glad I didn’t. These are amazing. If you’ve ever eaten a Fig Newton, you’d love these. They aren’t all hard and impossible to chew like some dried fruit. These are soft and chewy and truly taste like the inside of a Fig Newton but without the added sugar. Plus, the price was outstanding. Not even 3 dollars for the tub. Can’t beat that! I’d show you a full container but…well… mine has only 2 figs left in it lol.
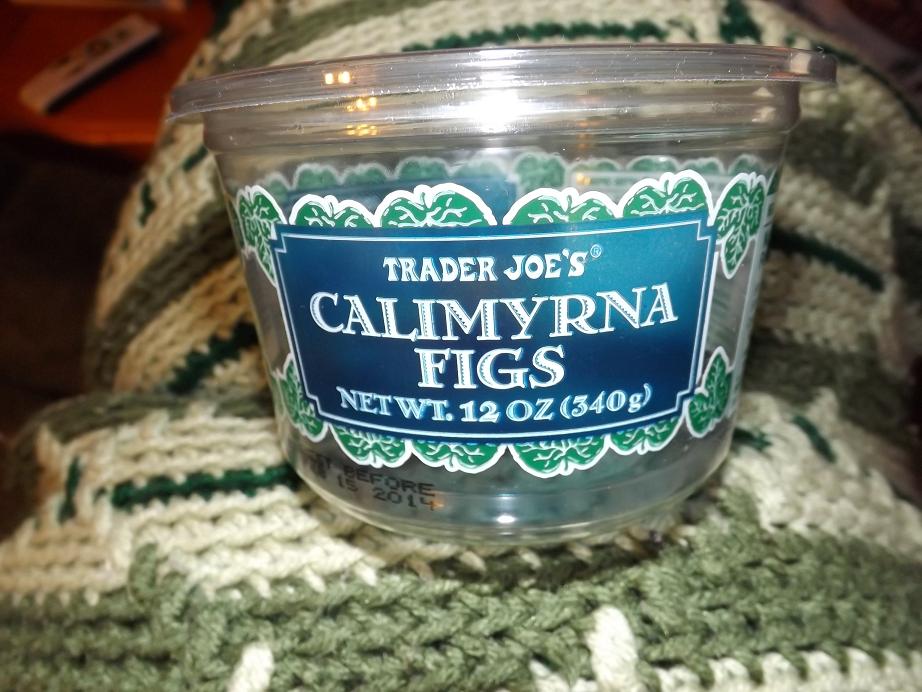
Trader Joes Dried Figs
On the rambling side of the post, cause I sure didn’t ramble up there hehe, I think Autumn is unofficially over. We had some spectacular colors this year. I had hoped we would since we had such a wet Summer, which is what makes the trees brighter in Fall. But now the trees have dropped all their leaves and they are hunkered down for cold weather. That’s ok; so are we. Wood stove has already been used more than once and my dads old Mickey Mouse blanket with the hole in it has taken up residence on my recliner to keep the chill off. Here’s what it looked like here a week ago; not anymore though.

View from the front porch
Have a great week this coming week, everyone!